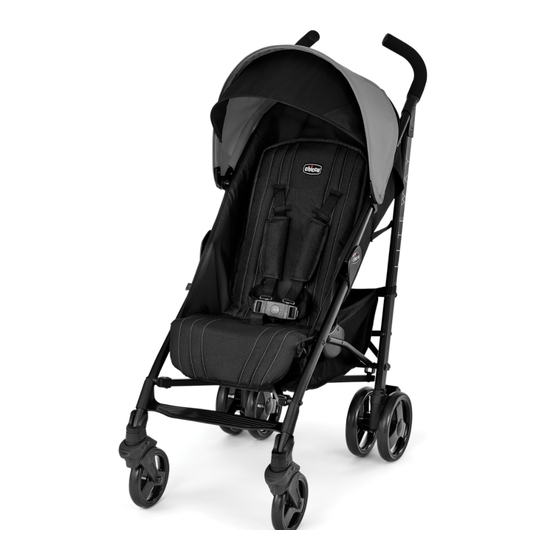
Chicco Liteway Manual Del Propietário
Ocultar thumbs
Ver también para Liteway:
- Instrucciones de uso (64 páginas) ,
- Manual del propietário (21 páginas) ,
- Instrucciones de uso (52 páginas)
Publicidad
Enlaces rápidos
Read all instructions BEFORE
assembly and USE of product.
KEEP INSTRUCTIONS FOR
FUTURE USE.
Lea todas las instrucciones ANTES
de armar y USAR este producto.
CONSERVE LAS INSTRUCCIONES
PARA USO FUTURO.
Liteway
Owner's Manual
Manual del propietario
©2017 Artsana USA, INC. 06/17
IS0090.3ES
www.chiccousa.com
Publicidad

Resumen de contenidos para Chicco Liteway
- Página 1 USE of product. KEEP INSTRUCTIONS FOR FUTURE USE. Lea todas las instrucciones ANTES de armar y USAR este producto. CONSERVE LAS INSTRUCCIONES PARA USO FUTURO. Liteway Owner's Manual Manual del propietario ©2017 Artsana USA, INC. 06/17 IS0090.3ES www.chiccousa.com...
- Página 2 • AVOID SERIOUS INJURY from • NEVER ALLOW YOUR STROLLER to supplied or approved by Chicco falling or sliding out. Always use be used as a toy. as they may make the stroller seat belt. After fastening buckles, •...
- Página 3 Asegúrese de que el • SUSPENDA EL USO DEL aprobados por Chicco, ya que cochecito esté completamente COCHECITO si se daña o se rompe. podrían comprometer la seguridad abierta y segura antes de permitir •...
- Página 4 How to Assemble the Front Wheels To Open Stroller Montaje de las ruedas delanteras Para desplegar el cochecito WARNING ADVERTENCIA WARNING ADVERTENCIA Efectuar esta operación prestando atención When opening the stroller, ensure that your Before use, ensure that the wheels are safely Antes del uso, asegurarse de que las ruedas child, or other children, are at a safe distance.
- Página 5 To Open Stroller Adjusting Safety Harness Para desplegar el cochecito Ajuste del arnés de seguridad WARNING ADVERTENCIA 3. Push the rear locking mechanism downward with your foot. Ensure that the This stroller features two harness positions. Este cochecito tiene dos posiciones de stroller is open and locked in the Always use a harness position located ABOVE cinturón.
- Página 6 Adjusting Safety Harness Adjusting Safety Harness Ajuste del arnés de seguridad Ajuste del arnés de seguridad WARNING ADVERTENCIA 6. The safety harness can be released by Never leave child unattended. Avoid serious Nunca deje al niño desatendido. Evite las pressing the button on the center of the injury from falling or sliding out.
- Página 7 Adjusting Safety Harness How to Adjust the Backrest Regulación del respaldo Ajuste del arnés de seguridad 8. To Recline the Backrest, squeeze together 7. The length of the Shoulder Straps and both levers and pull down on the Backrest. To Crotch Strap can be adjusted by pulling on adjust the Backrest into an upright position, the adjustment buckles to tighten or loosen.
- Página 8 How to Adjust the Leg rest Rear Brakes Regulación del apoyapiernas Frenos traseros The stroller’s Leg Rest can be adjusted to offer 10. To apply the brakes, push on each of the extra comfort to your child. two levers located at the center of the rear wheel units in a downward direction.
- Página 9 Rear Brakes Front Swivel Wheels Frenos traseros Ruedas delanteras giratorias WARNING ADVERTENCIA The stroller has front swivel/fixed wheels. It is recommended that you use the fixed mode on uneven surfaces and the swivel mode on normal road surfaces. Make sure you lock both front Always apply both brakes whenever the Recuerde siempre accionar ambos frenos wheels.
- Página 10 Canopy Canopy Capota Capota 14. Open the canopy as shown. The canopy must be fixed on both sides of the Es necesario fijar la capota en los dos lados stroller. Ensure that the canopy is correctly del cochecito. Verificar que la misma esté secured into position.
- Página 11 To Close the Stroller To Close the Stroller Para cerrar del cochecito Para cerrar del cochecito WARNING ADVERTENCIA 16. To close the stroller, pull the rear locking When closing the stroller, ensure that your child, Efectuar esta operación prestando atención a mechanism in an upward direction (fig.
- Página 12 To Close the Stroller To Remove the Fabric Cover Para cerrar del cochecito Para quitar la funda 17. To close the stroller completely, push the handles The fabric cover of the stroller can be removed. forward. 19A, 19B & 19C. To remove the fabric cover, raise the leg cover, as shown in figure 19A.
- Página 13 To Remove the Fabric Cover To Install the Fabric Cover Para quitar la funda Para le montaje de la funda 20A & 20B. Unfasten the snaps located on the To fit the fabric cover to the stroller, carry out the rear tubes of the stroller, as shown in figure 20A.
- Página 14 To Install the Fabric Cover Accessories Para le montaje de la funda Accesorios WARNING ADVERTENCIA 23A, 23B. Fasten the snaps (fig. 23A). Fit the fabric cover to the leg rest, then fasten the Warning: Do not overload the storage basket. Advertencia: no cargar el cestillo son pesos buckles (fig.
-
Página 15: Cleaning And Maintenance
How to Attach the Cupholder Cleaning and Maintenance Cómo fijar el dispositivo de soporte para tazas This product requires regular maintenance. The cleaning and maintenance of the stroller must only be carried out by an adult. WARNING ADVERTENCIA CLEANING Never place a container weighing more than Nunca coloque ningún recipiente que pese The cover can be removed (please refer to the section “How to Remove the Fabric Cover”). -
Página 16: Limpieza Y Mantenimiento
For more Information Limpieza y mantenimiento Para obtener más información Este producto requiere mantenimiento periódicamente. Las operaciones de limpieza y mantenimiento del cochecito deben ser efectuadas exclusivamente por un adulto. If you have any questions or comments about this product, or are missing any LIMPIEZA of the parts please do not return this product to the store. - Página 17 www.chiccousa.com...


