Tabla de contenido
Publicidad
Idiomas disponibles
Idiomas disponibles
Enlaces rápidos
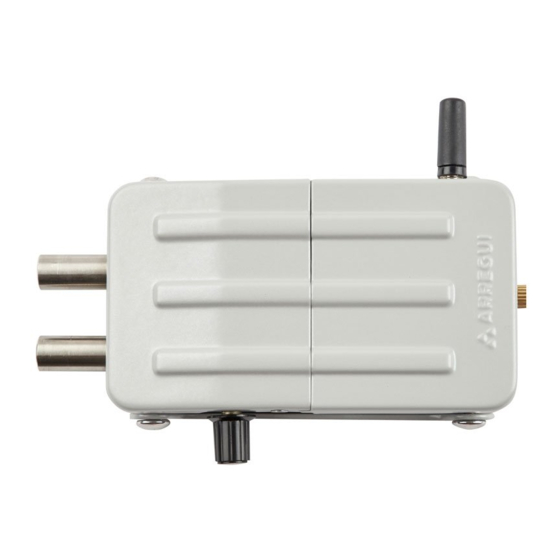
CI10
ES CERROJO DE SEGURIDAD INVISIBLE PARA PUERTAS
EN INVISIBLE SECURITY LOCK FOR DOORS
PT FERROLHO DE SEGURANÇA INVISÍVEL PARA PORTAS
INSTRUCCIONES
INSTRUCTIONS
INSTRUÇÕES
Componentes
Components
Componentes .......................................................................................................Pag.2
Puesta en marcha.............................................................................................Pág.3
Getting started..............................................................................................Pag. 6
Colocação em funcionamento..................................................................Pág.9
Montaje / Assembly / Montagem
De superfície ..................................................................................Pág.4
Flat surface ..............................................................................Pag.7
De superfície.......................................................................Pág.10
De embutir .................................Pág.5
Corner mounted ...................Pag.8
De embutir........................Pág.11
Publicidad
Tabla de contenido

Resumen de contenidos para Arregui CI10
- Página 1 CI10 ES CERROJO DE SEGURIDAD INVISIBLE PARA PUERTAS EN INVISIBLE SECURITY LOCK FOR DOORS PT FERROLHO DE SEGURANÇA INVISÍVEL PARA PORTAS INSTRUCCIONES INSTRUCTIONS INSTRUÇÕES Componentes Components Componentes .......................Pag.2 Puesta en marcha.....................Pág.3 Getting started....................Pag. 6 Colocação em funcionamento..............Pág.9 Montaje / Assembly / Montagem De superfície ..................Pág.4...
- Página 2 CI10 COMPONENTES / COMPONENTS / COMPONENTES ES Antena EN Aerial PT Antena ES Tapa de alojamiento de pilas ES Bulones EN Battery housing cover EN Bolts PT Tampa de alojamento das pilhas PT Trancas ES Tornillo de alojamiento de pilas...
- Página 3 CI10 INSTRUCCIONES DE USO INSTRUCCIONES PUESTA EN MARCHA CIERRE Cerrar Para cerrar la cerradura pulse el botón ( ) del mando a distancia. Una vez cerra- do se escuchará 1 pitido. (A) Apertura cerradura IMPORTANTE: cuando las pilas se estén agotando, la cerradura emitirá 4 pitidos (B) Apertura emergencia y no se realizará...
- Página 4 CI10 INSTRUCCIONES DE MONTAJE DE SUPERFICIE 1. Calcule en qué posición quiere instalar el ce- 2. Al lado del distanciador adhesivo (H)coloque 3. Fije las bandas adhesivas (I) en la trasera rrojo, siempre por el interior de la puerta. Coloque...
-
Página 5: Importante
CI10 INSTRUCCIONES DE MONTAJE PARA EMBUTIR 1. Calcule en qué posición quiere instalar 2. Al lado del distanciador adhesivo ( H) 3. Fije las bandas adhesivas (I) en el cerrojo, siempre por el interior de la coloque el embellecedor (F) sobre el marco la trasera de la placa base (B) o en puerta. -
Página 6: Getting Started
CI10 USER INSTRUCTIONS GETTING STARTED LOCK Lock To close the lock, press the ( ) button on the remote control. Once closed, you will hear 1 beep. (A) Unlock ATTENTION: when the batteries are running low, the lock will emit 4 beeps and (B) Emergency release will not lock. - Página 7 CI10 SURFACE MOUNTING INSTRUCTIONS 1. Calculate in which position you want to install 2. Place the housing pin (E) on the door frame 3. Fix the adhesive strips (I) onto the back the bolt, but always on the inside of the door.
- Página 8 CI10 CORNER MOUNTED ASSEMBLY INSTRUCTIONS 1. Calculate in which position you want to 2. Place the door jamb plate (F) next to the 3. Fix the adhesive strips (I) onto the install the bolt, but always on the inside of adhesive spacer (H) on the door frame.
-
Página 9: Instruções De Utilização
CI10 INSTRUÇÕES COLOCAÇÃO EM FUNCIONAMENTO INSTRUÇÕES DE UTILIZAÇÃO FECHO Para fechar a fechadura pressione o botão ( ) do comando à distância. Uma vez fechado ouve-se 1 apito. Fechar IMPORTANTE: quando as pilhas estiverem gastas, a fechadura emitirá 4 (A) Abertura fechadura apitos e não realizará... - Página 10 CI10 INSTRUÇÕES DE MONTAGEM DE SUPERFÍCIE 1. Calcule em que posição pretende instalar o 2. Ao lado do separador adesivo (H), coloque o 3. Fixe as bandas adesivas (I) na parte ferrolho, sempre pelo interior da porta. Coloque alojamento das trancas (E) sobre o aro da porta.
- Página 11 CI10 INSTRUÇÕES DE MONTAGEM PARA EMBUTIR 1. Calcule em que posição pretende 2. Ao lado do separador adesivo (H), coloque o 3. Fixe as bandas adesivas (I) na instalar o ferrolho, sempre pelo interior acabamento (F) sobre o aro da porta. O separador parte posterior da placa base (B) ou da porta.
-
Página 12: Declaración Ue De Conformidad Simplificada Según La Directiva 2014/53/Eu (Red)
Por la presente, ARREGUI Buzones y Sistemas de Seguridad S.L declara que el tipo de equipo radioeléctrico, Cerrojo de Seguridad Invisible ref. CI10, es conforme con la directiva 2014/53/UE. El texto completo de la declaración UE de conformidad estará disponible en la dirección de internet siguiente: https://www.arregui.es/producto/cerrojoCI10/...

