Tabla de contenido
Publicidad
Idiomas disponibles
Idiomas disponibles
Enlaces rápidos
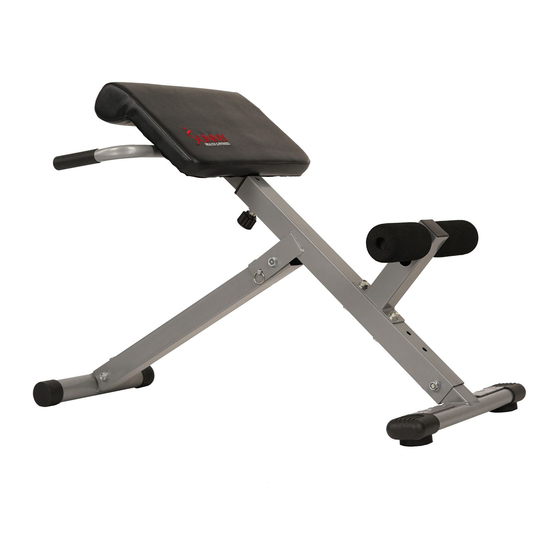
45 DEGREE HYPEREXTENSION
English, Page 1~9
Español, Page 10~14 ¡ IMPORTANTE! Conserve el manual del propietario para las instrucciones de
ROMAN CHAIR
USER MANUAL
IMPORTANT! Please retain owner's manual for maintenance and adjustment
instructions. Your satisfaction is very important to us, PLEASE DO NOT
RETURN UNTIL YOU HAVE CONTACTED US:
support@sunnyhealthfitness.com or 1- 877 - 90SUNNY (877-907-8669).
mantenimiento y ajuste. Su satisfacción es muy importante para nosotros, NO
DEVUELVA HASTA HABERNOS CONTACTADO:
support@sunnyhealthfitness.com ó 1- 877 - 90SUNNY (877-907-8669).
SF-H6629
Publicidad
Tabla de contenido

Resumen de contenidos para Sunny Health & Fitness SF-H6629
- Página 1 45 DEGREE HYPEREXTENSION ROMAN CHAIR SF-H6629 USER MANUAL IMPORTANT! Please retain owner’s manual for maintenance and adjustment English, Page 1~9 instructions. Your satisfaction is very important to us, PLEASE DO NOT RETURN UNTIL YOU HAVE CONTACTED US: support@sunnyhealthfitness.com or 1- 877 - 90SUNNY (877-907-8669).
-
Página 2: Important Safety Information
IMPORTANT SAFETY INFORMATION We thank you for choosing our product. To ensure your safety and health, please use this equipment correctly. It is important to read this entire manual before assembling and using the equipment. Safe and effective use can only be assured if the equipment is assembled, maintained, and used properly. - Página 3 INFORMACIÓN IMPORTANTE DE SEGURIDAD Gracias por haber elegido nuestro producto. Para garantizar su seguridad y salud, utilice este equipo correctamente. Es importante leer todo el manual antes de instalar y usar el equipo. Solo se puede garantizar el uso seguro y eficaz del equipo si se instala, mantiene y utiliza correctamente.
-
Página 4: Exploded Diagram
EXPLODED DIAGRAM HARDWARE PACKAGE... -
Página 5: Parts List
PARTS LIST Description Spec. n.° Descripción Especificaciones Cant. Cushion Almohadón Adjustable Tube Tubo Ajustable Barra de Manija Right Handle Bar Derecha Barra de Manija Left Handle Bar Izquierdo Back Stand Tube Tubo Trasero Tubo de Base Back Base Tube Trasero Front Stand Tubo Delantero Adjustable Tube... - Página 6 ASSEMBLY INSTRUCTIONS We value your experience using Sunny Health and Fitness products. For assistance with parts or troubleshooting, please contact us at support@sunnyhealthfitness.com or 1-877- 90SUNNY (877-907-8669). D M8x15 2 pcs E M10 4 pcs STEP 1: F M8 2 pcs G M10 2 pcs A M10x65 2 pcs 2 pcs...
- Página 7 ASSEMBLY INSTRUCTIONS We value your experience using Sunny Health and Fitness products. For assistance with parts or troubleshooting, please contact us at support@sunnyhealthfitness.com or 1-877- 90SUNNY (877-907-8669). STEP 3: C M10x15 3 pcs E M10 3 pcs Insert Front Stand Adjustable 2 pcs Tube (No.
- Página 8 ASSEMBLY INSTRUCTIONS We value your experience using Sunny Health and Fitness products. For assistance with parts or troubleshooting, please contact us at support@sunnyhealthfitness.com or 1-877- 90SUNNY (877-907-8669). STEP 5: Attach Back Stand Tube (No. 5) to Front Stand Adjustable Tube (No. 7) using Hex Bolt (B), 2 Washers (E), and Nut (G).
- Página 9 TO ADJUST THE CUSHION HEIGHT: With one hand, turn Lock Pin (I) to loosen and pull on it. With the other hand, move the adjustable tube to desired height. Insert Lock Pin (I) into one of the five settings to secure and turn to tighten. TO FOLD THE BENCH: Pull out Lock Pin (H).
- Página 10 MAINTENANCE INSTRUCTION IMPORTANT: Safe and effective use can only be achieved if the equipment is assembled, maintained and used properly. It is your responsibility to ensure that the equipment is maintained regularly. Any components found to be worn and/or damaged should be replaced before continuing use of the equipment.
-
Página 11: Instrucciones De Armado
INSTRUCCIONES DE ARMADO Valoramos su experiencia con los productos de Sunny Health and Fitness. Para asistencia con repuestos o solución de problemas, contáctenos en support@sunnyhealthfitness.com o al 1-877-90SUNNY (877-907-8669). PASO 1: Conecte el Almohadón (1) al Tubo Ajustable (2), usando Pernos Hexagonales (D) y Arandelas (F). - Página 12 INSTRUCCIONES DE ARMADO Valoramos su experiencia con los productos de Sunny Health and Fitness. Para asistencia con repuestos o solución de problemas, contáctenos en support@sunnyhealthfitness.com o al 1-877-90SUNNY (877-907-8669). PASO 3: C M10x15 3 pcs E M10 3 pcs Inserte el Tubo Delantero Ajustable 2 pcs (7) en el Tubo de Base Delantero (8).
- Página 13 INSTRUCCIONES DE ARMADO Valoramos su experiencia con los productos de Sunny Health and Fitness. Para asistencia con repuestos o solución de problemas, contáctenos en support@sunnyhealthfitness.com o al 1-877-90SUNNY (877-907-8669). PASO 5: Fije el Tubo Trasero (5) al Tubo Delantero Ajustable (7), usando un Perno Hexagonal (B), Arandela (E) y Tuerca (G).
- Página 14 Para ajustar la altura del almohadón. Con una mano, gire la Perilla de Bloqueo (I) para aflojarlo y tirar de él. Con la otra mano, mueve el tubo ajustable a la altura deseada. Inserte la Perilla de Bloqueo (I) en una de las cinco configuraciones para asegurar y girar para apretar.
-
Página 15: Instrucciones De Mantenimiento
INSTRUCCIONES DE MANTENIMIENTO IMPORTANTE: Solo se puede archivar un uso seguro y eficaz del equipo si se instala, mantiene y utiliza correctamente. Es su responsabilidad asegurarse de que se realice mantenimiento en el equipo con regularidad. Si encuentra algún componente gastado o dañado, deberá reemplazarlo antes de seguir usando el equipo.


