Tabla de contenido
Publicidad
Idiomas disponibles
Idiomas disponibles
Enlaces rápidos
Home NetWerks
SIMPLE SOLUTIONS FOR A SMARTER HOME
®
The BLUETOOTH
word mark and logos are registered trademarks owned by BLUETOOTH SIG, Inc. and any use of the said
mark by Homewerks Worldwide is under license. Other trademark and trade names are those of their respective owners.
Questions, problems, missing parts? Before returning to your retailer, call our customer
service department at 1-877-319-3757, 8 a.m. - 5 p.m., CST, Monday - Friday.
www.homewerksww.com
READ AND SAVE THESE INSTRUCTIONS
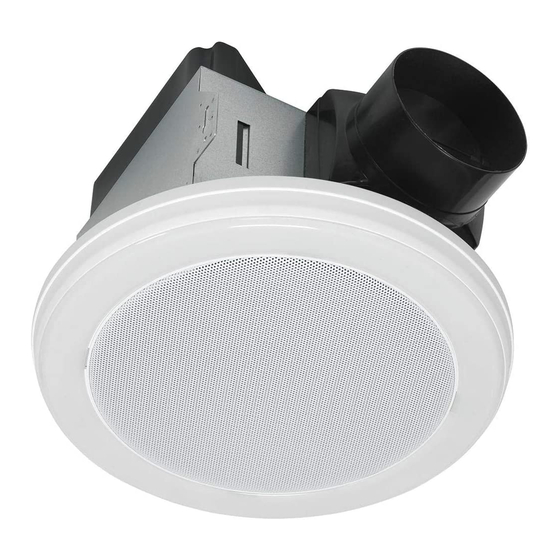
VENTILATING BATH FAN
WITH BLUETOOTH
SPEAKER AND LED
®
LIGHT
MODEL #7130-08-BT
Español p. 16
March 14, 2017
Publicidad
Capítulos
Tabla de contenido
Solución de problemas

Manuales relacionados para HomeNetWerks 7130-08-BT


Resumen de contenidos para HomeNetWerks 7130-08-BT
- Página 1 ® Home NetWerks SPEAKER AND LED LIGHT SIMPLE SOLUTIONS FOR A SMARTER HOME MODEL #7130-08-BT Español p. 16 ® The BLUETOOTH word mark and logos are registered trademarks owned by BLUETOOTH SIG, Inc. and any use of the said mark by Homewerks Worldwide is under license. Other trademark and trade names are those of their respective owners.
-
Página 2: Tabla De Contenido
TABLE OF CONTENTS Product Specifications ........................2 Package Contents ..........................3 Safety Information ..........................4 Preparation ............................5 New Construction Assembly Instructions ...................6 Existing Construction Assembly Instructions ..................8 Existing Construction Assembly Instructions – Attic Space not Accessible ........11 Pairing BLUETOOTH Device to Speaker ..................14 ®... -
Página 3: Package Contents
PACKAGE CONTENTS PART DESCRIPTION QUANTITY Fan housing Grille with speaker and LED light HARDWARE CONTENTS (not shown actual size) Long Wood Screw Qty. 4 www.homewerksww.com... -
Página 4: Safety Information
SAFETY INFORMATION Please read and understand this entire manual before attempting to assemble, operate or install the product. Always disconnect the power supply prior to servicing the fan, motor or junction box. Installation work must be carried out by a qualified person(s) in accordance to all local and safety codes including the rules for fire-rated construction. -
Página 5: Preparation
PREPARATION Before beginning assembly of product, make sure all parts are present. Compare parts with package contents list and hardware contents list. If any part is missing or damaged, do not attempt to assemble the product. Tools Required for Assembly (not included): Hammer, Drill Bits, Flathead Screwdriver, Wire Nuts, Nails, Duct Tape, Phillips Screwdriver, Utility Knife Helpful Tools (not included): Electric Drill, Wood Screws WARNING: Turn off electricity at breaker box before beginning installation. -
Página 6: New Construction Assembly Instructions
NEW CONSTRUCTION ASSEMBLY INSTRUCTIONS NEW CONSTRUCTION – ATTACHING TO THE JOIST BEFORE INSTALLATION Turn off power source. Review all safety precautions. 1. Place the fan housing next to a ceiling joist or wall stud. The fan housing should be level and perpendicular to the joist or stud. -
Página 7: Bluetooth ® Speaker Fan Grille Installation
NEW CONSTRUCTION ASSEMBLY INSTRUCTIONS 4. Replace duct connector by hooking the connector on one side of the metal flange opening on the fan housing and then pressing down on the other side to snap the connector into place. Ensure that all four metal flanges on the fan housing are inside the plastic duct connector when it is replaced. -
Página 8: Pairing Your Bluetooth® Device To The Speaker
BLUETOOTH SPEAKER FAN GRILLE INSTALLATION ® 2. Attach grille by pinching mounting springs and insert into narrow rectangular slots in the fan housing. Turn on power source. PAIRING YOUR BLUETOOTH® DEVICE TO THE SPEAKER 1. Turn ON bath fan. 2. To play your personal music files, you need a wireless BLUETOOTH ®... - Página 9 EXISTING CONSTRUCTION ASSEMBLY INSTRUCTIONS 2. Measure the opening to ensure it is large enough to accommodate the new fan housing (A) (7-1/2 in. x 7-1/4 in.). 3. If this fan is not replacing an old fan, be sure to cut a 7-1/2 in. x 7-1/4 in. opening for the fan housing (A).
- Página 10 EXISTING CONSTRUCTION ASSEMBLY INSTRUCTIONS 6. Mount fan housing to the joist or stud using long wood screws (AA) where indicated by arrows outside fan housing. Hardware Used Long wood screws 7. Replace duct connector by hooking the connector on one side of the metal flange opening on the fan housing and then pressing down on the other side to snap the connector into place.
-
Página 11: Existing Construction Assembly Instructions - Attic Space Not Accessible
BLUETOOTH SPEAKER FAN GRILLE INSTALLATION ® Housing must be installed flush with ceiling board or the grille mounting spring will not be long enough to insert into the slots inside the fan housing. 1. Join the connectors for the BLUETOOTH ®... - Página 12 EXISTING CONSTRUCTION ASSEMBLY INSTRUCTIONS – ATTIC SPACE NOT ACCESSIBLE 3. If this fan is not replacing an old fan, be sure to cut a 7-1/2 in. x 7-1/4 in. opening for the fan housing (A). 4. Remove grille mounting bracket by unscrewing two screws on each bracket.
- Página 13 EXISTING CONSTRUCTION ASSEMBLY INSTRUCTIONS – ATTIC SPACE NOT ACCESSIBLE 7. Install a circular 4 in. duct (not included) and secure it with duct tape or clamps (neither included). Finish ceiling work. Ceiling hole should be aligned with edge of the fan housing. 8.
-
Página 14: Pairing Bluetooth ® Device To Speaker
BLUETOOTH SPEAKER FAN GRILLE INSTALLATION ® 2. Attach grille by pinching mounting springs and insert into narrow rectangular slots in the fan housing. Turn on power source. PAIRING YOUR BLUETOOTH® DEVICE TO THE SPEAKER 1. Turn ON bath fan. 2. To play your personal music files, you need a wireless BLUETOOTH device. -
Página 15: Troubleshooting
TROUBLESHOOTING PROBLEM POSSIBLE CAUSE CORRECTIVE ACTION Be sure the CFM rating on the fan matches the CFM too great size of your room. Check damper to ensure it is opening and closing Damper not working properly or damaged properly. If the damper has become damaged, please call Customer Service. - Página 16 BLUETOOTH ALTAVOZ ® Y LUZ LED SIMPLE SOLUTIONS FOR A SMARTER HOME MODELO #7130-08-BT Número de patente de EE.UU. 9,398,357 ® La marca BLUETOOTH y sus logotipos son marcas comerciales registradas propiedad de Bluetooth SIG, Inc. y cualquier uso de dicha marca por Homewerks Worldwide es bajo licencia. Otros nombres de marcas y el comercio son de sus respectivos propietarios.
-
Página 17: Especificaciones Del Producto
TABLA DE CONTENIDO Especificaciones del producto ......................17 Contenido del paquete ........................18 Información de seguridad ........................19 Preparación .............................20 Instrucciones de montaje de construcción nueva ................18 Instrucciones de montaje de construcción existentes ..............23 Instrucciones de montaje de construcción existentes – Espacio del Ático no Accesible ....26 Emparejamiento del dispositivo Bluetooth®... -
Página 18: Contenido Del Paquete
CONTENIDO DEL PAQUETE PIEZA DESCRIPCIÓN CANTIDAD Carcasa del ventilador Parrilla con altavoz y luz LED ADITAMENTOS (no es el tamaño real) Tornillo de madera largo Cantidad 4 www.homewerksww.com... -
Página 19: Información De Seguridad
INFORMACIÓN DE SEGURIDAD Lea y comprenda completamente este manual antes de intentar ensamblar, usar o instalar el producto. Desconecte siempre el suministro de electricidad antes de realizar tareas de mantenimiento en el ventilador, el motor o la caja de unión. Se recomienda instalación profesional. -
Página 20: Preparación
PREPARACIÓN Antes de comenzar el montaje del producto, asegúrese de que todas las piezas estén presentes. Compare las piezas con la lista de contenido del paquete y la lista de contenido del hardware. Si falta alguna pieza o está dañada, no intente montar el producto. Herramientas necesarias para el ensamblaje (no incluidas): Martillo, brocas, destornillador de cabeza plana, tuercas de alambre, clavos, cinta aislante, destornillador Phillips, cuchillo utilitario Herramientas útiles (no incluidas): Taladro eléctrico, tornillos de madera... -
Página 21: Instrucciones De Ensamblaje
INSTRUCCIONES DE ENSAMBLAJE NUEVA CONSTRUCCIÓN - COLOCACIÓN DE LA VIGA ANTES DE LA INSTALACIÓN Apague la fuente de poder. Revisar toda la seguridad precauciones. Coloque la carcasa del ventilador junto a una viga del techo o un perno de pared. La carcasa del ventilador debe estar nivelada y perpendicular a la viga o perno. - Página 22 INSTRUCCIONES DE ENSAMBLAJE Vuelva a colocar el conector del conducto enganchando el conector en un lado de la abertura de brida metálica en la carcasa del ventilador y presionando hacia abajo en el otro lado para encajar el conector en su lugar. Asegúrese de que las cuatro bridas metálicas de la carcasa del ventilador están dentro del conector del conducto de plástico cuando se sustituye.
-
Página 23: Emparejando Su Dispositivo Bluetooth® Al Altavoz
INSTALACIÓN DE LA PARRILLA DEL VENTILADOR DE BLUETOOTH® 2. Conecte la rejilla presionando los resortes de montaje e inserte en ranuras rectangulares estrechas en la carcasa del ventilador. Encienda la fuente de alimentación. EMPAREJANDO SU DISPOSITIVO BLUETOOTH® AL ALTAVOZ 1. Encienda el ventilador del baño. 2. - Página 24 INSTRUCCIONES DE MONTAJE DE LA CONSTRUCCIÓN EXISTENTE Mida la abertura para asegurar que es lo suficientemente grande como para acomodar la nueva carcasa del ventila- dor (A) (7-1 / 2 pulgadas x 7-1 / 4 pulgadas). Si este ventilador no está reemplazando un ventilador viejo, asegúrese de para cortar una abertura de 7-1 / 2 pulg.
- Página 25 INSTRUCCIONES DE MONTAJE DE LA CONSTRUCCIÓN EXISTENTE Monte la carcasa del ventilador a la viga o al perno usando tornillos de madera largos (AA) donde se indican mediante flechas fuera de la carcasa del ventilador. Aditamentos utilizados Tornillo de madera largo Vuelva a colocar el conector del conducto enganchando el conector en un lado de la abertura de brida metálica en la carcasa del ventilador y presionando hacia abajo en el otro...
-
Página 26: Instrucciones De Montaje De Construcción Existentes - Espacio Del Ático No Accesible
INSTALACIÓN DE LA PARRILLA DEL VENTILADOR DE BLUETOOTH® La carcasa debe instalarse al ras con la placa de techo o el muelle de montaje de la rejilla no será lo suficientemente largo para insertar en las ranuras dentro de la carcasa del ventilador. Una los conectores para el altavoz y el adaptador de cor- riente BLUETOOTH ®... - Página 27 INSTRUCCIONES DE MONTAJE DE CONSTRUCCIÓN EXISTENTES – ESPACIO DEL ÁTICO NO ACCESIBLE Si este ventilador no está reemplazando un ventilador viejo, asegúrese de para cortar una abertura de 7-1 / 2 pulg. X 7-1 / 4 pulg.ventilador (A). Retire el soporte de montaje de la parrilla desatornillando dos tornillos en cada soporte.
- Página 28 INSTRUCCIONES DE MONTAJE DE CONSTRUCCIÓN EXISTENTES – ESPACIO DEL ÁTICO NO ACCESIBLE Tire de los cables de la casa a través del orificio de la tapa de la caja de alambre. Utilizando un conector rápido, asegure el cableado de la casa de 120 V AC desde el interruptor de pared al ventilador como se muestra en el diagrama de cableado en la página 5.
-
Página 29: Emparejamiento Del Dispositivo Bluetooth® Con El Altavoz
INSTALACIÓN DE LA PARRILLA DEL VENTILADOR DE BLUETOOTH® La carcasa debe instalarse al ras con la placa de techo o el muelle de montaje de la rejilla no será lo suficientemente largo para insertar en las ranuras dentro de la carcasa del ventilador. Una los conectores para el altavoz y el adaptador de cor- riente BLUETOOTH ®... -
Página 30: Cuidado Y Mantenimiento
CUIDADO Y MANTENIMIENTO Consulte la información de seguridad antes de proceder. El mantenimiento de rutina se debe hacer por lo menos una vez al año. • Nunca utilice solventes, diluyentes o productos químicos agresivos para limpiar el ventilador. • No permita que el agua entre en el motor. •...