Tabla de contenido
Publicidad
Idiomas disponibles
Idiomas disponibles
Enlaces rápidos
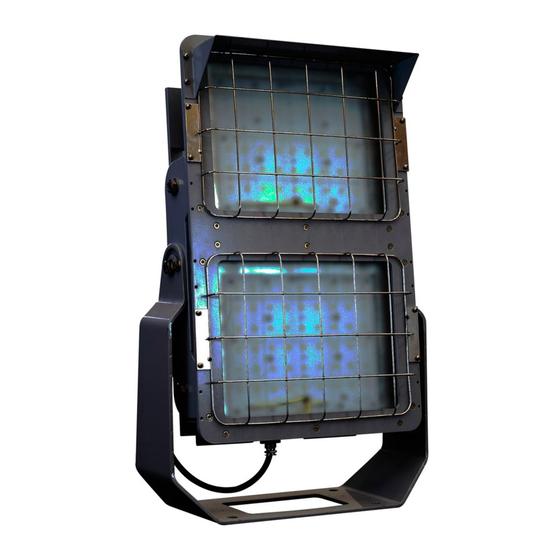
PFMA40L/50L LED Luminaires
Installation & Maintenance Information
APPLICATION
Pro Flood LED floodlights' construction is designed for use indoors and outdoors in
marine and wet locations, where moisture, dirt, corrosion, vibration and rough usage
may be present.
• UL1598 Luminaires, UL1598A Marine, UL8750
• Wet Locations, NEMA 4X
• IP66
• cULus
To avoid the risk of fire, explosion or electric shock, this product should be
installed, inspected and maintained by a qualified electrician only, in accordance
with all applicable electrical codes.
To avoid electric shock:
•
Be certain electrical power is OFF before and during installation and
maintenance.
To avoid burning hands:
•
Make sure LEDs and drivers are cool to touch when performing
maintenance.
INSTALLATION
Mounting
Yoke Mount – Wall Mount Using Floodlight Yoke Only
1.
Ensure that no less than two (2) operators move, or lift 50L fixture. Do not
use yoke as a contact point to move fixture, as it may become loose during
movement.
2.
Using yoke mounting dimensions shown in Figure 4, mark and drill desired
location on mounting surface.
3.
Secure floodlight yoke to surface using ½" bolts or lag screws (not provided).
WIRING
Wiring the Floodlight
1.
Open lower enclosure cover/heat sink (as shown in Figure 1) by loosening nine
(9) #10-24 x 0.75" stainless steel cover screws using a 5/16" nut socket or flat
head screwdriver (see Figure 1). The heat sink cover should be removed by
pulling back on one corner of the top most edge to prevent damage to gasket.
NOTE: To avoid pinching hazard between heat sink cover and driver housing, ensure
that floodlight is oriented in vertical position before, and during, wiring procedure.
2.
All components in the fixture are pre-wired so only line in, neutral and ground
need to be connected in the fixture using the supplied Wago connectors, using
methods that comply with all applicable codes. See Figure 2 for wiring diagram.
•
Wire range from AWG 20-14 (strip length 0.43").
•
Entries to driver housing shall have thread lubricant HTL or STL applied,
following NEC guidelines, and all applicable local codes.
•
Standard openings are 3/4" NPT.
•
If utilizing 3/4" to M20 reducer, ensure that an appropriate gasket is
used in conjunction with reducer.
•
Secure all electrical connections and wiring entry glands.
•
Ensure that the following lengths for field wiring, internal to the driver
housing compartment, are followed:
– 5.5" ± 0.25" (140 ± 6mm) for ground wire
– 4.5" ± 0.25" (114 ± 6mm) for neutral wire
– 3.5" ± 0.25" (90 ± 6mm) for line in wire
IF 1847 • 02/19
SAVE THESE INSTRUCTIONS FOR FUTURE REFERENCE
WARNING
WARNING
LINE TERMINAL
NEUTRAL TERMINAL
GROUND TERMINAL
Copyright
Pro Flood LED floodlights are supplied for use with a choice of voltages:
• 100-277 VAC, 50/60 Hz and 108-250 VDC
• 347-480 VAC, 50/60 Hz
To avoid potentially unsafe operating conditions:
•
Make sure the supply voltage is the same as the rated floodlight voltage.
•
Do not operate in ambient temperatures above those indicated on the
floodlight nameplate.
•
Use only replacement parts from Eaton's Crouse-Hinds Division.
•
Use proper supply wiring as specified on the floodlight nameplate.
•
All surfaces must be clean.
•
LED compartment non-serviceable. Do not open.
•
Before opening wiring compartment, electrical power to the floodlight
must be turned off. Keep tightly closed when in operation.
UPPER HOUSING
LOWER HOUSING
Cover/heat sink
2019, Eaton's Crouse-Hinds Division
®
WARNING
DO NOT PLACE
ADDITIONAL WEIGHT
ON THE BACK COVER/
HEAT SINK
Figure 1
IF 1847
COVER BOLTS
Page 1
Publicidad
Tabla de contenido

Manuales relacionados para Eaton PFMA40L


Resumen de contenidos para Eaton PFMA40L
- Página 1 Do not operate in ambient temperatures above those indicated on the with all applicable electrical codes. floodlight nameplate. • Use only replacement parts from Eaton’s Crouse-Hinds Division. WARNING • Use proper supply wiring as specified on the floodlight nameplate. •...
-
Página 2: Wiring Diagram
Tighten two (2) 5/16-18 angle marker bolts to 138 in.-lbs. (15.6 N-m). 5454. Turn power on. WARNING To avoid overheating of the floodlight: Do not position the floodlight beyond the aiming range limits. IF 1847 • 02/19 Copyright 2019, Eaton’s Crouse-Hinds Division Page 2 ®... - Página 3 All statements, technical information and recommendations contained herein are based on information and tests we believe to be reliable. The accuracy or completeness thereof are not guaranteed. In accordance with Eaton’s Crouse-Hinds Division’s “Terms and Conditions of Sale,” and since conditions of use are outside our control, the purchaser should determine the suitability of the product for his intended use and assumes all risk and liability whatsoever in connection therewith.
-
Página 4: Luminaires À Del Série Pfma40L/50L
Ne pas faire fonctionner à des températures ambiantes supérieures AVERTISSEMENT à celles indiquées sur la plaque signalétique du réflecteur. • Utiliser uniquement des pièces de rechange d’Eaton’s Crouse-Hinds Division. Pour éviter toute décharge électrique : • L’alimentation électrique doit être COUPÉE avant et pendant l’installation •... -
Página 5: Schéma De Câblage
Crouse-Hinds (adresse : 1201 Wolf Street, Syracuse, New York 13208; téléphone : 1-866-764-5454). AVERTISSEMENT Pour éviter la surchauffe du réflecteur : Ne pas placer le réflecteur au-delà des limites de la plage cible. IF 1847 • 02/19 © Eaton’s Crouse-Hinds Division, 2019 Page 2... - Página 6 Toutes les déclarations et les informations techniques contenues dans le présent document sont basées sur des informations et des essais que nous croyons fiables. Leur exactitude ou leur exhaustivité ne sont pas garanties. Conformément aux conditions de vente d’Eaton’s Crouse-Hinds Division, et étant donné que les conditions d’utilisation sont hors de notre contrôle, l’acheteur doit déterminer si le produit convient à...
-
Página 7: Dispositivos Led Pfma40L/50L
No opere a temperaturas ambiente por encima de las indicadas en la placa de identificación del reflector. ADVERTENCIA • Use solo piezas de reemplazo de la división Crouse-Hinds de Eaton. • Use un cableado de suministro adecuado como se especifica en la placa Para evitar descargas eléctricas: de identificación del reflector. -
Página 8: Diagrama De Cableado
Crouse-Hinds, 1201 Wolf Street, Syracuse, Nueva York, 13208, teléfono 866-764-5454. Para evitar el sobrecalentamiento del reflector: No ubique el reflector fuera de los límites de rango especificados. IF 1847 • 02/19 Copyright 2019, División Crouse-Hinds de Eaton Página 2 ®... -
Página 9: Dimensiones
Todas las declaraciones, la información técnica y las recomendaciones contenidas en este documento se basan en informaciones y pruebas que consideramos confiables. No se garantiza que las mismas sean precisas o estén completas. En conformidad con los “Términos y condiciones de venta” de la División Crouse-Hinds de Eaton y dado que las condiciones de uso están fuera de nuestro control, el comprador debe determinar la idoneidad del producto para su uso previsto y asume todo riesgo y responsabilidad con relación al mismo.