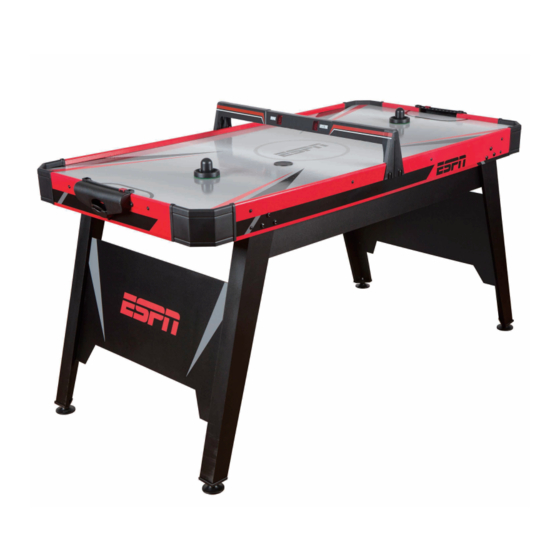
Tabla de contenido
Publicidad
Enlaces rápidos
TM
MODEL/MODELO: 1616003
WM.COM
ASSEMBLY INSTRUCTIONS
INSTRUCCIONES DE ARMADO
ATTENTION
ATENCIÓN
DO NOT RETURN
NO DEVOLVERLO
TO THE STORE
A LA TIENDA
Con tact
Contacto
MD Sports
MD Sports
Customer Service
Servicio al Cliente
* For additional resources and Frequently
* Por mayor información y Preguntas
Ask Questions, please visit us at
Frecuentes, favor visitarnos en
themdsports.com
themdsports.com
Publicidad
Tabla de contenido

Resumen de contenidos para MD SPORTS 1616003
- Página 1 MODEL/MODELO: 1616003 WM.COM ASSEMBLY INSTRUCTIONS INSTRUCCIONES DE ARMADO ATTENTION ATENCIÓN DO NOT RETURN NO DEVOLVERLO TO THE STORE A LA TIENDA Con tact Contacto MD Sports MD Sports Customer Service Servicio al Cliente * For additional resources and Frequently * Por mayor información y Preguntas...
-
Página 2: Garantía Limita De 90 Dias
Por favor comunique con el minorista por su política de devolución. (Continued on the next page.) (Continúe en la siguiente página.) www.themdsports.com 1616003... - Página 3 Mantener alejados a los exterior. Solo para uso en interior. necesarios area de ensamble animales domesticos No utilizar ni guardar el producto en del area de ensamble lugares humedos o mojados (Continued on the next page.) (Continúe en la siguiente página.) www.themdsports.com 1616003...
-
Página 4: Important Safety Instructions
8 años de edad. Como con todos los productos eléctricos, las precauciones deberían ser obser vadas durante el manejo y el empleo para reducir el riesgo de choque eléctrico. 1616003 (Continued on the next page.) www.themdsports.com (Continúe en la siguiente página.) - Página 5 Any Solid-State Speed Control Device. cualquier dispositivo de control sólido - velocidad estatal. Para Uso Doméstico Sólo. For Household use only. 1616003 (Continued on the next page.) www.themdsports.com (Continúe en la siguiente página.)
-
Página 6: Pre Installed Parts / Piezas Preinstaladas
English Español 1616003 PARTS LIST / LISTA DE PARTES Panel de Mainframe Unidad Principal Right Leg Pierna Derecha Pierna Izquierda Left Leg End Leg Panel Pierna Final Marcador Soporte de Scorer Support Round Puck Puck Redondo Electronic Scorer Connect Box Caja de Conexión... -
Página 7: Instrucciones De Ensamblaje
Vea la FIG. 1. por Pierna. 4. Screw the Leg Levelers (#12) into the bottom of each leg. 4. Atornille los Niveladores de Pierna (#12) al fondo de ca da Pierna. 1616003 www.themdsports.com (Continued on the next page.) (Continúe en la siguiente página.) - Página 8 3. Place it on all four feet at the same time on the ground. 3. Coloque los cuatro pies de la mesa sobre el piso al mismo tiempo. 1616003 www.themdsports.com (Continued on the next page.) (Continúe en la siguiente página.)
-
Página 9: Unidad Principal
Wire into the Connect Box (#7). de juego para insertar el Cable a la Caja de Conexión (#7). See FIG. 3B. Vea la FIG. 3B. 1616003 www.themdsports.com (Continued on the next page.) (Continúe en la siguiente página.) - Página 10 15. Insert the Adaptor (#14) into the DC Jack on the Motor (P1). See FIG. 4C. 15. Inserte el Adaptador (#14) a DC Motor (P1). Vea la FIG. 4C. 1616003 (Continued on the next page.) www.themdsports.com (Continúe en la siguiente página.)
-
Página 11: Operación Del Marcador Electrónico
Press “ON / OFF” again to turn it back on. 2. Ud. puede apretar “ON / OFF” en cualquier momento para apagar el marcador. Aprete el botón “ON / OFF” otra vez para encenderlo. 1616003 www.themdsports.com (Continued on the next page.) (Continúe en la siguiente página.) -
Página 12: Reglas Para Jugar Al Air Hockey
(2) Este dispositivo debe aceptar cualquier interferencia received, including interference that may cause recibida, incluyendo interferencias que puedan undesired operation. causar un funcionamiento no deseado. YOU ARE NOW READY TO PLAY! ¡USTED ESTA AHORA LISTO PARA JUGAR! 1616003 (The last page) www.themdsports.com (La ultima página)


