Tabla de contenido
Publicidad
Enlaces rápidos
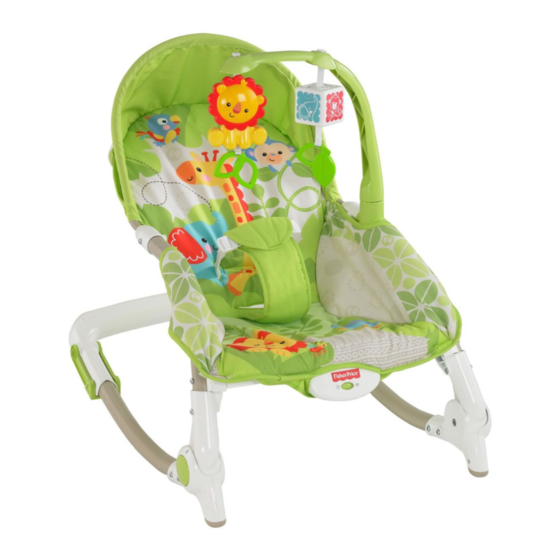
X7047
3
1
2
IMPORTANT! Please keep these instructions for future reference.
Do not adjust the seat recline with child in the seat.
¡IMPORTANTE! Guardar estas instrucciones para futura referencia.
No ajustar el respaldo de la silla estando el niño en ella.
LEA LAS INSTRUCCIONES ANTES DE MONTAR Y USAR EL PRODUCTO.
fisher-price.com
1
Publicidad
Tabla de contenido

Manuales relacionados para Fisher-Price X7047


Resumen de contenidos para Fisher-Price X7047
- Página 1 X7047 IMPORTANT! Please keep these instructions for future reference. Do not adjust the seat recline with child in the seat. ¡IMPORTANTE! Guardar estas instrucciones para futura referencia. No ajustar el respaldo de la silla estando el niño en ella. LEA LAS INSTRUCCIONES ANTES DE MONTAR Y USAR EL PRODUCTO.
-
Página 2: Consumer Information Información Al Consumidor
Consumer Information Información al consumidor WARNING To prevent serious injury or death: • Fall Hazard - Never use on any elevated surface, since child’s movement may cause the product to slide or tip over. Use only on a fl oor. •... - Página 3 DO NOT use if any parts are missing or broken. ® Contact Fisher-Price for replacement parts and instructions if needed. Never substitute parts. • Please read these instructions before assembly and use of this product.
- Página 4 Parts Piezas IMPORTANT! Please remove all parts from the package and identify them before assembly. ¡IMPORTANTE! Sacar todas las piezas del empaque e identificarlas antes de ensamblarlas. todas las piezas del empaq q ue e id Front Bar Barra delantera Barra delantera Toy Bar Barra de juguetes...
- Página 5 Assembly Montaje Crossbar Barra transversal PRESS PRESIONAR PRESS PRESIONAR Side Rails Barandillas laterales • Place the side rails on a flat surface. • While pressing the small buttons on each side rail, slide the crossbar onto the side rails. Make sure you hear a “click”. •...
- Página 6 Assembly Montaje • Lift the front rails. • Levantar las barandillas delanteras. Pad with Seat Back Tube Almohadilla con tubo del respaldo Front Rails Barandillas delanteras • Insert the ends of the seat back tube (inside the pad) into the sockets in the front rails. Push down on the seat back tube until you hear a “click”...
- Página 7 Assembly Montaje Clips Clips Clips Clips • Fit the clips on the front edge of the pad into the slots on bottom edge of the front bar. • Fit the opening in the front edge of the pad around the front of the soothing unit. •...
- Página 8 Assembly Montaje • Fasten the buckles on the seat pad back and crossbar. Make sure you hear a "click". • Abrochar las hebillas del dorso de la almohadilla y barra transversal. Asegurarse de oír un clic. Toy Bar Barra de juguetes •...
- Página 9 Storage Transportarla LOWER BAJAR PRESS PRESS PRESIONAR PRESIONAR PRESS PRESS PRESIONAR PRESIONAR • While pressing the buttons on the side rail hubs, lower the seat back. • Mientras presiona los botones de las piezas centrales de las barandillas laterales, bajar el respaldo.
-
Página 10: Battery Installation Colocación De La Pila
Battery Installation Colocación de la pila 1,5V D (LR20) • Unclip the front edge of the pad from the front bar and lift the pad. • Loosen the screws in the battery compartment door with a Phillips screwdriver and remove the battery compartment door. -
Página 11: Battery Safety Information Información De Seguridad Acerca De Las Pilas
Battery Safety Information Información de seguridad acerca de las pilas In exceptional circumstances, batteries may leak fluids that can cause a chemical burn injury or ruin your product. To avoid battery leakage: • Do not mix old and new batteries or batteries of different types: alkaline, standard (carbon-zinc) or rechargeable (nickel-cadmium). -
Página 12: Setup And Use Preparación Y Uso
Setup and Use Preparación y uso WARNING To prevent serious injury or death: • Fall Hazard - Never use on any elevated surface, since child’s movement may cause the product to slide or tip over. Use only on a fl oor. •... -
Página 13: Position Seat Recline Respaldo De 3 Posiciones
3-Position Seat Recline Respaldo de 3 posiciones Recline Reclinada Upright Vertical Number Número Pieza central Upright Vertical IMPORTANT! Do not adjust the seat recline with child in the seat. • While pressing the hub buttons on the side rails, lift or lower the seat to: Recline Upright Upright... -
Página 14: Kickstands Pies De Apoyo
Kickstands Pies de apoyo Kickstands Pies de apoyo • Rotate each kickstand down to use as a stationary seat. • Girar hacia abajo cada pie de apoyo para usar la silla como silla estacionaria. kickstands Pies de apoyo Rocker • Rotate each kickstand up to use as a rocker. Mecedora •... - Página 15 Adjustable Seat Back Respaldo ajustable Straps Straps Cinturones Cinturones • Lift the seat back and fasten the straps on the back of the seat. Make sure you hear a “click”. • Levantar el respaldo y abrochar los cinturones en el dorso de la silla. Asegurarse de oír un clic.
-
Página 16: Secure Your Child Sistema De Sujeción
Secure Your Child Sistema de sujeción Waist Belt Waist Belt Cinturón Cinturón de la cintura de la cintura Restraint Pad Almohadilla de sujeción • Place your child in the seat. Position the restraint pad between your child’s legs. • Fasten the waist belts to each side of the restraint pad. Make sure you hear a “click” on both sides. - Página 17 Secure Your Child Sistema de sujeción TIGHTEN LOOSEN APRETAR AFLOJAR To tighten: • Feed the anchored end of the waist belt up through the buckle to form a loop . Pull the free end of the waist belt To loosen: •...
-
Página 18: Soothing Vibrations Vibraciones Relajantes
Soothing Vibrations Vibraciones relajantes Power Switch Interruptor de encendido • Make sure your child is properly secured in the seat. • Slide the power switch on the soothing unit to for vibrations and O to turn vibrations off. • Asegurarse de que el niño esté bien asegurado en la silla. •... -
Página 19: Care Mantenimiento
Care Mantenimiento • The pad is machine washable. Wash it separately in cold water on the gentle cycle. Do not use bleach. Tumble dry separately on low heat and remove promptly. The frame, toy bar and toys may be wiped clean using a mild cleaning solution and a damp cloth. Do not use bleach. - Página 20 CONSUMER ASSISTANCE AYUDA AL CONSUMIDOR 1-800-432-5437 (US) Fisher-Price, Inc., 636 Girard Avenue, East Aurora, NY 14052. Hearing-impaired consumers/Clientes con problemas auditivos 1-800-382-7470. Centro de Servicio en México: 59-05-51-00 Ext. 5206 ó 01-800-463-59-89 MÉXICO Importado y distribuido por Mattel de México, S.A. de C.V., Miguel de Cervantes Saavedra No. 193, Pisos 10 y 11, Col.