Publicidad
Idiomas disponibles
Idiomas disponibles
Enlaces rápidos
Publicidad
Capítulos

Manuales relacionados para SPORTSTECH HTX100


Resumen de contenidos para SPORTSTECH HTX100
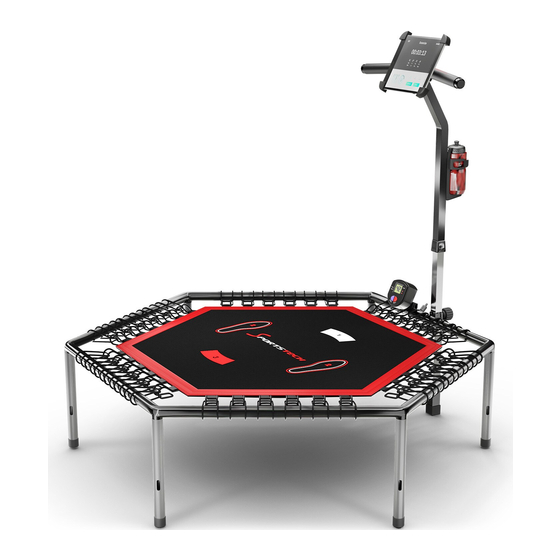
- Página 1 HTX100...
- Página 3 Sehr geehrter Kunde, wir freuen uns, dass Sie sich für ein Gerät aus der SPORTSTECH Produktpalette entschieden haben. SPORTSTECH Sportgeräte bieten Ihnen hohe Qualität und neue Technologie. Um die Leistungsfähigkeit des Gerätes voll nutzen zu können und viele Jahre Freude an Ihrem Gerät zu haben, lesen Sie bitte vor der Inbetriebnahme und dem Beginn des Trainings dieses Benutzerhandbuch sorgfältig durch und verwenden Sie das Gerät den Anweisungen entsprechend.
- Página 4 Aufbau, Benutzung, Abbau. 1. QR-Code scannen 2. Videos anschauen 3. Schnell und sicher starten Link zu den Videos: https://service.innovamaxx.de/htx100_video Uns gibt es auch auf Social Media! Hol dir die neuesten Produktinfos, Trainingsinhalte uvm. auf unserer: Instagram-Seite Facebook-Seite https://www.instagram.com/sportstech.de https://www.facebook.com/sportstech.de...
-
Página 5: Tabla De Contenido
INHALT TECHNISCHE ANGABEN ....................6 WICHTIGE SICHERHEITSHINWEISE ................6 EXPLOSIONSZEICHNUNG/ERSATZTEILLISTE ..............8 MONTAGE/AUFBAU ..................... 9 DEHNÜBUNGEN ......................15 KURZE TRAININGSTIPPS ....................16 TRAININGSCOMPUTER ....................17 APPLIKATION SOFTWARE (APP) ................... 18 WARTUNG / PFLEGE ....................21 ENTSORGUNG ......................22 KONFORMITÄT ......................22... -
Página 6: Technische Angaben
TECHNISCHE ANGABEN Produktinformationen Abmessungen (L x B x H) ca. 123 x 138 x 112~136 cm Gesamtgewicht 15 kg Maximales Körpergewicht des Nutzers 120 kg WICHTIGE SICHERHEITSHINWEISE Diese allgemeinen Sicherheitsinformationen müssen unbedingt für die Benutzung dieses Produkt beachtet werden. Lesen Sie alle Hinweise, bevor Sie das Produkt in Benutzung nehmen. - Página 7 • Tragen Sie angemessene Trainingskleidung während Sie das Gerät verwenden. Vermeiden Sie das Tragen von weiter Kleidung oder Kleidung, die sich im Gerät verfangen kann und Dieses beschädigen oder Sie verletzen könnte. • Das Gerät wurde für Benutzer bis zu einem Gewicht von 120kg getestet. Die Bremsleistung des Gerätes ist unabhängig von der Geschwindigkeit.
-
Página 8: Explosionszeichnung/Ersatzteilliste
EXPLOSIONSZEICHNUNG/ERSATZTEILLISTE Unter folgendem Link Unter folgendem Link finden Sie die Explosionszeichnung finden Sie die Explosionszeichnung und die Ersatzteile-Liste: und die Ersatzteile-Liste: https://service.innovamaxx.de/htx100_spareparts https://service.innovamaxx.de/htx100_spareparts... -
Página 9: Montage/Aufbau
MONTAGE/AUFBAU Alle Bauteile und vormontierten Teile fest anziehen! Schritt 1: Fügen Sie die Rahmenrohre Nr. 1 Abbildung 1 und Nr. 2 zusammen und ziehen Sie die Schrauben M6*12 (#22) fest an. Schritt 2: Fügen Sie nun alle Rahmenrohre mit der Markierung Nr. 2 zusammen und ziehen Sie auch hier die Schrauben M6*12 (#22) fest an. - Página 10 Schritt 3: Fügen Sie nun alle Rahmenrohre mit der Rahmenrohrverbindung mit der Markierung Nr. 3 zusammen und ziehen Sie auch hier die Schrauben M6*12 (#22) fest an. (siehe Abbildungen 4 und 5) Abbildung 4 Abbildung 5 Schritt 4: Schneiden Sie die Kunststoffbinder ab und stecken Sie das Standrohr auf den Schraubenkopf (siehe Abbildung 6)
- Página 11 Schritt 6: Drehen Sie das Sprungtuch auf den Kopf. Stellen Sie nun sicher, dass die Seite des Sprungtuches, die mit einem Loch versehen ist, parallel zur Rahmenrohrverbindung liegt. (Siehe Abbildung 8) Schritt 7: Haken Sie das Gummiband über dem Rohr und auf der Unterseite der Klammer ein.
- Página 12 Schritt 10: Fügen Sie zuerst den Handgriff (#11) mit dem mittleren Haltestangenrohr (#10) zusammen und befestigen Sie diese mit den entsprechenden Schrauben M8*12 (#23) und Flachdichtungen (#24). Nutzen Sie dazu den zur Verfügung gestellten Innensechskantschlüssel. Danach fügen Sie das verstellbare Haltestangenrohr (#9) mit dem mittleren Haltestangenrohr (#10) zusammen und befestigen diese auch mit Schrauben M8*12 (#23).
- Página 13 Schritt 12: Befestigen Sie die Konsolenbasis (#20) an das Rahmenrohr (#1). Verbinden Sie dann mit der Verbindungsfeder (#21) das kleine Loch im Sprungtuch mit der Konsole. Verbinden Sie nun das Kabel mit der Konsole und setzen Sie die Konsole (#19) in die feststehende Konsolenbasis (#20). Verändern Sie manuell die Federlänger und testen Sie die Konsole, ob es funktioniert.
- Página 14 Schritt 15: Legen Sie die Sprungtuchabdeckung (#15) auf das Sprungtuch (#14) und bringen Sie die Klettverschlüsse an. Stel- len Sie sicher, dass die Klettverschlüsse verdeckt sind. Befestigen Sie die Abdeckung anhand der schwarzen Bänder an den Standbeinen. Nicht zu fest, damit es nicht deformiert wird. Abbildung 16 Das Trampolin ist nun einsatzbereit.
-
Página 15: Dehnübungen
DEHNÜBUNGEN Vor jedem Training sollten Sie Ihre Muskeln mindestens 5-10 Minuten lang dehnen, um sie ausreichend aufzuwärmen. Wiederholen Sie die nachfolgenden Dehnungsübungen daher fünf Mal. Das Dehnen vor dem Training trägt zur Verbesserung der Flexibilität bei und verringert das Verletzungsrisiko. MIT DEM KOPF ROLLEN Drehen Sie den Kopf nach rechts für eine Sekunde, fühlen Sie die Streckung auf der linken Seite des Nackens, dann drehen Sie den Kopf zurück für eine Sekunde, recken Sie Ihr Kinn nach oben und lassen... -
Página 16: Kurze Trainingstipps
Trainingszonen-Übung Nach dem Aufwärmen erhöhen Sie bitte die Intensität entsprechend Ihrem gewünschten Trainingspro- gramm. Achten Sie darauf, Ihre Intensität für maximale Leistung beizubehalten. Atmen Sie regelmäßig und tief während des Trainings - halten Sie keinesfalls den Atem an. Abkühlen Beenden Sie jedes Training mit einem leichten Joggen oder Gehen Sie mindestens 1 Minute lang. Zur Vervollständigung machen Sie über 5 bis 10 Minuten hinweg Dehnungsübungen, um ganz abzukühlen. -
Página 17: Trainingscomputer
TRAININGSCOMPUTER Unseren Trampolin können Sie auch ohne Computer verwenden. Unser Display steht Ihnen jedoch hilfreich zur Seite, um Ihre Übungen noch wirksamer zu machen. Mit ihm können Sie wichtige Informationen über Ihren Trainings-Verlauf erfahren. Unser Gerät entspricht der Genauigkeits-Klasse C. Dies bedeutet, Sie können sich nicht auf die ganz genaue Treffsicherheit unserer Display-Anzeige verlassen. -
Página 18: Applikation Software (App)
Sie können im App-Store nach "Synteam Sport" suchen, oder über den QR Code herunterladen. Hinweise zur Nutzung der App: Sie sollten nur Apps installieren, deren Quellen Sie vertrauen. Sportstech Brands Holding kann keine Haftung für Software übernehmen, die von Drittanbietern bereitgestellt wird. - Página 19 Applikation: Verbindung mit dem Gerät • Bei der ersten Anmeldung von Synteam 1. Wechseln Sie die Sprache bei Bedarf auf Sport fragt die App, welche Zugriffe Sie ge- "English". statten möchten: Medien, Sprachaufnahme, 2. Klicken Sie auf "register". GPS etc. 3.
- Página 20 Applikation: Verbindung mit dem Gerät • Die App scannt die in der Nähe befindlichen • Nun befinden Sie sich im Trainingsprogramm. Geräte. Die gemessenen Sprünge werden als "Step" • Ihr Gerät sollte sollte wie folgt angezeigt angezeigt und ein vergleichbarer Wert für die werden: "ZTsmartPedometer".
- Página 21 KONFORMITÄT FÜR DIE KONSOLE Hiermit erklärt Sportstech Brands Holding GmbH, dass der Funkanlagentyp der Richtlinie 2014/53/EU entspricht. Der vollständige Text der EU-Konformitätserklärung ist unter der folgenden Internetadresse verfügbar: https://service.innovamaxx.de/htx100_conformity Bei der hier genannten Konformität handelt es sich ausschließlich um die Erklärung für die Konsole!
-
Página 22: Wartung / Pflege
WARTUNG / PFLEGE • Überprüfen Sie nach dem Zusammenbau und vor dem Einsatz des Gerätes, ob alle Schrauben voll- ständig und korrekt festgezogen sind. • Reinigen Sie das Gerät regelmäßig mit einem leicht angefeuchteten Tuch unter Einsatz eines milden Reinigungsmittels. •... - Página 23 Dear customer, We are pleased you chose a device from the SPORTSTECH product range. SPORTSTECH sports equip- ment offers you high quality and new technology. In order to fully use the potential of your device and be able to enjoy it for many years, please read this manual carefully before starting up and beginning of training, and use the device according to the instruc- tions.
- Página 24 1. Scan the QR code 2. Watch videos 3. Start fast and safely Link to the videos: https://service.innovamaxx.de/htx100_video We are also on social media! Get the latest product information, training content and much more on our: Instagram-page Facebook-page https://www.instagram.com/sportstech.de https://www.facebook.com/sportstech.de...
- Página 25 INDEX TECHNICAL DETAILS ....................26 IMPORTANT SAFETY INSTRUCTIONS ................26 EXPLODED DRAWING/SPARE PARTS LIST ..............28 MOUNTING/ASSEMBLY ....................29 STRETCH EXERCISE ....................35 BRIEF TRAINING TIPS ....................36 TRAINING COMPUTER ....................37 APPLICATION SOFTWARE (APP) ................... 38 MAINTENANCE/CARE ....................41 DISPOSAL ........................
-
Página 26: Technical Details
TECHNICAL DETAILS Product information Dimensions (L x W x H) approx. 123 x 138 x 112~136 cm Total weight 15 kg Maximum weight of the user 120 kg IMPORTANT SAFETY INSTRUCTIONS Basic precautions should always be followed, including the following safety instructions when using the crosstrainer: Read all instructions before using this equip- ment. - Página 27 • Wear appropriate training clothes while using the device. Avoid wearing other clothing or clothing that can get caught in the device and could damage it or injure you. • The device has been tested for users weighing up to 120kg. The braking ability of the device is independent of speed.
-
Página 28: Exploded Drawing/Spare Parts List
EXPLODED DRAWING/SPARE PARTS LIST At the following link At the following link you will find the exploded drawing you will find the exploded drawing and the spare parts list: and the spare parts list: https://service.innovamaxx.de/htx100_spareparts https://service.innovamaxx.de/htx100_spareparts... -
Página 29: Mounting/Assembly
MOUNTING/ASSEMBLY Firmly tighten all component parts and pre-assembled parts! Step 1: Put together the frame tubes #1 and Figure 1 #2 and tighten the screws M6*12 (#22). Step 2: Figure 2 Now put together all frame tubes with marking no. 2 and tighten the screws M6*12 (#22). - Página 30 Step 3: Now put together all frame tubes with the frame tube connection with marking no. 3 and tighten the screws M6*12 (#22) here as well. (see Figures 4 and 5) Figure 4 Figure 5 Step 4: Cut off the plastic ties and place the standpipe on the screw head (see Figure 6).
- Página 31 Step 6: Turn the jumping blanket upside down. Now make sure that the side of the jumping blanket, which has a hole, is parallel to the frame tube connection. (See Figure 8) Step 7: Hook the rubber band over the tube and on to the bottom of the bracket.
- Página 32 Step 10: First connect the handle (#11) to the middle support rod tube (#10) and fasten it with the corresponding screws M8*12 (#23) and flat seal (#24). Use the Allen key provided for this purpose. Then put together the adjustable support rod tube (#9) with the middle support rod tube (#10).
- Página 33 Step 12: Attach the console base (#20) to the frame tube (#1). Then use the connection spring (#21) to connect the small hole in the jumping blanket to the console. Connect the cable to the console and place the console (#19) in the fixed console base (#20).
- Página 34 Step 15: Place the jumping blanket cover (#15) on the jumping blanket (#14) and attach the Velcro fasteners. Make sure the Velcro straps are covered. Attach the cover to the pedestal using the black bands. Do not overtighten, so it won't get deformed.
-
Página 35: Stretch Exercise
STRETCH EXERCISE Before each workout you should stretch your muscles for at least 5-10 minutes to warm them up sufficiently. Repeat the following stretching exercises five times. Stretching before training helps improve flexibility and reduces the risk of injury. HEAD ROLLS Rotate your head to the right for one count, feeling the stretch up the left side of your neck, then rotate your head back for one count, stretching your chin to the ceiling and letting your mouth open. -
Página 36: Brief Training Tips
Training zone Exercise After warming up, increase the intensity to your desired exercise programme. Be sure to maintain your Intensity for maximum performance. Breathe regularly and deeply as you exercise -never hold your breath. Cool Down Finish each workout with a light jog or walk for at least 1 minute. Then complete 5 to 10 minutes of stretching to cool down. -
Página 37: Training Computer
TRAINING COMPUTER You can also use our trampoline without computer. However, our display will help you to make your exercises even more effective. You can gain important information about your training session with it. Our device corresponds to accuracy class C. This means that you cannot rely to 100% on the accuracy of our display. SELECT THE DISPLAY: The small arrow shows which mode has been selected. -
Página 38: Application Software (App)
APPLICATION SOFTWARE (APP) You can download the app "Sportstech"/ "Synteam Sport" via the QR code shown here. Mobile device requirement: Android 4.3 or higher with Bluetooth 4.0, iOS 7.0 or higher. Please turn on your Bluetooth function and GPS on your device first. - Página 39 Application: connection with the device • When Synteam Sport logs on for the first 1. "Change the language to 'English' if neces- time, the app asks what access you want to sary. allow: media, voice recording, GPS, etc. 2. Click on 'register'. •...
- Página 40 Application: connection with the device • The app scans the nearby devices. • Now you are in the training program. The • Your device should appear as follows: " measured jumps are displayed as 'Step' and ZTsmartPedometer ". a comparable value for the distance covered •...
- Página 41 CONFORMITY FOR THE CONSOLE Sportstech Brands Holding GmbH hereby declares that the radio system type is compliant with EU Directive 2014/53 / EU. The full text of the EU declaration of conformity is available at the following internet address: https://service.innovamaxx.de/htx100_conformity The conformity declaration mentioned herein is only applicable to the console.
-
Página 42: Maintenance/Care
MAINTENANCE/CARE • Check that all screws are fully and correctly tightened after assembly and before using the device. • Regularly clean the device with a slightly moistened cloth and a mild detergent. • Especially the handles, as these parts are in contact with your body during the whole training. CAUTION! When assembling and cleaning, please note that the following parts are particularly fragile! •... - Página 43 Estimado cliente, Nos complace que haya elegido un dispositivo de la línea de productos SPORTSTECH. Las máquinas de deporte de SPORTSTECH ofrecen una gran calidad y una tecnología innovadora. Con el fin de usar todo el potencial de su dispositivo y para que pueda disfrutarlo durante muchos años, por favor lea este manual cuidadosamente antes de comenzar a ejercitarse, y use el dispositivo de acuer- do a las instrucciones.
- Página 44 Montaje, Utilizar, Desmontaje. 1. Escanear el código QR 2. Ver vídeos 3. Comienza rápido y seguro Enlace a los videos: https://service.innovamaxx.de/htx100_video ¡También estamos en redes sociales! Obtenga la última información sobre nuestros productos, entrenamientos y mucho más aquí: Instagram Facebook https://www.instagram.com/sportstech.de https://www.facebook.com/sportstech.de...
- Página 45 CONTENIDOS INFORMACIÓN TÉCNICA ....................46 INSTRUCCIONES IMPORTANTES DE SEGURIDAD ............46 DIBUJO DE EXPLOSIÓN/LISTA DE REPUESTOS .............. 48 INSTALACIÓN / MONTAJE .................... 49 EJERCICIOS DE ESTIRAMIENTO ..................55 BREVES RECOMENDACIONES PARA EL ENTRENAMIENTO ..........56 ENTRENAMIENTO CON OREDENADOR ................57 SOFTWARE (APP) .......................
-
Página 46: Información Técnica
INFORMACIÓN TÉCNICA Detalles del producto Dimensiones (largo x ancho x alto) aprox. 123 x 138 x 112~136 cm Peso total 15 kg Peso de usuario máximo soportado 120 kg INSTRUCCIONES IMPORTANTES DE SEGURIDAD Al usar la caminadora siempre se deben seguir las precauciones básicas, incluyendo las siguientes instrucciones de seguridad importantes. - Página 47 • El funcionamiento seguro y continuo del dispositivo solo puede garantizarse a través de revisiones periódicas para detectar daños y reparar el desgaste. • Use el dispositivo según indicado en las instrucciones. Si detecta un defecto en el dispositivo, consulte al fabricante inmediatamente, suspenda inmediatamente el utilizo y no vuelva a utilizar el dispositivo hasta que se haya reparado el daño.
-
Página 48: Dibujo De Explosión/Lista De Repuestos
DIBUJO DE EXPLOSIÓN/LISTA DE REPUESTOS En el siguiente enlace En el siguiente enlace encontrarás el dibujo de explosión encontrarás el dibujo de explosión y la lista de repuestos: y la lista de repuestos: https://service.innovamaxx.de/htx100_spareparts https://service.innovamaxx.de/htx100_spareparts... -
Página 49: Instalación / Montaje
INSTALACIÓN / MONTAJE Apriete todos los componentes y piezas premontadas! Paso 1: Una los tubos No. 1 y No. 2 y apriete Ilustración 1 los tornillos M6*12 (#22). Paso 2: Ilustración 2 Ensamble todos los tubos marcados con no. 2 y apriete los tornillos M6*12 (# 22). - Página 50 Paso 3: Ensamble todos los tubos con el Conector para tubo marcado con no. 3 y apriete los tornillos M6*12 (# 22). (ver Figuras 4 y 5) Ilustración 4 Ilustración 5 Paso 4: Corte las ataduras de plástico y coloque el tubo vertical en la cabeza del tornillo (vea la Figura 6).
- Página 51 Paso 6: Ponga la lona de salto al revés. Ahora asegúrese de que el lado de la lona de salto que tiene un orificio esté paralela a la unión del tubo. (Ver figura 8) Paso 7: Enganche la banda elástica sobre el tubo y en la parte inferior de la abrazadera.
- Página 52 Paso 10: Primero, ensamble el manguito (# 11) con el tubo del medio de la barandilla (#10) y asegúrelos con el M8*12 (#23) adecuado y las juntas planas (#24). Use el destornillador adecuado. Luego, monte el tubo ajustable(#9) con el tubo medio (#10). Ahora ensamble la pata (#7) con el conector del tubo del armazón (#1). Coloque los tubos ya ensambladas (#11, #10, #9) junto al elemento de conexión en el trampolín.
- Página 53 Paso 12: Conecte la base de la consola (#20) al tubo del bastidor (#1). Luego, use el resorte (#21) para conectar el pequeño orificio de la lona de salto a la consola. Ahora conecte el cable a la consola y coloque la consola (#19) en la base de la consola fija (#20).
- Página 54 Paso 15: Coloque la funda (#15) sobre la lona de saltar (# 14) y las cintas de Velcro. Asegúrese de que los cierres de gancho y lazo estén ocultos. ponga la funda hasta las patas usando las correas negras. No apriete demasiado para evitar posibles deformaciones.
-
Página 55: Ejercicios De Estiramiento
EJERCICIOS DE ESTIRAMIENTO Antes de cada entrenamiento debes estirar tus músculos durante al menos 5-10 minutos para calentarlos lo suficiente. Repita los siguientes ejercicios de estiramiento cinco veces. El estiramiento antes del entrena- miento ayuda a mejorar la flexibilidad y reduce el riesgo de lesiones. GIROS CON LA CABEZA Gire su cabeza hacia la derecha por un segundo, sienta como se estira el lado izquierdo de su cuello, luego gire su cabeza hacia tras por un segundo, estirando su barbilla hacia el techo y dejando su boca abierta. -
Página 56: Breves Recomendaciones Para El Entrenamiento
Intensidad del ejercicio Después de calentar, aumente la intensidad de su programa de ejercicio deseado. Asegúrese de man- tener su intensidad para un máximo rendimiento. Respire de manera constante y profunda mientras se ejercita-nunca aguante la respiración. Enfriamiento Termine cada ejercicio con un trote ligero o camine durante al menos 1 minuto. Después complete de 5 a 10 minutos de estiramiento para el enfriamiento. -
Página 57: Entrenamiento Con Oredenador
ENTRENAMIENTO CON OREDENADOR Puede usar nuestro trampolín sin ordenador, pero nuestra pantalla le ayudará a hacer los ejercicios aún más eficazmente, ya que le mostrará información importante sobre el entrenamiento. Nuestro dispositivo tiene Precisión de Clase C. Esto significa que no puede contar completamente con la precisión de nuestro display gráfico. -
Página 58: Software (App)
Busca la app Synteam Sport en la App Store, o descárgalo usando el código QR. Notas sobre el uso de la aplicación: Instale solo aplicaciones de fuentes de confianza. Sportstech Brands Holding no se hace responsable de softwares proporcionados por terceros. -
Página 59: Aplicación: Conexión Con El Dispositivo
Aplicación: conexión con el dispositivo • La primera vez que entras Synteam Sport, la 1. Cambia el idioma si lo necesitas. aplicación te preguntará qué accesos quieres 2. Pulsa en "register". permitir: canales, grabación de voz, GPS, etc. 3. Escribe cualquier número y una contraseña •... - Página 60 Aplicación: conexión con el dispositivo • La aplicación escanea los dispositivos cerca- • Ya estás en el programa de entrenamien- nos. to. Los saltos medidos se muestran como • El dispositivo debe mostrar lo siguiente: "Step" y un y aparece un valor comparable "ZTsmartPedometer".
-
Página 61: Conformidad Para La Consola
CONFORMIDAD PARA LA CONSOLA Sportstech Brands Holding GmbH declara que el sistema de radio tipo cumple con la directiva 2014/53/EU. El texto completo de la Declaración UE de Conformidad está disponible en el siguiente enlace: https://service.innovamaxx.de/htx100_conformity La conformidad mencionada aquí se refiere exclusivamente a la consola. -
Página 62: Mantenimiento / Cuidado
MANTENIMIENTO / CUIDADO • Asegúrese de que todos los tornillos estén bien apretados después de ensamblar y antes de usar el dispositivo. • Limpie regularmente el equipo con un paño ligeramente humedecido con un detergente suave. • Sobre todo, hay que limpiar los mangos porque están en contacto con el cuerpo durante el entrena- miento. - Página 63 FRANÇAIS Cher client, Nous sommes ravis que vous ayez choisi un appareil de la gamme de produits SPORTSTECH. Les équi- pements sportifs SPORTSTECH vous offrent une qualité élevée et une technologie innovante. Afin d'utiliser pleinement le potentiel de votre appareil et de pouvoir l'apprécier pendant de nombreuses années, lisez attentivement ce manuel avant l'utilisation et le début de votre entraînement et utilisez l'ap-...
- Página 64 3. Démarrez rapidement et en toute sécurité Lien vers les vidéos: https://service.innovamaxx.de/htx100_video Vous pouvez aussi nous trouver sur les réseaux sociaux! Retrouve les dernières informations sur les produits, le contenu des entraînements et bien plus encore sur notre: la page Instagram la page Facebook https://www.instagram.com/sportstech.de https://www.facebook.com/sportstech.de...
- Página 65 CONTENU DONNÉES TECHNIQUES ....................66 CONSEILS DE SÉCURITÉ IMPORTANTS ................66 DESSIN ÉCLATÉ/LISTE DES PIÈCES DE RECHANGE ............68 MONTAGE ........................69 EXCERCICE D'ÉTIREMENT .................... 75 CONSEILS DE TRAINING BREFS ..................76 ORDINATEUR DE TRAINING ..................77 SOFTWARE APPLICATION (APP) ................... 78 MAINTENANCE/SOIN ....................
-
Página 66: Données Techniques
DONNÉES TECHNIQUES Informations sur le produit Mesures (l x L x h) à peu près 123 x 138 x 112~136 cm Poids total 15 kg Poids maximal de l'utilisateur 120 kg CONSEILS DE SÉCURITÉ IMPORTANTS Les précautions de base, y compris les consignes de sécurité importantes suivantes doivent toujours être respectées lorsque vous utilisez ce tapis roulant. - Página 67 l'appareil est indépendante de la vitesse. • L'appareil n'est pas adapté pour une utilisation thérapeutique. Faîtes attention lors du rangement ou du déménagement de l'appareil. Utilisez toujours la bonne technique pour le porter, ou demander de l'aide. AUTRES CONSEILS • Cet article ne peut être utilisé qu'à une personne à la fois lors de l'entraînement. •...
-
Página 68: Dessin Éclaté/Liste Des Pièces De Rechange
DESSIN ÉCLATÉ/LISTE DES PIÈCES DE RECHANGE A l‘adresse suivante A l‘adresse suivante vous trouverez le dessin éclaté vous trouverez le dessin éclaté et la liste des pièces de rechange : et la liste des pièces de rechange : https://service.innovamaxx.de/htx100_spareparts https://service.innovamaxx.de/htx100_spareparts... -
Página 69: Montage
MONTAGE Serrez fermement tous les composants et les pièces préassemblées ! Étape 1: Assemblez les tubes de cadre Représentation 1 Nr. 1 et Nr. 2 et serrez bien les vis M6*12 (#22). Étape 2: Représentation 2 Assemblez maintenant tous les tubes de cadre avec la marque Nr. - Página 70 Étape 3: Assemblez à présent tous les tubes de cadre avec les connexions de tubes de cadre avec la marque Nr. 3 et serrez, ici aussi, bien les vis M6*12 (#22). (voir schéma 4 et 5) Représentation 4 Étape 4: Coupez les liants artificiels et Représentation 5 enfoncez le tube vertical sur la tête...
- Página 71 Étape 6: Retournez la toile de rebonds. Assurez vous à présent que le côté de la toile de rebonds doté d'un trou est parallèle à la connexion de tubes de cadre. (voir schéma 8) Étape 7: Accrochez la bande élastique sur le tube et sur le bas de la pince.
- Página 72 Étape 10: Ajoutez, tout d'abord, la poignée (#11) avec le tube de cadre du milieu (#10) et attachez ceux-ci avec les vis correspondantes M8*12 (# 23) et les joints plats (#24). Utilisez pour cela la clé Allen mise à disposition. Ensuite, assemblez le tube de tige de fixation réglable (#9) avec le tube de tige de fixation moyen (#10).
- Página 73 Étape 12: Attachez le socle de console (#20) au tube de cadre (#1). Connectez ensuite, avec le ressort (#21), le petit trou dans la toile de rebonds avec la console. Connectez à présent le câble avec la console et mettez celle-ci (#19) dans le socle de console stable (#20).
- Página 74 Étape 15: Posez le recouvrement de la toile de rebonds (#15) sur cette dernière (#14) et montez les attaches velcro. Assurez vous que les attaches velcro soient dissimulés. Fixez le recouvrement à l'aide des bandes noires aux jambes de support. Pas trop fort, pour ne pas le déformer.
-
Página 75: Excercice D'étirement
EXCERCICE D'ÉTIREMENT Avant chaque séance d'entraînement, vous devez étirer vos muscles pendant au moins 5 à 10 minutes pour les réchauffer suffisamment. Répétez les exercices d'étirement suivants cinq fois. Les étirements avant l'entraînement permettent d'améliorer la flexibilité et de réduire le risque de blessure. ROULER LA TÊTE Tournez la tête vers la droite une fois, en étirant le côté... -
Página 76: Conseils De Training Brefs
Exercice dans la zone d'entraînement Après l'échauffement, augmentez l'intensité de votre programme d'exercice désiré. Assurez-vous de maintenir votre intensité pour une performance maximale. Respirez régulièrement et profondément pendant que vous faites un exercice - ne retenez jamais votre respiration. Refroidir Terminez chaque entraînement avec un jogging léger ou marchez pendant au moins 1 minute. -
Página 77: Ordinateur De Training
ORDINATEUR DE TRAINING Vous pouvez utiliser notre trampoline aussi sans ordinateur. Notre affichage vous est, cependant, utile en supplément pour rendre vos exercices encore plus efficaces. Avec lui, vous pouvez découvrir des informations importantes à propos du déroulement de votre entraînement. Notre appareil correspond à la classe de précision C. Ceci signifie que vous pouvez vous fier à... -
Página 78: Software Application (App)
SOFTWARE APPLICATION (APP) Vous pouvez télécharger l'application « Sportstech » / « Synteam Sport » par le biais du QR code affiché ici. Extension sur mobile : Android 4.3 ou plus haut avec Bluetooth, IOS 7.0 ou plus haut. Veuillez d'abord activer le GPS et la fonction Bluetooth de votre appareil. - Página 79 Application: connexion avec l'appareil • Lorsque Synteam Sport se connecte pour 1. Modifier le cas échéant la langue en "Ang- la première fois, l'application vous demande lais". quel accès vous souhaitez autoriser : média, 2. Cliquez sur "s'inscrire". enregistrement vocal, GPS, etc... 3.
- Página 80 Application: connexion avec l'appareil • L'application scanne les appareils qui se • Vous êtes maintenant dans le programme trouvent à proximité. d'entraînement. Les sauts mesurés sont af- • Votre appareil doit apparaître comme suit : fichés comme"Step"et une valeur comparable "ZTsmartPedometer".
-
Página 81: Maintenance De La Console
CONFORMITÉ POUR LA CONSOLE Sportstech Brands Holding GmbH déclare par la présente que l‘installation radio de type est conforme à la directive 2014/53/CE. Le texte intégral de la déclaration UE de conformité est disponible à l‘adresse Internet suivante: https://service.innovamaxx.de/htx100_conformity La conformité mentionnée ici concerne exclusivement la déclaration pour la console ! -
Página 82: Maintenance/Soin
MAINTENANCE/SOIN • Vérifiez après le montage et avant l'utilisation de l'appareil, si toutes les vis sont complètement et correctement serrés. • Nettoyez l'appareil régulièrement avec un chiffon légèrement humide combiné avec un détergent doux. • Ceci concerne particulièrement les poignées, puisque ces pièces sont en contact avec le corps pendant tout l'entraînement. - Página 83 ITALIANO Gentile cliente Siamo lieti che abbiate scelto un dispositivo della gamma SPORTSTECH. L'attrezzatura sportiva SPORT- STECH ti offre alta qualità e tecnologia innovativa. Per sfruttare a pieno il potenziale del dispositivo e poterlo utilizzare per molti anni, raccomandiamo di leggere attentamente questo manuale prima di iniziare l’allenamento e di utilizzare il dispositivo seguen-...
- Página 84 2. Guarda il video 3. Inizia ad allenarti veloce e sicuro Link per il Video: https://service.innovamaxx.de/htx100_video Ci siamo anche sui social! Scopri le ultime novità sui prodotti, contenuti per l'allenamento e molto altro ancora sul nostro: pagina Instagram pagina Facebook https://www.instagram.com/sportstech.de https://www.facebook.com/sportstech.de...
- Página 85 INDICE DATI TECNICI ......................86 ISTRUZIONI DI SICUREZZA IMPORTANTI ................ 86 DISEGNO ESPLOSO/LISTA DEI PEZZI DI RICAMBIO ............88 MONTAGGIO/ASSEMBLAGGIO ..................89 ESERCIZI DI STRETCHING .................... 95 BREVI CONSIGLI PER L'ALLENAMENTO ................. 96 COMPUTER PER ALLENAMENTO .................. 97 APPLICAZIONE SOFTWARE (APP) ................. 98 MANUTENZIONE/CURA ....................
-
Página 86: Dati Tecnici
DATI TECNICI Informazioni prodotto Misure (L x W x H) ca.. 123 x 138 x 112~136 cm Peso totale 15 kg Peso totale massimo utente 120 kg ISTRUZIONI DI SICUREZZA IMPORTANTI Precauzioni minime, incluse importanti istruzioni di sicurezza incluse nel presente ma- nual dovrebbero essere sempre seguite durante l’uso del tapisroulant. - Página 87 riparato. • Si prega di utilizzare indumenti adeguati durante l'allenamento ed evitare vestiti che possano impigliarsi, danneggiare il vostro attrezzo o che possano darvi fastidio durante il training. Il peso massimo per utente è di 120kg. I freni sono perfettamene funzionanti a qualsiasi velocità voi andiate. •...
-
Página 88: Disegno Esploso/Lista Dei Pezzi Di Ricambio
DISEGNO ESPLOSO/LISTA DEI PEZZI DI RICAMBIO Al seguente link Al seguente link troverete il disegno esploso troverete il disegno esploso e la lista dei pezzi di ricambio: e la lista dei pezzi di ricambio: https://service.innovamaxx.de/htx100_spareparts https://service.innovamaxx.de/htx100_spareparts... -
Página 89: Montaggio/Assemblaggio
MONTAGGIO/ASSEMBLAGGIO Avvitare bene tutti gli elementi e i pezzi preassemblati! Passo 1: Figura 1 Unite i tubi telaio Nr. 1 e Nr. 2 e fissare bene la vite M6*12 (#22). Passo 2: Figura 2 Unire adesso tutti i tubi per telaio con la marcatura Nr. - Página 90 Passo 3: Unite adesso tutti i tubi con gli elementi di raccordo tubi per telaio con la marcatura Nr. 3 e fissare anche qui la vite M6*12 (#22) ben salda. (vedi figura 4 e 5) Figura 4 Figura 5 Passo 4: Recidere il fissaggio in plastica e inserire il tubo verticale sulla testa della vite (vedi figura 6)
- Página 91 Passo 6: Girate il tappeto elastico al contrario. Assicuratevi che il lato del tappeto elastico sia dotato di foro situato in posizione parallela rispetto agli elementi di raccordo del tubo telaio. (vedi figura 8) Passo 7: Agganciate l'elastico intorno al tubo, nella parte inferiore del fermaglio.
- Página 92 Passo 10: Collegate in primis la maniglia (#11) con il tubo della barra di supporto centrale (#10) e fissatela con l'apposita vite M8*12 (#23) e la guarnizione piatta (#24). Utilizzate la brugola messa a vostra disposizione. Successivamente collegate il tubo regolabile (#9) insieme al tubo della barra di supporto centrale (#10). Adesso collegate la gamba d'appoggio della sbarra (#7) con l'elemento di giunzione del tubo per telaio (#1).
- Página 93 Passo 12: Fissate la base della console (#20) al tubo per telaio (#1). Tramite l'apposita molla (#21) unite il piccolo foro del tappeto elastico alla console. Unite il cavo alla console (#19) per poi riporla nella sua base di supporto (#20). Modificate manual- mente la lunghezza delle molle a vostro piacimento e verificate il funzionamento corretto della console.
- Página 94 Passo 15: Ponete la copertura del trampolino (#15) al tappeto elastico (#14) e inserite le chiusure velcro. Assicuratevi che queste ultime siano nascoste. Fissate la copertura alle gambe di appoggio per mezzo degli elastici neri ma non troppo rigida- mente in modo che non si deformi. Figura 16 Il trampolino è...
-
Página 95: Esercizi Di Stretching
ESERCIZI DI STRETCHING Prima di ogni allenamento si dovrebbe allungare i muscoli per almeno 5-10 minuti per riscaldarli a suffici- enza. Ripetere i seguenti esercizi di stretching per cinque volte. Lo stretching prima dell'allenamento aiuta a migliorare la flessibilità e riduce il rischio di lesioni. RULLI PER LA TESTA Ruotare la testa a destra, fino a sentir allungare il lato sinistro del collo, poi ruotare la testa indietro, allungan- do il mento verso il soffitto e aprendo la bocca. -
Página 96: Brevi Consigli Per L'allenamento
Esercizio per zona di Allenamento Dopo il riscaldamento, aumenta l'intensità del tuo programma di esercizio desiderato. Assicurati di man- tenere la tua intensità per ottenere una migliore performance. Respira regolarmente e profondamente durante i tuoi esercizi, non trattenere mai il respiro. Raffreddamento Termina ogni allenamento con una corsa o una camminata breve di almeno 1 minuto. -
Página 97: Computer Per Allenamento
COMPUTER PER ALLENAMENTO I nostri trampolini possono essere utilizzati anche semza computer. Il nostro display vi aiuterà ad eseguire gli esercizi in modo ancora più efficace. Avrete inoltre a portata di mano tutte le informazioni utili per il vostro allenamento e potrete seguirne gli sviluppi in tutta comodità. -
Página 98: Applicazione Software (App)
Cercare "Synteam Sport" nell'app store o scaricarlo utilizzando il codice QR. Consigli sull'utilizzo dell'app: Si dovrebbero installare solo le applicazioni da una fonte affidabile. Sportstech Brands Holding non si assume alcuna responsabilità per software forniti da terzi. Per utilizzare questa applicazione può essere richiesto un accesso speciale. L'applicazione potrebbe inoltre, chiedervi di installare altre applicazioni da questa fonte. - Página 99 Applicazione: connessione con il dispositivo • "Quando Synteam Sport accede per la prima 1. Modificare la lingua in "inglese" se necessa- volta, l'app chiede quale accesso si desidera rio. consentire: media, registrazione vocale, GPS, 2. Cliccare su "registrati". ecc. 3. Inserire qualsiasi numero e password (i dati •...
- Página 100 Applicazione: connessione con il dispositivo • L'app esegue la scansione dei dispositivi • Ora siete entrati nel programma di allena- vicini. mento. I salti misurati vengono visualizzati • Il dispositivo dovrebbe apparire come segue: come "Step" e verrà visualizzato anche il "...
- Página 101 CONFORMITÀ PER LA CONSOLE Sportstech Brands Holding GmbH dichiara che il tipo di sistema radio è conforme alla direttiva 2014/53/UE. Il testo completo della dichiarazione di conformità UE è disponibile al seguente indirizzo internet: https://service.innovamaxx.de/htx100_conformity La conformità qui menzionata si riferisce esclusivamente alla dichiarazione riguardante la console!
-
Página 102: Manutenzione/Cura
MANUTENZIONE/CURA • Dopo l'assemblaggio e prima dell'utilizzo verificate che vi siano tutte le viti necessarie e che siano ben salde. • Pulite costantemente l'apparecchio con un panno leggermente umido utilizzando un detergente non invasivo. • Pulire specialmente la maniglia di appoggio perché questa particolarmente a contatto col vostro corpo durante l'allenamento. - Página 103 GEBRUIKSAANWIJZING NEDERLANDS Geachte klant, We zijn blij dat je een apparaat uit het SPORTSTECH-assortiment hebt gekozen. De sportuitrusting van SPORTSTECH brengt hoogwaardige apparaten met nieuwe technologieën. Lees vóór gebruik deze gebruikershandleiding aandachtig door en gebruik het apparaat zoals aangege- ven. Zo zul je ten volle van de prestaties van het apparaat kunnen profiteren en er vele jaren geniet van hebben.
- Página 104 1. Scan de QR-code 2. Bekijk video‘s 3. Begin snel en veilig Link naar de video's: https://service.innovamaxx.de/htx100_video We zijn ook actief op social media! Raadpleeg voor de meest recente productinformatie, trainingen en nog veel meer, onze: Instagram-pagina Facebook-pagina https://www.instagram.com/sportstech.de https://www.facebook.com/sportstech.de...
- Página 105 INHOUD TECHNISCHE INFORMATIE ................... 106 BELANGRIJKE VEILIGHEIDSINSTRUCTIES ............... 106 EXPLOSIETEKENING/ONDERDELENLIJST ............... 108 MONTAGE/OPBOUW ....................109 STRETCHOEFENINGEN ....................115 ENKELE TRAININGSTIPS ....................116 TRAININGSCOMPUTER ....................117 APPLICATIESOFTWARE (APP) ..................118 ONDERHOUD/ZORG ....................121 VERWIJDERING ......................122 CONFORMITEIT ......................122...
-
Página 106: Technische Informatie
TECHNISCHE INFORMATIE Productinformatie Afmetingen (l x b x h) ca. 123 x 138 x 112-136 cm Totaalgewicht 15 kg Maximaal gebruikersgewicht 120 kg BELANGRIJKE VEILIGHEIDSINSTRUCTIES Deze algemene veiligheidsinformatie moet strikt worden nageleefd bij het gebruik van dit product. Lees alle instructies voordat je het apparaat gebruikt. •... - Página 107 • Draag geschikte trainingskleding wanneer je het apparaat gebruikt. Vermijd het dragen van losse kleding of kleding die in het apparaat kan blijven hangen en het kan beschadigen of waardoor je letsel kunt oplopen. • Het apparaat is getest voor gebruikers tot een gewicht van 120 kg. Het remvermogen van het apparaat is onafhankelijk van de snelheid.
-
Página 108: Explosietekening/Onderdelenlijst
EXPLOSIETEKENING/ONDERDELENLIJST Onder de volgende link Onder de volgende link vind je de explosietekening vind je de explosietekening en de reserveonderdelenlijst: en de reserveonderdelenlijst: https://service.innovamaxx.de/htx100_spareparts https://service.innovamaxx.de/htx100_spareparts... -
Página 109: Montage/Opbouw
MONTAGE/OPBOUW Alle componenten en voorgemonteerde onderdelen stevig vastdraaien! Stap 1: Verbind de framebuizen (1 en 2) met Afbeelding 1 elkaar en draai de schroeven M6x12 (22) vast. Stap 2: Verbind nu alle framebuizen (2) met elkaar en draai ook hier de schroeven M6x12 (22) vast. - Página 110 Stap 3: Verbind nu alle framebuizen met de frameverbinding (3) en draai ook hier de schroeven M6x12 (22) vast aan. (Zie afbeeldingen 4 en 5) Afbeelding 4 Afbeelding 5 Stap 4: Knip de plastic bindriem door en steek de staande buis op de schroefkop (zie afbeelding 6).
- Página 111 Stap 6: Draai het springdoek naar de bovenkant. Zorg er nu voor dat de zijde van het springdoek met de opening, parallel ligt aan de frameverbinding. (Zie stap 8) Stap 7: Haak de rubberen band over de buis en aan de onderkant van de klem. Trek het aan het andere uiteinde met behulp van het spangereedschap om de buis heen en haak het ook van...
- Página 112 Stap 10: Verbind eerst de handgreep (11) met de middelste steunbuis (10) samen en bevestig met de bijbehorende M8x12- schroeven (23) en vlakke dichtringen (24). Gebruik hiervoor de bijgeleverde inbussleutel (29). Verbind vervolgens de verstelbare steunbuis (9) met de middelste steunbuis (10) met elkaar en bevestig ook met de M8x12-schroeven (23). Verbind nu de steunpoot (7) met het verbindingselement van de framebuis (1) samen.
- Página 113 Stap 12: Bevestig de consolebasis (20) aan de framebuis (1). Verbind vervolgens met de verbindingsveer (21) het kleine gat in het springdoek met de console. Verbind nu de kabel op de console en plaats de console (19) in de vaststaande consolebasis (20).
- Página 114 Stap 15: Plaats de afdekking van het springdoek (15) op het springdoek (14) en breng de klittenbandsluitingen aan. Controleer of de klittenbandsluitingen verborgen zijn. Bevestig de afdekking van het springdoek aan de steunpoten met behulp van de zwarte banden. Niet te vast, zodat hij niet misvormt. Afbeelding 16 De trampoline is nu klaar voor gebruik.
-
Página 115: Stretchoefeningen
STRETCHOEFENINGEN Voor elke training moet u uw spieren minstens 5-10 minuten strekken om ze voldoende op te warmen. Herhaal de volgende stretchoefeningen vijf keer. Rekken voor de training helpt de flexibiliteit te verbeteren en vermindert het risico op letsel. MET JE HOOFD ROLLEN Draai je hoofd een seconde naar rechts, voel de stretch aan de linkerkant van je nek, draai dan je hoofd een seconde terug, strek je kin omhoog en laat je mond open. -
Página 116: Enkele Trainingstips
Training Verhoog na het opwarmen de intensiteit volgens je gewenste trainingsprogramma. Zorg ervoor dat de intensiteit voor maximaal vermogen wordt gehandhaafd. Adem regelmatig en diep tijdens de training - houd in geen geval je adem in. Afkoelen Sluit elke training af met een lichte jogging of wandeling van ten minste 1 minuut. Om te voltooien, doe je rekoefeningen gedurende 5 tot 10 minuten om volledig af te koelen. -
Página 117: Trainingscomputer
TRAININGSCOMPUTER Je kunt onze trampoline ook zonder computer gebruiken. Het display is echter wel handig om je oefeningen nog effectiever te maken. Hiermee weet je de belangrijke informatie over je training. Ons apparaat voldoet aan nauwkeurigheidsklasse C. Dit betekent dat je niet volledig op de exacte nauwkeurigheid van de display-weergave kunt voortgaan. -
Página 118: Applicatiesoftware (App)
APPLICATIESOFTWARE (APP) Je kunt de app “Sportstech” / “Synteam Sport” downloaden via de afgebeelde QR-code. Voorwaarde mobiel apparaat: Android 4.3 of hoger met Bluetooth 4.0, iOS 7.0 of hoger. Schakel eerst de Bluetooth-functie en gps op je apparaat in. Android Je kunt in de App Store naar “Synteam Sport”... - Página 119 Applicatieverbinding met het apparaat: • De eerste keer dat je je op Synteam Sport 1. Wijzig de taal indien nodig naar "Engels". aanmeldt, vraagt de app welke toegang je 2. Klik op "register". wilt toestaan: media, spraakopname, gps, 3. Voer een willekeurig nummer en wachtwoord enz.
- Página 120 Applicatieverbinding met het apparaat: • De app scant de apparaten in de buurt. • Nu ben je in het trainingsprogramma. De • Je apparaat moet als volgt worden weerge- gemeten sprongen worden weergegeven als geven: "ZTsmartPedometer". "Step" en een vergelijkbare waarde voor de •...
- Página 121 CONFORMITEIT VOOR DE CONSOLE Hierbij verklaart Sportstech Brands Holding GmbH dat het type radioapparatuur voldoet aan de richtlijn 2014/53/EU. De volledige tekst van de EU-conformiteitsverklaring is beschikbaar op het volgende internetadres: https://service.innovamaxx.de/htx100_conformity Bij de hier genoemde conformiteit gaat het alleen om de verklaring voor de console!
-
Página 122: Onderhoud/Zorg
ONDERHOUD/ZORG • Controleer na de montage en vóór het gebruik van het apparaat of alle schroeven volledig zijn en correct zijn aangehaald. • Maak het apparaat regelmatig schoon met een licht bevochtigde doek en een mild schoonmaakproduct. • Dit geldt met name voor de handgrepen, omdat deze onderdelen tijdens de training in contact komen met je lichaamsdelen. - Página 124 Verkauf durch / Distributed by / Distribuido por / Distribué / Distribuito da / Verkoop via Sportstech Brands Holding GmbH Potsdamer Platz 11 10785 Berlin +49 30 220 663 520 www.sportstech.de...