Tabla de contenido
Publicidad
Idiomas disponibles
Idiomas disponibles
Enlaces rápidos
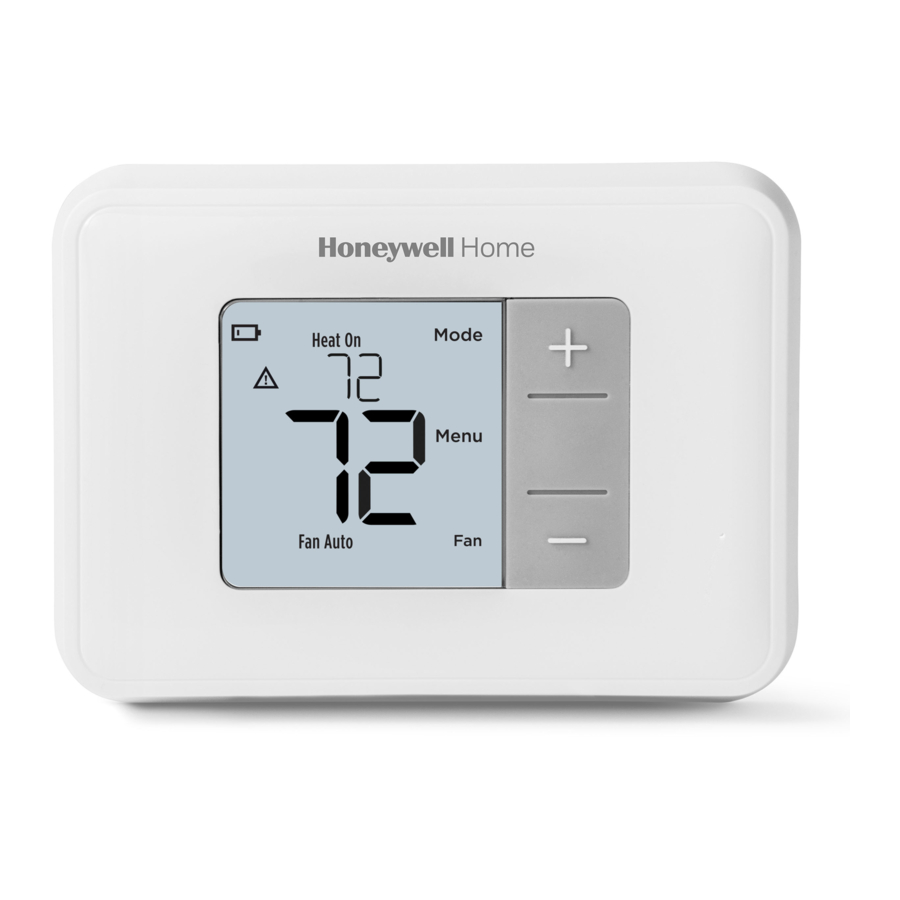
RTH5160 Series
Non-Programmable
Thermostat
RTH5160D1003
Quick Installation Guide
Included in your box
Screws and
anchors
UWP™
Mounting
System
(UWP)
Tools you will need
Phillips screwdriver
Small flat head screwdriver
Pencil
Level
Tools you may need
Wire stripper
Needle-nose pliers
Heat On
Menu
Fan Auto
RTH5160
Thermostat
Quick Install Guide
Drill and
drill bit
Publicidad
Tabla de contenido

Manuales relacionados para Honeywell Home RTH5160 Serie


Resumen de contenidos para Honeywell Home RTH5160 Serie
- Página 1 RTH5160 Series Non-Programmable Thermostat Heat On RTH5160D1003 Menu Quick Installation Guide Fan Auto Included in your box Screws and anchors RTH5160 Thermostat UWP™ Mounting System (UWP) Quick Install Guide Tools you will need Tools you may need Phillips screwdriver Wire stripper Small flat head screwdriver Drill and Pencil...
- Página 2 Quick Installation Guide Read and save these instructions Removing your old thermostat Turn power OFF. To protect yourself and your equipment, turn off the power at the breaker box or the switch that controls your heating/cooling system. Switch Breaker box Check that your system is off.
- Página 3 RTH5160 Series Take a picture of how your wiring looks right now. Be sure to include the letters next to the terminals where the wires are inserted. This will be a helpful reference when wiring your new thermostat. Tip: If the color of your wires has faded or if 2 terminals have the same wire color, use the wire labels provided in the package to label...
- Página 4 Quick Installation Guide Disconnect the wires and remove the old wall plate. Use a screwdriver to release wires from terminals. Then, use a wire label to identify each wire as it’s disconnected. The letter on the wire label should match the letter on the terminal. Tip: To prevent wires from falling back into the wall, wrap the wires around a pencil.
- Página 5 RTH5160 Series Insert the wall anchors. It is recommended that you use the wall anchors included in the box to mount your thermostat. You can use the UWP to mark where you want to place the wall anchors. a) Level the wall plate. b) Mark the location of the wall anchors using a pencil.
- Página 6 Quick Installation Guide Connect remaining wires. Depress the tabs to put the wires into the inner holes of the corresponding terminals on the UWP (one wire per terminal) until it is firmly in place. Gently tug on the wires to verify they are secure.
- Página 7 RTH5160 Series Install batteries. Insert two AA alkaline batteries in the back of the thermostat as shown. Attach your thermostat. Align the thermostat onto the UWP and firmly snap it into place. Turn your power ON. Turn on the power at the breaker box or switch that controls the heating/ cooling system.
-
Página 8: System Setup
Quick Installation Guide System Setup Now that you have installed your thermostat, please follow the steps below to setup your system and personalize your thermostat. Select System Setup options. Press Edit (-) to change values or select from available options. Then press Next (+) to save changes and advance to the next System Setup number. - Página 9 RTH5160 Series System Setup options System Setup Number and Description Options (factory default in bold) 0 = Fahrenheit 125 = Temperature Indication Scale 1 = Celsius 1 = Conventional Forced Air Heat 2 = Heat Pump 3 = Radiant Heat (Boiler) 200 = Heating System Type 5 = None (Cool Only) Note: This option selects the basic system type your thermostat will...
-
Página 10: System Operation Settings
Quick Installation Guide System operation settings Press Menu, and then press the Mode (+) button to cycle to the next available System mode. Cycle through the modes until the required System mode is displayed, and then press Done. NOTE: Available System modes vary by model and system settings. -
Página 11: Wiring-Heat Pump
RTH5160 Series Wiring—conventional systems Alternate wiring (conventional systems) If labels do not match terminals, connect wires as shown below (see notes, below). NOTES: 1. If you must connect both R and Rc wires, set the R Slider Tab to the down position (2 wires). -
Página 12: Battery Replacement
Quick Installation Guide Alternate wiring (for heat pumps only) NOTES: 1. Keep R Slider Tab in the up position (1 wire). 2. If your old thermostat had both V and VR wires, stop now and contact a qualified contractor for help. 3. - Página 13 RTH5160 Series Alerts screen You will see the alert icon and the alert number on the screen. Press Next (+) to see additional alerts, if any. Then press Done to go back to the home screen. NOTE: If the alert is a critical alert, you may not be able to access the home screen and should call a HVAC professional.
- Página 14 Quick Installation Guide Troubleshooting If you have difficulty with your thermostat, please try the following suggestions. Most problems can be corrected quickly and easily. Display is blank Make sure fresh AA alkaline batteries are properly installed (see page 7). Cannot change system Check System Setup Option 220 to make sure the options are setting to Cool set to either 1 or 2 (see page 9).
- Página 15 RTH5160 Series 1-year limited warranty Resideo warrants this product, excluding battery, to be free from defects in workmanship or materials, under normal use and service, for a period of one (1) year from the date of first purchase by the original purchaser. If at any time during the warranty period the product is determined to be defective due to workmanship or materials, Resideo shall repair or replace it (at Resideo’s option).
-
Página 16: Customer Assistance
33-00200ES—07 M.S. 02-20 | Printed in United States © 2020 Resideo Technologies, Inc. All rights reserved. The Honeywell Home trademark is used under license from Honeywell International, Inc. This product is manufactured by Resideo Technologies, Inc. and its affiliates. -
Página 17: Su Caja Incluye
Serie RTH5160 Termostato no programable RTH5160D1003 Heat On Menu Guía de instalación rápida Fan Auto Su caja incluye Tornillos y Termostato anclajes RTH5160 Sistema de montaje UWP™ (UWP) Guía de instalación rápida Herramientas que Herramientas que podría necesitará necesitar Destornillador de estrella Alicates Destornillador de hoja plana pequeño Lápiz... - Página 18 Apag Guía de instalación rápida Lea y guarde estas instrucciones Remoción del termostato antiguo Desconecte el suministro de energía eléctrica. Encendido Apagado Para protegerse usted y el equipo, desconecte el suministro de Apagado energía eléctrica desde la caja de interruptores de circuito o el Interruptor interruptor que controla el sistema de calefacción/refrigeración.
- Página 19 Serie RTH5160 Tome una foto de cómo se ve el cableado en este momento. Asegúrese de capturar las letras que aparecen al lado de los terminales donde se colocan los cables. Esto será una referencia de ayuda para realizar el cableado del termostato nuevo.
-
Página 20: Instalación Del Termostato Rth5160
Guía de instalación rápida Desconecte los cables y quite la placa de pared antigua. Use un destornillador para quitar los cables de los terminales. A continuación, use etiquetas para cables a fin de identificar cada cable a medida que lo desconecta. - Página 21 Serie RTH5160 Inserte los anclajes de pared. Se recomienda que para el montaje del termostato use los anclajes de pared incluidos en la caja. Puede usar la UWP para marcar el lugar donde desea colocar los anclajes de pared. a) Nivele la placa de pared. b) Marque la ubicación de los anclajes de pared con un lápiz.
- Página 22 Guía de instalación rápida Conecte el resto de los cables. Presione hacia abajo las lengüetas para insertar los cables en los agujeros de los terminales correspondientes en el UWP (un cable por terminal) hasta que quede firmemente en su lugar. Tire suavemente los cables paras verificar que estén seguros.
- Página 23 Serie RTH5160 Instale las baterías. Inserte dos baterías alcalinas AA en la parte posterior del termostato, tal como se muestra. Coloque el termostato. Alinee el termostato con la UWP y presiónelo con firmeza para que calce correctamente. Encienda la energía eléctrica. Encienda la energía eléctrica desde Encedido la caja de interruptores de circuito o...
-
Página 24: Configuración Del Sistema
Guía de instalación rápida Configuración del sistema Ahora que ya instaló su termostato, siga los pasos a continuación para configurar el sistema y personalizar el termostato. Seleccione las opciones de configuración del sistema. Presione Edit (-) (Editar) para cambiar los valores, o bien seleccione uno de las opciones disponibles. -
Página 25: Opciones De Configuración Del Sistema
Serie RTH5160 Opciones de configuración del sistema Código y descripción de la configuración Opciones (las configuraciones predeterminadas de del sistema fábrica están en negrita) 0 = Fahrenheit 125 = Escala de indicación de temperatura 1 = Centígrados 1 = Calefacción por aire forzado convencional 2 = Bomba de calor 3 = Calefacción radiante (Caldera) 200 = Tipo de sistema de calefacción... -
Página 26: Ajustes De Funcionamiento Del Sistema
Guía de instalación rápida Ajustes de funcionamiento del sistema Presione Menu (Menú) y, luego, el botón Mode (+) (Modo) para pasar al próximo modo del sistema disponible. Pase por los modos hasta que se muestre el modo del sistema requerido y, luego, presione Done (Terminado). -
Página 27: Cableado: Sistemas Convencionales
Serie RTH5160 Cableado: sistemas convencionales Cableado alternativo (sistemas convencionales) Si las etiquetas no corresponden con los terminales, conecte los cables como se muestra a continuación (consulte las notas a continuación). NOTAS: 1. Si debe conectar tanto el cable R como el cable Rc, configure la lengüeta deslizante R a la posición hacia abajo... -
Página 28: Cableado Alternativo (Para Bombas De Calor Únicamente)
Guía de instalación rápida Cableado alternativo (para bombas de calor únicamente) NOTAS: 1. Mantenga la lengüeta deslizante R en la posición hacia arriba (1 cable). 2. Si el termostato antiguo tenía cables V y VR, deténgase y comuníquese con un contratista cualificado para obtener ayuda. 3. -
Página 29: Pantalla De Alerta
Serie RTH5160 Pantalla de alerta Visualizará el ícono de alerta ) y el código de alerta en la pantalla. Presione Next (+) (Siguiente) para ver otros códigos de alerta, en caso de que los hubiere. Luego, presione Done (Terminado) para volver a la pantalla de inicio. -
Página 30: Localización Y Solución De Problemas
Guía de instalación rápida Localización y solución de problemas Si tiene dificultades con el termostato, intente seguir las sugerencias que se indican a continuación. La mayoría de los problemas se pueden solucionar de manera fácil y rápida. La pantalla está en blanco Compruebe que las baterías alcalinas AA nuevas estén instaladas correctamente (consulte la página 6). -
Página 31: Poliza De Garantia
Serie RTH5160 POLIZA DE GARANTIA IMPORTADO EN MEXICO POR: Instromet Mexicana S. de R.L. de C.V. Avenida Santa Fe 94, Torre A Piso 1, Zedec ED Plaza Santa Fe, Alvaro Obregon, Ciudad de Mexico, CP 01210 Telefono: 01 (55) 5081 0200 Instromet Mexicana S. -
Página 32: Alerta: Eliminación De Residuos Hhw
33-00200ES—07 M.S. 02-20 | Impreso en EE. UU. © 2020 Resideo Technologies, Inc. All rights reserved. The Honeywell Home trademark is used under license from Honeywell International, Inc. This product is manufactured by Resideo Technologies, Inc. and its affiliates.