Publicidad
Enlaces rápidos
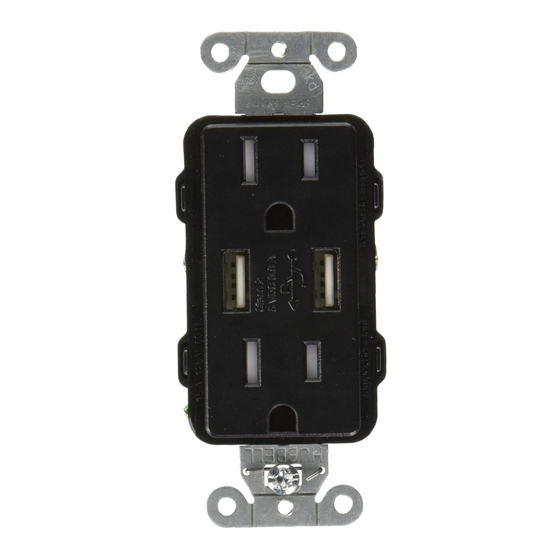
USB Receptacles (15 A) | Prises de courant USB (15 A)
CAR-15-UBTR
125 V~ 60 Hz 15 A
SCR-15-UBTR
3,8 A 5 V-
NTR-15-UBTR
P/N 041532 Rev. B 01/2016
1
2
Wiring | Câblage
Line / Hot
Ligne / Phase
Brass | Laiton
Silver | Argenté
125 V~
60 Hz
Neutral (white wire)
Neutre (fil blanc)
3
a.
Wallplate Adapter
Adaptateur de
plaque murale
Receptacle
Prise de courant
Wallbox
Adapter Mounting
(ordered separately)
Screws (2)
Boîtier d'encastrement
Vis de montage
(commandé séparément)
del'adaptateur (2)
4
Lutron Electronics Co., Inc.
7200 Suter Road
Coopersburg, PA 18036-1299
Ground (green or bare)
Mise à la terre (vert ou nu)
b.
c.
Device Mounting
Screws (2)
Vis de montage du le
dispositif (2)
Receptacle
Installation Instructions
Important Notes
Installation: Install in accordance with all national and local
electrical codes.
Notice: DO NOT fully remove screws from terminals. Damage to
terminals will occur.
Notice: Charging certain combinations of devices from the USB ports,
may result in currents greater than the 3.8 A product rating.
Cleaning: To clean, wipe with a clean damp cloth. Do not use any
chemical cleaning solutions.
FCC/IC information: For FCC/IC information, please visit
www.lutron.com/fcc-ic
Wallbox: Install in a standard electrical wallbox measuring at least 3 in x
2 in x 2.5 in (76 mm x 51 mm x 64 mm), raceway, power pole, furniture
box, tabletop box, etc., and wired in accordance with NECR Article 314
box fill requirements.
Receptacle Installation
1
!
WARNING: Shock Hazard. May result in serious
injury or death. Turn off power at circuit breaker before
installing the unit.
2
Strip wires [14 AWG to 10 AWG (1.5 mm
the strip gauge on the receptacle, and connect as shown. Tighten
screws 10 in-lb to 12 in-lb (1.1 N•m to 1.4 N•m) (do not
over-tighten).
Note: To avoid loose connections when backwiring the receptacle,
ensure that the wires are fully inserted between the wire clamp and
the brass terminal plate before tightening the screw terminal.
3
a. Mount wallplate adapter to receptacle (screws provided).
b. Mount receptacle in wallbox. Tighten screws until wallplate
adapter contacts wall surface.
c. Attach wallplate.
Wallplate
Plaque murale
4
Turn ON power.
English
Prise de courant
Please Read Before Installing
Instructions d'installation
Remarques importantes
Installation : Installer conformément à tous les codes électrique
locaux et nationaux.
Avis : NE retirez PAS complètement les vis des bornes. Vous
endommageriez les bornes.
Avis : La charge de certaines combinaisons de dispositifs à partir des ports
USB peut entraîner des courants supérieurs à la cote du produit de 3,8 A.
Nettoyage : pour procéder au nettoyage, utiliser un chiffon propre
imbibé. N'utiliser pas de solution de nettoyage chimique.
Informations sur la FCC/IC : Pour obtenir des informations sur la
FCC/IC, veuillez consulter la page : www.lutron.com/fcc-ic
Boîtier d'encastrement : Installer dans une boîte électrique murale
mesurant au moins 76 mm x 51 mm x 64 mm (3 po x 2 po x 2,5 po),
une canalisation, un poteau électrique, une boîte pour meuble, une
boîte pour meuble, une boîte de table, etc. et câblé conformément au
code canadien de l'électricité.
Installation de prises
1
!
AVERTISSEMENT : Risque de choc. Peut entraîner de
graves blessures ou la mort. Couper l'alimentation au
niveau du disjoncteur avant d'installer l'unité.
2
to 6.0 mm
)] according to
Dénudez les fils [1,5 mm
2
2
jauge à dénuder présente sur la prise et raccordez comme indiqué.
Serrez les vis 1,1 N•m à 1,4 N•m (10 po-lb à 12 po-lb) (ne les serrez
pas trop).
Remarque : Pour éviter les pertes de connexions durant le câblage
du boîtier, vérifiez que les câbles soient complètement insérés entre
le serre-fils et la borne en laiton avant de serrer la borne à vis.
3
a. Montez l'adaptateur de la plaque murale dans la prise
(vis fournies).
b. Installez la prise dans le boîtier. Serrez les vis jusqu'à ce que
l'adaptateur de la plaque murale entre en contact avec la surface
du mur.
c. Attachez la plaque murale.
4
Rétablissez le courant.
Français
À lire avant de procéder à l'installation
à 6,0 mm
(14 AWG à 10 AWG)] selon la
2
2
Publicidad

Manuales relacionados para Lutron CAR-15-UBTR


Resumen de contenidos para Lutron CAR-15-UBTR
- Página 1 Informations sur la FCC/IC : Pour obtenir des informations sur la www.lutron.com/fcc-ic FCC/IC, veuillez consulter la page : www.lutron.com/fcc-ic Wallbox: Install in a standard electrical wallbox measuring at least 3 in x Boîtier d’encastrement : Installer dans une boîte électrique murale 2 in x 2.5 in (76 mm x 51 mm x 64 mm), raceway, power pole, furniture...
- Página 2 Limited Warranty Aviso: NO retire totalmente los tornillos de los terminales. Ocurrirán (Valid only in the U.S.A., Canada, Puerto Rico, and the Caribbean.) Lutron will, at its option, repair or replace any unit daños a los terminales. that is defective in materials or manufacture within one year after purchase. For warranty service, return unit to place of purchase or mail to Lutron at 7200 Suter Rd., Coopersburg, PA 18036-1299, postage pre-paid.