Tabla de contenido
Publicidad
Enlaces rápidos
!
Installation Guide
1
Electrical connections:
3
supply connectors;
Relay output connectors (C, NC, NO);
5
DIP Switches;
Status LED.
D
ESCRIPTION
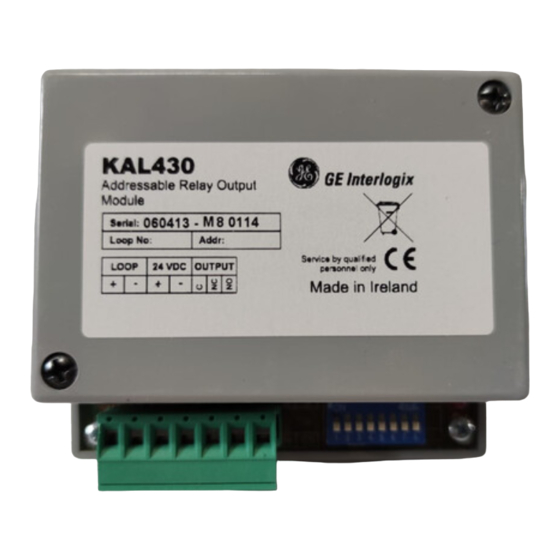
The KAL430 provides for one potential free relay output for the fire
system loop. Each relay allows for C, NC and NO contacts.
The module is suitable for operation with power or power supply
equipment requiring a supply board independent from the fire
system or part of another system. The 24 V relay power supply
outputs are isolated from the rest of the board.
I
NSTALLATION
For general guidelines on fire system planning,
design, installation, commissioning, use and
maintenance refer to the EN54-14 (2001) standard
and local regulations.
The module is designed for cabinet installation and must be
protected against environmental agents. The power supply should
be disconnected during installation.
The module may be used with any electrical equipment and the
choice of terminals used will set the desired event (C, NC or NO).
The 24 V power supply can be taken from the loop or from an
auxiliary power source. If more than 10 KAL400 series modules
are connected to a loop, an auxiliary power supply is
recommended. Always verify large installations using the loop load
calculator to confirm that enough power is available on the loop.
Power supply configuration
To set the module power supply remove the unit cover and
configure jumpers JMP1 and JMP2. See Figure 2: power supply
jumper configuration.
© (2004) GE Interlogix B.V.. All rights reserved.
Version 3-1 / August 2004
1050795
2
Loop connectors;
Auxiliary power
KAL430 Addressable Relay Output Module
Figura 2: configurazione ponticelli alimentazione.
4
Loop powered jumper
configuration.
Do not connect a 24 VDC auxiliary power supply to
the module if power is supplied by the loop.
Status LED
The status LED is configured using DIP switch 8 in the DIP switch
selector: If set to ON the LED will flash during all communications
between the module and the control panel. If set to OFF it will flash
only during selected communications between the module and
control panel (see control panel manual for further details). The
status LED is lit constantly during alarm.
Addressing
Each module requires a numeric address between 128 and 253 for
identification purposes. This is set using DIP switches 1-7 (see
Table 1: DIP switch address settings). DIP switch 8 is reserved for
configuration of the status LED.
M
AINTENANCE AND
Basic maintenance is reduced to a yearly inspection. Do not
modify internal wiring or circuitry.
To test:
1.
Configure the module as an output to be activated by a
detector or manual call point.
2.
Remove a detector head from its base or activate a manual
call point.
Installation Guide
24 VDC auxiliary power supply
jumper configuration.
T
ESTING
Publicidad
Tabla de contenido

Resumen de contenidos para GE KAL430
- Página 1 ESCRIPTION configuration. jumper configuration. The KAL430 provides for one potential free relay output for the fire system loop. Each relay allows for C, NC and NO contacts. Do not connect a 24 VDC auxiliary power supply to The module is suitable for operation with power or power supply the module if power is supplied by the loop.
-
Página 2: Descripción
Tensión de alimentación ..........22 – 38 VDC ESCRIPCIÓN Corriente de consumo 24 VDC (reposo)........70 µA El KAL430 dispone de una salida de relé en el bucle de la Corriente de consumo 35 VDC (reposo).........100 µA instalación. Cada relé se permite contactos de C, NC y NA. - Página 3 ESCRIÇÃO Configurazione alimentazione O KAL430 fornece uma output de relé livre de potencial do loop do Per configurare la modalità di alimentazione del modulo, rimuovere sistema de detecção de incêndios. Cada relé permite contactos C, il coperchio dell'unità e configurare i ponticelli JMP1 e JMP2.
-
Página 4: Especificações Técnicas
Configure o módulo como uma output a ser activada por um detector ou botoneira manual. Retire uma cabeça de um detector da base ou active uma botoneira manual. Se o LED de estado e o painel de controlo não assinalarem o teste, devem ser inspeccionadas todas as ligações e o endereço do módulo. - Página 5 Table 1 / Tabla 1 / Tabella 1 / Tabela 1 / 1 2 3 4 5 6 7 8 1 2 3 4 5 6 7 8 1 2 3 4 5 6 7 8 1 2 3 4 5 6 7 8...


