Tabla de contenido
Publicidad
Enlaces rápidos
U P
®
C
®
ASME A112.18.1 / CSA B125.1
Models/Modelos/Modèles
989-DST & 999-DST
Series/Series/Seria
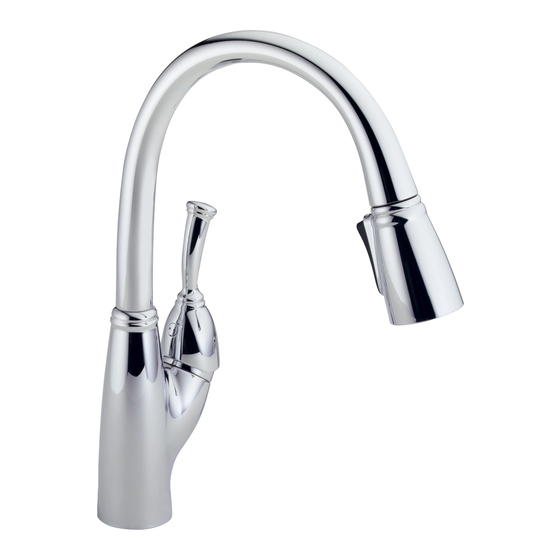
ALLORA
®
Write purchased model number here.
Escriba aquí el número del modelo comprado.
Inscrivez le numéro de modèle ici.
WARNING: THIS FAUCET IS NOT TO BE USED WITH PORTABLE
DISHWASHERS! / ADVERTENCIA: ¡SESTA LLAVE NO SE DEBE UTILIZAR
CON MAQUINAS LAVAPLATOS PORTATILES! / AVERTISSEMENT: ON NE
DOIT PAS BRANCHER UN LAVE-VAISSELE PORTATIF SUR CE ROBINET!
MEETS OR EXCEEDS — ASME A112.18.1 / CSA B125.1
ALCANZA O EXCEDE LAS SIGIENTES NORMAS —
ASME A112.18.1 / CSA B125.1
LE ROBINET EST CONFORME OU SUPèRIEUR AUX EXIGENCES DES
NORMES SUIVANTES: ASME A112.18.1 / CSA B125.1
For easy installation of your Delta
faucet you will need:
• To READ ALL the instructions completely
before beginning.
• To READ ALL warnings, care, and maintenance
information.
Para instalación fácil de su llave Delta
usted necesitará:
• LEER TODAS las instrucciones completamente
antes de empezar.
• LEER TODOS los avisos, cuidados, e
información de mantenimiento.
Pour installer votre robinet Delta
facilement, vous devez:
• LIRE TOUTES les instructions avant de débuter;
• LIRE TOUS les avertissements ainsi que toutes
les instructions de nettoyage et d'entretien.
HIGH-RISE PULL-DOWN KITCHEN AND
BAR / PREP FAUCETS
LLAVES DE AGUA ELEVADAS, DESLIZABLES
HACIA ABAJO, PARA COCINAS Y BARES / PREP
ROBINET À COL DE CYGNE ET BEC-DOUCHETTE
POUR ÉVIER DE BAR OU D'ÎLOT DE CUISINE
You may need/Usted puede necesitar/
Articles dont vous pouvez avoir besoin:
US. Pat. 4,043,359, 3,786,995, 4,562,960, 4,593,430, 4,089,347, 4,218,785, 4,765,365,
4,696,322, 5,771,934, 5,960,832
1
T E FLO N
1/8"
10/1/08
Rev. C
Publicidad
Tabla de contenido

Resumen de contenidos para Delta ALLORA Serie
- Página 1 • To READ ALL the instructions completely before beginning. • To READ ALL warnings, care, and maintenance information. Para instalación fácil de su llave Delta usted necesitará: • LEER TODAS las instrucciones completamente antes de empezar. • LEER TODOS los avisos, cuidados, e información de mantenimiento.
-
Página 2: Sistema De Protección Contra El Contraflujo
& repair. OF MERCHANTABILITY. Delta will replace, FREE OF CHARGE, during the warranty period, any part or finish that proves This warranty excludes all industrial, commercial & business usage, whose purchasers are defective in material and/or workmanship under normal installation, use & service. Replacement hereby extended a five year limited warranty from the date of purchase, with all other terms of parts may be obtained by calling 1-800-345-DELTA (in the U.S. - Página 3 RP53102▲ (model 989) Sprayer Assembly RP47271▲ (includes aerator) Set Screw & Button Ensamble de rociador Tornillo de Presión y Botón (incluye el aireador) Vis de calage et bouton Pulvérisateur (inclut aérateur) RP47270▲ Lever Handle Manijas de Palanca Manette RP47667▲ Aerator RP51502▲...
-
Página 4: Installation Instructions
Alternative Hose Installation Instalación alterna de la Manguera Autre méthode d’installation du flexible INSTALLATION INSTRUCTIONS Your faucet is designed for a hole diameter of 1 3/8" +/- 1/4" (35 mm +/- 6 mm) and a deck thickness of up to 2 1/2" (64 mm). Note: An alternative to this method is to feed the Attach Spout to Valve hose through the spout and hub after they are... - Página 5 OPTIONAL OPTIONAL B. RP37490 (Not Included) Optional Escutcheon Installation Mount Faucet to Deck Note: To improve stability on thin gage metal sinks, RP37490 thin For optional installations using the 10" Push hose partially up into mounting deck aid (see illustration 2A) is available free of charge by calling shank (1).
-
Página 6: Hose Installation
Hose Installation Slide hose weight (1) over end of hose (2). Push hose end (1) onto faucet outlet (2). Attach clip (3) over hoses as shown. Pull down moderately to ensure connection has been made. Instalación De la Manguera Deje pasar el extremo de la manguera (1) por la salida de la llave de agua / grifo (2). Conecte el Deslice la pesa de la manguera (1) sobre el gancho (3) sobre las mangueras como se muestra. - Página 7 Loop tubing (2) if it created. Delta is not responsible for tubing that is cut l Tubing is cut too short: buy a coupling union and a is too long.
-
Página 8: Correct Method Método Correcto Bonne Méthode
Correct method Incorrect Installation Instalación Incorrecta Método Correcto Installation Incorrecte Bonne méthode Do not install sleeve Ensure cut is straight. upside down. Custom Fit Connections - Plastic Sleeve Installation Instructions No instale la manga Asegúrese que el corte 1. Identify desired length of tube (1). Leave 1" - 2" of extra length to allow for easier boca abajo. - Página 9 For Models with Soap Dispenser Turn on hot and cold water supplies (1). Pull Sprayer will lock into position when brought into Remove the bottle (1). Separate head (2) from body the hose assembly (2) out of the spout and proximity of the spout magnet.
-
Página 10: Fijando La Parada De Límite De La Manija (Opcional)
Setting The Handle Limit Stop (Optional) because it limits the amount of hot water in the mix; however, this handle limit stop This faucet includes an integrated handle limit stop that has two positions. Position will not always prevent scalding because it does not compensate for incoming 1, to the left, allows full handle motion (the full range between “all cold”... -
Página 11: Mantenimiento
Maintenance Note: Do not attempt to disassemble cartridge (6). If faucet exhibits very low flow reinstalling parts, make sure bonnet nut (5) is There are no repairable parts inside. A. Remove and clean aerator (1), or tightened securely with a wrench.* B. - Página 12 Notes / Notas / Notes...


