Tabla de contenido
Publicidad
Idiomas disponibles
Idiomas disponibles
Enlaces rápidos
Publicidad
Tabla de contenido

Manuales relacionados para Aqua Marina LAXO


Resumen de contenidos para Aqua Marina LAXO
- Página 1 LAXO / MEMBA INFLATABLE HEAVY-DUTY KAYAK User’s Guide WARNING For your own safety and that of your equipment, make sure to take the following precautions. Failure to follow warning notices and instruction may result in property damage, serious injury or death.
-
Página 2: General Information
GENERAL INFORMATION SAFETY Kayak sports can be very dangerous and physically demanding. The users of this product should understand participating in kayak sports may involve serious injury or death. Observe all applicable watercraft laws, and use common sense. PLEASE KEEP THIS MANUAL IN A SECURE PLACE, AND HAND IT OVER TO THE NEW OWNER WHEN YOU SELL THE CRAFT. - Página 3 MANUFACTURER’S RECOMMENDATION The total number of persons and total weight shall not exceed the limits printed on the kayak. Please refer to the kayak’s hull label for the actual specifications of your product. KAYAK LABEL FORMAT Ⅲ 1. Standard: EN ISO 6185 PART 1 TYPE 2.
-
Página 4: Part List
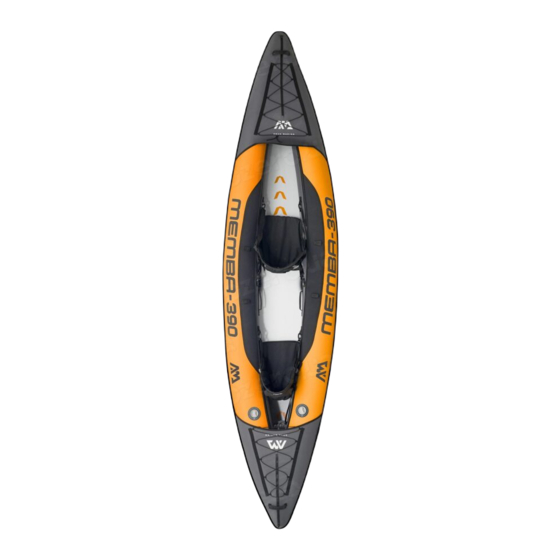
PART LIST LAXO Pressure gauge Extended water splash guard bow design Zipper of hull covers Slide-in kayak fin x 2 Carry bag Cargo bungee cord Durable high-back seat D-rings for seat connection (LA-285 x 1, LA-320 x 2, LA-380 x 3) - Página 5 PART LIST MEMBA Extended water splash guard bow design 16” hand pump with inflation hose Zipper of hull covers Pressure gauge Cargo bungee cord Adaptor for high pressure valve D-rings for seat connection Slide-in kayak fin x 2 Velcro paddle holder design Carry bag Durable high-back seat Integrated drain valve...
- Página 6 INSTRUCTION FOR ASSEMBLING AND DISASSEMBLING UNFOLD THE KAYAK FROM THE PACKAGING BOX On a clean and smooth space, unfold the Aqua Marina kayak and lay it out flat. The kayak fins need to be installed if you use the kayak on flat water.
- Página 7 LAXO Step 1 BOSTON VALVE Step 2 Step 2 Upper Cap INFLATION NOTE: FOR DEFLATION ONLY MEMBA Step 2 Step 1 Step 1...
- Página 8 Inflate the side chambers and air floor in sequence as shown in the picture. 1. Attach the pump hose to the pump and secure it tightly. 2. BOSTON VLAVE (FOR LAXO) Ensure that the main valve is securely screwed into the ring plate first.
- Página 9 SEAT INSTALLATION 1. Attach the seat to the kayak floor with Velcro. It is important to place the seat in the right place to evenly balance the boat when in the water. A solo paddler should be slightly aft of the boat’s center. With two paddlers, the heavier one should sit toward the rear.
- Página 10 KAYAK FIN INSTALLATION Turn the kayak over and slide the kayak fin into the base. It only slides in facing one way. Slide in the push-in pin into the grove until it clicks into the position. LAXO BOSTON VALVE Deflate Inflate...
- Página 11 16” HAND PUMP KAYAK DEFLATION 1. Clear any water or debris out of the valve areas. 2. BOSTON VLAVE (FOR LAXO) Open the lower cap of the Boston valve for deflation. In this situation, the valve only lets air out, not in.
- Página 12 NOTE: Please avoid bending the fin box. KAYAK FOLDING STEPS 1. Remove all the accessories from the kayak: seats and fins. 2. After deflation, tri-fold the tubes of the kayak. Then, fold the bow to the middle and force out any remaining air. Repeat this procedure for the stern, and place bow folds on top of stern.
- Página 13 INSTRUCTION FOR CARE AND STORAGE The kayak is made of the highest quality materials and complies with ISO 6185 standards. Altering the construction of the kayak will endanger your own safety, safety of the occupants and void the limited warranty! There is very little that you have to do to keep your kayak in good condition for many years.
- Página 14 LEAK DETECTION AND REPAIR A leaking valve is rare, but if you do find a leak, turn to after-sales service center for a replacement valve. To locate a leak, we recommend mixing soap and water in a spray bottle, spray around the valve. If you see bubbles forming, check your valve seating and base and be sure the valve insert is screwed tight.
- Página 15 WARRANTY AM warrants this product to be free from major defects in material or workmanship to the original purchaser for a period of ONE (1) YEAR from the date of purchase. This warranty is subject to the following limitations: 1. The warranty is valid only when this product is used for normal recreational activities and does not cover products used in rental or school operations 2.
- Página 16 LAXO / MEMBA KAYAK GONFLABLE ROBUSTE Guide de l'utilisateur ATTENTION Pour votre propre sécurité et celle de votre équipement, assurez-vous de prendre les précautions notifiées dans ce manuel. Le non-respect des avertissements et des instructions peut entraîner des dommages matériels, des blessures graves ou la mort.
-
Página 17: Information Generale
INFORMATION GENERALE SECURITE Les sports à pagayepeuvent être très dangereux et exiger une bonne condition physique. Les utilisateurs de ces produits doivent comprendre que pratiquer des sports à pagaye peut entraîner des blessures graves ou la mort. Observez toutes les lois de navigation et utilisez votre bon sens. - Página 18 RECOMMANDATIONS DU FABRICANT Le nombre total de personnes et le poids total ne doivent pas excéder les limites imprimées sur le Kayak. S’il vous plait, referez-vous au label sur la coque pour les spécifications actuelles de votre produit. KAYAK FORMAT D’ETIQUETTE 1.
-
Página 19: Liste Des Pièces
LISTE DES PIÈCES LAXO Protection contre les éclaboussures d’eau sous forme d’arc prolongé Conception de l'arc Manomètre prolongé de garde d'eau Couvertures de la coque avec fermeture éclair 2 dérives de kayak coulissantes Sac de transport Corde de bungee pour le chargement Siège robuste avec dossier haut... - Página 20 LISTE DES PIÈCES MEMBA Pompe à main de 16 ”avec tuyau de Protection contre les éclaboussures d’eau sous gonflage forme d’arc prolongé Couvertures de la coque avec fermeture éclair Manomètre Corde de bungee pour le chargement Adaptateur pour valve haute pression Anneaux en D pour la connexion du siège 2 dérives de kayak coulissantes Sac de transport...
- Página 21 INSTRUCTIONS DE MONTAGE ET DE DEMONTAGE VEUILLEZ SORTIR L’KAYAK DE SON CONDITIONNEMENT ET LE DÉBALLER Soyezdans uneplace propre et lisse pour déplier le kayak Aqua Marina et le posez à plat. Si vousprévoyez d’utiliser votre kayak sur l’eau plate, installez la dérive.
- Página 22 LAXO Etape 1 VALVE BOSTON Etape 2 Etape 2 Capuchon supérieur GONFLAGE REMARQUE: UNIQUEMENT POUR LE DÉGONFLAGE MEMBA Etape 2 Etape 1 Etape 1...
- Página 23 1. Fixez le tuyau de la pompe à celle-ci et fixez-le solidement. 2. VALVE BOSTON (POUR LAXO) Assurez-vous d’abord que la valve principale est bien vissée dans la plaque annulaire. Ouvrez le capuchon supérieur de la valve Boston pour le gonfler.
- Página 24 INSTALLATION DU SIÈGE 1. Fixez le siège au plancher du kayak avec un velcro. Il est important de placer le siège au bon endroit pour équilibrer le bateau lorsqu'il sera mis à l’eau. Un pagayeur en solo devrait être légèrement en arrière du centre du bateau. Dans le cas de deux pagayeurs, le plus lourd devrait s’asseoir vers l’arrière.
- Página 25 INSTALLATION DE L’AILERON DU KAYAK Retournez le kayak et faites glisserd l’aileron du kayak dans la base.Celui-ci ne glisse que dans un sens. Insérez la goupille d’insertion dans la rainure jusqu’à ce qu’elle soit verrouillée dans sa position. LAXO BOSTON VALVE Dégonflerlate Gonfler POMPE À...
- Página 26 DÉGONFLAGE DU KAYAK 1. Enlevez toute eau ou tous les débris des zones de la valve. 2. VALVE BOSTON (POUR LAXO) Ouvrez le capuchon inférieur de la valve Boston pour le dégonflage. Dans cette situation, la valve laisse uniquement sortir l’air, pas d’air qui entre VALVE HAUTE PRESSION (POUR MEMBA) Appuyez lentement sur la tige de la valve pour permettre à...
- Página 27 REMARQUE: Evitez de plier le boîtier de l’aileron. ÉTAPES DE PLIAGE DU KAYAK 1. Retirez tous les accessoires du kayak: sièges et ailerons. 2. Après dégonflage, pliez en trois les tubes du kayak. Ensuite, repliez l’arc au milieu et faites sortir tout l’air qui reste. Répétez cette procédure pour la poupe et placez les plis de la proue au-dessus de la poupe.
-
Página 28: Assemblage De La Pagaie
INSTRUCTIONS POUR L'ENTRETIEN ET LE STOCKAGE Le kayak est fabriqué à partir de matériaux de la plus haute qualité et il est conforme aux normes ISO 6185. Si vous modifiez la construction du kayak cela mettra en danger votre propre sécurité, celle des occupants et cela annulera la garantie limitée! Vous avez très peu de choses à... - Página 29 DÉTECTION ET RÉPARATION D’UNE FUITE Une valve qui fuit est rare, mais si vous trouvez une fuite, adressez-vous au centre de service après-vente pour remplacer la valve. Pour localiser une fuite, nous vous recommandons de mélanger du savon et de l'eau dans un flacon pulvérisateur, vaporisez le mélange autour de la valve.
- Página 30 GARANTIE AM garantit à l'acheteur original que ce produit est exempt de défauts majeurs de main d'oeuvre pour une période d'un (1) an à partir de la date d'achat. Cette garantie est soumise aux limitations suivantes: 1. La garantie est valide seulement lorsque ce produit est utilisé pour des activités récréatives normales et elle ne couvre pas les produits utilisés en cas de location ou pour un apprentissage.
- Página 31 LAXO / MEMBA AUFBLASBARES UND STRAPAZIERFÄHIGES KAYAK Benutzerhandbuch WARNUNG Für Ihre eigene Sicherheit und die Sicherheit Ihrer Ausrüstung, stellen Sie sicher, dass die folgende Vorsichtsmaßnahmen übernommen werden. Die Nichtbeachtung der Warnhinweise und Anweisungen in Sachwerten kann aquamarina.com Schäden, schwere Verletzungen oder Tod führen.
-
Página 32: Allgemeine Einführung
ALLGEMEINE EINFÜHRUNG SICHERHEIT Paddel-Sport kann sehr gefährlich und körperlich anstrengend sein. Die Benutzer dieses Produkts sollten sich bewusst sein, dass Teilnahme an Paddelsport schwere Verletzungen oder Tod verursachen könnte. Bitte beachten Sie alle anwendbaren Wasserfahrzeugvorschriften und benutzen Sie gesunden Menschenverstand. BITTE BEWAHREN SIE DIESE ANLEITUNG AN EINEM SICHEREN ORT AUF UND ÜBERGEBEN SIE SIE BEIM WEITERVERKAUF DES FAHRZEUGS AN DEN NEUEN EIGENTÜMERN. - Página 33 • Bitte überschreiten Sie die Datein auf dem Kapazitätsplatte nicht. • BITTE BEACHTEN SIE DEN WIND UND DIE STÖRMUNG. HERSTELLEREMPFEHLUNG Die Gesamtzahl der Personen und das Gesamtgewicht darf nicht die auf dem Kajak gedruckte Grenzen überschreiten. Bitte beachten Sie die Kajak Rumpfetikett für den tatsächlichen Spezifikationen Ihres Produktes.
- Página 34 TEILELISTE LAXO Druckmesser Erweitertes Spritzschutzdesign am Bug Reisverschluss für Rumpfabdeckungen 2 x Einschub-Finne für Kayak Tragetasche Gummizughalterung für Ladung Robuster Sitz mit hoher Rückenlehne D-Ringe zur Befestigung von Sitzen (LA-285 x 1, LA-320 x 2, LA-380 x 3) Kayak- Paddel...
- Página 35 TEILELISTE MEMBA 16 Zoll Fußpumpe mit Füllschlauch Erweitertes Spritzschutzdesign am Bug Reisverschluss für Rumpfabdeckungen Druckmesser Gummizughalterung für Ladung Adapter für Hochdruckventil D-Ringe zur Befestigung von Sitzen 2 x Einschub-Finne für Kayak Tragetasche Klettverschlusshalterung für Paddel Robuster Sitz mit hoher Rückenlehne Integriertes Ablassventil (ME-330 x 1, ME-390 x 2) Robuster Tragegriff aus Gummi...
- Página 36 MONTAGE-UND DEMONTAGEANLEITUNG ENTFALTEN SIE DAS BOARD AUS DER VERPACKUNG Suchen Sie einen sauberen und glatten Ort um den Aqua Marina Kajak zu entfalten und legen Sie den Kajak flach ab. Wenn Sie Ihrem Kajak auf Flachwasser benutzen möchten, installieren Sie die Tracking-Finne.
- Página 37 LAXO Schritt 1 BOSTON VENTIL Schritt 2 Schritt 2 Obere Kappe AUFPUMPEN HINWEIS: NUR ZUM ABLASSEN MEMBA Schritt 2 Schritt 1 Schritt 1...
- Página 38 Pumpen Sie die Seiten- und Luftkammern des Bodens der Reihe nach auf, wie in der Abbildung dargestellt. 1. Befestigen Sie den Pumpenschlauch an der Pumpe und sichern ihn ordentlich. 2. BOSTON VENTIL (FÜR LAXO) Stellen Sie zunächst sicher, dass das Hauptventil fest an der Ringlamelle verschraubt ist. Öffnen Sie zum Aufblasen Schritt 2 die obere Kappe des Boston Ventils.
- Página 39 EINBAU DES SITZES 1. Befestigen Sie den Sitz mit Klettband am Kajak. Es ist wichtig, den Sitz an der richtigen Stelle zu platzieren, um das Boot im Wasser gleichmäßig auszubalancieren. Ein Alleinpaddler sollte etwas hinter der Mitte des Bootes Platz nehmen. Bei zwei Paddlern sollte der schwerere hinten sitzen.
- Página 40 MONTAGE DER KAJAKFLOSSE Drehen Sie das Kajak um und schieben Sie die Kajakflosse in die Basis. Sie lässt sich nur in eine Richtung schieben. Schieben Sie den Einsteckstift in die Nut, bis er einrastet. LAXO BOSTON VENTIL Luft Aufblasen 11 ZOLL...
- Página 41 ABLASSEN DER LUFT DES KAJAKS 1. Entfernen Sie jegliches Wasser oder Schmutz aus den Ventilbereichen. 2. BOSTON VENTIL (FÜR LAXO) Öffnen Sie die obere Kappe des Boston Ventils zum Aufblasen. In diesem Zustand lässt das Ventil nur Luft ausströmen, nicht einströmen.
- Página 42 HINWEIS: Bitte vermeiden Sie das Biegen des Finnenkastens. ZUSAMMENFALTEN DES KAJAKS 1. Entfernen Sie alle Zubehörteile aus dem Kajak: Sitze und Finnen. 2. Nach dem Ablassen der Luft, falten Sie die Schläuche des Kajaks dreifach. Klappen Sie dann den Bug in die Mitte und drücken Sie die verbeibende Luft heraus. Wiederholen Sie diesen Vorgang für das Heck, und platzieren Sie die Bugfalten auf dem Heck.
- Página 43 HINWEISE ZUR PFLEGE UND AUFBEWAHRUNG Das Kajak ist aus hochwertigsten Materialien gefertigt und entspricht den ISO 6185-Standards. Eine Änderung der Konstruktion des Kajaks gefährdet Ihre eigene Sicherheit, die Sicherheit der Insassen und macht die eingeschränkte Garantie ungültig! Sie müssen nur wenig tun, um Ihr Kajak für viele Jahre in gutem Zustand zu halten. •...
- Página 44 LECKERKENNUNG UND REPARATUR Ein undichtes Ventil ist selten. Sollten Sie dennoch ein Leck finden, wenden Sie sich an das Kundendienstzentrum, um ein Ersatzventil zu erhalten. Um ein Leck zu lokalisieren, empfehlen wir, Seife und Wasser in einer Sprühflasche zu mischen und um das Ventil herum zu sprühen. Wenn sich Blasen bilden, überprüfen Sie den Ventilsitz und den Sockel und stellen Sie sicher, dass der Ventileinsatz festgeschraubt ist.
- Página 45 GARANTIE AM garantiert dem ursprünglichen Käufer für die Dauer von einem (1) Jahr ab Kaufdatum, dass dieses Produkt frei von wesentlichen Material- oder Verarbeitungsfehlern ist. Diese Garantie unterliegt folgenden Einschränkungen Die Garantie ist nur gültig, wenn dieses Produkt für normale Freizeitaktivitäten verwendet wird und nicht für Produkte, die im Verleih oder Schulbetrieb verwendet werden.
-
Página 46: Kayak Inflable De Alta Resistencia
LAXO / MEMBA KAYAK INFLABLE DE ALTA RESISTENCIA Guía de Usuario WARNING Por su propia seguridad y la de su equipo, asegúrese de tomar las siguientes precauciones. El incumplimiento de las advertencias e instrucciones puede resultar en daños a la propiedad, lesiones graves o la muerte. -
Página 47: Información General
INFORMACIÓN GENERAL SEGURIDAD Los deportes de remo pueden ser muy peligrosos y físicamente exigentes. Los usuarios de este producto deben entender que la participación en deportes de remo podrá implicar lesiones graves o la muerte. Haga el favor de observar todas las leyes aplicables sobre embarcaciones, y de utilizar el sentido común. -
Página 48: Recomendación Del Fabricante
RECOMENDACIÓN DEL FABRICANTE El número total de personas y el peso total no deberán exceder a los límites impresos en el kayak. Haga el favor de consultar la etiqueta en el casco del kayak para las especificaciones reales de su producto. FORMATO DE ETIQUETA DE KAYAK 1. -
Página 49: Lista De Piezas
LISTA DE PIEZAS LAXO Diseño extendido de arco de protección Manómetro contra salpicaduras Cubiertas de cremallera de la cubierta Aleta deslizable de kayak x 2 Bolsa de transporte Cuerda elástica de carga Asiento duradero de respaldo alto Anillas en D para conectar el asiento... - Página 50 LISTA DE PIEZAS MEMBA Diseño extendido de arco de protección Bomba manual de 16” con manguera contra salpicaduras de inflado Manómetro Cubiertas de cremallera de la cubierta Cuerda elástica de carga Adaptador para válvula de alta presión Anillas en D para conectar el asiento Aleta deslizante del kayak x 2 Asa de transporte de goma duradera Bolsa de transporte...
-
Página 51: Especificaciones
INSTRUCCIONES PARA MONTAJE Y DESMONTAJE DESPLEGAR LA TABLA DESPUÉS DE HABERLA SACADA DE LA CAJA Se localiza un espacio limpio y suave para desdoblar el Aqua Marina kayak y dejarla plana. Si usted planea usar su kayak en el agua plana, se necesita instalar la aleta de seguimiento. - Página 52 LAXO Paso 1 VÁLVULA BOSTON Paso 2 Paso 2 Tapa superior INFLADO NOTA: SÓLO PARA DESINFLAR MEMBA Paso 2 Paso 1 Paso 1...
-
Página 53: Inflar El Kayak
1. Conecte la manguera de la bomba a la bomba y asegúrela firmemente. 2. VÁLVULA BOSTON (PARA LAXO) Asegúrese primero de que la válvula principal está bien atornillada en la placa de anillas. Abra la tapa superior de la válvula Paso 2 Boston para inflar. - Página 54 INSTALACIÓN DEL ASIENTO 1. Acople el asiento al suelo del kayak con velcro. Es importante colocar el asiento en el lugar correcto para equilibrar el bote en el agua. Un solo remador debe colocarse ligeramente a popa del centro del bote. Con dos remadores, el más pesado debe sentarse hacia atrás.
- Página 55 INSTALACIÓN DE LA ALETA DEL KAYAK Dele la vuelta al kayak / piragua y deslice la aleta del kayak en la base. Sólo se desliza orientado hacia un lado. Deslice el perno en la ranura hasta que encaje en posición. LAXO VÁLVULA Desinflar Inflar...
-
Página 56: Desinflado Del Kayak
DESINFLADO DEL KAYAK 1. Limpie el agua o los desechos de las áreas de la válvula. 2. VÁLVULA BOSTON (PARA LAXO) Abra la tapa inferior de la válvula Boston para desinflar. En esta situación, la válvula solo deja salir el aire, no entrar. -
Página 57: Pasos Para Plegar El Kayak
NOTA: Evite doblar la caja de aletas. PASOS PARA PLEGAR EL KAYAK 1. Retire todos los accesorios del kayak: asientos y aletas. 2. Tras desinflar, pliegue tres veces el kayak. Luego, pliegue el arco por la mitad y saque el aire restante. Repita este proceso para la popa y coloque los pliegues del arco encima de la popa. -
Página 58: Instrucciones De Cuidados Y Almacenamiento
INSTRUCCIONES DE CUIDADOS Y ALMACENAMIENTO El kayak está hecho de materiales de alta calidad y cumple con las normas ISO 6185. ¡La alteración de la estructura del kayak pondrá en peligro su seguridad, la de los ocupantes e invalidará la garantía limitada! Mantener su kayak en buenas condiciones durante muchos años es muy sencillo. -
Página 59: Detección Y Reparación De Fugas
DETECCIÓN Y REPARACIÓN DE FUGAS Una válvula con fugas es poco frecuente, pero si encuentra una fuga, visite el centro de servicio posventa para obtener una válvula de reemplazo. Para localizar fugas, recomendamos mezclar agua y jabón en una botella pulverizadora y pulverizar alrededor de la válvula. -
Página 60: Garantía
GARANTÍA AM garantiza que este producto está libre de defectos importantes en el material o su fabricación al comprador original por un período de un (1) año a partir de la fecha de compra. Esta garantía está sujeta a las siguientes limitaciones 1.