
Manuales relacionados para Klarstein Royal Flush Eco


Resumen de contenidos para Klarstein Royal Flush Eco
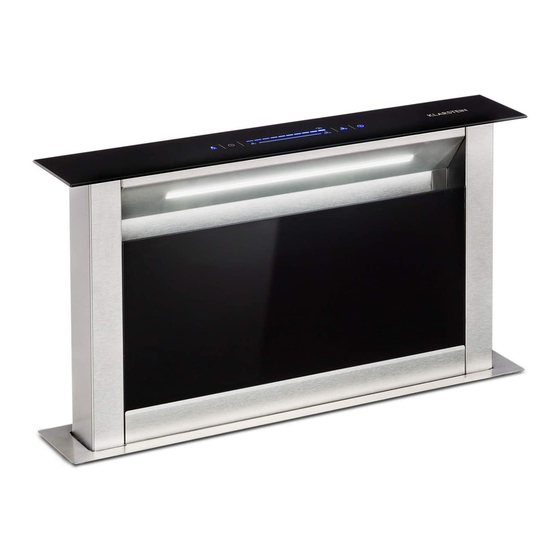
- Página 1 Royal Flush Eco Dunstabzugshaube Range Hood Campana extractora Hotte aspirante Cappa aspirante 10032863 10034330...
-
Página 3: Tabla De Contenido
Sehr geehrter Kunde, wir gratulieren Ihnen zum Erwerb Ihres Gerätes. Lesen Sie die folgenden Hinweise sorgfältig durch und befolgen Sie diese, um möglichen Schäden vorzubeugen. Für Schäden, die durch Missachtung der Hinweise und unsachgemäßen Gebrauch entstehen, übernehmen wir keine Haftung. Scannen Sie den folgenden QR-Code, um Zugriff auf die aktuellste Bedienungsanleitung und weitere Informationen rund um das Produkt zu erhalten. -
Página 4: Sicherheitshinweise
SICHERHEITSHINWEISE • Lesen Sie sich alle Hinweise vor der Benutzung sorgfältig durch und bewahren Sie die Bedienungsanleitung zum späteren Nachschlagen gut auf. • Die Montagearbeiten dürfen nur von einem Elektrofachmann oder einer Fachkraft durchgeführt werden. Bevor Sie die Dunstabzugshaube verwenden, stellen Sie sicher, dass die Spannung (V) und die auf der Dunstabzugshaube angegebene Frequenz (Hz) der Spannung (V) und Frequenz (Hz) ihrer Stromversorgung entsprechen. - Página 5 Wichtige Hinweise zum Abluftbetrieb WARNUNG Vergiftungsgefahr durch zurückgesaugte Abgase! Betreiben Sie das Gerät nicht im Abluftbetrieb, wenn es zusammen mit einer raumluftabhängigen Feuerstätte betrieben wird und keine ausreichende Luftzirkulation garantiert wird. Raumluftabhängige Feuerstätten, wie Gas-, Öl-, Holz- oder Kohleheizungen, Boiler oder Durchlauferhitzer) beziehen die Luft aus dem Raum und führen Sie durch ein Abluftrohr oder eine Kamin ins Freie.
-
Página 6: Montage
MONTAGE Bei der Montage muss der Mindestabstand zwischen Kochfeld und Haube exakt eingehalten und die Schritte und die zusätzlichen Hinweise beachtet werden. Beri der Ausführung der Abluft ins Freie (A- siehe auch Montagehinweise), werden die Dämpfe über einen am Anschlussring befestigten Abluftschlauch abgesaugt. Der Durchmesser des Abluftschlauches muss dem des Anschlussringes entsprechen. - Página 7 Verwendung der Dunstabzugshaube als Ablufthaube (mit Abluft nach außen) Wenn die Dunstabzugshaube werkseitig mit einem Aktivkohlefilter ausgestattet ist, muss dieser entfernt werden. Dies ist nur sinnvoll, wenn Sie Ihre Abzugshaube im Umluftbetrieb verwenden. Umbau der Dunstabzugshaube zur Umlufthaube Wenn Sie eine entsprechend montierte Haube als Umlufthaube verwenden möchten, müssen Sie den/die Aktivkohlefilter vor dem Einsatz der Haube am Lüftermotor montieren.
- Página 8 Montage der Dunstabzugshaube Bitte besorgen Sie sich einen Abluftka- Versehen Sie die Arbeitsplatte mit nal 150 mm mit zwei Schlauchschellen einem Ausschnitt für das Kochfeld. (nicht im Lieferumfang enthalten!). Setzen Sie die Lüftungsanlage in Versehen Sie die Arbeitsplatte mit den Ausschnitt ein und verbinden Sie den passenden Ausschnitten für die diese über die Halteschienen mit der Lüftungsanlage.
- Página 10 • Montage des Motors: • Sie haben die Möglichkeit, den Motor rechts oder links am Entlüftungsgehäuse anzuschließen. • Schließen Sie dann die verschiedenen Rotorblätter an und überprüfen Sie die Funktion des Gerätes. Hinweis: Das Belüftungssystem hat scharfe Kanten. Tragen Sie Schutzhandschuhe (Abbildung 10).
-
Página 11: Bedienfeld
BEDIENFELD Licht ein/aus Stufe einstellen Autom. Gebläsestufe 4 Sek. gedrückt Gerät ein-/ausschalten Nachlaufzeit ein/aus halten Turbo-Stufe Haube hoch/runter heben: Wenn Sie die -Taste 2 Sekunden lang drücken, hebt sich die Haube an und bleibt in der höchstmöglichen Position. Durch erneutes Drücken der Taste fährt sich die Haube ein. - Página 12 Abluft-Rohrleitung 1 Luftauslass nach außen 2 Luftauslass über einen Luftschacht • Die Abluftleitung sollte so kurz und gerade wie möglich sein. • Um übermäßigen Lärm oder eine verminderte Absaugleistung zu vermeiden, sollte der Durchmesser der Abluftleitung nicht kleiner als 150 mm sein. •...
-
Página 13: Reinigung Und Pflege
REINIGUNG UND PFLEGE Vor Wartungs- und Reinigungsarbeiten ist die Haube von der Stromversorgung zu trennen, indem Sie den Gerätestecker herausziehen oder den Sicherungsschalter der Hausinstallation abschalten oder die schraubbare Sicherung vollständig aus der Hausinstallation herausschrauben. • Die Dunstabzugshaube darf nicht mit einem Dampfreiniger gereinigt werden. •... - Página 14 • Metallfettfi lter müssen nicht ausgetauscht werden, wenn sie überfüllt sind, sondern einmal im Monat von Hand oder in der Spülmaschine (60 °C) gewaschen werden. Lassen Sie den Filter gründlich trocknen und setzen Sie ihn vorsichtig in die Dunstabzugshaube ein. Verwenden Sie keine alkalischen Geschirrspülmittel (pH-Wert über 7).
-
Página 15: Fehlerbehebung
FEHLERBEHEBUNG Fehler Mögliche Ursache Lösung Das Licht geht an aber der Das Lüfterblatt ist kaputt. Schalten Sie das Gerät Lüfter arbeitet nicht. aus und lassen Sie es Der Motor ist beschädigt. von einem Fachbetrieb untersuchen. Das Licht und der Lüfter Die Birne ist durchge- Ersetzen Sie die Birne funktionieren nicht. -
Página 16: Hinweise Zur Entsorgung
HINWEISE ZUR ENTSORGUNG Befindet sich die linke Abbildung (durchgestrichene Mülltonne auf Rädern) auf dem Produkt, gilt die Europäische Richtlinie 2012/19/EU. Diese Produkte dürfen nicht mit dem normalen Hausmüll entsorgt werden. Informieren Sie sich über die örtlichen Regelungen zur getrennten Sammlung elektrischer und elektronischer Gerätschaften. - Página 17 Dear Customer, Congratulations on purchasing this device. Please read the following instructions carefully and follow them to prevent possible damages. We assume no liability for damage caused by disregard of the instructions and improper use. Scan the QR code to get access to the latest user manual and more product information.
-
Página 18: Safety Instructions
SAFETY INSTRUCTIONS • Thank you for purchasing this cooker hood. Please read the instruction manual carefully before you use the cooker hood, and keep it in a safe place. • The installation work must be carried out by a qualified electrician or competent person. - Página 19 Important notes about the extraction mode WARNING Risk of poisoning from exhaust gases sucked back! Never operate the device in extraction mode simultaneously with an open flue appliance when there is not adequate airflow guaranteed. Open fl ue combustion equipment (for example, gas, oil, wood or coal-fi red heaters, tankless water heaters, water heaters) pulls combustion air from the room and runs it through an exhaust pipe or chimney to the outside.
- Página 20 INSTALLATION On installation, the minimum distance between the hob and the hood must be exactly complied with (see chapter 7.1 “Installation data“) and follow the numbering of the steps and the additional instructions. Execution with air exhausted outdoors (A- see also the installation data).
- Página 21 Using the extractor hood as an exhaust air hood (with air extracted to outdoors) If the extractor hood has been fitted at the factory with a carbon filter, this must be removed. It is only practicable to use this when operating your hood in circulation mode. Converting the extractor hood to a circulation hood If you wish to use an appropriately fitted hood as a circulation hood, you must mount the active carbon filter(s) to the fan motor before using the hood.
- Página 22 Installation of the hood Please get an exhaust duct 150 mm Provide the worktop with the matching with two hose clamps (not included!). cutouts for the ventilation system. Provide the countertop with a cutout for Insert the ventilation system in the the cooktop.
- Página 24 • Mounting the motor unit: • You have the option to connect the motor unit to the right or left on the vent housing • Then connect the different blades and check the unit for function. Note: The ventilation system has sharp edges. Use safety gloves (Figure 10).
- Página 25 Abluft-Rohrleitung 1 Air outlet to outdoors 2 Air outlet via an air shaft • The exhaust air line should be as short and straight as possible. • To avoid excessive noise or a reduced extraction capacity the diameter of the exhaust air pipeline should not be less than 150 mm.
-
Página 26: Control Panel
CONTROL PANEL Lift hood up/down If you press the extract button for 2 seconds, the hood begins to lift up and remain in the highest position available. By again pressing the key, the hood retracts. Important: Check that the core when moving in and out is not blocked or obstructed. There is a risk that a container is lifted (handle, etc.) and possibly hot contents may spill. -
Página 27: Cleaning And Care
CLEANING AND CARE Prior to any maintenance or cleaning work, isolate the hood from the electrical supply by: pulling out the appliance connector plug or tripping the house installation circuit breaker or fully unscrew the screw type fuse from the house installation. •... - Página 28 Carbon fi lters a) Traditional carbon fi lters (normally round in shape) can be neither washer nor regenerated. In normal use and depending on their size, replace every 4 to 6 months. Comply with the relevant instructions on the package. b) Washable and regeneratable carbon fi lters (normally square in shape) are to be washed once a month in a dishwasher, using a standard rinsing agent and with the intensive rinsing program (at the highest temperature).
- Página 29 TROUBLESHOOTING Fault Cause Solution Light on, but fan does not The fan blade is jammed. Switch of the unit and work repair by qualified service The motor is damaged. personnel only. Both light and fan do not light bulb burn. Replace the bulb with cor- work rect rating.
-
Página 30: Hints On Disposal
HINTS ON DISPOSAL According to the European waste regulation 2012/19/EU this symbol on the product or on its packaging indicates that this product may not be treated as household waste. Instead it should be taken to the appropriate collection point for the recycling of electrical and electronic equipment. - Página 31 Chère cliente, cher client, Toutes nos félicitations pour l’acquisition de ce nouvel appareil. Veuillez lire attentivement et respecter les instructions de ce mode d’emploi afin d’éviter d’éventuels dommages. Nous ne saurions être tenus pour responsables des dommages dus au non-respect des consignes et à...
-
Página 32: Consignes De Sécurité
CONSIGNES DE SÉCURITÉ • Lisez bien toutes les indications avant d'utiliser l'appareil et conservez le mode d'emploi en lieu sûr pour vous y référer ultérieurement. • Les travaux de montage ne doivent être effectués que par un électricien professionnel ou une personne qualifiée. Avant d’utiliser la hotte aspirante, assurez-vous que la tension (V) et la fréquence indiquée sur la hotte aspirante (Hz) correspondent à... - Página 33 Remarques importantes concernant le mode d‘extraction MISE EN GARDE Danger de mort, risques d‘intoxication ! Par la ré-aspiration de gaz de combustion. Ne jamais utiliser la fonction d’aspiration de l’appareil en même temps qu’un foyer dépendant de l’air ambiant si l’air frais est insuffi sant.
-
Página 34: Montage
MONTAGE Lors du montage, la distance minimale entre la plaque de cuisson et la hotte doit être strictement respectée de même que les étapes et les instructions supplémentaires. En ce qui concerne l'évacuation de l'air vers l'extérieur (A - voir également les instructions d'installation), les fumées sont aspirées par un conduit d'évacuation fixé... - Página 35 Utilisation de la hotte en mode d'extraction (avec l'air refoulé à l'extérieur) Si la hotte est équipée en usine d'un filtre à charbon actif, celui-ci doit être retiré. Cela n'a de sens que si vous utilisez votre hotte en mode recyclage d'air. Transformation de la hotte en mode recyclage d'air Si vous souhaitez utiliser une hotte montée en mode de recirculation, vous devez monter le(s) filtre(s) à...
- Página 36 Montage de la hotte aspirante Veuillez vous procurer un conduit Prévoyez une découpe dans le plan de d‘extraction de 150 mm avec deux travail pour la plaque de cuisson. colliers de serrage (non fournis !). Insérez le système de ventilation dans Prévoyez les découpes appropriées la découpe et connectez-le à...
- Página 38 • Montage du moteur : • Vous avez la possibilité de connecter le moteur à droite ou à gauche du boîtier d'extraction. • Fixez ensuite les différentes pales de rotor et vérifiez le fonctionnement de l'appareil. Remarque : les bords du système de ventilation sont coupants. Portez des gants (illustration 10).
-
Página 39: Panneau De Commande
PANNEAU DE COMMANDE Allumer/ Commande éteindre ventilateur l’appareil Activation/désactivation Appuyez sur 4 Réglage de Allumer/éteindre automatique du délai secondes:Turbo- la vitesse l’appareil Level ventilateur Soulever / abaisser la hotte : Si vous appuyez sur la touche pendant 2 secondes, la hotte se relève et reste dans la position la plus haute. -
Página 40: Conduit D'évacuation
Conduit d'évacuation 1 évacuation extérieure 2 évacuation par une colonne intérieure • Le conduit d'évacuation doit être aussi court et droit que possible. • Pour éviter un bruit excessif ou une puissance d'aspiration réduite, le diamètre du conduit d'évacuation ne doit pas être inférieur à 150 mm. •... -
Página 41: Nettoyage Et Entretien
NETTOYAGE ET ENTRETIEN Avant d'effectuer des travaux d'entretien et de nettoyage, débranchez la hotte de l'alimentation électrique en débranchant la fiche de l'appareil ou en débranchant le disjoncteur de l'installation domestique ou en dévissant complètement le fusible à visser de l'installation domestique. •... - Página 42 Filtres à charbon actif a) Les fi ltres à charbon actif courants (ronds en principe) ne peuvent être ni lavés ni réutilisés. En cas d'utilisation normale et en fonction de leur taille, ils doivent être changés tous les 4 à 6 mois. Respectez les conseils inscrits sur l'emballage. b) Les fi ltres à...
-
Página 43: Résolution Des Problèmes
RÉSOLUTION DES PROBLÈMES Problème Cause possible Solution L'éclairage s'allume mais Une pale du ventilateur est Eteignez l'appareil et le ventilateur ne fonction- cassée. faites-le contrôler par un ne pas. professionnel. Le moteur est endom- magé. L'éclairage ni le ventilateur L'ampoule est grillée. Remplacez l'ampoule ne fonctionnent. -
Página 44: Informations Sur Le Recyclage
INFORMATIONS SUR LE RECYCLAGE Vous trouverez sur le produit l’image ci-contre (une poubelle sur roues, barrée d‘une croix), ce qui indique que le produit se trouve soumis à la directive européenne 2012/19/UE. Renseignez- vous sur les dispositions en vigueur dans votre région concernant la collecte séparée des appareils électriques et électroniques. - Página 45 Estimado cliente, Le felicitamos por la adquisición de este producto. Lea atentamente las siguientes instrucciones y sígalas para evitar posibles daños. No asumimos ninguna responsabilidad por los daños causados por el incumplimiento de las instrucciones y el uso inadecuado. Escanee el siguiente código QR para obtener acceso a la última guía del usuario y más información sobre el producto.
-
Página 46: Instrucciones De Seguridad
INSTRUCCIONES DE SEGURIDAD • Lea atentamente todas las instrucciones antes del uso y guarde el manual de instrucciones en un lugar seguro para poder consultarlo en el futuro. • Los trabajos de ensamblaje sólo pueden ser realizados por un electricista o un especialista. - Página 47 Indicaciones importantes para la campana en modalidad aspirante ADVERTENCIA Peligro de intoxicación por gases de escape aspirados! No utilice la unidad en modalidad aspirante si se utiliza junto con una chimenea dependiente del aire y si no está garantizada una circulación de aire sufi ciente.
-
Página 48: Instalación
INSTALACIÓN Durante la instalación hay que mantener exactamente la distancia mínima entre la placa de cocina y la campana extractora y hay que tener en cuenta los pasos y las instrucciones adicionales. Durante la extracción del aire al exterior (A- véase también las instrucciones de instalación), los vapores son aspirados a través de una manguera de aire de escape conectada a un anillo de conexión. - Página 49 Utilización de la campana extractora como campana de extracción (con aire extraído al exterior) Si la campana extractora viene equipada de fábrica con un filtro de carbono, deberá ser retirada. Sólo es factible utilizarlo cuando utilice la campana en modo de circulación.
- Página 50 Instalación de la campana extractora Por favor, compre un tubo de salida Prepare en la superficie de trabajo de aire de 150 mm con dos abra- los recortes correspondientes para el zaderas de manguera (¡no incluidas sistema de ventilación. en el alcance de suministro!). Inserte el sistema de ventilación en Proporcione la superficie de trabajo el recorte y conéctelo a través de los...
- Página 52 • Instalación del motor: • Tiene la opción de conectar el motor a la derecha o a la izquierda de la carcasa de aireación. • A continuación, conecte las distintas palas del rotor y compruebe el funcionamiento del dispositivo. Nota: El sistema de ventilación tiene bordes afilados. Use guantes protectores (Figura 10).
-
Página 53: Panel De Control
PANEL DE CONTROL Encender/ Ventilador apagar la luz control Retardo automático Ajuste de la Presionar 4 Encender/apagar el encendido/apagado velocidad de segundos: aparato ventilación Turbo-Level Levantar/bajar la campana : Pulsando la tecla durante 2 segundos, la campana se levanta y permanece en la posición más alta posible. - Página 54 Tubería de aire de salida 1 Salida de aire hacia el 2 Salida de aire a través de un pozo de aire exterior • La tubería de salida de aire debe ser lo más corta y recta posible. • Para evitar ruidos excesivos o un rendimiento de aspiración reducido, el diámetro de la tubería de salida de aire no debe ser inferior a 150 mm.
-
Página 55: Limpieza Y Mantenimiento
LIMPIEZA Y MANTENIMIENTO Antes de realizar cualquier trabajo de mantenimiento y limpieza, hay que desconectar la campana de la red eléctrica desenchufando el enchufe del aparato, desconectando el interruptor de la instalación doméstica o desenroscando completamente el fusible atornillable de la instalación doméstica. •... - Página 56 Filtros de carbón a) Los fi ltros de carbón tradicionales (normalmente de forma redonda) no pueden ser ni lavados ni reciclados. En condiciones de un uso normal y dependiendo de su tamaño, debe sustituirlo cada 4 a 6 meses. Cumpla con las instrucciones que fi guran en el embalaje.
-
Página 57: Subsanación De Errores
SUBSANACIÓN DE ERRORES Error Causa posible Solución La luz se enciende pero el Une pale du ventilateur est Eteignez l'appareil et ventilador no funciona. cassée. faites-le contrôler par un professionnel. La luz y el ventilador no funcionan. El aparato vibra fuerte- La pala del ventilador Sustituya la bombilla por mente. -
Página 58: Retirada Del Aparato
RETIRADA DEL APARATO Si el aparato lleva adherida la ilustración de la izquierda (el contenedor de basura tachado) entonces rige la normativa europea, directiva 2012/19/UE. Este producto no debe arrojarse a un contenedor de basura común. Infórmese sobre las leyes territoriales que regulan la recogida separada de aparatos eléctricos y electrónicos. - Página 59 Gentile cliente, La ringraziamo per aver acquistato il dispositivo. La preghiamo di leggere attentamente le seguenti istruzioni per l’uso e di seguirle per evitare possibili danni. Non ci assumiamo alcuna responsabilità per danni scaturiti da una mancata osservazione delle avvertenze di sicurezza e da un uso improprio del dispositivo.
-
Página 60: Avvertenze Di Sicurezza
AVVERTENZE DI SICUREZZA • Leggere attentamente tutte le avvertenze prima dell’utilizzo e conservare il manuale d’uso per future consultazioni. • Il montaggio deve essere realizzato da un elettricista o da un tecnico specializzato. Prima di utilizzare la cappa aspirante, assicurarsi che la tensione (V) e la frequenza (Hz) indicate sulla cappa corrispondano a tensione (V) e frequenza (Hz) dell’alimentazione elettrica. - Página 61 Avvertenze importanti sulla modalità di funzionamento di scarico dell’aria AVVERTENZA Pericolo di intossicazione dovuto ai gas di scarico riaspirati! Non utilizzare il dispositivo in modalità di scarico dell’aria se viene utilizzato con focolari dipendenti dall’aria della stanza e non viene garantita suffi ciente ventilazione.
-
Página 62: Montaggio
MONTAGGIO Durante il montaggio, è necessario rispettare esattamente la distanza minima tra cappa e piano di cottura e seguire i passaggi e le indicazioni aggiuntive. Nella modalità di scarico all’aperto (a- vedere anche avvertenze per il montaggio), i vapori vengono aspirati tramite un anello di collegamento fissato al tubo di scarico. Il diametro del tubo di scarico deve corrispondere a quello dell’anello di collegamento Se si utilizza o si prevede di utilizzare una valvola di ritorno per il fumo, è... - Página 63 Utilizzo della cappa aspirante come cappa di scarico dell’aria (con scarico verso l’esterno) Se la cappa aspirante è dotata di filtro ai carboni attivi nella configurazione di fabbrica, è necessario rimuoverlo. Il filtro ai carboni attivi è utile solo se si utilizza la cappa in funzione di ricircolo.
- Página 64 Montaggio della cappa aspirante Procurarsi un canale di scarico da 150 Realizzare un intaglio sul pannello di mm con due fascette per tubi flessibili lavoro per il piano cottura. (non inclusi in consegna). Posizionare l’impianto di ventilazione Realizzare intagli appropriati sul nell’intaglio e collegarlo con pannello di lavoro per l’impianto di le guide di supporto alla parte...
- Página 66 • Montaggio del motore: • Il motore può essere montato a destra o a sinistra dell’alloggiamento di aspirazione. • Collegare poi le diverse pale del rotore e controllare il funzionamento del dispositivo. Avvertenza: il sistema di ventilazione ha bordi taglienti. Indossare guanti protettivi (immagine 10).
-
Página 67: Pannello Di Controllo
PANNELLO DI CONTROLLO Accensione/ Controllo spegnimento ventola luce Attivazione/disattivazione Regolazione Premere 4 secondi: Attivazione/ ritardo automatico velocità ventola Turbo-Level disattivazione apparecchio Sollevare/abbassare la cappa : Premendo il tasto per 2 secondi, la cappa si solleva e resta nella posizione più alta possibile. - Página 68 Condotto di scarico dell’aria 1 Fuoriuscita dell’aria verso 2 Fuoriuscita dell’aria tramite un pozzo di l’esterno ventilazione • Il condotto di scarico dell’aria deve essere il più corto e dritto possibile. • Per evitare rumore eccessivo e una capacità aspirante limitata, il diametro del condotto di scarico deve essere di almeno 150 mm.
-
Página 69: Pulizia E Manutenzione
PULIZIA E MANUTENZIONE Prima di effettuare pulizia e manutenzione, è necessario scollegare la cappa dalla rete elettrica, staccando la spina o spegnendo l’interruttore di sicurezza in casa o svitando completamente il fusibile avvitabile. • Non utilizzare pulitori a vapore per pulire la cappa aspirante. •... - Página 70 Filtro ai carboni attivi a) I tradizionali fi ltri ai carboni attivi (solitamente rotondi) non possono essere lavati o riutilizzati. In caso di normale utilizzo e in base alle dimensioni, sostituirli ogni 4-6 mesi. Rispettare le indicazioni sulla confezione. b) I fi ltri ai carboni attivi lavabili e riutilizzabili (solitamente quadrati) devono essere lavati in lavastoviglie una volta al mese con normale detersivo per piatti e il programma intensivo (alla temperatura massima).
-
Página 71: Ricerca E Correzione Degli Errori
RICERCA E CORREZIONE DEGLI ERRORI Problema Possibile causa Soluzioni La luce si accende, ma la La ventola è guasta. Spegnere il dispositivo ventola non funziona. e farlo controllare da un Il motore è danneggiato. tecnico. Luce e ventola non funzi- La lampadina è... -
Página 72: Smaltimento
SMALTIMENTO Se sul prodotto è presente la figura a sinistra (il cassonetto mobile sbarrato), si applica la direttiva europea 2012/19/UE. Questi prodotti non possono essere smaltiti con i rifiuti normali. Informarsi sulle disposizioni vigenti sulla raccolta separata di dispositivi elettrici ed elettronici. Non smaltire i vecchi dispositivi con i rifiuti domestici.