Publicidad
CONTACT US FIRST
CONTACT US FIRST
sauder.com
sauder.com
sauder.com
BEFORE MAKING ANY RETURNS TO THE STORE.
BEFORE MAKING ANY RETURNS TO THE STORE.
sauder.com/service
Visit
Prefer the phone? Give us a rin at
Customer Service is available Monday-Friday - 9 a.m. to 5:30 p.m. EST (except holidays)
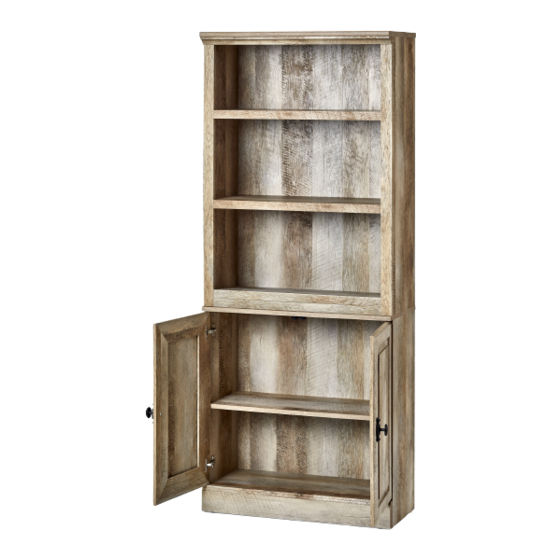
Bookcase with Doors
Model 418735
Share your journey!
to order replacement parts, view video assembly tips, or chat with a live rep.
1-800-523-3987
.
Here's one for
the books.
NOTE: THIS INSTRUCTION
BOOKLET CONTAINS IMPORTANT
SAFETY INFORMATION.
PLEASE READ AND KEEP FOR
FUTURE REFERENCE.
En lish p 1-17
Español p 18-20
Lot # 530075
05/24/19
Purchased: __________________
Publicidad
Tabla de contenido

Manuales relacionados para Sauder 418735


Resumen de contenidos para Sauder 418735
- Página 1 Customer Service is available Monday-Friday - 9 a.m. to 5:30 p.m. EST (except holidays) Here's one for the books. Bookcase with Doors NOTE: THIS INSTRUCTION BOOKLET CONTAINS IMPORTANT SAFETY INFORMATION. Model 418735 PLEASE READ AND KEEP FOR FUTURE REFERENCE. En lish p 1-17 Español p 18-20 Share your journey! Lot # 530075...
- Página 2 Assembly Tools Required Part Identifi cation No. 2 Phillips Screwdriver Tip Shown Actual Size Hardware Identifi cation Assembly Steps 5-17 Hammer Not actual size Español 18-20 Safety 21-22 Skip the power trip. Warranty This time. Pa e 2 418735 www.sauder.com/service...
-
Página 3: Part Identifi Cation
LEFT END (1) ADJUSTABLE SHELF (2) TOP (1) SHELF (1) BACK (1) SMALL BACK (1) DOOR (2) LOWER ADJUSTABLE SHELF (1) UPPER END MOLDING (2) M33 TOP MOLDING (1) M34 BASE MOLDING (1) M76 SHELF MOLDING (2) www.sauder.com/service 418735 Pa e 3... - Página 4 RUBBER SLEEVE - 12 BLACK 9/16" LARGE HEAD SCREW - 13 BLACK 1-7/8" FLAT HEAD SCREW - 5 SILVER 5/8" FLAT HEAD SCREW - 8 BROWN 1-5/8" FLAT HEAD SCREW - 3 SILVER 1-1/2" MACHINE SCREW - 2 Pa e 4 418735 www.sauder.com/service...
- Página 5 E) and BOTTOM (D). Then, insert the metal end of a CAM DOWEL (2F) into each HIDDEN CAM. Do not ti hten the HIDDEN CAMS in this step. Arrow (12 used) Arrow Insert the metal end of the CAM DOWEL into the HIDDEN CAM. www.sauder.com/service 418735 Pa e 5...
- Página 6 HIDDEN CAMS must be completely Maximum Arrow ti htened. HIDDEN 210 de rees CAMS that are not completely ti htened may loosen, and parts may separate. To Minimum completely ti hten: 190 de rees Pa e 6 418735 www.sauder.com/service...
- Página 7 Slide the UPPER END MOLDING (M) onto the notched ed e. The lar e roove is closer to this ed e. The lar e roove is closer to this ed e. www.sauder.com/service 418735 Pa e 7...
- Página 8 BLACK 1-7/8" FLAT HEAD SCREWS (2S). Push two DOOR STOPS (4I) into the holes in the SHELF (H). å These holes are closer to this ed e. BLACK 1-7/8" FLAT HEAD SCREW (4 used in this step) Pa e 8 418735 www.sauder.com/service...
- Página 9 S u r D E N H I D These holes must be here. S u r f a c H I D D E N i t h www.sauder.com/service 418735 Pa e 9...
- Página 10 BOTTOM (D). Use six BLACK 9/16" LARGE HEAD SCREWS (1S) throu h the METAL BRACKETS on the ENDS and BOTTOM and into the BASE MOLDING. Curved ed e BLACK 9/16" LARGE HEAD SCREW (12 used for the METAL BRACKETS) Pa e 10 418735 www.sauder.com/service...
- Página 11 Usin your hammer, ently tap four TACK GLIDES (12E) å into the bottom ed es of the ENDS (C and E) and BASE MOLDING (M34). These holes must line up over the SHELF (H). For support, place packin foam and ma azines here. www.sauder.com/service 418735 Pa e 11...
- Página 12 Place four HINGE SPACERS (22H) over the lar e holes in å the DOORS (K). Fasten four HINGES (13H) to the DOORS (K). Use ei ht å SILVER 5/8" FLAT HEAD SCREWS (23S). SILVER 5/8" FLAT HEAD SCREW (8 used in this step) Pa e 12 418735 www.sauder.com/service...
- Página 13 DOOR (K). Use a SILVER 1-1/2" MACHINE SCREW (95S). Repeat this step for the other DOOR (K). å See the next step for DOOR adjustments. å Stop Mountin screw Hin e SILVER 1-1/2" MACHINE SCREW (2 used for the KNOBS and BACKPLATES) www.sauder.com/service 418735 Pa e 13...
- Página 14 To adjust the DOORS in or out (depth), loosen the mountin å screw one turn and move the DOORS in or out, as needed. Ti hten the mountin screw after makin adjustments. Mountin screw (depth) Adjustin screw (horizontal) (vertical adjustment) Pa e 14 418735 www.sauder.com/service...
- Página 15 Slide the SHELF MOLDING (M76) onto the notched ed e. These surfaces should be even. Notched ed e Slide the SHELF MOLDING (M76) onto the notched ed e. The roove is closer to this ed e. www.sauder.com/service 418735 Pa e 15...
- Página 16 FLAT HEAD SCREW (2S) into a stud in your wall. BLACK 1-7/8" FLAT HEAD SCREW (1 used into a stud in your wall) BLACK 9/16" LARGE HEAD SCREW (1 used into the top of your unit) Pa e 16 418735 www.sauder.com/service...
- Página 17 This completes assembly. Clean with a damp cloth. Wipe dry. å And to celebrate, why not share your success story at Walmart.com or No load 30 lbs. 30 lbs. (12 used) 35 lbs. 30 lbs. 50 lbs. www.sauder.com/service 418735 Pa e 17...
-
Página 18: Biblioteca Con Puertas
Si EXTREMO IZQUIERDO SUPERIOR ....1 EXCÉNTRICO ESCONDIDO ......12 necesita ponerse en EXTREMO DERECHO ..........1 PASADOR DE EXCÉNTRICO ......12 contacto con Sauder en FONDO .................1 MÉNSULA DE SEGURIDAD .........1 cuanto a esta unidad, refi érase al número EXTREMO IZQUIERDO ..........1 SOPORTE DE METAL ..........6... - Página 19 Ase úrese de clavar li eramente los clavos en los a ujeros que se del ESTANTE (H). alinean sobre el ESTANTE (H). Con un martillo, suavemente introduzca olpeando cuatro TACHUELAS DESLIZANTES (12E) en los bordes de la parte inferior de los EXTREMOS (C y E). www.sauder.com/service 418735 Pa e 19...
- Página 20 Para ajustar las PUERTAS hacia atrás o hacia adelante (profundidad), afl oje el tornillo de montaje una vuelta y mueva las PUERTAS hacia el interior o hacia el exterior se ún sea necesario. Apriete el tornillo de montaje después de hacer los ajustes. Pa e 20 418735 www.sauder.com/service...
- Página 21 • This product is not desi ned to support a not desi ned to support a television is heavy. Plus the wei ht and location of the television. hazardous. picture tube tends to make TVs unbalanced and prone to tippin forward. www.sauder.com/service 418735 Pa e 21...
- Página 22 Además, el peso y la ubicación del tubo de ima en tienden a causar la inestabilidad de televisores y propensa a volcarse hacia adelante. Pa e 22 418735 www.sauder.com/service...
-
Página 23: Garantía Limitada De 1 Año
2. There is no warranty covera e for defects or conditions that result from the failure the laws of certain states, there may be no implied warranties from Sauder and all to follow product assembly instructions, information or warnin s, misuse or abuse, implied warranties, INCLUDING ANY IMPLIED WARRANTY OF MERCHANTABILITY intentional dama e, fi... -
Página 24: If You Need Assistance
Walmart.com in the product detail pa e. General Conformity Certifi cate 1. This certifi cate applies to the Sauder Woodworkin Product identifi ed by this Instruction Book. 2. This certifi cate applies to compliance of this product with the CPSC Ban on Lead-Containin Paint (16 CFR 1303).