Tabla de contenido
Publicidad
Idiomas disponibles
Idiomas disponibles
Enlaces rápidos
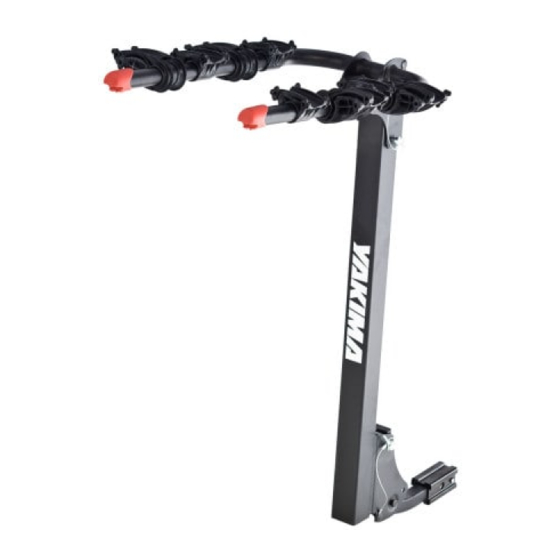
This kit contains a tongue for
a 2" hitch. If using a two- or
four-bike carrier, a 1-1/4"
tongue is available as
replacement part #02410.
WARNING: Do not use the
1-1/4" tongue with the
5-bike carrier.
IMPORTANT WARNING
I
T IS CRITICAL THAT ALL YAKIMA RACKS AND ACCESSORIES BE PROPERLY AND SECURELY ATTACHED TO YOUR VEHICLE
COULD RESULT IN AN AUTOMOBILE ACCIDENT
RESPONSIBLE FOR SECURING THE RACKS AND ACCESSORIES TO YOUR CAR
INSPECTING THE PRODUCTS FOR ADJUSTMENT
INSTRUCTIONS AND CAUTIONS SUPPLIED WITH YOUR YAKIMA PRODUCT PRIOR TO INSTALLATION OR USE
OF THE INSTRUCTIONS AND CAUTIONS
INSTALLATION PROCEDURES
.
AUTO BODY SHOP
1033249D-1/15
KingPin 2,4,&5
,
AND COULD CAUSE SERIOUS BODILY INJURY OR DEATH TO YOU OR TO OTHERS
,
WEAR
,
OR IF YOU HAVE NO MECHANICAL EXPERIENCE AND ARE NOT THOROUGHLY FAMILIAR WITH THE
,
YOU SHOULD HAVE THE PRODUCT INSTALLED BY A PROFESSIONAL INSTALLER SUCH AS A QUALIFIED GARAGE OR
,
CHECKING THE ATTACHMENTS PRIOR TO USE
,
. T
AND DAMAGE
HEREFORE
TOOLS
7/8" wrench
9/16" wrenches (2)
STRAPS AND CRADLES:
This instruction shows KingPin 4.
• The KingPin 2 will have 6 straps for
two sets of cradles.
• The KingPin 5 will have 15 straps
for five sets of cradles.
PURCHASE
SEPARATELY:
DeadLock
Locks bikes to carrier, and
carrier to vehicle.
Part #8002411
PowderHorn
-for KingPin 4 & 5 ONLY-
Carries up to 6 pr. skis or 4
snow boards.
Part #8002588
. I
,
YOU MUST READ AND UNDERSTAND ALL OF THE
. I
F YOU DO NOT UNDERSTAND ALL
MPROPER ATTACHMENT
. Y
OU ARE
,
AND PERIODICALLY
Part #1033249 RevD
Publicidad
Tabla de contenido

Manuales relacionados para Yakima KingPin 2


Resumen de contenidos para Yakima KingPin 2
- Página 1 Part #8002588 IMPORTANT WARNING T IS CRITICAL THAT ALL YAKIMA RACKS AND ACCESSORIES BE PROPERLY AND SECURELY ATTACHED TO YOUR VEHICLE MPROPER ATTACHMENT COULD RESULT IN AN AUTOMOBILE ACCIDENT AND COULD CAUSE SERIOUS BODILY INJURY OR DEATH TO YOU OR TO OTHERS...
- Página 2 PULL OUT THE PIN INSTALL TONGUE. AND WIRE-LOCK FROM THE HITCH Push the tongue into the hitch plate, aligning the holes. • Install one of the hex bolts and a flat washer. PLATE. • Add a second washer, attach a nut. ATTACH THE STOP BOLT AND BOLT SLEEVE.
- Página 3 INSERT MAST INTO VEHICLE'S HITCH. INSTALL LARGE BOLT PUSH THE AND LOCK-WASHER. SAFETY CLIP ONTO THE EXPOSED END OF Install bolt from right side THE BOLT. of receiver. IF SPARE TIRE CAUSES INTERFERENCE, DO NOT USE THIS PRODUCT! TIGHTEN with 7/8" wrench. Align the holes in the receiver to the holes in the tongue.
- Página 4 LOAD LARGEST OR HEAVIEST BIKE FIRST. Stabilize the bike • Always load first frame in bike with chain the cradle away from vehicle. Arrange • Compress cradles bikes for best against stabilizer. stabilization. Pull straps tightly over frame, hook into place. LOAD REMAINING BIKES.
- Página 5 Yakima product is defective, the customer must return it to an authorized Yakima dealer with proof of purchase. Yakima will then issue authorization to the dealer for the return of these products. If an article is found to be defective upon inspection by Yakima, Yakima will repair or replace the defective article at its discretion without charge.
- Página 6 KingPin 2,4,&5 OUTILS 1 clé de 22 mm (7/8 po) 2 clés de 15 mm (9/16 po) Cet ensemble comporte un coude destiné à un attelage de 2 po. Pour les modèles pour 2 SANGLES ET BERCEAUX ou 4 vélos, il existe un coude...
- Página 7 DÉCROCHER L’ÉTRIER DE POSER LE COUDE. SÛRETÉ ET SORTIR LA Engager le coude entre les plaques d’articulation en GOUPILLE DE VERROUILLAGE alignant les trous. DES PLAQUES • Insérer un des boulons hexagonaux muni d’une rondelle. D’ARTICULATION. • Poser une deuxième rondelle et un écrou. METTRE EN PLACE LE BOULON DE BUTÉE ET SERRER avec les clés de SON MANCHON.
- Página 8 ENFILER LE COUDE DANS LE TUBE D’ATTELAGE. POSER LE GROS BOULON ET ENGAGER LA SA RONDELLE DE SÉCURITÉ. BROCHE DE SÛRETÉ SUR LE BOUT DU Enfiler le boulon par la droite du BOULON. tube d’attelage. SI LA ROUE DE SECOURS GÊNE, NE PAS INSTALLER CE PRODUIT! SERRER avec la clé...
- Página 9 CHARGER EN PREMIER LE VÉLO LE PLUS GRAND OU LE PLUS LOURD. Stabiliser le cadre du vélo • Toujours charger le dans le premier vélo en plaçant berceau. sa chaîne du côté opposé au véhicule. Disposer les vélos pour qu’ils •...
-
Página 10: Effectuer Les Vérifications De Sécurité
Yakima autorisera alors le dépositaire à retourner le produit. Si, après inspection, Yakima juge le produit défectueux, Yakima réparera ou remplacera le produit, à sa discrétion et sans frais. Le client devra assumer les frais de transport jusqu’à Yakima et Yakima assumera les frais de retour au client. Les retours non autorisés ne seront pas acceptés. -
Página 11: Compra Por Separado
Parte #8002588 AVISO IMPORTANTE! ES FUNDAMENTAL QUE TODAS LAS PARRILLAS Y ACCESORIOS YAKIMA ESTÉN BIEN COLOCADOS Y ASEGURADOS AL VEHÍCULO. UNA INSTALACIÓN DEFICIENTE PODRÍA RESULTAR EN ACCIDENTE AUTOMOVILÍSTICO Y PROVOCAR HERIDAS GRAVES O MUERTE A USTED O A TERCEROS. USTED ES RESPONSABLE DE ASEGURAR LAS PARRILLAS Y ACCESORIOS AL VEHÍCULO, VERIFICANDO UNIONES Y AMARRES ANTES DE USAR E INSPECCIONANDO EL AJUSTE DE... - Página 12 QUITE EL PERNO Y EL INSTALE LA ESPIGA. ALAMBRE DE CIERRE Introduzca la espiga en la placa del enganche, haciendo DE LA PLACA DEL coincidir los agujeros. ENGANCHE. • Instale uno de los tornillos hexagonales y una arandela plana. • Agregue una segunda arandela, coloque una tuerca.
-
Página 13: Extienda Los Brazos Del Portabicicletas
INSERTE EL MÁSTIL EN EL ENGANCHE DEL VEHÍCULO. INSTALE EL TORNILLO GRANDE COLOQUE EL CLIP DE Y LA ARANDELA DE CIERRE SEGURIDAD SOBRE EL EXTREMO EXPUESTO Instale el tornillo desde el lado DELTORNILLO. derecho del receptor. ¡SI LA RUEDA AUXILIAR INTERFIERE, NO UTILICE ESTE PRODUCTO! AJUSTE CON LLAVE DE 7/8"... - Página 14 CARGUE PRIMERO LA BICICLETA MÁS GRANDE O MÁS PESADA. Estabilice el • Siempre cargue la cuadro de la primera bicicleta bicicleta en con la cadena la cuna. hacia afuera del vehículo. Arregle las • Empuje las cunas bicicletas para contra el tener buena estabilizador.
-
Página 15: Verifique La Seguridad
Yakima, ni daños resultantes de uso inadecuado, accidentes o alteraciones. El comprador reconoce que Yakima no tiene ningún control sobre la forma en que sus productos han sido afianzados a los vehículos o sobre la fijación de otros artículos a los productos Yakima . Por lo tanto, Yakima no asume responsabilidad alguna por daños a la propiedad resultantes de una fijación mal hecha del uso de sus productos.