Tabla de contenido
Publicidad
Idiomas disponibles
Idiomas disponibles
Enlaces rápidos
OPERATING
INSTRUCTION MANUAL
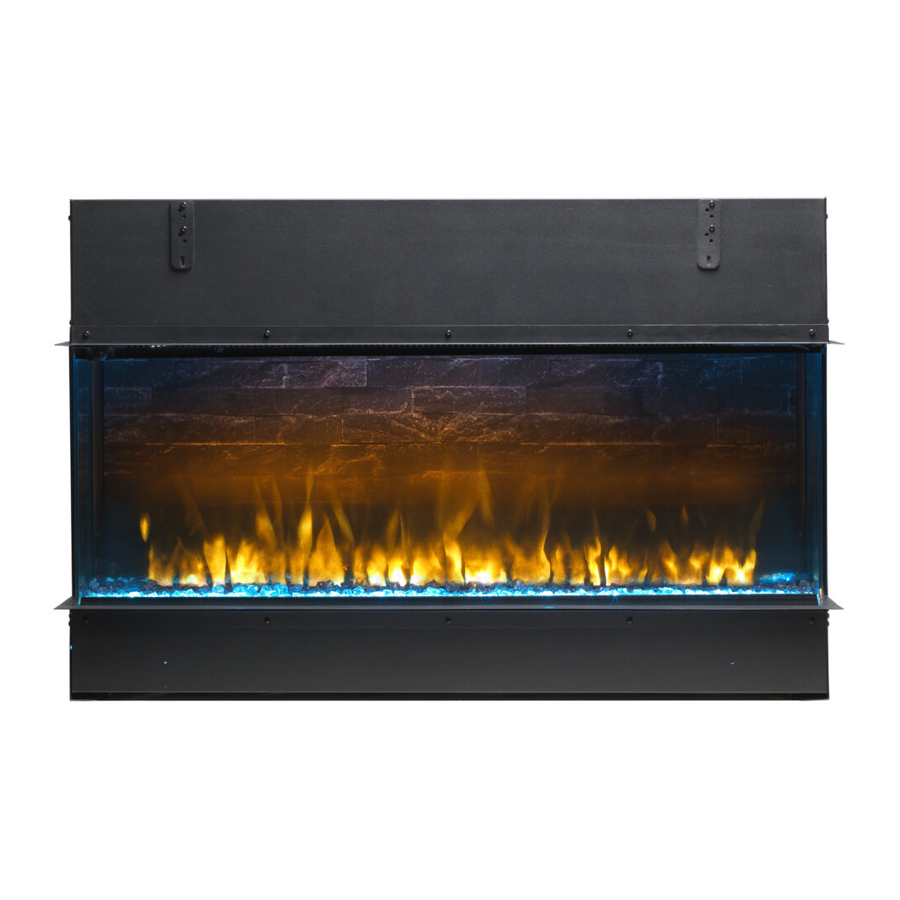
Vivente Landscape Electric Fire
Models: V VT7 5 , V VT100, VVT150
EN
EN: This product is only suitable for well insulated rooms or occasional use. FR : Ce foyer ne peut être utilisé que dans des pièces bien
aérées ou ne peut être utilisé qu'occasionnellement. DE: Dieses Produkt ist nur für gut isolierte Räume oder gelegentlichen Gebrauch
geeignet. IT: Questo prodotto è idoneo soltanto per stanze ben coibentate e per un uso occasionale. ES: este producto solo es adecuado
para espacios bien aislados o para uso ocasional. PT: Este produto só é adequado para espaços devidamente isolados ou para utilização
ocasional. NL: Dit product is enkel geschikt voor goed geventileerde kamers of voor occasioneel gebruik. PL: Produkt ten jest odpowiedni
wyłącznie do dobrze odizolowanych miejsc lub do okazjonalnego użytku. NO: Dette produktet egner seg kun for godt isolerte rom eller
sporadisk bruk. DK: Dette produkt er udelukkende egnet til velisolerede rum eller lejlighedsvis brug. TR: Bu ürün yalnızca iyi yalıtılmış odalar
veya ara sıra kullanım için uygundur.
The product complies with the European Safety Standards and the European Standard Electromagnetic Compatibility (EMC)
These cover the essential requirements of EEC Directives
FR
DE
IT
ES
PT
08/54579/0 ISSUE 2 OCN -----
Publicidad
Tabla de contenido

Manuales relacionados para Dimplex Vivente Landscape Electric Fire VVT75


Resumen de contenidos para Dimplex Vivente Landscape Electric Fire VVT75
- Página 1 OPERATING INSTRUCTION MANUAL Vivente Landscape Electric Fire Models: V VT7 5 , V VT100, VVT150 EN: This product is only suitable for well insulated rooms or occasional use. FR : Ce foyer ne peut être utilisé que dans des pièces bien aérées ou ne peut être utilisé...
-
Página 2: Important Safety Advice
CAUTION: Please read this information guide carefully to be able to safely install, use and maintain your product. Important Safety Advice When using electrical appliances, basic precautions should always be followed to reduce the risk of fire, electrical shock and injury to persons, including the following: If the appliance is damaged, check with the supplier before installation and operation. -
Página 3: Dimplex Vivente Electric Fire
Dimplex Vivente Electric Fire Models: VVT 75 , V V T1 0 0 , V V T1 5 0 Thank you for choosing a Dimplex electric fire. General Information CAUTION: Ensure installation does not allow fireplace to be in direct contact with building vapour barrier or insulation and meets all local building code. -
Página 4: Installation Instructions
Installation Instructions Step 1: Choosing Installation Type The Vivente can be configured in 4 different ways: • Single-sided – Front glass only (see Fig 1a) • Two-sided Right (see Fig 1b) • Two-sided Left (see Fig 1c) • Three-sided (see Fig 1d). The Vivente is supplied as a Three-sided configuration. - Página 5 Fitting panel – After Installation The Back Panel can also be change after the product has been installed, a person of suitable competency is required to carry out this task. Please follow the steps below. 1. Unplug product from Power Supply and remove front trim on unit. See Fig. 2 2.
-
Página 6: Operation And Use
3.Build the finished wall up against the appliance using the glass trims as a guide. The finished wall should be built in a way that allows the power supply to be accessible after installation. It is recommended to leave 150mm of clearance area directly above the product for ventilation purposes. - Página 7 On this setting SmartSense will only switch the flame effect when it detects movement between the hours of 5-11pm, so if you enter the room during the day the fire will not react. However in the evening, your Dimplex fire will instantly switch on your flame effect – remembering your last setting.
- Página 8 There are seven settings available on the onboard controls. (Display shows "AMB1" to "AMB7") "AMB8" is a customisable mood setting that is available via the Dimplex Flame Connect App. Please Note: "-F6-" is not an available setting when in "AMB6", "AMB7"...
-
Página 9: Remote Control
Remote control The fireplace is supplied with a remote control. Operating Instructions using REMOTE CONTROL - See Figure 17 Icon Display Function Description Press Once to turn the product on. ("ON") Press a second time to put the product into standby. ("ST.BY" is shown, then "." is displayed "FIRE"... -
Página 10: Onboard Controls
Product Features Overview Function Onboard Controls Remote Control App Control Standby ✓ ✓ ✓ Temperature Adjustment ✓ ✓ ✓ (15º C – 32º C) Heat Disable ✓ Heater Mode (ECO, Boost ✓ Frost protection, fan, etc.) Flame Intensity ✓ ✓ ✓... - Página 11 The partially reflective glass should be completely dried with a lint free cloth to prevent water spots. To prevent scratching, do not use abrasive cleaners. CAUTION: Assembly, installation and repair of this heater must be carried out by Dimplex or its authorised agent.
-
Página 12: Additional Information
Additional Information After Sales Service Your product is guaranteed for one year from the date of purchase. Within this period, we undertake to repair or exchange this product free of charge provided it has been installed and operated in accordance with these instructions. Your rights under this guarantee are additional to your statutory rights, which in turn are not affected by this guarantee. - Página 13 ATTENTION : Veuillez lire attentivement ces informations pour pouvoir installer, utiliser et entretenir votre foyer en toute sécurité. Conseils importants concernant la sécurité Lorsque vous utilisez des appareils électriques, des précautions fondamentales doivent toujours être suivies afin de minimiser les risques d'incendie, d’électrocution et de blessures, notamment : Si l'appareil est endommagé, consultez le fournisseur avant toute installation et utilisation...
-
Página 14: Foyer Électrique Dimplex Vivente
Foyer électrique Dimplex Vivente Modèles : VV T 7 5, V V T1 0 0 , V V T1 5 0 Merci d'avoir choisi un foyer électrique Dimplex. Informations générales ATTENTION : Veillez à ce que l'installation soit telle que le foyer ne puisse toucher le pare-vapeur ou l'isolation du bâtiment, et respecte tous les codes locaux du bâtiment. - Página 15 Instructions d'installation Étape 1 : Choix du type d'installation Le Vivente peut être installé de 4 manières différentes : • Une seule face - Verre frontal uniquement (voir Fig 1a) • Deux côtés, droite (voir Fig 1b) • Deux côtés, gauche (voir Fig 1c) •...
- Página 16 Montage du panneau - Après installation Le panneau arrière peut également être changé après l'installation du produit, une personne de compétence appropriée est requise pour effectuer cette tâche. Veuillez suivre les étapes ci-dessous. 1. Débranchez le foyer de l'alimentation électrique et retirez la garniture frontale. Voir Fig 2 2.
-
Página 17: Fonctionnement Et Utilisation
Il est recommandé de laisser 150 mm de dégagement au-dessus de l’appareil à des fins de ventilation. (Fig 12) Ce dégagement peut être situé derrière la surface du mur fini Le produit ne doit pas être collé avec du silicone ou de l'adhésif, car le débit d'air peut en être restreint. - Página 18 17 h et 23 h ; donc si vous entrez dans la pièce pendant la journée, le foyer ne réagira pas. Cependant, le soir, votre foyer Dimplex déclenchera instantanément votre effet de flammes - en se rappelant votre dernier réglage.
- Página 19 « AMB1 » à « AMB7 ») « AMB8 » est un paramètre d'atmosphère personnalisable via l'application Dimplex Flame Connect. Veuillez noter : « -F6- » n'est pas un paramètre utilisable en atmosphère AMB6, AMB7 ou AMB8.
-
Página 20: Télécommande
Télécommande Le foyer est livré avec une télécommande. Mode d'emploi de la TÉLÉCOMMANDE - Voir Fig 17 Icône Pupitre Fonction Description Appuyez une fois pour allumer le foyer. (« ON ») « FIRE Appuyez une seconde fois pour mettre le foyer en veille. (« ST.BY » s'affiche, puis « . » pour Allumage/ »... -
Página 21: Application Pour Smartphone
Aperçu des fonctions du foyer Boutons sur le foyer Fonction Télécommande Bouton de l’application lui-même Veille ✓ ✓ ✓ Réglage de la température ✓ ✓ ✓ (15 - 32 °C) Couper le chauffage ✓ Mode Appareil de chauffage (ECO, Boost, Protection ✓... - Página 22 ATTENTION : Le montage, l'installation et la réparation de cet appareil de chauffage, doivent être entrepris par Dimplex ou l’un de ses agents agréés. ATTENTION : Nous recommandons de faire vérifier annuellement cet appareil par un électric-...
-
Página 23: Autres Informations
Autres informations Service après-vente Votre produit est garanti un an à compter de la date d'achat. Durant cette période, nous nous engageons à réparer ou échanger ce produit gratuitement, à condition qu'il ait été installé et utilisé conformément à ces instructions. Vos droits en vertu de cette garantie s'ajoutent à vos droits statutaires, lesquels, à... -
Página 24: Wichtige Sicherheitshinweise
ACHTUNG: Bitte lesen Sie dieses Informationshandbuch sorgfältig durch, um Ihr Produkt sicher installieren, verwenden und warten zu können. Wichtige Sicherheitshinweise Bei der Verwendung elektrischer Geräte sind grundlegende Vorsichtsmaßnahmen immer zu beachten, um das Risiko von Feuer, Stromschlag und Verletzungen von Personen zu verringern, einschließlich der folgenden: Wenn das Gerät beschädigt ist, wenden Sie sich an den Lieferanten, bevor sie es installieren und in Betrieb nehmen. -
Página 25: Dimplex Vivente Elektrisches Feuer
Dimplex Vivente Elektrisches Feuer Modelle: V VT 7 5, V V T1 00 , V V T 1 50 Vielen Dank, dass Sie sich für dieses elektrische Feuer von Dimplex entschieden haben. Allgemeine Informationen VORSICHT: Stellen Sie sicher, dass die Installation des Kamins keinen direkten Kontakt mit der Dampfsperre oder Isolierung des Gebäudes zulässt und allen örtlichen Bauvorschriften entspricht. - Página 26 Technische Informationen Wärmeleistung 230 V 240 V Nennwärmeleistung Mindestwärmeleistung Maximale Dauerwärmeleistung Hilfsstromverbrauch Im Standby-Modus 0.49 0.49 mit elektronischer Raumtemperaturregelung. Installationsanweisungen Schritt 1: Auswählen des Installationstyps Der Vivente kann auf 4 verschiedene Arten konfiguriert werden: • Einseitig – Nur Frontscheibe (siehe Abb. 1a) •...
-
Página 27: Elektrische Anforderungen
Einsetzen des Paneels – Vor der Installation (empfohlen) 1. Entfernen Sie die Seitenhalterung wie in Abb. 4 gezeigt. 2. Mit der Seitenhalterung kann die Rückwand herausgenommen werden. Führen Sie den unteren Teil der Seitenhalterung in die Aussparung des Rückpaneels ein und schieben Sie das Rückpaneel heraus (Abb. - Página 28 1. Erstellen Sie anhand der Produktabmessungen (Abb. 11) eine geeignete Struktur, in die das Produkt passt. Stellen Sie sicher, dass sich das Produkt nach der Installation innerhalb von 1 m Entfernung von einer Steckdose befindet. Weitere Informationen finden Sie oben im Abschnitt Elektrische Anforderungen.
- Página 29 Betrieb und Nutzung WARNUNG: Die Nichtbeachtung dieser Bedienungsanleitung kann zu Verletzungen und/oder Schäden führen. Vielen Dank, dass Sie sich für das Vivente entschieden haben. Wir wünschen Ihnen viel Freude mit Ihrem neuen elektrischen Feuer. Bitte nehmen Sie sich ein paar Minuten Zeit, um diese Anleitung zu lesen.
- Página 30 Bei dieser Einstellung schaltet SmartSense den Flammeneffekt nur dann ein, wenn es zwischen 17:00 und 23:00 Uhr eine Bewegung feststellt. Wenn Sie also tagsüber den Raum betreten, reagiert das Feuer nicht. Am Abend jedoch schaltet Ihr Dimplex-Feuer augenblicklich Ihren Flammeneffekt ein – und erinnert sich dabei an Ihre letzte Einstellung.
- Página 31 „AMB“: Die Umgebungseinstellung kann dann mit den Tasten „+“ oder „-“ angepasst werden. Auf den integrierten Steuerelementen stehen sieben Einstellungen zur Verfügung. (Das Display zeigt „AMB1“ bis „AMB7“.) „AMB8“ ist eine anpassbare Stimmungseinstellung, die über die Dimplex Flame Connect-App verfügbar ist. Bitte beachten Sie: „-F6-“ ist keine verfügbare Einstellung, wenn Sie sich in „AMB6“, „AMB7“...
- Página 32 Fernbedienung Der Kamin wird mit einer Fernbedienung geliefert. Bedienungsanleitung für die FERNBEDIENUNG – Siehe Abbildung 17 Display Funktion Beschreibung Sym- Einmal drücken, um das Produkt einzuschalten. („ON“) Drücken Sie ein zweites Mal, um das Produkt in den Standby-Modus zu versetzen. („ST. „FIRE“/ Power / BY“...
- Página 33 Übersicht der Produktmerkmale Integrierte Steuerele- Funktion Fernbedienung App-Bedienung mente Standby ✓ ✓ ✓ Temperatureinstellung ✓ ✓ ✓ (15 bis 32 ⁰C) Heizung deaktivieren ✓ Heizmodus (ECO, Boost, ✓ Frostschutz, Nur Lüfter etc.) Flammenintensität ✓ ✓ ✓ Lautstärkeeinstellung ✓ ✓ ✓ Rücklauf-Timer ✓...
- Página 34 Tuch abgetrocknet werden, um Wasserflecken zu vermeiden. Um Kratzer zu vermeiden, verwenden Sie bitte keine scheuernden Reinigungsmittel. VORSICHT: Die Montage, Installation und Reparatur dieses Heizgeräts muss von Dimplex oder seinem autorisierten Vertreter durchgeführt werden. VORSICHT: Wir empfehlen, dieses Heizgerät jährlich von einem qualifizierten Elektriker auf...
- Página 35 Zusatzinformationen Kundendienst nach dem Kauf Ihr Produkt hat eine Garantie von einem Jahr ab Kaufdatum. Innerhalb dieses Zeitraums verpflichten wir uns, dieses Produkt kostenlos zu reparieren oder auszutauschen, sofern es gemäß diesen Anweisungen installiert und betrieben wurde. Ihre Rechte aus dieser Garantie ergänzen Ihre gesetzlichen Rechte, die wiederum von dieser Garantie nicht berührt werden.
-
Página 36: Importante Avviso Di Sicurezza
ATTENZIONE: leggere questa guida informativa attentamente per essere in grado di installare, utilizzare e mantenere il prodotto in modo sicuro. Importante avviso di sicurezza Quando vengono utilizzati dispositivi elettrici, dovrebbero essere sempre prese precauzioni di base per ridurre il rischio di incendio, scossa elettrica e lesioni a persone, tra cui quanto segue: Qualora l’apparecchiatura sia danneggiata, contattare il fornitore prima dell’installazione e del funzionamento. -
Página 37: Informazioni Generali
Caminetto elettrico Vivente di Dimplex Modelli: VV T 7 5, V V T1 0 0 , V V T 1 5 0 Vi ringraziamo per aver scelto un caminetto elettrico Dimplex. Informazioni generali ATTENZIONE: assicurarsi che l’installazione non permetta al caminetto di entrare direttamente a contatto con una barriera al vapore o materiale isolante e soddisfi tutti le normative edilizie locali. -
Página 38: Istruzioni Di Installazione
Istruzioni di installazione Passaggio 1: scegliere il tipo di installazione Vivente può essere configurato in 4 modalità diverse: • con un solo lato - solo vetro anteriore (vedere Fig. 1a) • con due lati, di cui uno a destra (vedere Fig. 1b) •... - Página 39 Montare il pannello – Dopo l’installazione Il Pannello Posteriore può essere modificato anche dopo che il prodotto è stato installato, per svolgere questo compito è richiesta una persona di adeguata competenza. Si prega di seguire i passaggi seguenti. 1. Disconnettere il prodotto dall’alimentazione e rimuovere l’inserto anteriore sull’unità. Vedere Fig. 2 2.
-
Página 40: Funzionamento E Utilizzo
3. Costruire la parete a ridosso dell’apparecchiatura utilizzando gli inserti dei vetri come guida. La parete dovrebbe essere costruita in modo da permettere un accesso all’alimentazione a seguito dell’installazione. Si raccomanda di lasciare uno spazio libero di 150mm direttamente al di sopra del prodotto a scopo di aerazione. - Página 41 In questa impostazione SmartSense avvia l’effetto fiamma solo quando rileva un movimento tra le 17.00 e le 23.00, di conseguenza entrare nella stanza durante le altre ore del giorno non farà attivare la fiamma. Di sera, tuttavia, il caminetto Dimplex attiverà immediatamente l’effetto fiamma, avendo memorizzato l’ultima impostazione.
-
Página 42: Modalità Utente
"-". Ci sono sette impostazioni disponibili sui comandi sul dispositivo. (Il display mostra da "AMB1" a "AMB7") "AMB8” è un’impostazione di modalità personalizzabile disponibile attraverso l'applicazione Flame Connect di Dimplex. Importante: "-F6-" non è un’impostazione disponibile nelle modalità "AMB6", "AMB7" o "AMB8". -
Página 43: Telecomando
Telecomando Il caminetto è provvisto di un telecomando. Istruzioni d’uso per utilizzare il TELECOMANDO - Vedere Figura 17 Display Funzione Descrizione Ico- Premere una volta per accendere il prodotto. ("ON") Premere una seconda volta per far entrare il prodotto in standby. (Viene quindi visualizzato "FIRE"... -
Página 44: Codici Di Errore
Sommario delle caratteristiche del prodotto Comandi sull’apparec- Funzione Telecomando Comandi tramite app chiatura Standby ✓ ✓ ✓ Regolazione della temperatura ✓ ✓ ✓ (15 - 32ºC) Disattiva emissione di calore ✓ Modalità riscaldamento (ECO, Boost, Protezione ✓ antigelo, Solo ventola,ecc.) Intensità... - Página 45 Per evitare graffi, non utilizzare detergenti abrasivi. ATTENZIONE: l’installazione, la riparazione e l’assemblaggio di questa stufa devono essere effettuati da Dimplex o da un agente autorizzato. ATTENZIONE: per ragioni di sicurezza consigliamo un controllo annuale della stufa effettuato da un elettricista qualificato.
-
Página 46: Informazioni Aggiuntive
Informazioni aggiuntive Servizio post-vendita Il vostro prodotto ha una garanzia di un anno a partire dalla data di acquisto. In questo periodo, ci impegniamo a riparare o sostituire il prodotto gratuitamente, purché sia installato e fatto funzionare in conformità con queste istruzioni. I vostri diritti ai sensi della presente garanzia sono aggiuntivi rispetto ai diritti del consumatore, che a loro volta non risentono della presente garanzia. -
Página 47: Consejo Importante De Seguridad
PRECAUCIÓN: Por favor, lea esta guía con atención para poder instalar, utilizar y realizar las tareas de mantenimiento de su producto de forma segura. Consejo importante de seguridad: Cuando utilice aparatos eléctricos, debe seguir siempre unas medidas de prevención básicas para reducir el riesgo de incendio, descarga eléctrica o daños a personas. -
Página 48: Chimenea Eléctrica Vivente De Dimplex
Chimenea eléctrica Vivente de Dimplex Modelos: V VT 7 5, V V T1 0 0 , V V T 1 5 0 Gracias por escoger una chimenea eléctrica Dimplex. Información general PRECAUCIÓN: Asegúrese de que la instalación no permita que la chimenea entre en contacto directo con la barrera de vapor o el aislamiento del edificio, y de que cumpla con todos los códigos... - Página 49 Instrucciones de instalación Paso 1: escoger el tipo de instalación La Vivente se puede configurar de 4 formas distintas: • De un solo lado: solo cristal frontal (ver Fig. 1a) • De dos lados, por la derecha (ver Fig. 1b) •...
-
Página 50: Paso 3: Instalar El Producto
3. Extraiga los tornillos de fijación del lecho y retire el lecho (Fig. 7). 4. Retire los dos cristales laterales. Muévalos por la parte inferior y deslícelos hasta extraerlos por completo. Guárdelos en un lugar seguro (Fig. 8). 5. Retire la pantalla interna de plástico inclinándola desde la base (Fig. 9). 6. -
Página 51: Paso 4: Montar El Lecho
Paso 4: Montar el lecho Con el producto ha recibido diversos materiales para crear el lecho de forma que pueda escoger el aspecto que desee. Para mejorar el efecto, dispone de un lote de leños de cerámica de alta calidad. Tenga mucho cuidado cuando los manipule para que no se le caigan ni se dañen, ya que son frágiles. - Página 52 5 y las 11 pm; por lo tanto, si accede a la habitación a lo largo del día, la chimenea no reaccionará. No obstante, la chimenea Dimplex se activará instantáneamente con el efecto de las llamas en la última configuración que estableció.
-
Página 53: Icono Función
7 configuraciones distintas en los botones. La pantalla se las irá mostrando desde “AMB1” hasta “AMB7”. Además, dispone de “AMB8”, una configuración personalizable, con la aplicación Dimplex Flame Connect. Nota: la configuración “F6” no está disponible en los modos “AMB6”, “AMB7” y “AMB8”. -
Página 54: El Mando A Distancia
El mando a distancia La chimenea viene con un mando a distancia. Instrucciones de uso con mando a distancia (consulte Fig. 17). Icono Pantalla Función Descripción Presiónelo una vez para encender el aparato (“ON”). Presiónelo una segunda vez para ponerlo en espera (verá el texto “ST.BY” y, a continuación, "FIRE"... -
Página 55: Aplicación Para Móviles
Repaso de características del producto Función Botones Mando a distancia Aplicación Modo de espera ✓ ✓ ✓ Ajuste de temperatura ✓ ✓ ✓ (15º C – 32º C) Desactivación de calefacción ✓ Modo de calefacción (ECO, aumento, Protección ✓ contra el frío, Solo ventilador etc.) Intensidad de llamas ✓... -
Página 56: Mantenimiento
Seque este cristal completamente con un paño sin pelusas para eliminar las marcas de agua. Para evitar arañazos, no utilice limpiadores abrasivos. PRECAUCIÓN: deberá ser Dimplex o un agente autorizado quien se encargue del montaje, instalación y reparación de esta estufa. -
Página 57: Información Adicional
Información adicional Servicio posventa El producto cuenta con una garantía de un año desde la fecha de compra. Durante este período, nos encargaremos de repararlo o cambiarlo sin coste alguno siempre que se haya instalado y utilizado siguiendo estas instrucciones. Los derechos que le otorga esta garantía se suman a los derechos que le reconoce la legislación, que no se verán afectados por esta. - Página 58 ATENÇÃO: Leia atentamente o presente guia informativo para poder instalar, utilizar e manter este aparelho em segurança. Indicação importante em matéria de segurança Durante a utilização de aparelhos elétricos, devem ser sempre respeitadas as precauções básicas para reduzir o risco de incêndio, eletrocussão e dano pessoal, nomeadamente: Se o aparelho estiver danificado, consulte o fornecedor antes da instalação e operação.
-
Página 59: Lareira Elétrica Vivente Da Dimplex
Lareira Elétrica Vivente da Dimplex Modelos: V VT 7 5, V V T1 0 0 , V V T 1 5 0 Obrigado por ter escolhido uma lareira elétrica da Dimplex. Informações gerais ATENÇÃO: Certifique-se de que a instalação não permite que a lareira esteja em contacto direto com a barreira de vapor ou isolamento do edifício e cumpre todos os regulamentos do código de... -
Página 60: Instruções De Instalação
Instruções de instalação 1.º passo: Escolha do tipo de instalação A Vivente pode ser configurada de 4 formas diferentes: • Face única – Apenas vidro da frente (ver Fig. 1a) • Duas faces – Direita (ver Fig. 1b) • Duas faces – Esquerda (ver Fig. 1c) •... -
Página 61: Requisitos Elétricos
3. Retirar os parafusos de fixação do leito de combustível e, seguidamente, retirar o leito de combustível. (Fig. 7) 4. Retirar ambos os vidros laterais deslocando-os para fora na parte inferior, e fazendo-os deslizar para fora para os retirar. Guardá-los em local seguro. (Fig. 8). 5. -
Página 62: º Passo: Montagem Do Leito De Combustível
4.º passo: Montagem do leito de combustível Foi disponibilizada uma gama de material para o leito de combustível que permite a escolha do aspeto pretendido. Um conjunto de toros de cerâmica de alta qualidade potencia o efeito desta lareira. Há que ter cuidado ao manusear estes toros para evitar que caiam ou façam fricção entre si, pois ficam facilmente marcados. - Página 63 Com esta regulação, o SmartSense só acionará o efeito de chama quando detetar movimento no período entre as 05h00 e as 23h00. Contudo, à noite, a sua lareira Dimplex ligará imediatamente o seu efeito de chama – recordando a última regulação que foi feita.
- Página 64 "-". Existem sete regulações disponíveis nos comandos do aparelho. (O visor mostra "AMB1" a "AMB7") "AMB8" é uma regulação de ambiente personalizável, disponível através da aplicação Dimplex Flame Connect. Nota: "-F6-" não está disponível como regulação se estiver definido "AMB6", "AMB7" ou "AMB8".
-
Página 65: Telecomando
Telecomando A lareira é fornecida com um telecomando. Instruções de funcionamento utilizando o TELECOMANDO – Ver Fig. 17 Ícone Visor Função Descrição Pressionar uma vez para ligar o produto. ("ON") Pressionar uma segunda vez para colocar o produto em modo de espera. ("ST.BY" aparece, "FIRE"... -
Página 66: Aplicação Para Smartphone
Resumo das funcionalidades do produto Controlo através da apli- Função Comandos no aparelho Telecomando cação Modo de espera ✓ ✓ ✓ Regulação da temperatura ✓ ✓ ✓ (15º C – 32º C) Desativar aquecimento ✓ Modo do aquecedor (ECO, Boost, Proteção anti- ✓... - Página 67 Códigos de falhas Visor do Descrição Ação aparelho Erro no sensor da sala (NTC) Contactar o vendedor e indicar este código de CD20 erro. O NTC interno mede temperaturas elevadas no interior do Desligar a unidade da fonte de alimentação para CD03 produto.
-
Página 68: Informações Complementares
Em caso de necessidade de informação pós-venda ou de assistência relativamente a este produto, visitar www.dimplex.co.uk e selecionar “Customer Support” (assistência ao cliente) ou ligar para o nosso serviço de apoio pelo +44 (0) 8448793588 (Reino Unido) ou +353 (0) 18428222 (República da Irlanda). - Página 69 Fig. 1a Fig. 1b Fig. 1c Fig. 1d Fig. 2 Fig. 3a...
- Página 70 Fig. 4 Fig. 3b Fig. 6 Fig. 5 Fig. 8 Fig. 7...
- Página 71 Fig. 9 Fig. 10a Fig. 10b...
- Página 72 Fig. 11 X + 30mm MODEL ‘X’ ‘X’ V V T7 5 764mm V V T1 0 0 1014mm V V T1 5 0 1514mm 200 - 800...
- Página 73 Fig. 12 Fig. 13a 150mm 200 - 800mm Fig. 13b Fig. 13c Fig. 14...
- Página 74 Fig. 15 Fig. 16 Fig. 17...
- Página 75 VVT75...
- Página 76 VVT100...
- Página 77 VVT150...
- Página 78 Fig. 18...