Publicidad
CONTACT US FIRST
CONTACT US FIRST
sauder.com
sauder.com
sauder.com
BEFORE MAKING ANY RETURNS TO THE STORE.
BEFORE MAKING ANY RETURNS TO THE STORE.
sauder.com/service
Visit
Prefer the phone? Give us a ring at
Customer Service is available Monday-Friday - 9 a.m. to 5:30 p.m. EST (except holidays)
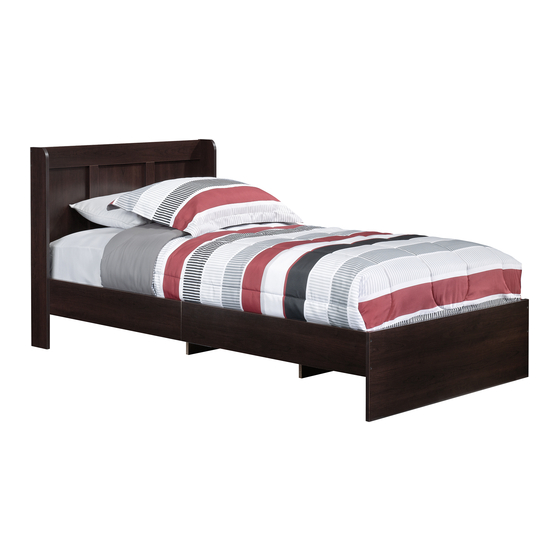
Twin Platform Bed
with Headboard
Parklane Collection | Model 414129
Share your journey!
to order replacement parts, view video assembly tips, or chat with a live rep.
1-800-523-3987
.
WARNING
CHOKING HAZARD - Small Parts
Not for children under 3 years.
Adult assembly required.
NOTE: THIS INSTRUCTION
BOOKLET CONTAINS IMPORTANT
SAFETY INFORMATION.
PLEASE READ AND KEEP FOR
FUTURE REFERENCE.
English pg 1-20
Français pg 21-23
Español pg 24-26
Lot # 530074
05/28/19
Purchased: __________________
Publicidad
Tabla de contenido

Manuales relacionados para Sauder Parklane 414129


Resumen de contenidos para Sauder Parklane 414129
- Página 1 CONTACT US FIRST CONTACT US FIRST sauder.com sauder.com sauder.com BEFORE MAKING ANY RETURNS TO THE STORE. BEFORE MAKING ANY RETURNS TO THE STORE. sauder.com/service Visit to order replacement parts, view video assembly tips, or chat with a live rep. 1-800-523-3987 Prefer the phone? Give us a ring at Customer Service is available Monday-Friday - 9 a.m.
- Página 2 Table of Contents Assembly Tools Required Part Identifi cation Hardware Identifi cation No. 2 Phillips Screwdriver Tip Shown Actual Size Assembly Steps 5-20 Français 21-23 Español 24-26 Skip the power trip. This time. Warranty Page 2 414129 www.sauder.com/service...
-
Página 3: Part Identifi Cation
SMALL SUPPORT (4) E3 HEADBOARD TOP (1) HEADBOARD (1) LARGE SUPPORT (2) SLAT (2) LEFT HEADBOARD RAIL (1) CENTER BACK (1) N2 LEFT FOOTBOARD RAIL (1) RIGHT HEADBOARD RAIL (1) O2 RIGHT FOOTBOARD RAIL (1) LEFT/RIGHT BACK (2) www.sauder.com/service 414129 Page 3... - Página 4 FELT DISC CARD - 2 METAL PIN - 8 12S BROWN 1" FLAT HEAD SCREW - 52 BLACK 9/16" LARGE HEAD SCREW - 36 101S BLACK 1-1/2" FLAT HEAD SCREW - 16 113S BLACK 1-15/16" FLAT HEAD SCREW - 20 Page 4 414129 www.sauder.com/service...
- Página 5 Look for this icon. It means a Step 1 video assembly tip is available at www.sauder.com/service/tips Assemble your unit on a carpeted fl oor or on the empty carton å to avoid scratching your unit or the fl oor. Push four HIDDEN CAMS (1F) into the RAILS (N2, O2, T, and U).
- Página 6 NOTE: Start each SCREW a few turns before å tightening any of them. BROWN 1" FLAT HEAD SCREW (12 used in this step) Finished edge These holes must be here. These holes must be here. The HIDDEN CAM must be here. Page 6 414129 www.sauder.com/service...
- Página 7 LARGE SUPPORTS (Y). NOTE: Start each SCREW a few turns before tightening å any of them. BROWN 1" FLAT HEAD SCREW (20 used in this step) Unfi nished edge Unfi nished edge www.sauder.com/service 414129 Page 7...
- Página 8 NOTE: Start each SCREW a few turns before tightening any å of them. BROWN 1" FLAT HEAD SCREW (8 used in this step) Surface with more holes Curved edge The HIDDEN CAM must be here. Curved edge The HIDDEN CAM must be here. Page 8 414129 www.sauder.com/service...
- Página 9 FLAT HEAD SCREWS (12S). NOTE: Start each SCREW a few turns before tightening å any of them. BROWN 1" FLAT HEAD SCREW (12 used in this step) These holes must be here. These holes must be here. www.sauder.com/service 414129 Page 9...
- Página 10 Step 6 Peel the FELT DISCS from the FELT DISC CARDS (1M) å and stick them onto the edges of the ENDS (A3 and B3), LARGE SUPPORTS (Y), and FOOTBOARD (R) as shown. Long fi nished edge Page 10 414129 www.sauder.com/service...
- Página 11 RAILS (N2 and O2). Use four BLACK 1-15/16" FLAT HEAD SCREWS (113S). NOTE: Start each SCREW a few turns before å tightening any of them. 113S BLACK 1-15/16" FLAT HEAD SCREW (4 used in this step) Long fi nished edge Finished edge Finished edge www.sauder.com/service 414129 Page 11...
- Página 12 Use four BLACK 1-15/16" FLAT HEAD SCREWS (113S). NOTE: The LARGE SUPPORT (Y) should be off the ground and å facing toward the FOOTBOARD (R). 113S BLACK 1-15/16" FLAT HEAD SCREW (4 used in this step) Page 12 414129 www.sauder.com/service...
- Página 13 Fasten the HEADBOARD (S) to the LEFT HEADBOARD RAIL (T). å Use two BLACK 1-15/16" FLAT HEAD SCREWS (113S). Finished edge with holes The LARGE SUPPORT (Y) should be here. 113S BLACK 1-15/16" FLAT HEAD SCREW (4 used in this step) www.sauder.com/service 414129 Page 13...
- Página 14 Use two BLACK 1-15/16" FLAT HEAD SCREWS (113S). Fasten the SUPPORT (Q) to the SMALL SUPPORT (X) on the å RIGHT HEADBOARD RAIL (U). Use two BLACK 1-15/16" FLAT HEAD SCREWS (113S). 113S BLACK 1-15/16" FLAT HEAD SCREW (4 used in this step) Page 14 414129 www.sauder.com/service...
- Página 15 å Fasten the FOOTBOARD RAILS (N2 and O2) to the HEADBOARD RAILS (T and U). å Tighten two HIDDEN CAMS. NOTE: Be sure the WOOD DOWELS in the HEADBOARD RAILS insert into the å FOOTBOARD RAILS. www.sauder.com/service 414129 Page 15...
- Página 16 Use eight BLACK 9/16" LARGE HEAD SCREWS (1S). NOTE: The Z-PLATES will wrap around the bottom edges of å the RAILS (N2, O2, T, and U). BLACK 9/16" LARGE HEAD SCREW (8 used in this step) Page 16 414129 www.sauder.com/service...
- Página 17 HEADBOARD (S). Place the SLATS (I3) onto the METAL PINS (1R) in å the HEADBOARD (S). Insert four METAL PINS (1R) into the holes in the top å edges of the SLATS (I3). Finished surface www.sauder.com/service 414129 Page 17...
- Página 18 NOTE: Be sure the METAL PINS in the SLATS (I3) insert into å the HEADBOARD TOP. 113S BLACK 1-15/16" FLAT HEAD SCREW (4 used in this step) Edge without holes 113S F i n i s h e u r f a Page 18 414129 www.sauder.com/service...
- Página 19 BACKS (V). of the BACKS (V) last using fi rm Please do not remove. pressure. The two smaller holes in the edges of the BACKS (V) must line up over the ENDS (A3 and B3). www.sauder.com/service 414129 Page 19...
- Página 20 BLACK 1-1/2" FLAT HEAD SCREW (16 used in this step) These holes are closer together and must be here. NOTE: Do not put SCREWS into these two holes. These holes are closer together and must be here. Page 20 414129 www.sauder.com/service...
-
Página 21: Liste De Pièces
élément et conserver le livret pour future référence. EXTRÉMITÉ DROITE ..........1 EXCENTRIQUE ESCAMOTABLE .....4 Pour contacter Sauder EXTRÉMITÉ GAUCHE ..........1 15F CHEVILLE EN BOIS ...........2 en ce qui concerne cet DESSUS DE TÊTE DE LIT ........1 25F CHEVILLE BICAME ............2... - Página 22 REMARQUE : Il est préférable de donner quelques tours de REMARQUE : Le GRAND SUPPORT (Y) doit être hors du sol et tournevis à chaque VIS avant de les serrer toutes à bloc. dirigé vers le PIED DE LIT (R). Page 22 414129 www.sauder.com/service...
- Página 23 Fixer les PLAQUES EN Z (75G) aux TRAVERSES (N2, O2, T et U). Utiliser huit VIS TÊTE LARGE 14 mm NOIRES (1S). REMARQUE : Les PLAQUES EN Z seront enrobées les chants inférieurs des TRAVERSES (N2, O2, T et U). www.sauder.com/service 414129 Page 23...
-
Página 24: Plataforma De Cama Doble Con Cabecera
EXTREMO IZQUIERDO ..........1 15F PASADOR DE MADERA .........2 necesita ponerse en PANEL SUPERIOR DE CABECERA ....1 25F PASADOR DE DOS LEVAS ........2 contacto con Sauder en LISTÓN ................2 75G PLACA-Z ................2 cuanto a esta unidad, refi érase al número RIEL IZQUIERDO DEL PIE DE CAMA ..1 TARJETA CON TOPES DE FIELTRO .....2... - Página 25 NOTA: Comience a atornillar cada TORNILLO unas vueltas antes CABEZA PERDIDA de 49 mm (113S). de apretar cualquier tornillo fi rmemente. NOTA: El SOPORTE GRANDE (Y) debe estar fuera del suelo y orientado hacia el PIE DE CAMA (R). www.sauder.com/service 414129 Page 25...
- Página 26 Fije las PLACAS-Z (75G) a los RIELES (N2, O2, T y U). Utilice ocho TORNILLOS NEGROS DE CABEZA GRANDE de 14 mm (1S). NOTA: Las PLACAS-Z no deben extenderse más allá de los bordes inferiores de los RIELES (N2, O2, T y U). Page 26 414129 www.sauder.com/service...
-
Página 27: Garantie Limitée De 5 Ans
à compter de la date d'achat la première fois et qui sont signalés à Sauder dans les limites de couverture de la contre tout défaut de matériaux ou de fabrication des composantes de mobilier Sauder. -
Página 28: If You Need Assistance
Walmart.com in the product detail page. General Conformity Certifi cate 1. This certifi cate applies to the Sauder Woodworking Product identifi ed by this Instruction Book. 2. This certifi cate applies to compliance of this product with the CPSC Ban on Lead-Containing Paint (16 CFR 1303).