Publicidad
sauder.com
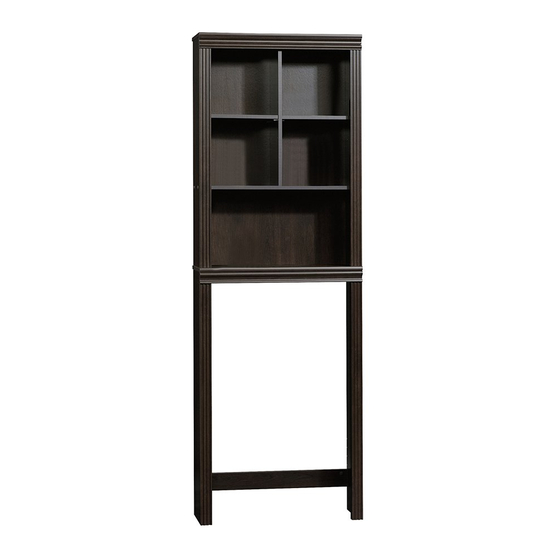
Etagere
Model 414573
Need help? Visit Sauder.com to view video assembly tips or chat with a live rep.
Prefer the phone? Call 1-800-445-1527.
Share your journey!
It's ok. We can't
pronounce it either.
NOTE: THIS INSTRUCTION
BOOKLET CONTAINS IMPORTANT
SAFETY INFORMATION.
PLEASE READ AND KEEP FOR
FUTURE REFERENCE.
English pg 1-22
Français pg 23-25
Español pg 26-28
Lot #: 501733
Date Purchased: __________________
03/29/17
Be sure to give us a ring before
making any returns. 1-800-445-1527
Publicidad
Tabla de contenido

Manuales relacionados para Sauder 414573


Resumen de contenidos para Sauder 414573
- Página 1 NOTE: THIS INSTRUCTION BOOKLET CONTAINS IMPORTANT SAFETY INFORMATION. PLEASE READ AND KEEP FOR Need help? Visit Sauder.com to view video assembly tips or chat with a live rep. FUTURE REFERENCE. Prefer the phone? Call 1-800-445-1527. English pg 1-22 Français pg 23-25 Español pg 26-28...
- Página 2 Assembly Tools Required Part Identifi cation No. 2 Phillips Screwdriver Tip Shown Actual Size Hardware Identifi cation Assembly Steps 5-22 Hammer Not actual size Français 23-25 Español 26-28 Skip the power trip. Safety 29-30 This time. Warranty Page 2 www.sauder.com 414573...
-
Página 3: Part Identifi Cation
LOWER RIGHT END (1) UPPER LEFT END (1) LOWER LEFT END (1) UPRIGHT (1) TOP (1) UPPER SHELF (1) SHELF (1) BACK (1) ADJUSTABLE SHELF (2) BRACE (1) UPPER END MOLDING (2) LOWER END MOLDING (2) MOLDING (2) 414573 www.sauder.com Page 3... - Página 4 RUBBER SLEEVE - 8 CAM COVER - 22 SCREW COVER CARD - 1 NAIL - 44 FURNITURE TIPPING RESTRAINT KIT - 2 BLACK 1-1/2" FLAT HEAD SCREW - 16 BLACK 1/2" PAN HEAD SCREW - 16 Page 4 www.sauder.com 414573...
- Página 5 Assemble your unit on a carpeted fl oor or on the å empty carton to avoid scratching your unit or the fl oor. Turn fourteen CAM SCREWS (2) into the å END MOLDINGS (L and M). (14 used) 414573 www.sauder.com Page 5...
- Página 6 å Fasten the UPPER END MOLDINGS (L) to the UPPER å ENDS (A and C). Tighten six HIDDEN CAMS. The arrow must point toward the edge of the board. (6 used) These surfaces should be even. Page 6 www.sauder.com 414573...
- Página 7 å Fasten the LOWER END MOLDINGS (M) to the LOWER å ENDS (B and D). Tighten eight HIDDEN CAMS. The arrow must point toward the edge of the board. (8 used) These surfaces should be even. 414573 www.sauder.com Page 7...
- Página 8 Do not stand the unit upright without the BACK fastened. The unit may collapse. BLACK 1-1/2" FLAT HEAD SCREW (2 used in this step) Finished edge Finished edge The larger space between the holes and short edge should be positioned here. Page 8 www.sauder.com 414573...
- Página 9 Fasten the UPPER LEFT END (C) to the UPPER SHELF (G). å Use two BLACK 1-1/2" FLAT HEAD SCREWS (10). BLACK 1-1/2" FLAT HEAD SCREW (2 used in this step) S u r f a c H I D D E N i t h o 414573 www.sauder.com Page 9...
- Página 10 Fasten the UPPER RIGHT END (A) to the UPPER SHELF (G). å Use two BLACK 1-1/2" FLAT HEAD SCREWS (10). BLACK 1-1/2" FLAT HEAD SCREW (2 used in this step) S u r f a c i t h H I D D E N Page 10 www.sauder.com 414573...
- Página 11 å Use eight BLACK 1/2" PAN HEAD SCREWS (11). NOTE: Be sure the ANGLE BRACKETS are even with the å edges of the MOLDINGS. BLACK 1/2" PAN HEAD SCREW (8 used in this step) (8 used) 414573 www.sauder.com Page 11...
- Página 12 Step 8 Fasten one of the MOLDINGS (N) to the TOP (F). Use four å BLACK 1/2" PAN HEAD SCREWS (11). BLACK 1/2" PAN HEAD SCREW (4 used in this step) Finished edge Page 12 www.sauder.com 414573...
- Página 13 Step 9 Fasten the TOP (F) to the UPPER ENDS (A and C) and å UPRIGHT (E). Use six BLACK 1-1/2" FLAT HEAD SCREWS (10). BLACK 1-1/2" FLAT HEAD SCREW (6 used in this step) 414573 www.sauder.com Page 13...
- Página 14 Turn four CAM SCREWS (2) into the SHELF (H). å Fasten the remaining MOLDING (N) to the SHELF (H). å Use four BLACK 1/2" PAN HEAD SCREWS (11). BLACK 1/2" PAN HEAD SCREW (4 used in this step) Finished edge Page 14 www.sauder.com 414573...
- Página 15 Fasten the SHELF (H) to the UPPER ENDS (A and C). Use å four BLACK 1-1/2" FLAT HEAD SCREWS (10). BLACK 1-1/2" FLAT HEAD SCREW (4 used in this step) i t h f a c S u r 414573 www.sauder.com Page 15...
- Página 16 NOTE: Be sure to tap NAILS into the holes that line up å over the UPPER SHELF (G). NAIL (44 used in this step) These holes will be used for the TIPPING RESTRAINT KITS. These holes must line up over the UPPER SHELF (G). Page 16 www.sauder.com 414573...
- Página 17 S u r f a c H I D D E N i t h S u r f a c H I D D E N i t h o 414573 www.sauder.com Page 17...
- Página 18 Step 14 Using your hammer, gently tap four TACK GLIDES (4) into å the bottom edges of the LOWER ENDS (B and D). Page 18 www.sauder.com 414573...
- Página 19 Push the RUBBER SLEEVES (6) over the METAL PINS (5). å Insert the METAL PINS into the hole locations of your choice in the UPPER ENDS (A and C) and UPRIGHT (E). Set the ADJUSTABLE SHELVES (J) onto the METAL PINS. (8 used) 414573 www.sauder.com Page 19...
- Página 20 Insert four HIDDEN CAMS (1) into the BRACE (K). å You may need to slightly widen the LOWER ENDS (B and D) to å The arrow must fasten the BRACE (K) to them. Tighten four HIDDEN CAMS. point toward the edge of the board. Page 20 www.sauder.com 414573...
- Página 21 Follow the instructions included in the KIT to fasten your unit å to the wall. Use the 5/8" screw through the small hole in a bracket and into the back edge of the TOP (F). Small hole 414573 www.sauder.com Page 21...
- Página 22 This completes assembly. Clean with your favorite furniture polish or a damp cloth. Wipe dry. å And to celebrate, why not share your success story? No load 10 lbs. 10 lbs. 20 lbs. total 20 lbs. (6 used) (22 used) Page 22 www.sauder.com 414573...
-
Página 23: Liste De Pièces
Modèle 414573 Étagère Utilisez les instructions d’ a ssemblage en français avec les NOUS SOMMES LA POUR VOUS AIDER! schémas étape par étape du manuel d’instruction en anglais. Nous faisons de notre mieux pour nous assurer que votre meuble Chaque étape en français correspond à la même étape arrive dans d’excellentes conditions. - Página 24 Fixer l'EXTRÉMITÉ GAUCHE SUPÉRIEURE (C) à la Fixer la TABLETTE (H) aux EXTRÉMITÉS SUPÉRIEURES (A et C). TABLETTE SUPÉRIEURE (G). Utiliser deux VIS TÊTE Utiliser quatre VIS TÊTE PLATE 38 mm NOIRES (10). PLATE 38 mm NOIRES (10). Page 24 www.sauder.com 414573...
- Página 25 Ceci complète l'assemblage. Nettoyer à l’ a ide d’une encaustique dans les trous choisis dans les EXTRÉMITÉS SUPÉRIEURES (A pour meubles ou d’un chiff on humide. Essuyer. et C) et le MONTANT (E). Poser les TABLETTES RÉGLABLES (J) sur les GOUPILLES EN MÉTAL. 414573 www.sauder.com Page 25...
-
Página 26: Lista De Partes
Modelo 414573 Estantería Use estas instrucciones de ensamblaje en español junto con las ESTAMOS AQUI PARA AYUDAR! fi guras paso-a-paso provistas en el folleto inglés. Cada paso Tratamos de asegurar que su mueble llega en condición excelente. en español corresponde al mismo paso en inglés. Se destacan Nuestros representantes de Servicio al Cliente son amables y las fi... - Página 27 Fije el ESTANTE (H) a los EXTREMOS SUPERIORES (A y C). Utilice Fije el EXTREMO IZQUIERDO SUPERIOR (C) al ESTANTE cuatro TORNILLOS NEGROS DE CABEZA PERDIDA de 38 mm (10). SUPERIOR (G). Utilice dos TORNILLOS NEGROS DE CABEZA PERDIDA de 38 mm (10). 414573 www.sauder.com Page 27...
- Página 28 Seque con un paño. METAL (5). Inserte las ESPIGAS DE METAL dentro de los agujeros al nivel preferido de los EXTREMOS (A y C) y del PARAL (E). Coloque los ESTANTES AJUSTABLES (J) sobre las ESPIGAS DE METAL. Page 28 www.sauder.com 414573...
- Página 29 Les téléviseurs peuvent être un téléviseur. cet eff et. particulièrement lourds. De plus, le poids et l’emplacement du tube image ont tendance à rendre les téléviseurs instables et enclins à tomber vers l’ a vant. 414573 www.sauder.com Page 29...
- Página 30 Además, el peso y la ubicación del tubo de imagen tienden a causar la inestabilidad de televisores y propensa a volcarse hacia adelante. Page 30 www.sauder.com 414573...
-
Página 31: Garantie Limitée De 5 Ans
à compter de la date d'achat la première fois et qui sont signalés à Sauder dans les limites de couverture de la contre tout défaut de matériaux ou de fabrication des composantes de mobilier Sauder. - Página 32 Dear Valued Customer: So, how did it go? Thanks so much for choosing Sauder® furniture. I hope the Set a world record for speed? purchase and assembly process was a positive experience Feeling good about yourself? and you feel good about the furniture you just built. If you Nice.