Publicidad
Enlaces rápidos
6837-NU
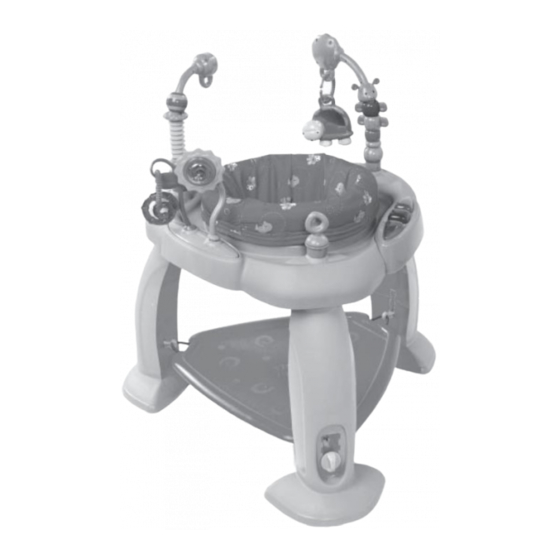
Bounce, Bounce, Baby
Activity Zone • Centro de Actividades
Zone d'activités
•
Congratulations on your purchase of a new Bright Starts
instructions before assembly and use of the activity center.
•
¡Felicitaciones por haber comprado un nuevo producto de Bright Starts
todas las instrucciones antes de armar este centro de actividades.
•
Félicitations pour votre achat d'un nouveau produit Bright Starts
toutes les instructions avant d'assembler et d'utiliser le centre d'activités.
ENGLISH • ESPAÑOL • FRANÇAIS
IMPORTANT! KEEP FOR FUTURE REFERENCE.
¡IMPORTANTE!
CONSÉRVELO PARA REFERENCIA FUTURA.
IMPORTANT !
À CONSERVER POUR CONSULTATION.
™
™
product! Please read all
™
™
! Veuillez lire
www.brightstarts.com
! Lea
Publicidad

Manuales relacionados para Bright Starts Bounce Bounce Baby 6837-NU


Resumen de contenidos para Bright Starts Bounce Bounce Baby 6837-NU
- Página 1 Please read all instructions before assembly and use of the activity center. ™ • ¡Felicitaciones por haber comprado un nuevo producto de Bright Starts ! Lea todas las instrucciones antes de armar este centro de actividades. • Félicitations pour votre achat d’un nouveau produit Bright Starts ™...
- Página 2 WARNING • ADVERTENCIA • AVERTISSEMENT To Prevent Serious Injury or Death: • Use the activity center ONLY if the child meets ALL of the following conditions: ...is at least four (4) months of age ...can sit up by him or herself ...is less than 30”...
- Página 3 Pour éviter les risques d’accident grave ou de décès : • Utilisez le centre d’activité SEULEMENT si l’enfant répond à TOUTES les conditions suivantes : ... est âgé de moins de quatre (4) mois ... peut s’asseoir seul ... mesure moins de 76,2 cm ...
- Página 4 Assembly Instructions • Instrucciones para armarlo Instructions d’assemblage Drawing and Parts List • Dibujo y lista de partes • Dessin et liste de pièces Tools needed Herramientas necesarias Outils nécessaires #2 Phillips screwdriver Destornillador Phillips Nro. 2 Tournevis Phillips n° 2 Hardware for assembly Equipo de ensamblado Quincaillerie d’assemblage...
- Página 5 Part Qty. Parte Cant. Description Descripción Description Pièce Qté (10) Screw, M3.5 x 10mm (3/8”) Tornillo, M3.5 x 10mm (3/8”) Vis à tête Phillips M3.5 x 10 mm (3/8 po) Screw, M4 x 12mm (1/2”) with Tornillo, M4 x 12mm (1/2”) con Vis, M4 x 12 mm (1/2 po) avec rondelle washer arandela...
- Página 6 × 2 M3.5 screws • Tornillos M3.5 • Vis M3.5 × 3 × 6 M4 screws with washer Tornillos M4 con arandela Vis M4 avec rondelle Phillips screwdriver Destornillador Phillips Tournevis cruciforme × 6 – 6 –...
- Página 7 Platform Assembly • Ensamblaje de la plataforma • Ensemble de la plate-forme × 3 × 3 × 3 × 3 M3.5 screws • Tornillos M3.5 • Vis M3.5 × 2 × 2 × 3 × 3 Verify that the bungee loop pivots freely. The metal crimps on each loop must be contained inside the cover.
- Página 8 × 3 Click Clic Clic × 3 Check the installation by pressing downward on the middle of the platform. The bungee loops must remain connected to all three legs. Revise la instalación presionando hacia abajo en la parte central de la plataforma. Los lazos elásticos deben permanecer conectados a las tres patas.
- Página 9 Click Clic Clic Slot in toy bar Ranura en la barra de juguetes Encoche dans la barre de jouets Keys in socket Llaves dentro del receptáculo Clés dans le manchon Toy tray • Bandeja para juguetes • Plateau pour jouets Click Slot in toy bar Clic...
- Página 10 Seat Assembly • Ensamblaje del asiento • Ensemble du siège × 6 Align the center of the safety label to the arrow Q × 6 embossed on the seat carrier. Click • Clic • Clic Alinee el centro de la etiqueta de seguridad a la fl echa grabada en el soporte del asiento.
- Página 11 Battery Installation • Instalación de las Baterias • Installation des Piles The Bounce, Bounce Baby ™ Piano Module requires (2) size AA/LR6 (1.5V) batteries (not included). Please use alkaline batteries for better performance. CAUTION: Follow the battery guidelines in this section. Otherwise, battery life may be shortened or the batteries may leak or rupture.
- Página 12 Phillips screwdriver Destornillador Phillips Tournevis cruciforme Install (2) size AA/LR6 (1.5 V) batteries, observing the polarity markings embossed on the bottom of the compartment. Instale (2) baterías tamaño AA/LR6 (1.5 V), observando las marcas de polaridad grabadas en la parte inferior del compartimiento. Installer (2) piles de type AA/LR6 (1,5 volts), en respectant les marques de polarité...
- Página 13 Operating Instructions • Instrucciones de funcionamiento • Mode d’emploi Adjusting the Platform Height • Ajuste de la altura de la plataforma Ajustez la hauteur de la plate-forme • The goal of adjusting the platform height is to ensure the child is supported by both the seat and their legs. In this way, they can have assistance while learning how to transition from sitting to walking.
- Página 14 Piano Operation • Funcionamiento del piano • Fonctionnement du piano NOTE: Weak batteries cause erratic product operation, including distorted sound and dimming or failed lights. Because each electrical component requires a different operating voltage, replace the batteries when any function fails to operate.
- Página 15 Care and Cleaning • Cuidado y limpieza • Entretien et nettoyage × 8 × 4 Locking tabs Pestañas de ajuste Languettes de verrouillage Press Presione Appuyer Fabric Seat – First, you must remove the seat carrier... To wash the fabric seat... Machine wash the fabric seat in cold water. Use a gentle wash cycle with no bleach. Tumble dry, using low heat.
- Página 16 Servicing Replaceable Parts • Servicio para las partes reemplazable Réparation des pièces remplaçables Piano Module – To replace the piano module... • Locate and remove the (2) screws underneath the play surface that fasten the piano to the play surface. From the top of the play surface, lift the piano away from its mounting location.