Klarstein Heizung Manual Del Usario
Ocultar thumbs
Ver también para Heizung:
- Manual del usuario (44 páginas) ,
- Manual del usuario (40 páginas)
Tabla de contenido
Publicidad
Idiomas disponibles
Idiomas disponibles
Enlaces rápidos
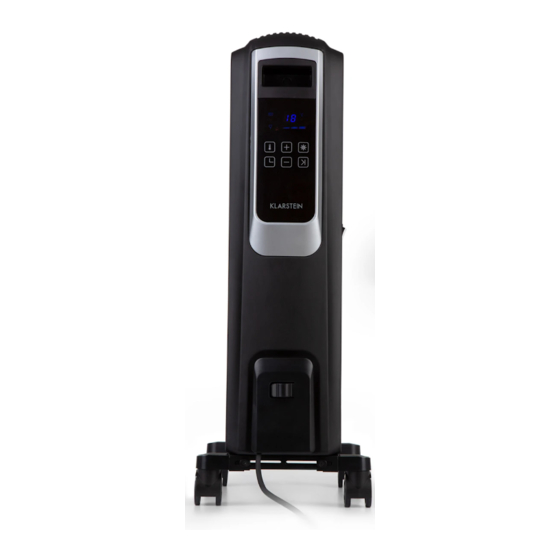
Heizung
Heater
Calefactor
Radiateur
Stufa
10034253
Hinweis: Dieses Produkt ist nur für gut isolierte Räume
oder für den gelegentlichen Gebrauch geeignet.
Note: This product is only suitable for well insulated
spaces or occasional use.
Advertencia: Este producto está indicado únicamente
en lugares abrigados o para una utilización punctual.
Remarque : Ce produit ne peut être utilisé que dans des
locaux bien isolés ou de manière occasionnelle.
Nota: Questo prodotto è adatto solo per spazi ben
isolati o uso occasionale.
Publicidad
Capítulos
Tabla de contenido

Manuales relacionados para Klarstein Heizung


Resumen de contenidos para Klarstein Heizung
- Página 1 Heizung Hinweis: Dieses Produkt ist nur für gut isolierte Räume oder für den gelegentlichen Gebrauch geeignet. Note: This product is only suitable for well insulated Heater spaces or occasional use. Calefactor Advertencia: Este producto está indicado únicamente en lugares abrigados o para una utilización punctual.
-
Página 3: Tabla De Contenido
Sehr geehrter Kunde, wir gratulieren Ihnen zum Erwerb Ihres Gerätes. Lesen Sie die folgenden Hinweise sorgfältig durch und befolgen Sie diese, um möglichen Schäden vorzubeugen. Für Schäden, die durch Missachtung der Hinweise und unsachgemäßen Gebrauch entstehen, übernehmen wir keine Haftung. Scannen Sie den folgenden QR-Code, um Zugriff auf die aktuellste Bedienungsanleitung und weitere Informationen rund um das Produkt zu erhalten. -
Página 4: Sicherheitshinweise
SICHERHEITSHINWEISE • Prüfen Sie vor der Benutzung die Spannung auf der Geräteplakette und schließen Sie das Gerät nur an Steckdosen an, die der Spannung des Geräts entsprechen. • Falls das Netzkabel beschädigt ist, lassen Sie es von einer ausgebildeten Fachkraft ersetzen. •... -
Página 5: Produktdatenblatt
PRODUKTDATENBLATT Modellkennung(en) 10034253 Angabe Symbol Wert Einheit Angabe Einheit Wärmeleistung Nur bei elektrischen Speicher-Einzelraumheizgeräten: Art der Regelung der Wärmezufuhr Nennwärmeleistung Manuelle Regelung der Wärmezufuhr mit k.A. integriertem Thermostat Mindestwärmeleistung Manuelle Regelung der Wärmezufuhr k.A. (Richtwert) mit Rückmeldung der Raum- und/oder Außentemperatur Maximale kontinuierliche Elektronische Regelung der Wärmezufuhr... -
Página 6: Zusammenbau
ZUSAMMENBAU Stellen Sie das Gerät auf eine kratzfreie und stabile Oberfläche, um Schäden an der Lackierung oder Ihrer Bodenoberfläche zu vermeiden. • Drehen Sie das Gerät auf den Kopf. • Ziehen Sie die Räder zu beiden Seiten heraus. • Betreiben Sie das Gerät nur in aufrechter Position mit am Boden befestigten Rädern. -
Página 7: Bedienung
(Steckersymbol) leuchtet. Bei jedem Tastendruck ertönt ein Piepton. Drücken Sie die Standby-Taste (f), um den Standby-Modus zu verlassen und mit einen der Modi auszuwählen. Die Heizung beginnt mit dem Betrieb mit niedriger Leistung. Heizleistung einstellen Drücken Sie mehrmals auf die Power/Mode-Taste (c), um eine der folgenden Heizleistungen auszuwählen: niedrig (... - Página 8 Temperatur nähert. Beispiel: Die eingestellte Temperatur ist 25 °C. Wenn die Raumtemperatur niedriger ist als 22 °C ist, arbeitet die Heizung mit hoher Leistung. Wenn die Raumtemperatur auf 23 °C steigt, arbeitet die Heizung mit mittlerer Leistung. Wenn die Raumtemperatur auf 24 °C steigt, arbeitet die Heizung mit niedriger Leistung. Wenn die Raumtemperatur die eingestellte Temperatur erreicht, schaltet sich die Heizung automatisch aus.
- Página 9 2. Drücken Sie die Timer-Taste (d), das Licht (H) leuchtet auf und die Startstundenzahl (0.0) blinkt. 3. Stellen Sie mit den Tasten [+] und [-] die Betriebszeit der Heizung zwischen 1-24 Stunden ein. Zwischen 0.0-5.0 Stunden lässt sich die Zeit in 0,5-Stunden- Schritten einstellen, zwischen 5-24 Stunden lässt sich die Zeit in 1-Stunden-...
-
Página 10: Reinigung Und Pflege
• Verwenden Sie keine scharfen Reinigungsmittel oder Scheuermittel. • Besprühen Sie das Gerät nicht mit Flüssigkeiten und tauchen Sie es nicht in Wasser oder andere Flüssigkeiten. • Öffnen Sie niemals das Gehäuse der Heizung. HINWEISE ZUR ENTSORGUNG Befindet sich die linke Abbildung (durchgestrichene Mülltonne auf Rädern) auf dem Produkt, gilt die Europäische Richtlinie... - Página 11 Dear Customer, Congratulations on purchasing this equipment. Please read this manual carefully and take care of the following hints to avoid damages. Any failure caused by ignoring the items and cautions mentioned in the instruction manual is not covered by our warranty and any liability. Scan the QR code to get access to the latest user mannual and other information about the product CONTENT...
-
Página 12: Safety Instructions
SAFETY INSTRUCTIONS • Do not use the appliance until it is securely fi xed as described in this manual. • Check that the voltage indicates on the data plate corresponds with that of the local network before connecting the appliance to the mains power supply. •... -
Página 13: Product Data Sheet
PRODUCT DATA SHEET Model identifier(s): 10034253 Item Symbol Value Unit Item Unit Heat output Type of heat input, for electric storage local space heaters only Nominal heat output manual heat charge control, with integrated thermostat Minimum heat output manual heat charge control with room and/or (indicative) outdoor temperature feedback Maximum continuous heat... -
Página 14: Assembly
ASSEMBLY Place the unit on a scratch-free and stable surface to prevent damage to the paint or your floor surface. • Turn the unit upside down. • Pull out the wheels on both sides. • Operate the unit only in an upright position with the wheels fixed to the floor. -
Página 15: Operation
Inserting batteries into the remote control OPERATION Press the Standby button (f) to turn on the unit. The product is now in standby mode. You can now select a function from the control panel or remote control. The unit beeps and the power indicator (plug symbol) lights up. - Página 16 Eco mode Press the Power/Mode button (c) until the ECO light illuminates. In Eco mode, the heating output adjusts automatically when the room temperature approaches the set temperature. Example: The set temperature is 25 °C. If the room temperature is lower than 22 °C, the heating operates at high output.
- Página 17 Timer: Automatic switch-on Note: This function should only be set if you want the heater to turn on automatically after a specified time (1 to 24 hours from the time of setting). Set the timer in standby mode. 1. Press the Standby button (f) to turn on the unit. The power indicator (plug symbol) lights up.
-
Página 18: Cleaning And Care
CLEANING AND CARE Note: Turn off the unit and unplug it from the power outlet. Wait until the unit has completely cooled down before cleaning it. • Use a vacuum cleaner to clean the ventilation slots and grilles. • Remove dust on the outside surfaces with a damp (not wet) cloth. •... - Página 19 Estimado cliente: Le felicitamos por la adquisición de este producto. Lea atentamente el siguiente manual y siga cuidadosamente las instrucciones de uso con el fin de evitar posibles daños. La empresa no se responsabiliza de los daños ocasionados por un uso indebido del producto o por haber desatendido las indicaciones de seguridad.
-
Página 20: Indicaciones De Seguridad
INDICACIONES DE SEGURIDAD • Antes de utilizar el aparato, compruebe la tensión en la placa técnica del mismo y conecte el aparato solamente a tomas de corriente que se adecuen a dicha tensión. • Si el cable de alimentación está dañado, deberá ser sustituido por un servicio técnico. •... -
Página 21: Hoja De Datos Del Producto
HOJA DE DATOS DEL PRODUCTO Denominación del modelo 10034253 Dato Símbolo Valor Unidad Dato Unidad Potencia térmica Solo con disposítivos de acumulación de calor eléctricos para abastecimiento local: Tipo de regulación del abastecimiento de calor Potencia térmica nominal Regulación manual del abastecimiento de calor con termostato integrado: Potencia térmica mínima Regulación manual de abastecimiento de calor... -
Página 22: Montaje
MONTAJE Coloque la unidad sobre una superficie estable y libre de arañazos para evitar daños a la pintura o a la superficie de su piso. • Ponga la unidad boca abajo. • Extraiga las ruedas por ambos lados. • Utilice el aparato sólo en posición vertical con las ruedas fijadas al suelo. -
Página 23: Operación
Insertar las pilas en el mando a distancia OPERACIÓN Pulse el botón Standby (f) para encender la unidad. El producto está ahora en modo de espera. Ahora puede seleccionar una función desde el panel de control o el mando a distancia. La unidad emite un sonido y el indicador de alimentación (símbolo del enchufe) se ilumina. - Página 24 Modo Eco Pulse el botón Encendido/Modo (c) hasta que se encienda la luz ECO. En el modo Eco, la salida de la calefacción se ajusta automáticamente cuando la temperatura ambiente se acerca a la temperatura establecida. Ejemplo: La temperatura de ajuste es de 25 °C. Si la temperatura ambiente es inferior a 22 °C, el calentador funciona a alta potencia.
- Página 25 Temporizador: Encendido automático Nota: Esta función sólo debe configurarse si desea que el calefactor se encienda automáticamente después de un tiempo especificado (de 1 a 24 horas a partir de la hora de configuración). Ponga el temporizador en el modo de espera. 1.
-
Página 26: Limpieza Y Cuidado
LIMPIEZA Y CUIDADO Nota: Apague la unidad y desenchúfela de la toma de corriente. Espere hasta que la unidad se haya enfriado completamente antes de limpiarla. • Use una aspiradora para limpiar las ranuras de ventilación y las rejillas. • Elimine el polvo de las superficies exteriores con un paño húmedo (no mojado). •... -
Página 27: Fiche Technique
Cher client, Toutes nos félicitations pour l’acquisition de ce nouvel appareil. Veuillez lire attentivement les instructions suivantes de branchement et d’utilisation afin d’éviter d’éventuels dommages. Le fabricant ne saurait être tenu pour responsable des dommages dus au non-respect des consignes de sécurité et à la mauvaise utilisation de l’appareil. -
Página 28: Consignes De Sécurité
CONSIGNES DE SÉCURITÉ • Avant utilisation, vérifi ez la tension sur l‘étiquette de l‘appareil et ne branchez l‘appareil que sur des prises correspondant à la tension de l‘appareil. • Si le câble d‘alimentation est endommagé, faites-le remplacer par un professionnel qualifi é. -
Página 29: Fiche De Données Produit
FICHE DE DONNÉES PRODUIT Référence (s) du produit 10034253 Donnée Symbole Valeur Unité Donnée Unité Puissance calorifique Uniquement pour les radiateurs électriques à accumulation : Type de régulation de l'apport de chaleur Puissance calorifique Régulation manuelle de l'apport de chaleur n.c. -
Página 30: Assemblage
ASSEMBLAGE Placez l‘appareil sur une surface stable et sans rayures afin d‘éviter d‘endommager la peinture ou le sol. • Retournez l‘appareil. • Tirez les roues des deux côtés. • Ne faites fonctionner l‘appareil que dans une position verticale avec les roues fixées au sol. -
Página 31: Utilisation
Installation des piles dans la télécommande UTILISATION Appuyez sur la touche de veille (f) pour allumer l‘appareil. Le produit est maintenant en mode veille. Vous pouvez maintenant sélectionner une fonction sur le panneau de commande ou la télécommande. L‘appareil émet un bip et le voyant d‘alimentation (icône du connecteur) s‘allume. - Página 32 Mode Eco Appuyez sur la touche Alimentation / Mode (c) jusqu‘à ce que le voyant ECO s‘allume. En mode Eco, la puissance de chauffage s’adapte automatiquement lorsque la température ambiante approche de la température définie. Exemple : La température de consigne est de 25 °C. Lorsque la température ambiante est inférieure à...
- Página 33 Minuterie : démarrage automatique Remarque : Cette fonction ne doit être activée que si vous souhaitez que le radiateur s‘allume automatiquement après une certaine durée (1 à 24 heures après le réglage). Réglez la minuterie en mode veille. 1. Appuyez sur la touche de veille (f) pour allumer l‘appareil. Le témoin de fonctionnement (symbole de la fiche) s‘allume.
-
Página 34: Nettoyage Et Entretien
NETTOYAGE ET ENTRETIEN Remarque : Mettez l‘appareil hors tension et débranchez-le de la prise de courant. Attendez que l‘appareil soit complètement refroidi avant de le nettoyer. • Utilisez un aspirateur pour nettoyer les fentes d‘aération et les grilles. • Enlever la poussière sur les surfaces extérieures à l‘aide d‘un chiffon umide (non mouillé). - Página 35 Gentile cliente, La ringraziamo per aver acquistato il dispositivo. La preghiamo di leggere attentamente le seguenti istruzioni per l’uso e di seguirle per evitare possibili danni tecnici. Non ci assumiamo alcuna responsabilità per danni scaturiti da una mancata osservazione delle avvertenze di sicurezza e da un uso improprio del dispositivo.
-
Página 36: Avvertenze Di Sicurezza
AVVERTENZE DI SICUREZZA • Prima dell‘uso, controllare la tensione sulla targhetta del dispositivo e collegare il dispositivo solo ad una presa che corrisponde alla tensione indicata. • Se il cavo di alimentazione è danneggiato, farlo sostituire da un tecnico qualifi cato. •... -
Página 37: Scheda Informativa Del Prodotto
SCHEDA INFORMATIVA DEL PRODOTTO Identificazione del modello (i) 10034253 Indicazione Simbolo Valore Unità Indicazione Unità Potenza termica Solo per gli apparecchi per il riscaldamento d'ambiente locale elettrici ad accumulo: Tipo di controllo dell´apporto termico Potenza termica nominale Controllo manuale del carico termico con n.d. -
Página 38: Assemblaggio
ASSEMBLAGGIO Posizionare il dispositivo su una superficie piana e antigraffio, in modo da evitare danni alla laccatura o alla superficie del pavimento. • Ribaltare il dispositivo. • Tirare fuori le rotelle su entrambi i lati. • Utilizzare il dispositivo solo in posizione verticale con le ruote fissate al pavimento. -
Página 39: Utilizzo
Inserire le batterie nel telecomando UTILIZZO Premere il tasto Standby (f) per accendere il dispositivo. Il prodotto si trova ora in modalità standby. È possibile selezionare una funzione con il pannello di controllo o con il telecomando. Il dispositivo emette un segnale acustico e l’indicazione di funzionamento (simbolo della spina) si illumina. - Página 40 Modalità Eco Premere il tasto Power/Mode (c) fino a quando la spia ECO si illumina. In modalità Eco, la potenza riscaldante si regola automaticamente quando la temperatura ambiente si avvicina a quella impostata. Esempio: la temperatura impostata è di 25 °C. Se la temperatura ambiente è minore di 22 °C, la stufa funziona con potenza elevata.
- Página 41 Timer: accensione automatica Avvertenza: questa funzione deve essere impostata solo se si desidera che la stufa si accenda automaticamente dopo un determinato lasso di tempo (da 1 a 24 ore dal momento dell’impostazione). 1. Premere il tasto Standby (f) per accendere il dispositivo. L’indicazione di funzionamento (simbolo della spina) si illumina.
-
Página 42: Pulizia E Manutenzione
PULIZIA E MANUTENZIONE Nota: Spegnere l‘unità e scollegarla dalla presa di corrente. Attendere che l‘unità si sia raffreddata completamente prima di pulirla. • Pulire le fessure e le griglie di aerazione con un aspirapolvere. • Rimuovere la polvere dalle superfici esterne con un panno umido (non bagnato). •...