Tabla de contenido
Publicidad
Idiomas disponibles
Idiomas disponibles
Enlaces rápidos
Glaskonvektor
Glass Convector Heater
Radiateur convecteur vitré
Convector de cristal
Convettore in vetro
Artikelnummer 10031981 10031982
Hinweis:Dieses Produkt ist nur für gut isolierte
Räume oder für den gelegentlichen Gebrauch
geeignet.
Note: This product is only suitable for well
insulated spaces or occasional use.
Advertencia: Este producto está indicado
únicamente en lugares abrigados o para una
utilización punctual.
Remarque : Ce produit ne peut être utilisé que
dans des locaux bien isolés ou de manière
occasionnelle.
Nota: Questo prodotto è adatto solo per spazi
ben isolati o uso occasionale.
Publicidad
Capítulos
Tabla de contenido

Manuales relacionados para Klarstein 10031981


Resumen de contenidos para Klarstein 10031981
- Página 1 únicamente en lugares abrigados o para una utilización punctual. Convettore in vetro Remarque : Ce produit ne peut être utilisé que dans des locaux bien isolés ou de manière occasionnelle. Nota: Questo prodotto è adatto solo per spazi ben isolati o uso occasionale. Artikelnummer 10031981 10031982...
-
Página 3: Tabla De Contenido
Sehr geehrter Kunde, wir gratulieren Ihnen zum Erwerb Ihres Klarstein Gerätes. Lesen Sie die folgenden Anschluss- und Anwen- dungshinweise sorgfältig durch und befolgen Sie diese, um möglichen technischen Schäden vorzubeugen. Für Schäden, die durch Missachtung der Sicherheitshinweise und unsachgemäßen Gebrauch entstehen, übernehmen wir keine Haftung. - Página 4 Pflichtangaben nach 2015/1188/EU Modellkennung(en) 10031981, 10031982 Angabe Symbol Wert Einheit Angabe Einheit Wärmeleistung Nur bei elektrischen Speicher-Einzelraumheizgeräten: Art der Regelung der Wärmezufuhr Nennwärmeleistung Manuelle Regelung der Wärmezufuhr mit Nein integriertem Thermostat Mindestwärmeleistung Manuelle Regelung der Wärmezufuhr Nein mit Rückmeldung der Raum- und/oder Außentemperatur...
-
Página 5: Sicherheitshinweise
SICHERHEITSHINWEISE Lesen und befolgen Sie die folgenden Sicherheitshinweise, selbst wenn Sie sich mit dem Gerät vertraut fühlen. Bewahren Sie die Bedienungsanleitung zum künftigen Nachschlagen auf. Bei der Verwendung eines elektrischen Gerätes müssen die Sicherheitshinweise befolgt werden, einschließ- lich der Folgenden: •... - Página 6 • Immer in der aufrechten Lage betreiben. • Vor dem Bewegen ausschalten und abkühlen lassen. • Nicht mit einem aufgewickelten Kabel betreiben, da die Bildung von Wärme wahrscheinlich ist und aus- reicht, um eine Gefahr darzustellen. • Die Verwendung eines Verlängerungskabels wird bei diesem Gerät nicht empfohlen. •...
-
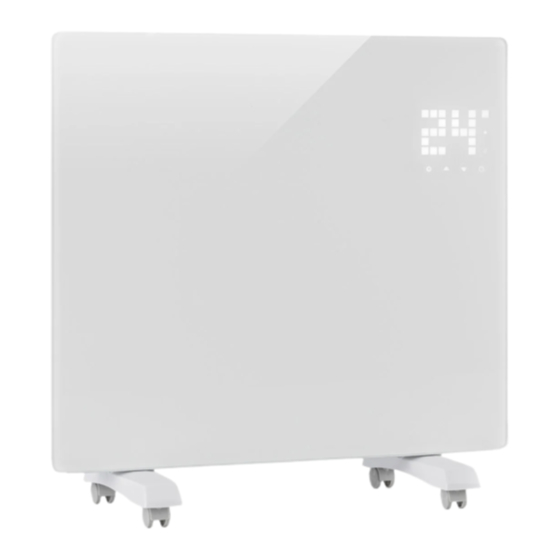
Página 7: Geräteübersicht
GERÄTEÜBERSICHT Luftauslass Schalter Füße mit Rollen... -
Página 8: Montage
MONTAGE Freistehende Montage mit Rollen Rollen montieren Rollen entfernen Knopf drücken Slide Schieben Slide Schieben Wenn die Montage abeschlossen Knopf drücken, um die Rollen if the installation is complete, press the button up, ist hören Sie einen Klick abzunehmen it’s will hear a sound click. take down the caster Von der Wand abnehmen Wandmontage... - Página 9 BEDIENFELD Bedienfeld I EO CN W/24H 置 示 Anzeige Tasten Fenster offen" 13. Ein/A us-Schalter 2 Wochentimer 14. Wert runter 3 Tagestimer 15. Wert hoch 4 Timerperiode 16. Einstellungen (Bedienfeld) 5 Stunden 17. Temperaturanzeige 6 Woche 18. Einstellungen (Fernbedienung) 7 Minute 19.
- Página 10 BEDIENUNG Inbetriebnahme Nehmen Sie das Gerät vorsichtig aus dem Karton. Heben Sie den Karton für die Lagerung außerhalb der Saison auf. 2. Achten Sie darauf, dass die Ein/Aus-Taste ausgeschaltet ist, bevor Sie das Gerät anschließen. 3. Die Heizung muss nach der Montageanleitung vollständig zusammengebaut und montiert sein. 4.
- Página 11 Kindersicherung Im Betrieb beide Pfeiltasten (2 und 3) gleichzeitig gedrückt halten um das Gerät zu sperren. Dann wird ein Quadrat angezeigt ( ) Wege zum Entsperren: (1) Gerät ausschalten; (2) Die Tasten (5) und (6) 3 Sekunden lang gleichzeitig gedrückt halten.
-
Página 12: Reinigung
REINIGUNG Es ist sehr einfach, das Gerät hinten zu reinigen. Zum Reinigen der Rückseite halten Sie den Konvektorheizer mit beiden Händen an den Seiten fest und ziehen ihn nach vorn. Nach der Reinigung stellen Sie den Heizer wieder an den Platz zurück. Lagerung Wenn Sie das Gerät für längere Zeit nicht nutzen, wird empfohlen, zu reinigen und es (vorzugsweise im Originalkarton) an einem kühlen und trockenen Ort zu lagern. -
Página 13: Technical Data
Declaration of Conformity ......... 22 TECHNICAL DATA Item number 10031981 10031982 Power supply 220-240 V~, 50 Hz... - Página 14 Mandatory statement according to 2015/1188/EU Model identifier(s): 10031981, 10031982 Item Symbol Value Unit Item Unit Heat output Type of heat input, for electric storage local space heaters only Nominal heat output manual heat charge control, with integrated thermostat Minimum heat output...
-
Página 15: Safety Instructions
SAFETY INSTRUCTIONS Read and follow all the instructions in this manual even if you feel you are familiar with the product, and find a place to keep it handy for future reference. Read all instructions before using this appliance and keep them for future reference. - Página 16 • The use of an extension cord with this appliance is not recommended. • Do not remove plug from power socket until the appliance has been switched off. • Do not remove plug from power socket by pulling the supply cord-always grip plug. •...
-
Página 17: Product Overview
PRODUCT OVERVIEW air outlet switch castor wheel stand... -
Página 18: Installation
INSTALLATION Caster Installation&removal if the installation is complete, press the button up, it’s will hear a sound click. take down the caster Pull up the heater 5mm, then move to left 10mm to take down the heater. Wall mounted mode Take down the heater from wall... -
Página 19: Control Panel
CONTROL PANEL CONTROL PANEL I EO CN W/24H 置 示 Display Buttons Open Window Indicator 13. ON/ OFF Power Switch 2. Week Timer Indicator 14. Decrease Button 3. Day Timer Indicator 15. Increase Button 4. Timer Period Indicator 16. Setting Button (in display) 5. - Página 20 OPERATION Starting Take out the heater from the carton carefully. Please save the carton for off-season storage. 2. Make sure the power switch is in the OFF position before plugging it in. 3. Ensure the heater is fully assembled according to the Mounting Guide . 4.
- Página 21 Power selected When did not enter any models, pressing” 2 “to select the output power, the heater will work the full rated output while” 7 “is displayed. Pressing” 3 “to switch to” 6 “heating mode. Or through high/low on the remote control switch button”...
-
Página 22: Cleaning
CLEANING Cleaning It is very easy to clean behind it. Hold two sides of the heater ,after upwards pull the heater forwards. then you can clean behind. After cleaning, the heater must be fixed in the normal position. Storage If you do not plan to use the heater for extended periods of time, it is recommended that the heater is cleaned and then stored (preferably in its original packaging) in a cool dry place. -
Página 23: Sommaire
Déclaration de conformité ......... 32 FICHE TECHNIQUE Numéro d’article 10031981 10031982 Alimentation 220-240 V~, 50 Hz... - Página 24 Informations obligatoires conformément à 2015/1188/UE Référence (s) du produit 10031981, 10031982 Donnée Symbole Valeur Unité Donnée Unité Puissance calorifique Uniquement pour les radiateurs électriques à accumulation : Type de régulation de l'apport de chaleur Puissance calorifique Pnom Régulation manuelle de l'apport de chaleur nominale avec thermostat intégré...
-
Página 25: Consignes De Sécurité
CONSIGNES DE SÉCURITÉ Lisez et suivez les consignes de sécurité ci-dessous, même si vous vous sentez familier avec l‘appareil. Conservez le manuel d‘instructions pour vous y référer ultérieurement. Lors de l‘utilisation d‘un appareil élec- trique, les consignes de sécurité doivent être respectées, notamment: •... - Página 26 • Toujours utiliser en position verticale. • Éteignez l‘appareil et laissez-le refroidir avant de le déplacer. • Ne pas utiliser avec un câble enroulé, car cela dégage de la chaleur et peut présenter un danger. • L‘utilisation d‘une rallonge n‘est pas recommandée pour cet appareil. •...
-
Página 27: Aperçu De L'appareil
APERÇU DE L‘APPAREIL Sortie d‘air Interrupteur Pieds avec roulettes... -
Página 28: Montage
MONTAGE Montage en pose libre avec roulettes Montage des roulettes Retirer les roulettes Appuyer sur le bouton Pousser Slide Slide Schieben Lorsque le montage est terminé Knopf drücken, um die Rollen if the installation is complete, press the button up, vous devez entendre un clic abzunehmen it’s will hear a sound click. -
Página 29: Panneau De Commande
PANNEAU DE COMMANDE I EO CN W/24H 置 示 Témoins Touches "Fenêtre ouverte " 13. Interrupteur de marche/arrêt 2. Minuterie hebdomadaire 14. Réduire la valeur 3. Minuterie quotidienne 15. Augmenter la valeur 4. Période de minuterie 16. Paramètres (panneau de commande) 5. -
Página 30: Utilisation
UTILISATION Mise en service Retirez délicatement l’ a ppareil de la boîte. Gardez le carton hors saison pour le stockage. 2. Assurez-vous que le bouton d’ a limentation est éteint avant de connecter l’ a ppareil. 3. Le chauffage doit être entièrement assemblé et installé conformément aux instructions d’installation. 4. - Página 31 Verrouillage parental Pendant le fonctionnement, appuyez simultanément sur les touches fléchées (2 et 3) pour verrouiller l’ a ppa- reil. Un carré s’ a ffiche pour confirmer le verrouillage [] . Modes de déverrouillage : (1) éteindre l’ a ppareil ; (2) maintenir simultanément les touches (5) et (6) pendant 3 secondes.
-
Página 32: Nettoyage
NETTOYAGE Il est très facile de nettoyer l‘appareil à l‘arrière. Pour nettoyer le dos, tenez le convecteur par les côtés avec les deux mains et tirez-le vers l‘avant. Après le nettoyage, remettez le radiateur en place. Rangement Si vous n‘utilisez pas l‘appareil pendant une longue période, il est recommandé de le nettoyer et de le ranger (de préférence dans sa boîte d‘origine) dans un endroit frais et sec. -
Página 33: Indice
Dichiarazione di conformità ........42 DATI TECNICI Numero articolo 10031981 10031982 Alimentazione 220-240 V~, 50 Hz... - Página 34 Informazione obbligatoria in basea 2015/1188/UE Identificazione del modello (i) 10031981, 10031982 Indicazione Simbolo Valore Unità Indicazione Unità Potenza termica Solo per gli apparecchi per il riscaldamento d'ambiente locale elettrici ad accumulo: Tipo di controllo dell´apporto termico Potenza termica nominale Pnom...
-
Página 35: Avvertenze Di Sicurezza
AVVERTENZE DI SICUREZZA Leggere attentamente tutte le avvertenze di sicurezza. Conservare il manuale di istruzioni per consultazioni future. L´utilizzo di un apparecchio elettrico comporta il rispetto di avvertenze di sicurezza tra cui le seguenti: • Collegare il dispositivo ad una presa conforme alla tensione indicata sulla targhetta identificativa. •... - Página 36 • Utilizzare il dispositivo sempre in posizione verticale. • Prima di spostare il dispositivo, farlo raffreddare. • Non utilizzare il dispositivo con il cavo attorcigliato poiché la formazione del calore può comportare dei pericoli. • Si sconsiglia l´uso di prolunghe con questo dispositivo. •...
-
Página 37: Panoramica Del Dispositivo
PANORAMICA DEL DISPOSITIVO Uscita dell‘aria Interruttore Piedi con ruote... -
Página 38: Montaggio
MONTAGGIO Montaggio libero con ruote Montare le ruote Rimuovere le ruote Premere il pulsante Slide Far scorrere Slide Far scorrere Quando il montaggio è terminato si Premere il pulsante per rimuovere if the installation is complete, press the button up, sente un clic le ruote it’s will hear a sound click. -
Página 39: Pannello Di Controllo
PANNELLO DI CONTROLLO I EO CN W/24H 置 示 Display Tasti “Finestra aperta” 13. Interruttore On/Off 2. Timer settimanale 14. Abbassare valore 3. Timer giornaliero 15. Aumentare valore 4. Periodo del timer 16. Impostazioni (pannello di controllo) 5. Ore 17. Indicazione temperatura 6. -
Página 40: Funzionamento
FUNZIONAMENTO Messa in servizio Rimuovere con cautela il dispositivo dalla confezione. Conservare il cartone in modo da poter poi stipare il dispositivo durante la stagione estiva. 2. Assicurarsi che il pulsante di accensione sia spento prima di collegare il dispositivo. Il riscaldatore deve essere completamente montato e installato secondo le istruzioni di installazione. - Página 41 Attivazione dei tasti del display sensibili al tocco Durante il funzionamento, i tasti del display sono normalmente spenti. Toccare l‘area sotto l‘indicatore della temperatura per attivare i pulsanti del display. Modalità ECO (modalità a risparmio economico) Tenere premuto (16) e la freccia verso il basso (14) per tre secondi (o premere il tasto ECO sul telecomando per impostare l‘unità...
-
Página 42: Pulizia
PULIZIA È molto facile pulire il dispositivo sul retro. Per pulire la parte posteriore, tenere il riscaldatore del convettore dai lati con entrambe le mani e tirarlo in avanti. Dopo la pulizia, rimettere il riscaldatore in posizione. Conservazione Se non si utilizza il dispositivo per un lungo periodo, si consiglia di pulirlo e conservarlo (preferibilmente nella sua confezione originale) in un luogo fresco e asciutto. -
Página 43: Índice
Estimado cliente Le felicitamos por la adquisición de este producto Klarstein. Lea atentamente el siguiente manual y siga cuidadosamente las instrucciones de uso con el fin de evitar posibles daños técnicos. La empresa no se responsabiliza de los daños ocasionados por un uso indebido del producto o por haber desatendido las indicaciones de seguridad. - Página 44 Información obligatoria según 2015/1188/UE Denominación del modelo 10031981, 10031982 Dato Símbolo Valor Unidad Dato Unidad Potencia térmica Solo con disposítivos de acumulación de calor eléctricos para abastecimiento local: Tipo de regulación del abastecimiento de calor Potencia térmica nominal Pnom Regulación manual del abastecimiento de calor con termostato integrado: Potencia térmica mínima...
-
Página 45: Indicaciones De Seguridad
INDICACIONES DE SEGURIDAD Lea y siga las siguientes indicaciones de seguridad, incluso cuando ya se haya familiarizado con el aparato. Conserve este manual para consultas posteriores. Cuando utilice dispositivos eléctricos, debe seguir las indi- caciones de seguridad, incluidas las siguientes: •... - Página 46 • No se recomienda utilizar un cable alargador con este aparato. • No desconecte el enchufe de la toma de corriente sin antes apagar el aparato. • Nunca desconecte el enchufe tirando el cable de alimentación, sino del cuerpo del enchufe. •...
-
Página 47: Vista General Del Aparato
VISTA GENERAL DEL APARATO Salida de aire Interruptor Pies de apoyo con ruedas... -
Página 48: Montaje
MONTAJE Montaje independiente con ruedas Montar ruedas Desmontar ruedas Pulse el botón Deslizar Slide Slide Schieben Cuando haya finalizado el montaje, Pulse el botón para desmontar las if the installation is complete, press the button up, escuchará un clic. ruedas. it’s will hear a sound click. -
Página 49: Panel De Control
PANEL DE CONTROL I EO CN W/24H 置 示 Display Botones Indicador de «Ventana abierta» 13 Botón de encendido/apagado 2 Indicador de temporizador semanal 14 Botón «Disminuir valor» 3 Indicador de temporizador diario 15 Botón «Aumentar valor» 4 Indicador de periodo de temporizador 16 Ajustes (panel de control) 5 Indicador de hora 17 Indicador de temperatura... -
Página 50: Funcionamiento
FUNCIONAMIENTO Puesta en funcionamiento Retire con cuidado el aparato de la caja de cartón. Guarde la caja para almacenar el aparato cuando no lo utilice. 2. Asegúrese de que el interruptor de encendido/apagado esté desactivado antes de encender el aparato. 3. - Página 51 Activar los botones del display sensibles al tacto Normalmente, los botones del display están desactivados cuando el aparato está en marcha. Toque el área debajo del indicador de temperatura para activar los botones del display. Modo ECO (Modo de ahorro) Mantenga pulsados el botón Ajustes (16) y el botón «Disminuir valor»...
-
Página 52: Limpieza
LIMPIEZA Es muy sencillo limpiar el aparato. Para limpiar la parte posterior, sujete el calefactor de convección con am- bas manos por los laterales y empújelo hacia adelante. Tras la limpieza, vuelva a colocar el aparato en su sitio. Almacenamiento Si no utiliza el aparato durante un periodo prolongado de tiempo, recomendamos limpiarlo y guardarlo en un lugar fresco y seco (preferentemente en la caja original).