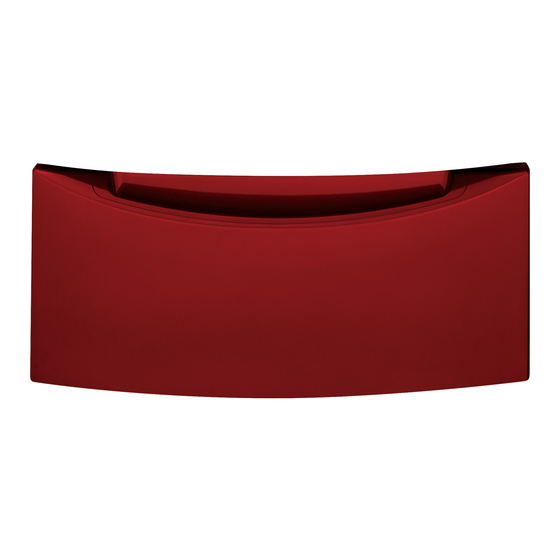
Tabla de contenido
Publicidad
Idiomas disponibles
Idiomas disponibles
Enlaces rápidos
Installation
Instructions
Pedestal
Instructions en français : . . . . . . . . . .. . . . . .5
Instrucciones en español: . . . . . . . . . . . . . . .9
BEFORE YOU BEGIN
Read these instructions completely and carefully.
IMPORTANT
•
inspector's use.
IMPORTANT
•
ordinances.
• Note to Consumer – Keep these instructions for future
reference.
• Completion time – 1 to 2 hours
• Proper installation is the responsibility of the installer.
• Product failure due to improper installation is not
covered under the Warranty
CAUTION
of these products, and to reduce the risk of
PEOPLE ARE REQUIRED FOR PROPER INSTALLATION.
• See washer and dryer Owner's Manual & Installation
Instructions for additional installation requirements and
guidelines.
KIT CONTENTS
4 Mounting screws -
Dryer
4 Mounting bolts -
Washer
31-16708-1
11-13 GE
– Save these instructions for local
– Observe all governing codes and
.
Drawer divider
White Pedestal: GFXP1308FWW
Red Pedestal: GFXP1308FRR
Metallic Carbon Pedestal: GFXP1308FMC
For Washer Models:
GFWS2500, GFWS2505, GFWS2600, GFWS2605,
GHWS3600, GHWS3605, GFWS3700 and GFWS3705
For Dryer Models:
GFDS250, GFDS255, GFDS260, GFDS265, GHDS360,
GHDS365, GFDS370 and GFDS375
TOOLS YOU WILL NEED
Phillips-head
screwdriver
9/16" socket wrench
INSTALLATION PREPARATION
Remove the packaging.
Flatten the product carton to use as a pad to lay
the washer or dryer down on its side. Continue using
the carton to protect the finished floor in front of the
installation location.
1 REMOVE THE LEVELING LEGS
Carefully lay down the appliance to access
A
the leveling legs on its bottom. The washer
shipping bolts must remain in place until the
washer is returned to an upright position.
Washer – Lay on its back
Dryer – Lay on its side
Use an adjustable wrench to remove the
B
washer or dryer leveling legs.
1
8 mm socket wrench
10" Adjustable
wrench
Printed in the United States
Publicidad
Tabla de contenido

Resumen de contenidos para GE GFXP1308FWW
- Página 1 Installation White Pedestal: GFXP1308FWW Red Pedestal: GFXP1308FRR Metallic Carbon Pedestal: GFXP1308FMC Instructions For Washer Models: GFWS2500, GFWS2505, GFWS2600, GFWS2605, GHWS3600, GHWS3605, GFWS3700 and GFWS3705 Pedestal For Dryer Models: GFDS250, GFDS255, GFDS260, GFDS265, GHDS360, GHDS365, GFDS370 and GFDS375 Instructions en français : ....5 Instrucciones en español: .
-
Página 2: Installation Instructions
Installation Instructions 2 PREPARE THE PEDESTAL 3 INSTALL THE PEDESTAL TO THE WASHER OR DRYER Pull the drawer out as far as it will go. Place the pedestal against the bottom of the unit. Check to be sure the drawer front is at Remove screws the front of the washer. -
Página 3: Remove Shipping Screws
Installation Instructions 4 LEVEL THE WASHER OR DRYER 6 REMOVE SHIPPING SCREWS Stand the washer or dryer upright. Move it Remove the 4 shipping screws on the back side of the close to its final location. washer. Make sure that the washer or dryer is level by placing a level on top. - Página 4 Notes...
- Página 5 Instructions Piédestal blanc: GFXP1308FWW Piédestal rouge: GFXP1308FRR Piédestal carbone métallique: GFXP1308FMC d’installation Pour le modèle de laveuse : GFWS2500, GFWS2505, GFWS2600, GFWS2605, GHWS3600, GHWS3605, GFWS3700 et GFWS3705 Piédestal For les modèles de sécheuses : GFDS250, GFDS255, GFDS260, GFDS265, GHDS360, GHDS365, GFDS370 and GFDS375 AVANT DE COMMENCER OUTILS NÉCESSAIRES...
- Página 6 Instructions d’installation 2 COMMENT PRÉPARER LE SOCLE 3 COMMENT INSTALLER LE SOCLE SUR LA LAVEUSE OU LA SÉCHEUSE Tirez le tiroir au maximum. Placez le socle au bas de l’appareil. Veillez à ce que l’avant du tiroir soit placé à l’avant de Retirez les vis la laveuse.
-
Página 7: Comment Retirer Les Vis De Transport
Instructions d’installation 4 COMMENT METTRE LA LAVEUSE OU 6 COMMENT RETIRER LES VIS DE LA SÉCHEUSE DE NIVEAU TRANSPORT Placez la laveuse ou la sécheuse debout. Retirez les 4 vis de transport situées à l’arrière de la Placez-la proximité de l’endroit où vous avez laveuse. - Página 8 Notes...
-
Página 9: Preparación Para La Instalación
Instrucciones de Pedestal blanco: GFXP1308FWW Pedestal rojo: GFXP1308FRR Pedestal carbono metálico: GFXP1308FMC instalación Para modelo de lavadora: GFWS2500, GFWS2505, GFWS2600, GFWS2605, GHWS3600, GHWS3605, GFWS3700 y GFWS3705 Pedestal Para modelos de secadora: GFDS250, GFDS255, GFDS260, GFDS265, GHDS360, GHDS365, GFDS370 and GFDS375... -
Página 10: Cómo Instalar El Pedestal En La Lavadora O Secadora
Instrucciones de instalación 2 PREPARE EL PEDESTAL 3 CÓMO INSTALAR EL PEDESTAL EN LA LAVADORA O SECADORA Abra el cajón hasta el Coloque el pedestal contra la parte inferior de máximo. la unidad. Controle que el frente del cajón se encuentre en el frente de la lavadora. -
Página 11: Cómo Nivelar La Lavadora Osecadora
Instrucciones de instalación 4 CÓMO NIVELAR LA LAVADORA O 6 QUITE LOS TORNILLOS DE EMPAQUE SECADORA Quite los 4 tornillos de embalaje ubicados en la parte trasera de la lavadora. Coloque la lavadora o secadora en posición vertical. Colóquela cerca de su ubicación definitiva. - Página 12 SPECIFICATIONS SUBJECT TO CHANGE WITHOUT NOTICE GE Appliances General Electric Company Louisville, Kentucky 40225 GEAppliances.com...


