Publicidad
Enlaces rápidos
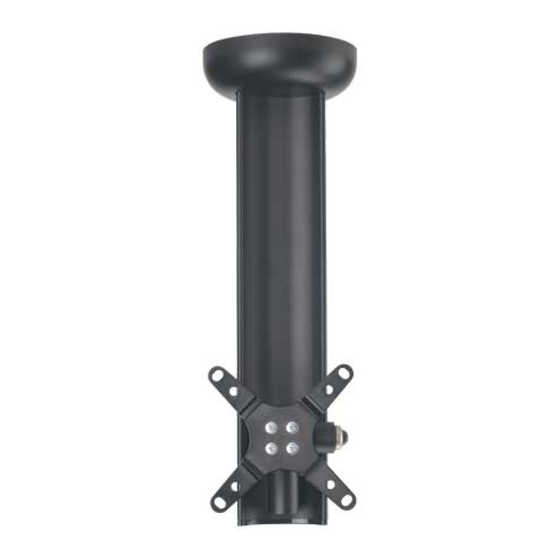
Thank you for choosing a Sanus Systems ceiling mount. The SC1A is designed to mount
EN
televisions with a VESA (Video Electronics Standards Association) hole pattern of 75 mm
x 75 mm or 100 mm x 100 mm. It allows you to tilt the television up to 15° vertically, and
swivel 75° horizontally to the left, and 28° horizontally to the right.
The weight of the television must not exceed 22.7 kg (50 lbs). Improper installation
may cause property damage or personal injury. Do not use this product for any
purpose that is not explicitly specified by Sanus Systems.
Gracias por optar por un soporte de techo de Sanus Systems. El SC1A está diseñado
ES
para montar televisores con un patrón de orificios VESA (Video Electronics Standards
Association) de 75 x 75 o 100 x 100 mm, que le permitirá inclinar el televisor hasta 15º
verticalmente, girarlo 75º horizontalmente hacia la izquierda y 28º horizontalmente hacia
la derecha.
El televisor no debe tener más de 22,7 kg (50 libras) de peso. Una instalación
inadecuada puede causar daños materiales o lesiones personales. No utilice este
producto para ningún fin que no sea explícitamente especificado por Sanus Systems.
FR
Merci d'avoir choisi un dispositif de fixation au plafond de Sanus Systems. Le SC1A est
conçu pour installer au plafond des téléviseurs pourvus d'une configuration de fixation
conforme à la norme VESA (Video Electronics Standards Association) de 75 mm x 75 mm
ou de 100 mm x 100 mm. Il vous permet d'incliner le téléviseur verticalement jusque de
15° et de le faire pivoter horizontalement de 75° vers la gauche et de 28° vers la droite.
Le poids du téléviseur ne doit pas dépasser 22,7 kg (50 lb). Une installation incorrecte
peut entraîner des préjudices corporels ou des dommages matériels. N'utilisez pas
ce produit à une fin non spécifiée expressément par Sanus Systems.
Customer Service: 1-800-359-5520 • info@sanus.com • www.sanus.com
CauTION
aDVERTENCIa
aTTENTION
Sanus Systems 2221 Hwy 36 West, Saint Paul, MN 55113 USA
SC1A
(6901-300089 <00>)
Publicidad

Resumen de contenidos para Sanus Systems SC1A
- Página 1 SC1A (6901-300089 <00>) Thank you for choosing a Sanus Systems ceiling mount. The SC1A is designed to mount televisions with a VESA (Video Electronics Standards Association) hole pattern of 75 mm x 75 mm or 100 mm x 100 mm. It allows you to tilt the television up to 15° vertically, and swivel 75°...
- Página 2 The supplied hardware is not for metal, concrete, brick, or block. If you are uncertain about the nature of your ceiling, consult an installation contractor. Sanus makes every effort to provide all television mounting hardware. If the hardware you need is not included, please consult your local hardware store or call Sanus Systems. CauTION...
- Página 3 [02] x 1 [03] x 1 [01] x 1 M4 x 10mm [04] x 3 [05] x 3 [06] x 4 [07] x 1 [08] x 1 [09] x 1 [10] x 1 [11] x 1 6901-300089 <00>...
- Página 4 3/16 in. 63 mm (2.5 in.) 6901-300089 <00>...
- Página 5 [04] [05] [01] CauTION To avoid personal injury or property damage, tighten the lag bolts [05] only until the lag bolt washers [04] are pulled tightly against the ceiling plate on the pillar [01]. aDVERTENCIa Para evitar lesiones personales o daños materiales, apriete los tornillos de madera [05] solamente hasta que las arandelas de tornillo de madera [04] se encuentren fuertemente sujetas a la placa de techo del poste [01].
- Página 6 [06] Attach the Monitor Mount [02] to the back of your television using the M4 x 10 mm Screws [06], as shown. Position the Monitor Mount so that the large side of the tapered hole faces the bottom of the television. Tighten the Screws into the monitor.
- Página 7 [11] [10] [07] CauTION: This step may require [09] two people to lift the assembly onto the pillar. [08] aDVERTENCIa: Para este paso, es posible que hagan falta dos personas para levantar el conjunto hasta el poste. [02] aTTENTION : Cette étape peut exiger la présence de deux [01] personnes pour soulever l’ensemble...
- Página 8 [03] Snap the cable cover [03] into the grooves along the edge of the channel. Cables can be then routed through the break-away tab on the shroud at the top of the pillar. Encaje la cubierta de cables [03] en la ranura situada a lo largo del borde del túnel. Luego podrán dirigirse los cables a través de la pestaña de ocultamiento situada en el refuerzo en la parte superior del poste.
- Página 9 Optional pillar adjustment Ajuste de poste optativo Réglage de la hauteur sur la colonne de suspension en option CauTION To prevent property damage or personal injury, do not adjust the pillar [H] height with a TV or monitor attached. aDVERTENCIa Para evitar daños materiales o lesiones personales, no ajuste la altura del poste [H] con el televisor o el monitor acoplados.
- Página 10 CSAV, Inc. and its affiliated corporations and subsidiaries (collectively, “CSAV”), intend to make this manual accurate and complete. However, CSAV makes no claim that the information contained herein covers all details, conditions, or variations. Nor does it provide for every possible contingency in connection with the installation or use of this product. The information contained in this document is subject to change without notice or obligation of any kind.


