Tabla de contenido
Publicidad
Idiomas disponibles
Idiomas disponibles
Enlaces rápidos
English, Page 7 ~ 11
Español, Page 12~ 16 ¡IMPORTANTE! Conserve el manual del propietario para las instrucciones de mantenimiento y ajuste. Su
Français, Page 17 ~ 21
Deutsche, Seite 22 ~ 26 WICHTIG! Bitte bewahren Sie das Benutzerhandbuch für Wartungs- und Einstellanweisungen auf. Ihre
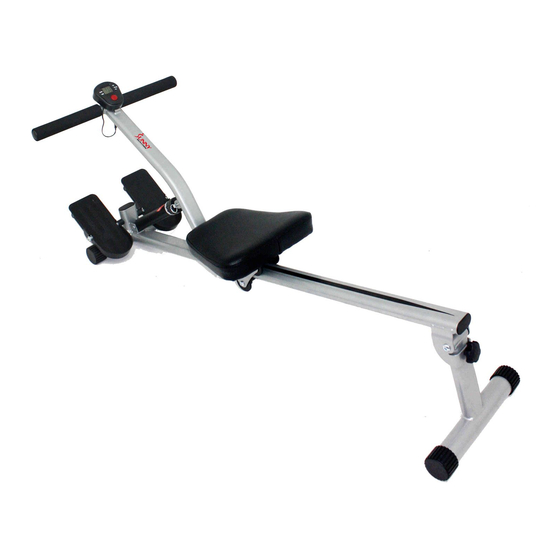
ROWING MACHINE
SF-RW1205
USER MANUAL
IMPORTANT! Please retain owner's manual for maintenance and adjustment instructions. Your
satisfaction is very important to us, PLEASE DO NOT RETURN UNTIL YOU HAVE CONTACTED US:
support@sunnyhealthfitness.com or 1- 877 - 90SUNNY (877-907-8669).
satisfacción es muy importante para nosotros, NO DEVUELVA HASTA HABERNOS ONTACTADO:
support@sunnyhealthfitness.com ó 1- 877 - 90SUNNY (877-907-8669).
IMPORTANT! Veuillez conserver le manuel du propriétaire pour les instructions de réglage et d'entretien.
Votre satisfaction est très importante pour nous, VEUILLEZ NE PAS EFFECTUER DE RETOUR AVANT
DE NOUS AVOIR CONTACTÉ: support@sunnyhealthfitness.com ou 1- 877 – 90SUNNY (877-907-
8669).
Zufriedenheit ist besonders wichtig für uns, BITTE SCHICKEN SIE DAS PRODUKT NICHT ZURÜCK,
BEVOR SIE SICH MIT UNS IN VERBINDUNG GESETZT HABEN: support@sunnyhealthfitness.com
oder 1-877-90SUNNY (877-907-8669).
0
Publicidad
Tabla de contenido

Manuales relacionados para Sunny SF-RW1205


Resumen de contenidos para Sunny SF-RW1205
- Página 1 ROWING MACHINE SF-RW1205 USER MANUAL English, Page 7 ~ 11 IMPORTANT! Please retain owner’s manual for maintenance and adjustment instructions. Your satisfaction is very important to us, PLEASE DO NOT RETURN UNTIL YOU HAVE CONTACTED US: support@sunnyhealthfitness.com or 1- 877 - 90SUNNY (877-907-8669).
-
Página 2: Important Safety Information
IMPORTANT SAFETY INFORMATION We thank you for choosing our product. To ensure your safety and health, please use this equipment correctly. It is important to read this entire manual before assembling and using the equipment. Safe and effective use can only be achieved if the equipment is assembled, maintained and used properly. -
Página 3: Informations De Sécurité Importantes
INFORMATIONS DE SÉCURITÉ IMPORTANTES Nous vous remercions d’avoir choisi notre produit. Pour votre santé et votre sécurité, veuillez utiliser correctement cet appareil. Il est important de lire entièrement le présent manuel avant d’assembler l’appareil et de l’utiliser. L’utilisation sûre et efficace n’est possible que si l’appareil est correctement assemblé, entretenu et utilisé. -
Página 4: Exploded Diagram
EXPLODED DIAGRAM 25 24 10 11 33 34 20 22 HARDWARE PACKAGE #41 M8 1PC #A 1PC #27 M8 1PC #B 1PC... -
Página 5: Parts List
PARTS LIST Description Spec. Qty. Description Spec. Qty. Bearing Sponge Roller Casing Pipe for Idler Handlebar Wheel Meter Bolt Seat Washer Seat Support Front Support Tube Bolt Grommet Magnet Hydraulic Cylinder Bolt M3.4 Bolt Main Frame Washer Sensor Pedal Cushion Spacer Adjustment Knob Bolt... -
Página 6: Liste Des Éléments
LISTE DES ÉLÉMENTS N° Descripción Especificaciones Cant. N° Descripción Especificaciones Cant. Embout d’Extrémité Roulement Mousse Rouleau Guidon Tuyau d'Enveloppe Compteur Écrou Siège Rondelle Support de Siège Tube de Support Avant Boulon Oeillet Aimant Vérin Hydraulique Boulon M3.4 Boulon Cadre Principal Rondelle Capteur Pédale... - Página 7 Ordering Replacement Parts (U.S. and Canadian Customers only) Please provide the following information for us to accurately identify the part(s) needed: ✓ The model number (found on cover of manual) ✓ The product name (found on cover of manual) ✓ The part number found on the “EXPLODED DIAGRAM”...
- Página 8 ASSEMBLY INSTRUCTIONS We value your experience using Sunny Health and Fitness products. For assistance with parts or troubleshooting, please contact us at support@sunnyhealthfitness.com or 1-877-90SUNNY (877-907- 8669). STEP 1: Loosen and remove the Adjustment Knob (No. 36) and unfold the Rear Stabilizer (No. 38). Reinsert and tighten the Adjustment Knob (No.
- Página 9 We value your experience using Sunny Health and Fitness products. For assistance with parts or troubleshooting, please contact us at support@sunnyhealthfitness.com or 1-877-90SUNNY (877-907- 8669). STEP 3: Remove 2 Bolts (No. 5) and 2 Washers (No. 6) from Front Support Tube (No. 7) using Allen Wrench (No. A).
-
Página 10: Battery Installation & Replacement
BATTERY INSTALLATION & REPLACEMENT Battery Battery Cover BATTERY INSTALLATION: 1. Take out 2 AA batteries from meter box. 2. Press the buckle of battery cover on the Meter (No. 4), then remove battery cover. 3. Install 2 AA batteries into the battery case on the back of the Meter (No. 4). Pay attention to the battery + and –... -
Página 11: Adjusting The Balance
ADJUSTMENTS & USAGE GUIDE ADJUSTING THE TENSION To adjust the tension level, turn the adjustment knob on the Hydraulic Cylinder (No. 9) to the desired level. The tension levels range is from Level 1 to Level 12, with Level 1 being the lowest resistance. ADJUSTING THE BALANCE Before using your product, check the balance of the product to ensure that it is safe for use. - Página 12 EXERCISE METER Our exercise meter on the Sunny Rowing Machine allows the user to tailor a personalized workout by monitoring their progress. During a workout, the exercise meter will alternately and repeatedly display your Time, Count, Calories, Total Count, and Scan (alternates all of the above). With our easy-to-use meter, the user can efficiently track their fitness improvements from one workout to the next.
-
Página 13: Instrucciones De Armado
INSTRUCCIONES DE ARMADO Valoramos su experiencia con los productos de Sunny Health and Fitness. Para obtener ayuda con piezas resolución problemas, escríbanos dirección correo support@sunnyhealthfitness.com, o llámenos al 1-877-90SUNNY (877-907-8669). PASO 1: Afloje y retire la Perilla de Ajuste (n.°... - Página 14 Valoramos su experiencia con los productos de Sunny Health and Fitness. Para obtener ayuda con piezas resolución problemas, escríbanos dirección correo support@sunnyhealthfitness.com, o llámenos al 1-877-90SUNNY (877-907-8669). PASO 3: Retire 2 Pernos (n.° 5) y 2 Arandelas (n.° 6) del Tubo de Soporte Delantero (n.°...
-
Página 15: Instalación Y Reemplazo De Las Pilas
INSTALACIÓN Y REEMPLAZO DE LAS PILAS Pila Cubierta de Píla INSTALACIÓN DE LAS PILAS: 1. Saque 2 pilas AA de la caja del medidor. 2. Presione el broche de la tapa de las pilas en la Medidor (n.° 4), luego, retire la tapa de las pilas. 3. -
Página 16: Ajustando La Resistencia
AJUSTES Y GUÍ A DE USO AJUSTANDO LA RESISTENCIA Para ajustar el nivel de tensión, gire la perilla de ajuste en el Cilindro Hidráulico (n.° 9) hasta el nivel deseado. Los niveles de tensión van desde el Nivel 1 hasta el Nivel 12. -
Página 17: Medidor De Ejercicio
MEDIDOR DE EJERCICIO Nuestra consola de visualización que viene con la máquina de remo Rowing Machine de Sunny le permite al usuario diseñar un entrenamiento personalizado ya que por medio de ella puede controlar su progreso. Durante el entrenamiento, la consola de visualización mostrará de manera alternada y repetida el tiempo, el conteo, las calorías, el conteo total y escaneará... -
Página 18: Instructions D'assemblage
INSTRUCTIONS D’ASSEMBLAGE Votre expérience d’utilisation des produits Sunny Health and Fitness compte pour nous. Pour obtenir l’aide avec pièces dépannage, veuillez nous contacter à l’adresse : support@sunnyhealthfitness.com ou au 1-877-90SUNNY (877-907-8669). ÉTAPE 1: Desserrez et enlevez le Bouton de Réglage (N° 36) et dépliez le Stabilisateur Arrière (N°... - Página 19 Votre expérience d’utilisation des produits Sunny Health and Fitness compte pour nous. Pour obtenir l’aide avec pièces dépannage, veuillez nous contacter à l’adresse : support@sunnyhealthfitness.com ou au 1-877-90SUNNY (877-907-8669). ÉTAPE 3: Retirez 2 Vis (N° 5) et 2 Rondelles (N° 6) du Tube de Support Avant (N°...
-
Página 20: Installation Et Remplacement Des Piles
INSTALLATION ET REMPLACEMENT DES PILES Batterie Couvercle de la batterie INSTALLATION DES PILES: 1. Retirer les 2 piles AA du boîtier du compteur. 2. Appuyer sur le fermoir du couvercle du compartiment à piles de Compteur (N° 4) et retirer le couvercle. -
Página 21: Réglage De La Sangle De Pédale
RÉGLAGES ET GUIDE D’UTILISATION RÉGLAGE DU NIVEAU DE TENSION Pour régler le niveau de tension, tournez le bouton de réglage sur le Vérin Hydraulique(N° 9) jusqu’au niveau souhaité. Les niveaux de tension vont de 1 à 12, le premier étant celui de plus faible résistance. AJUSTER L'ÉQUILIBRE Avant d'utiliser votre produit, vérifiez l'équilibre du produit pour vous assurer qu'il peut être utilisé... -
Página 22: Touche De Fonction
COMPTEUR D’EXERCICE Notre console d’affichage sur le rameur de Sunny permet à l’utilisateur de créer un entraînement personnalisé tout en surveillant ses progrès. Lors de la séance, la console affichera de façon alternative et répétée la durée, le nombre, les calories, le nombre total ou le mode balayage (tout ce qui précède). - Página 23 MONTAGEANLEITUNG Wir schätzen Ihre Erfahrung im Umgang mit den Produkten von Sunny Health and Fitness. Für Fragen Teilen oder Hilfe Fehlerbehebung kontaktieren bitte unter support@sunnyhealthfitness.com oder 1-877-90SUNNY (877-907-8669). SCHRITT 1: Lockern und entfernen Sie den Einstellknopf (Nr. 36) und klappen Sie den Stabilisator Hinten (Nr.
- Página 24 Wir schätzen Ihre Erfahrung im Umgang mit den Produkten von Sunny Health and Fitness. Für Fragen Teilen oder Hilfe Fehlerbehebung kontaktieren bitte unter support@sunnyhealthfitness.com oder 1-877-90SUNNY (877-907-8669). SCHRITT 3: Entfernen Sie 2 Bolzen (Nr. 5) und 2 Beilagscheiben (Nr. 6) vom Stützrohr Vorne (Nr. 7) mit dem Inbusschlüssel (Nr.
-
Página 25: Einlegen Der Batterien
EINLEGEN UND AUSTAUSCHEN DER BATTERIE Batterie Batterieabdeckung EINLEGEN DER BATTERIEN: 1. Nehmen Sie 2 AA-Batterien aus der Zählerbox. 2. Betätigen Sie die Verschlussklappe der Batterieabdeckung auf dem Zähler (Nr. 4) und entfernen Sie dann die Batterieabdeckung. 3. Legen Sie 2 AA-Batterien in das Batteriefach auf der Rückseite des Zähler (Nr. 4) ein. Achten Sie vor dem Einsetzen der Batterie auf die Pole + und –. - Página 26 EINSTELLUNGEN UND GEBRAUCHSANWEISUNG EINSTELLEN DER SPANNUNG Um das Spannungsniveau einzustellen, drehen Sie den Einstellknopf am Hydraulikzylinder (Nr. 9) auf das gewünschte Niveau. Der Spannungsbereich liegt zwischen Level 1 und Level 12, wobei Level 1 der niedrigste Widerstand ist. EINSTELLEN DER BALANCE Vor der Inbetriebnahme Ihres Produkts überprüfen Sie die Balance des Produkts, um sicherzustellen, dass der Gebrauch sicher ist.
- Página 27 TRAININGSZÄHLER Unser Trainingscomputer auf der Sunny-Rudermaschine ermöglicht es dem Benutzer, ein individuelles Training zu gestalten, indem er seinen Fortschritt überwacht. Während eines Trainings zeigt der Trainingscomputer abwechselnd und wiederholt Ihre Zeit, die Anzahl, die Kalorien, den Gesamtzähler und den Scan an (alle oben genannten werden abwechselnd angezeigt). Mit unserem benutzerfreundlichen Computer kann der Anwender seine Fitnessverbesserungen von einem Training zum nächsten effizient verfolgen.