Tabla de contenido
Publicidad
Idiomas disponibles
Idiomas disponibles
Enlaces rápidos
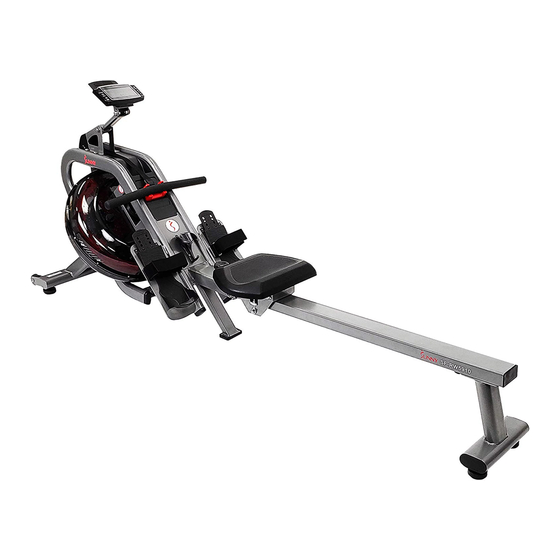
PHANTOM HYDRO WATER
English, Page 10 ~ 21
Español, Page 22 ~ 33
ROWING MACHINE
SF-RW5910
USER MANUAL
IMPORTANT! Please retain owner's manual for maintenance and adjustment
instructions. Your satisfaction is very important to us, PLEASE DO NOT
RETURN
UNTIL
support@sunnyhealthfitness.com or 1 - 877 - 90SUNNY (877-907-8669).
¡ IMPORTANTE! Por favor, conserve el manual del usuario para las
instrucciones de mantenimiento y ajuste. Su satisfacció n es muy importante
para nosotros, SI AL PRODUCTO LE HACE FALTA PARTES, POR FAVOR
NO LO DEVUELVA HASTA TENER CONTACTO CON NOSOTROS:
support@sunnyhealthfitness.com o al 1 – 877 - 90SUNNY (877-907-8669).
YOU
HAVE
CONTACTED
US:
Publicidad
Tabla de contenido

Manuales relacionados para Sunny SF-RW5910


Resumen de contenidos para Sunny SF-RW5910
- Página 1 PHANTOM HYDRO WATER ROWING MACHINE SF-RW5910 USER MANUAL IMPORTANT! Please retain owner’s manual for maintenance and adjustment English, Page 10 ~ 21 instructions. Your satisfaction is very important to us, PLEASE DO NOT RETURN UNTIL HAVE CONTACTED support@sunnyhealthfitness.com or 1 - 877 - 90SUNNY (877-907-8669).
-
Página 2: Important Safety Information
IMPORTANT SAFETY INFORMATION We thank you for choosing our product. To ensure your safety and health, please use this equipment correctly. It is important to read this entire manual before assembling and using the equipment. Safe and effective use can only be achieved if the equipment is assembled, maintain and used properly. - Página 3 INFORMACIÓN IMPORTANTE DE SEGURIDAD Gracias por haber elegido nuestro producto. Para garantizar su seguridad y salud, utilice este equipo correctamente. Es importante que lea todo el manual antes de instalar y usar el equipo. Solo se puede garantizar el uso seguro y eficaz del equipo si se instala, mantiene y utiliza correctamente.
-
Página 4: Exploded Diagram
EXPLODED DIAGRAM 1... - Página 5 EXPLODED DIAGRAM 2...
-
Página 6: Parts List
PARTS LIST Description Spec. Qty. Description Spec. Qty. Main Frame Handlebar Holder Meter Support Tube Protective Cover Slide Rail Mesh Belt Rear Support Tube Board Ф10xL94.5 Bolt Fixed Plate Pull Bar Screw M8x15 Meter Plate Screw ST4.2x16 U Shape Baffle PC Board 3 Supporting Board Volute Spring... - Página 7 Description Spec. Qty. Description Spec. Qty. Bearing Flat Washer S=10,13,14, Belt Roller Spanner 15,17 Belt Wheel Axle Allen Wrench Hex Bolt M6x15 Allen Wrench Spring Washer...
-
Página 8: Lista De Piezas
LISTA DE PIEZAS n.º Descripción Espec. Cant. n.º Descripción Espec. Cant. Estructura Principal Tornillo M5X10 Tubo Soporte de Sifón de Bombeo Computadora Riel Deslizante Tornillo M5x10 Tubo de Soporte Portabotella Trasero Soporte de Ф10xL94.5 Perno Dispositivo Barra de Remo Tornillo M5x15 Placa del Soporte de Barra... - Página 9 n.º Descripción Espec. Cant. n.º Descripción Espec. Cant. Rueda Eje de Arandela Correa Almohadilla de Pie de Cojinete Goma Tapón Oblato Rodillo de Correa Eje de Rueda de Perno M8x38 Correa Rodillo Perno Hexagonal M6x15 Arandela de d8xФ16x1.5 Arandela Plana Resorte Tuerca de Nailon Arandela Plana...
-
Página 10: Hardware Package
HARDWARE PACKAGE #17 D8xD20x1.5 8PCS #19 M8×16 8PCS #36 1PC #37 d12xФ24x2.0 1PC #5 Ф10xL94.5 1PC #10 M6xL15 1PC #99 S=10,13,14,15,17 1PC #34 1PC #101 S=6 1PC #100 S=5 1PC Ordering Replacement Parts (U.S. and Canadian Customers only) Please provide the following information in order for us to accurately identify the part(s) needed: ✓... - Página 11 ASSEMBLY INSTRUCTIONS We value your experience using Sunny Health and Fitness products. For assistance with parts or troubleshooting, please contact us at support@sunnyhealthfitness.com or 1-877-90SUNNY (877-907-8669). STEP 1: Remove pre-assembled Limit Cushion (No. 12) and 2 Screws (No. 13) from the Slide Rail (No. 3) using Spanner (No.
- Página 12 We value your experience using Sunny Health and Fitness products. For assistance with parts or troubleshooting, please contact us at support@sunnyhealthfitness.com or 1-877-90SUNNY (877-907-8669). STEP 2: 2-1: Attach the Slide Rail (No. 3) to the Main Frame (No. 1) with the 2 Bolts (No.
- Página 13 We value your experience using Sunny Health and Fitness products. For assistance with parts or troubleshooting, please contact us at support@sunnyhealthfitness.com or 1-877-90SUNNY (877-907-8669). STEP 3: 3-1: Remove the pre-assembled 2 Screws (No. 43) from the Main Frame (No. 1) using Spanner (No. 99). Attach the Bottle Holder (No.
- Página 14 HOW TO FILL AND EMPTY THE TANK 1. Remove the Plug (No. 72) from the Upper Tank Cover (No. 73a). 2. To fill the tank with water, refer to Fig. A. Insert the Funnel (No. 11) into the tank, then use a cup or a bucket and Pumping Siphon (No.
-
Página 15: Battery Installation & Replacement
BATTERY INSTALLATION & REPLACEMENT Battery Battery Cover BATTERY INSTALLATION: 1. Take out 2 AA batteries from meter box. 2. Press the buckle of battery cover on the back of the Meter (No. 39), then remove battery cover. 3. Install 2 AA batteries into the battery case on the back of the Meter (No. 39). Pay attention to the battery + and –... - Página 16 ADJUSTMENTS GUIDE ADJUSTING THE BALANCE MOVING THE ROWER To move the rower, lift up the Rear Support Tube (No. 4) until the Adjust the Hex Nuts (No. 32) on the Adjustable Foot Rollers (No. 85) touch the ground. With the Rollers (No. 85) on the Pads (No.
- Página 17 EXERCISE METER Our computerized exercise meter on the Sunny Water Rowing Machine allows the user to tailor a personalized workout by monitoring their progress. During a workout, the exercise meter will alternately and repeatedly display the Time, Time/500M, SPM, Distance, Strokes, Total Strokes, Calories Burned, and Pulse.
- Página 18 FUNCTIONS TIME: Set target time (1 min ~ 99 min) by pressing UP and DOWN buttons, in 1 minute increments. TIME/500M: Your average 500M time is automatically displayed. SPM: Strokes per minute. DISTANCE: Preset target distance (100 ~ 99900 meters) by pressing UP and DOWN buttons, in 100 meters increments.
- Página 19 Fig 2 2. The CLOCK will flash. Press UP button to set the hour. Press ENTER to confirm. Press UP to set the minutes. Press ENTER to confirm. Continue press UP button to set the YEAR (in the STROKES window); MONTH (in the CALORIES window); DAY (in the PULSE window).
- Página 20 the values for DISTANCE, STROKES, CALORIES, or PULSE. (Note: You can only set the value for one function to countdown. For example, if you have set the target value for TIME, then DISTANCE can’t be set.) Press START button to start and the STOP icon will disappear. When the countdown reaches zero or you press STOP button, the meter will stop and display the average value.
- Página 21 a. Press START button to start and STOP icon will disappear. USER and PC will display in the matrix (Fig.6). The meter will stop when either the user or meter has reached the race distance that was set. Then, the matrix displays “PC WIN” or “USER WIN” (Fig.7). Fig 6 Fig 7 b.
-
Página 22: Sleep Mode
ALARM Alarm only works while the meter is in sleep mode. Alarm will not sound during exercise. Press and hold RESET to go to clock screen to set up ALARM. SLEEP MODE The meter will go into sleep mode after about 4 minutes of inactivity. BATTERY This meter uses 2 AA batteries, which are included. - Página 23 INSTRUCCIONES DE MONTAJE Valoramos su experiencia con los productos de Sunny Health and Fitness. Para obtener ayuda con piezas resolver algún problema, escrí banos direcció n correo support@sunnyhealthfitness.com,o llámenos al 1-877-90SUNNY (877-907-8669). PASO 1: Retire el Cojí n de Lí mite (n.º 12) premontado y los 2 Tornillos (n.º...
- Página 24 Valoramos su experiencia con los productos de Sunny Health and Fitness. Para obtener ayuda con piezas resolver algún problema, escrí banos direcció n correo support@sunnyhealthfitness.com,o llámenos al 1-877-90SUNNY (877-907-8669). PASO 2: 2-1: Fije el Riel Deslizante (n.º 3) al Estructura Principal (n.º 1) con los 2 Pernos (n.º...
- Página 25 Valoramos su experiencia con los productos de Sunny Health and Fitness. Para obtener ayuda con piezas resolver algún problema, escrí banos direcció n correo support@sunnyhealthfitness.com,o llámenos al 1-877-90SUNNY (877-907-8669). PASO 3: 3-1: Retire los 2 Tornillos (n.º 43) premontados Estructura Principal (n.º...
-
Página 26: Cómo Llenar Y Vaciar El Tanque
CÓMO LLENAR Y VACIAR EL TANQUE 1. Retire el Tapón del Tanque (n.º 72) de la Cubierta del Tanque (n.º 73a). 2. Para llenar el tanque con agua, consulte la Fig. A. Inserte el Embudo (n.º 11) en el tanque, luego use una taza o la Sifón de Bombeo (n.º... -
Página 27: Instalación Y Reemplazo De La Pila
INSTALACIÓN Y REEMPLAZO DE LA PILA Pila Tapa de la Pila INSTALACIÓN DE LA PILA: 1. Saque 2 pilas AA de la caja del Computadora (n.º 39). 2. Presione la hebilla de la tapa de la pila en la parte posterior del Computadora (n.º 39), luego retire la tapa de la pila. -
Página 28: Guí A De Ajustes
GUÍ A DE AJUSTES TRASLADO DE LA MÁQUINA AJUSTE DEL BALANCE Ajuste las Tuercas Hexagonales (n.° 32) de las Para mover la remadora, levante el Tubo de Soporte Trasero (n.º 4) Almohadillas de Pie Ajustables (n.° 33) de la remadora hasta que los Rodillos (n.º... -
Página 29: Medidor De Ejercicio
MEDIDOR DE EJERCICIO La consola de visualización computarizada en la remadora de agua de Sunny permite al usuario adaptar un entrenamiento personalizado al monitorear su progreso. Durante un entrenamiento, el medidor de ejercicio mostrará alternativamente y repetidamente el tiempo, tiempo / 500M, SPM, distancia, remadas, remadas totales, calorí... -
Página 30: Funcionamiento
FUNCIONES TIME (TIEMPO): Establezca el tiempo objetivo al pulsar los botones UP y DOWN (de 1 min a 99 min), en incrementos de 1 minuto. TIME/500 M (TIEMPO/500 M): Su tiempo promedio de 500 m se muestra automáticamente. SPM: Remadas por minuto. DISTANCIA: Preestablezca el valor objetivo al pulsar los botones UP y DOWN (de 100 a 99900 metros), en incrementos de 100 metros. - Página 31 Fig 2 5. El RELOJ parpadeará. Pulse UP para establecer la hora. Pulse ENTER para confirmar. Pulse UP para establecer los minutos. Pulse ENTER para confirmar. Continú e configurando el AÑO (en la pantalla STROKES); el MES (en la pantalla CALORIES); el DÍ A (en la pantalla PULSE) al pulsar UP o DOWN.
- Página 32 valor de TIME comenzará a parpadear. Pulse UP para establecer el valor de TIME a cuenta regresiva. Pulse ENTER para confirmar. Si no desea establecer el valor del tiempo en COUNTDOWN (CUENTA REGRESIVA), pulse ENTER para ir a la siguiente funció n. Puede establecer los valores de DISTANCE, STROKES, CALORIES o PULSE.
- Página 33 Fig.5 c. Pulse el botón de START para iniciar y STOP desaparecerá. USER (USUARIO) y PC (COMPUTADORA) se mostrará n en la matriz (Fig. 6). La computadora se detendrá cuando el usuario o la computadora haya alcanzado la distancia de carrera que se estableció. A continuación, la matriz muestra "PC WIN"...
-
Página 34: Sleep Mode (Modo De Suspensión)
Fig 7 d. Cuando termine la carrera, puede presionar START para comenzar una carrera nuevamente. Presione RESET para salir de la pantalla RACE. (3) RECOVERY (Recuperacion): Este medidor funciona con un monitor de frecuencia cardí aca con correa de pecho de 5.3 kHz (no incluido).