Publicidad
Idiomas disponibles
Idiomas disponibles
Enlaces rápidos
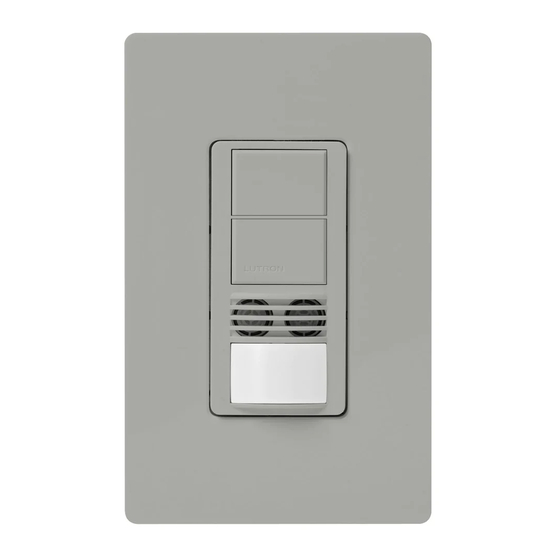
Dual Circuit Dual Technology
Sensor Switch
Installation Guide
MS-A202
WMS-A202
Occupancy
Two circuits, each rated at:
Lighting
120 – 277 V~ 50 / 60 Hz 6 A
Fan
120 V~ 50 / 60 Hz 4.4 A 1/6 HP
Combined lighting and fan load
120 V~ 50 / 60 Hz 4.4 A
Major motion coverage:
30 ft × 30 ft (9 m × 9 m) [900 ft
2
(81 m
2
)]
Minor motion coverage:
2
2
20 ft × 20 ft (6 m × 6 m) [400 ft
(36 m
)]
®
English
P/N 032567 Rev. A
10/2020
Wiring
1
Turn power OFF
WARNING! Shock Hazard. May
result in serious injury or death.
Turn power OFF at circuit breakers
before installing the unit.
* Two Line Wiring. Wiring must comply with NECR code for wiring multiple branch circuits:
Where two or more branch circuits supply devices or equipment on the same yoke, a means to
simultaneously disconnect the ungrounded conductors supplying those devices shall be provided at
the point at which the branch circuits originate.
Warranty: http://www.lutron.com/TechnicalDocumentLibrary/Sensor_Warranty.pdf
Lutron and Maestro are trademarks or registered trademarks of Lutron Electronics Co., Inc. in the US and/or other countries.
NEC is a registered trademark of National Fire Protection Association, Quincy, Massachusetts.
© 2014 – 2020 Lutron Electronics Co., Inc.
Lutron Electronics Co., Inc.
|
7200 Suter Road
|
Coopersburg, PA 18036-1299
Important Notes
Please read before installing.
1. A ground connection is required for product to function.
®
Connect green-sleeved wire to ground only in retrofit and
replacement applications. When neutral connection is
available, remove green sleeve and connect to neutral. If
neither wire is present, consult a licensed electrician.
2. Device will not function if black wire and red wire
(Circuit 1/Line 1) are not wired.
3. This product is rated to control 6 A per circuit. Circuits may
NOT be wired in parallel to control loads greater than 6 A.
4. When power is applied, the sensor switch can be manually
turned on or off after the first 10 seconds and will
automatically control the load after 2 minutes.
5. CAUTION: Risk of Electric Shock — More than one
disconnect switch may be required to de-energize the
equipment before installing the unit, rewiring, or replacing
bulbs.
6. The sensor switch requires an unobstructed view of the room
and line-of-sight to detect motion.
7. Hot objects or moving air currents can affect the performance
of the sensor switch and may cause the sensor to turn
on unexpectedly or maintain its current state longer than
desired.
8. CAUTION: To reduce the risk of overheating and possible
damage to other equipment,
DO NOT use to control receptacles.
9. Install in accordance with all national and local electrical
codes.
10. For indoor use only. Operate between 32 °F and 104 °F
(0 °C and 40 °C).
11. Clean with a soft damp cloth only. DO NOT use any chemical
cleaners.
O
O
O
Single-Line
Two-Line*
|
www.lutron.com/support
2
Connect sensor switch
A. When neutral is present in outlet box: remove green sleeve, connect white wire to neutral.
Single-Line Wiring
Line / Hot
120–277 V~
Neutral
Two-Line Wiring
Line 1
120–277 V~
Line 2
120–277 V~
Neutral 2
Neutral 1
B. If no neutral is present, connect green-sleeved wire to ground.
Single-Line Wiring
Line / Hot
120–277 V~
O
Neutral
O
Two-Line Wiring
O
Line 1
120–277 V~
Line 2
120–277 V~
Neutral 2
Neutral 1
**
Device will not function if black wire and red wire are not wired.
• Before installing wallplate, program all desired settings. See back for programming instructions.
• For additional wiring instructions, please visit www.lutron.com/DTMaestroInstall
3
Turn Power ON
CAUTION! Risk of Electric
Shock. Leakage current present.
Earth connection required before
connecting power.
4
Wait for 2 minutes
• The sensor switch will manually control the load after the first 10 seconds.
• Once power has been restored, the sensor switch will automatically control the load after
the first 2 minutes.
Black**
Red**
Load
1
Black /
Black /
30
m
Hi
Load
15
Med
5
Low
1
Off
Orange
Orange
Mode
PIR
2
Occ
Hi
Lrn
Med
Fixd
Low
Vac
Min
Green
White
Ground
Black**
Red**
Load
1
Black /
Black /
30
m
Load
Hi
15
Med
5
Low
1
Off
Orange
Mode
PIR
Orange
2
Occ
Hi
Lrn
Med
Fixd
Low
Vac
Min
Green
White
Ground
Black**
Red**
Load
1
Black/
Black /
30
m
Hi
Load
15
Med
5
Low
1
Off
Orange
Orange
Mode
PIR
2
Occ
Hi
Lrn
Med
Fixd
Low
Vac
Min
Green
Green-sleeved
wire
Ground
Black**
Red**
Load
1
Black /
Black /
30
m
Hi
Load
15
Med
5
Low
1
Off
Orange
Mode
PIR
Orange
2
Occ
Hi
Lrn
Med
Fixd
Low
Vac
Min
Green
Green-sleeved
wire
Ground
O
O
O
O
O
O
Publicidad

Manuales relacionados para Lutron Maestro MS-A202


Resumen de contenidos para Lutron Maestro MS-A202
- Página 1 Warranty: http://www.lutron.com/TechnicalDocumentLibrary/Sensor_Warranty.pdf Wait for 2 minutes Lutron and Maestro are trademarks or registered trademarks of Lutron Electronics Co., Inc. in the US and/or other countries. • The sensor switch will manually control the load after the first 10 seconds. NEC is a registered trademark of National Fire Protection Association, Quincy, Massachusetts.
-
Página 2: Change Settings
• Sensor does not have full view of the room. Move objects blocking line-of-sight. For additional features, wiring help, troubleshooting, and product information please visit: www.lutron.com/DTMaestroInstall Customer Assistance: www.lutron.com/support U.S.A., Canada, Caribbean: 1.844.LUTRON1 Mexico: +1.888.235.2910... -
Página 3: Remarques Importantes
Garantie : http://www.lutron.com/TechnicalDocumentLibrary/Sensor_Warranty.pdf Attendez 2 minutes Lutron et Maestro sont des marques commerciales ou déposées de Lutron Electronics Co., Inc. aux États-Unis et/ou dans d’autres pays. • L’interrupteur de détection commandera la charge manuellement après les 10 premières NEC est une marque de commerce déposée de National Fire Protection Association, Inc., Quincy, Massachusetts. -
Página 4: Changer Les Réglages
Le niveau peut être réglé dans les paramètres « Niveau ALD fixe ». Pour des fonctionnalités supplémentaires, de l’assistance pour le câblage, un dépannage ou des informations sur les produits, veuillez consulter : www.lutron.com/DTMaestroInstall Assistance à la clientele : www.lutron.com/support États-Unis, Canada et les Caraïbes : 1.844.LUTRON1 Mexique : +1.888.235.2910 Autres : +1.610.282.3800... - Página 5 Garantía: http://www.lutron.com/TechnicalDocumentLibrary/Sensor_Warranty.pdf Espere 2 minutos Lutron y Maestro son marcas comerciales o marcas comerciales registradas de Lutron Electronics Co., Inc. en E.U.A. y/o en otros países. NEC es una marca registrada de National Fire Protection Association de Quincy, Massachusetts. • El interruptor sensor controla manualmente la carga después de los primeros 10 segundos.
-
Página 6: Selección De Configuración Personalizada
Selección de configuración personalizada Valores de configuración adicionales Nota: En www.lutron.com/DTMaestroInstall puede encontrar información adicional del producto, entre esta información Para que aparezcan los valores de configuración actuales pulse el botón de tiempo límite “Intercambio de circuitos” y otras opciones de programación, además de diagramas de cableado.