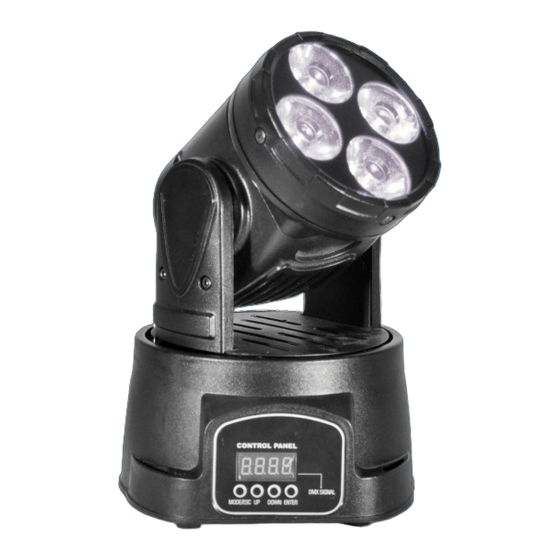
Resumen de contenidos para TECshow ALFIE Mini moving head – 4 x Osram 10W RGBW LEDs
- Página 1 ALFIE Mini moving head – 4 x Osram® 10W RGBW LEDs USER MANUAL / MANUAL DE USUARIO PLEASE READ THE INSTRUCTIONS CAREFULLY BEFORE USE POR FAVOR LEA LAS INSTRUCCIÓNES ANTES DE USAR...
-
Página 2: Tabla De Contenido
Contents Contenidos Section 1. Getting Started 1ra. Sección. Empezando - What is included - Que se incluye - Unpacking - Desempacando - AC Power - Energia y conectores - Safety Instructions - Instrucciones de seguridad Section 2. Introduction 2da. Sección. Introducción - Product overview - Descripción del producto - Specifications... -
Página 3: Section 1. Getting Started
Section 1. Getting Started 1ra. Sección. Empezando What is included Que se incluye - 1pc Mini wash - 1 Mini wash - 1pc User Manual - 1 Manual de usuario Unpacking Desempaque Thanks for using our ALFIE mini moving beam. Immediately upon Gracias por usar nuestro mini moving head ALFIE. -
Página 4: Section 2. Introduction
Section 2. Introduction 2da. Sección. Introducción Product overview Descripción del producto ALFIE is an ultra-compact beam moving head with a 7.5º beam ALFIE es un cabezal móvil ultra compacto con un ángulo de haz de angle, powered by 4 x Osram® 10W RGBW LEDs. Thanks to its 7.5º, alimentado por 4 LEDs RGBW Osram®. - Página 5 DMX Channel summary Resumen de canales DMX 12 Channel Mode for Wash 12 modos de canal para bañador CHANNEL FUNCTION CANAL FUNCIÓN Pan Fine Pan Fine Tilt Tilt Tilt Fine Tilt Fine Vector speed (Pan/Tilt) Velocidad del vector (Pan/Tilt) Dimmer / Strobe Dimmer / Strobo Rojo Green...
-
Página 6: Section 3. Set Up
Section 3. Set Up Sección 3. Armado Note: Nota: Disconnect the powercord before replacing Desconecte el cable de alimentación antes a fuse and always replace with the same type fuse. de cambiar el fusible y siempre reemplazelo por un fusible del mismo tipo. Fuse Replacement Reemplazo de fusible With a flat head screwdriver wedge the fuse holder out of... - Página 7 Data cabling Cableado de información To link fixtures together you must obtain data cables. If you Para vincular equipos debe obtener cables de datos. Si choose to create your own cable please use data-grade cables decide crear sus propios cables, por favor use cables que that can carry a high quality signal and are less prone to puedan llevar señales de alta calidad y poco propensos a la electromagnetic interference.
- Página 8 CAUTION: PRECAUCIÓN: Do not allow contact between the common and No permita el contacto entre la tierra común the fixture s chassis ground. Grounding the common can y el equipo. Esto puede crear un ground loop, haciendo que cause a ground loop, and your fixture may perform erratically. el equipo performe erráticamente.
-
Página 9: Master/Slave Fixture Linking
Master/Slave Fixture Linking Vinculación Master/Slave del equipo Connect the (male) 3 pin connector side of the DMX cable Conecte el lado macho de 3 pins del conector DMX a la to the output (female) 3 pin connector of the first fixture. salida hembra de 3 pines del primer equipo. -
Página 10: Section 4. Operating Instructions
Section 4. Operating Instructions Sección 4. Instrucciones de Operación Navigating the control panel Navegando el panel de control Access control panel functions using the four panel buttons Accede a las funciones del panel de control usando los cuatro located directly underneath the LCD Display. botones del panel ubicado justo debajo del display LCD. -
Página 11: Al Navegar El Menú
When navigating the menu: Al navegar el menú: • Use the “UP” button to move up. • Use el botón “UP” para moverse hacia arriba. • Use the “DOWN” button to move down. • Use el botón “DOWN” para moverse hacia abajo. •... -
Página 12: User Configurations
User configurations Configuración de usuario TO SET THE PAN TO INVERTING OR NON-INVERTING: PARA SETEAR EL PAN A INVERTIDO O NO INVERTIDO: Press the Mode button until it shows Presione el botón Mode hasta que muestre Use the Up/Down buttons to set to the desired inversion, Use los botones Up/Down para setear la opción deseada, press enter to confirm. -
Página 13: Operación
Operation Operación STAND-ALONE MODE (AUTO MODE): MODO STAND-ALONE (AUTOMÁTICO): This mode allows a single unit to run to a factory installed Este modo permite a una única unidad correr en dos program in one of two speeds. velocidades un programa instalado en fábrica. To set the fixture in auto mode Fast, select . - Página 14 DMX CHANNEL VALUES (12 CHANNEL FOR WASH) / VALORES CANALES DMX (12 CANALES PARA BAÑADOR) CHANNEL / CANAL VALUE / VALOR FUNCTION / FUNCION Pan Fine Tilt Tilt Fine Vector speed (Normal - Slow) / Velocidad de vector (Normal - Lento) Dimmer / Strobe Closed / Cerrado 100-0%...
- Página 15 DMX CHANNEL VALUES (4 CHANNEL FOR WASH) / VALORES CANALES DMX (4 CANALES PARA BAÑADOR) CHANNEL / CANAL VALUE / VALOR FUNCTION / FUNCION Tilt Dimmer / Strobe Closed / Cerrado 100-0% Strobe (Slow - Fast) / Strobo (Lento-Rápido) Open / Abierto Color Macros / Macros de color No function / Sin función Macro 1...
- Página 16 Versión Español...


