Tabla de contenido
Publicidad
Enlaces rápidos
1. Introduction & Characteristics
Dispose of this product in accordance with Local and National Disposal Regulations.
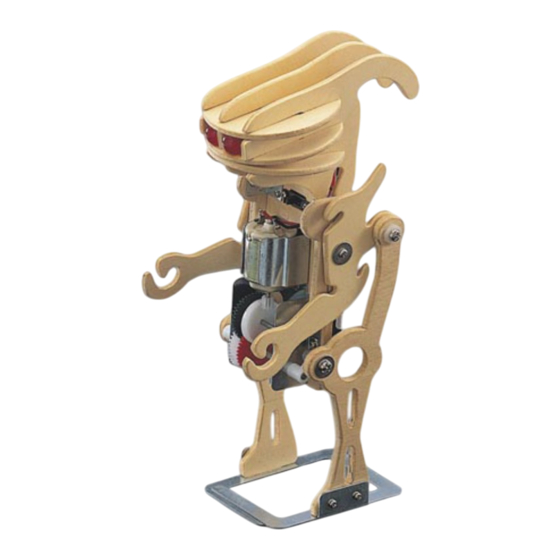
Thank you for buying the KNS3 ! Read this manual carefully before bringing the device into use.
• Easy to build, no glue or soldering required.
• Dislodge pre-cut pieces when you need them, not before. Sand any jagged edges before use (sandpaper included).
• The kit is powered by 2 AA-batteries (not included).
The kits of the KNS-series are supplied with prepunched boards, a gearbox, gears, shafts, a switch, a motor, a
battery holder and all necessary parts.
2. Parts List
Part n°
Quant.
1
1
2
1
3
1
4
1
5
1
6
1
7
1
8
1
9
1
10
2
11
2
12
2
13
8
14
6
15
2
KNS3
KNS3 – ROBOMECH
Description
gearbox
motor 3Vdc
pinion gear 8T
gear 40T/0T (white)
gear 40T/10T (red)
gear 40T/10T (green)
face gear 36T/10T (white)
metal shaft (3 x 52mm)
metal shaft (2 x 40mm)
nylon pad
nylon post (H : 3mm)
nylon connector
nylon pad Ø8mm
washer
nut M2
Part n°
Quant.
16
18
17
2
18
2
19
2
20
2
21
2
22
1
23
1
24
1
25
1
26
1
27
2
28
2
29
2
30
1
Fig.1
- 1 -
Description
self-tapping screw (2 x 4mm)
self-tapping screw (3 x 16mm)
screw
rivet
nylon cap
LED with wires
wire with terminal (yellow)
wire with terminal (green)
battery holder
slide switch with wire
PVC tube (small)
PVC tube (large)
metal foot (U-shaped)
fixing plate (large)
fixing plate (small)
VELLEMAN
Publicidad
Tabla de contenido

Resumen de contenidos para Velleman ROBOMECH
- Página 1 KNS3 – ROBOMECH 1. Introduction & Characteristics Dispose of this product in accordance with Local and National Disposal Regulations. Thank you for buying the KNS3 ! Read this manual carefully before bringing the device into use. • Easy to build, no glue or soldering required.
- Página 2 Note that the protruding edge should point towards the metal case. Fig.4 Screw a fixing plate P29 to boards B and C and fix them to board A. Then screw the gearbox onto board A. KNS3 - 2 - VELLEMAN...
- Página 3 PVC tube (P26), twist the two wires and cover the joint with the PVC tube. Make sure all wiring is correctly connected! 1, 6, 8: black wire 2, 3, 7: red wire 4: green wire 5: yellow wire KNS3 - 3 - VELLEMAN...
-
Página 4: Lijst Van Onderdelen
100% horizontal. The specifications and contents of this manual can be subject to change without prior notice. KNS3 – ROBOMECH 1. Inleiding & kenmerken Ontdoe u van dit product volgens de plaatselijke en nationale regelgeving inzake verwijdering. -
Página 5: Problemen En Oplossingen
• De robot kan soms omver vallen. Buig het scharnier van de twee metalen plaatjes dan naar de grond toe. Ga na of de metalen voeten 100% horizontaal staan De inhoud van deze handleiding kan worden gewijzigd zonder voorafgaande kennisgeving. KNS3 – ROBOMECH 1. Introduction et caractéristiques Débarrassez-vous de ce produit en respectant la législation d'élimination locale et nationale. -
Página 6: Liste Des Pièces
• Le KNS3 peut tomber parfois. Dans ce cas-ci, il faut plier la charnière métallique des pieds vers le sol. Vérifiez si les pieds sont parfaitement horizontaux. Les spécifications et le contenu de cette notice peuvent être modifiées sans notification préalable. KNS3 - 6 - VELLEMAN... - Página 7 KNS3 – ROBOMECH 1. Introducción y Características Tire las muestras inservibles en los correspondientes depósitos de eliminación de residuos según las leyes locales y nacionales. ¡Gracias por haber comprado el KNS3! Lea cuidadosamente las instrucciones del manual antes de montarlo.
-
Página 8: Solución De Problemas
Verifique si los pies están perfectamente horizontales. Se pueden modificar las especificaciones y el contenido de este manual sin previo aviso. KNS3 – ROBOMECH 1. Einführung und Eigenschaften Entsorgen Sie dieses Produkt gemäß der örtlichen und nationalen Gesetzgebung bezüglich Entsorgung. - Página 9 • Kontrollieren Sie ob die Verdrahtung richtig ist • Lockern Sie die Schrauben der Beine etwas wenn der Robomech nicht bewegt obwohl der Motor läuft. • Sorgen Sie dafür dass die Pins der LED einander nicht berühren um einen Kurzschluss zu vermeiden.


