Publicidad
Enlaces rápidos
Publicidad

Resumen de contenidos para Harman JBL OR300
- Página 1 OR300...
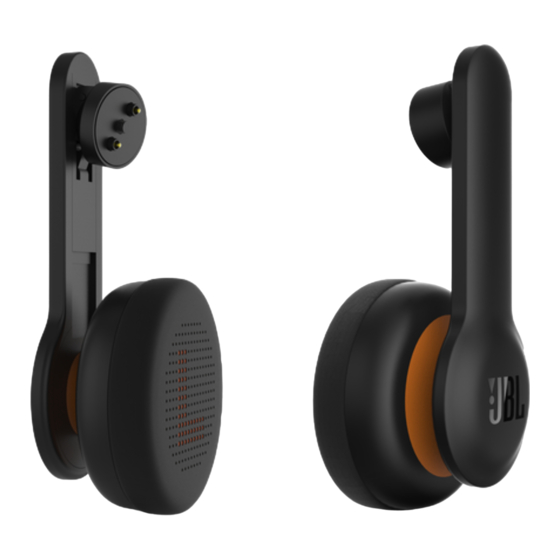
- Página 2 OR300 What’s in the box OR300 Headphones Carrying case Warranty card, Warning card, QSG...
- Página 3 OR300 Installation A. To attach the audio arm 1. Locate the screw on the inside of the strap that is used to attach the OR300 headphone. 2. Place the head of the audio arm into the screw and hold it in place.
- Página 4 OR300 3. Insert the audio tool* into the slot of the screw. 4. Turn the audio tool clockwise (to the right) to tighten the screw until it is secure. *Note: The Audio Tool is a small black tool included in the Oculus Rift accessories box.
- Página 5 OR300 2. Adjust by moving the headphone on its axes. 3. Adjust by moving it right and left. C. To remove the audio arm 1. Insert the audio tool* into the slot of the screw.
-
Página 6: Instalación
OR300 2. Turn the audio tool counter clockwise (to the left) to loosen the screw. Installation A. Fixation de la tige audio 1. Trouvez la vis à l'intérieur de la trappe utilisée pour attacher les oreillettes OR300 JBL. 2. Placez l'extrémité de la tige audio dans la vis et maintenez-la en position. 3. - Página 7 OR300 *Nota: La herramienta de audio es una pequeña herramienta negra incluida en la caja de accesorios de Oculus Rift. En su lugar, también se puede utilizar un destornillador plano. B. Cómo ajustar 1. Ajustar desalizando hacia arriba y hacia abajo. 2.
- Página 8 OR300 2. Regolare muovendo la cuffia sul suo asse. 3. Regolare muovendola a destra e sinistra. C. Per rimuovere il braccetto audio 1. Inserire lo strumento audio* nel vano della vite. 2. Girare lo strumento audio in senso anti-orario (verso sinistra) per allentare la vite. Installatie A.
- Página 9 OR300 Asennus A. Liittääksesi äänivarren 1. Paikanna hihnan sisäpuolella oleva ruuvi, jota käytetään liittämään OR300 -kuuloke. 2. Aseta äänivarren pää ruuviin ja pidä sitä paikallaan. 3. Aseta äänityökalu* paikalleen ruuvin uraan. 4. Käännä äänityökalua myötäpäivään (oikealle) kiristääksesi ruuvia, kunnes se on kireä.
- Página 10 OR300 3. Indsæt det medfølgende værktøj* i rillen på skruen. 4. Drej værktøjet med uret (til højre) for at spænde skruen, indtil den er spændt sikkert fast. *Bemærk: Værktøjet er et lille sort værktøj, som medfølger i æsken med tilbehør fra Oculus Rift.
- Página 11 OR300 2. A fejhallgatót a tengelyei mentén mozgatva állíthatja be. 3. Jobbra, illetve balra mozgatva állíthatja be. C. A hangkar eltávolítása 1. Helyezze be a hangeszközt* a csavar nyílásába. 2. Forgassa el a hangeszközt az óramutató járásával ellentétes irányba (balra) a csavar meglazításához.
- Página 12 OR300 Pemasangan A. Cara memasang lengan audio 1. Cari sekrup di bagian dalam lekukan yang dipakai untuk memasang headphone OR300. 2. Letakkan kepala lengan audio ke dalam sekrup tersebut dan tahan di posisinya. 3. Masukkan alat audio* ke dalam slot sekrup. 4.
- Página 13 OR300 *참고: 오디오 툴은 Oculus Rift 부속품 상자에 포함된 검은색 소형 공구입니다. 대신 일자 스크루드라이버를 사용할 수도 있습니다. B. 조절 방법 1. 위아래로 밀어 조절하십시오. 2. 헤드폰 축을 움직여 조절하십시오. 3. 좌우로 움직여 조절하십시오. C. 오디오 암 제거 1. 오디오 툴*을 나사의 슬롯에 삽입합니다. 2.
- Página 14 OR300 התקנה . כדי לחבר את זרוע הקולA 1. יש לאתר את הבורג הנמצא על החלק הפנימי של החלק המשמש לחיבור האוזניות OR300 JBL .2. הניחו את ראש זרוע הקול בתוך הבורג והחזיקו אותו במקומו .3. הכניסו את כלי ההידוק* לחריץ הבורג .4.
- Página 15 OR300 • Driver:40mm dynamic driver • Haut-parleur : haut-parleur dynamique de 40mm • Impedance:32 • Impédance : 32 • Sensitivity:99dbSPL @1k Hz 1mW • Sensibilité : 99 dB SPL à 1 kHz, 1 mW • Frequency response:10-20kHz • Réponse en fréquence : 10-20 kHz •...
- Página 16 OR300 • Динамик: 40 мм • Driver: Driver dinâmico de 40 mm • Импеданс: 32Ω • Impedância: 32 • Чувствительность: 99 дБ SPL/V при 1 кГц 1mW • Sensibilidade 99 dB SPL a 1 kHz e 1 mW • Эффективный рабочий диапазон частот: 10 Гц-20 кГц •...
- Página 17 : OOO “ХАРМАН РУС СиАйЭс“, Россия, 127018, г.Москва, ул. Двинцев, д.12, к 1 Гарантийный период : 1 год Информация о сервисных центрах : www.harman.com/ru тел. +7-800-700-0467 Срок службы : 2 года Товар не подлежит обязательной сертификации Дата производства : Дата изготовления устройства определяется по двум буквенным...


