Publicidad
Publicidad
Tabla de contenido

Manuales relacionados para Sauder 425767


Resumen de contenidos para Sauder 425767
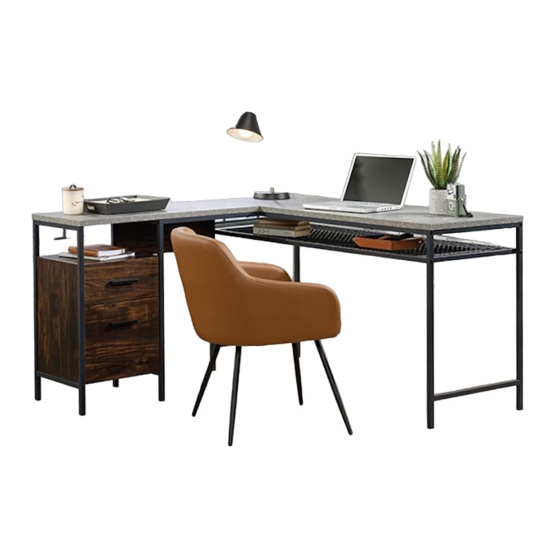
- Página 1 We're in your corner. L-Shaped Desk Market Commons Collection |...
- Página 2 Table of Contents Assembly Tools Required Part Identifi cation No. 2 Phillips Screwdriver Tip Shown Actual Size Hardware Identifi cation Assembly Steps 5-20 Hammer Not actual size Français 21-24 Español 25-28 Skip the power trip. Safety 29-30 This time. Warranty Page 2...
-
Página 3: Part Identifi Cation
Now you know Part Identifi cation our ABCs. å While not all parts are labeled, some of the parts will have a label or an inked letter on the edge to help distinguish similar parts from each other. Use this part identifi cation to help identify similar parts. LEFT END LEG (1) LARGE DRAWER BACK (1) FRONT LONG BRACE (1) - Página 4 Hardware Identifi cation å Screws are shown actual size. You may receive extra hardware with your unit. (EXTENSION SET SHOWN SEPARATED) EXTENSION RAIL - 2 EXTENSION SLIDE - 2 DRAWER RIGHT - 1 DRAWER LEFT - 1 CAM SCREW - 17 HIDDEN CAM - 17 CABINET RIGHT - 1 CABINET LEFT - 1...
- Página 5 Hardware Usage Guide HOW TO USE A HIDDEN CAM & CAM SCREW OR CAM DOWEL NOTE: Various CAM SCREWS or a CAM DOWEL may be used. Turn the CAM SCREW or gently tap the CAM DOWEL until the shoulder is against the surface of the part.
- Página 6 Step 1 Assemble your unit on a carpeted fl oor or on the empty å carton to avoid scratching your unit or the fl oor. Turn eight CAM SCREWS (7) into the LEFT END LEG (A) å and LEFT UPRIGHT LEG (B). (8 used) Page 6...
- Página 7 Step 2 Fasten the CABINET RIGHT (5) to the LEFT UPRIGHT LEG (B). Use three BLACK 1/2" FLAT HEAD SCREWS (19). å Fasten the CABINET LEFT (6) to the LEFT END LEG (A). Use three BLACK 1/2" FLAT HEAD SCREWS (19). å...
- Página 8 Step 3 Insert eight LARGE WOOD DOWELS (10) into the edges å of the BACK (C) and SHELF/BOTTOMS (D). Push eight HIDDEN CAMS (8) into the SHELF/BOTTOMS (D). å Arrow Arrow (8 used) Arrow Hole The arrow in the HIDDEN CAM must point toward the hole in the edge of the board.
- Página 9 Step 4 Fasten the SHELF/BOTTOMS (D) and the BACK (C) to the å LEFT UPRIGHT LEG (B). Tighten four HIDDEN CAMS. Some assembly NOTE: Be sure the WOOD DOWELS in the SHELF/ å (and snacks) required. BOTTOMS and BACK (C) insert into the LEFT UPRIGHT LEG. Fasten the LEFT END LEG (A) to the BACK (C) and å...
- Página 10 Step 5 Fasten the LEGS (T and U) to the WIRE SHELF (Q). å Tighten four BLACK 1-3/16" HEX HEAD SCREWS (16) using the L-WRENCH (11). Fasten the LONG BRACES (R and S) to the LEGS (T and U). å Tighten four BLACK 1-3/16"...
- Página 11 Step 6 Carefully stand your unit upright. å Insert a LARGE WOOD DOWEL (10) into the exact hole shown å in the BRACE (P). Arrow Push a HIDDEN CAM (8) into the BRACE (P). å Fasten the BRACE (P) to the REAR LEG (U). Tighten two BLACK å...
- Página 12 Step 7 Fasten the LARGE TOP (V) to the LONG BRACES (R and S) å and LEGS (T and U). Tighten eight BLACK 1-3/16" HEX HEAD SCREWS (16) using the L-WRENCH (11). BLACK 1-3/16" HEX HEAD SCREW (8 used in this step) Page 12...
- Página 13 Step 8 Turn a CAM SCREW (7) into the SMALL TOP (O). å Side Step: Make Flip the SMALL TOP over and fasten it to the LEGS (A and B), å nachos. (Optional, but SHORT BRACE (W) and BRACE (P). Tighten the HIDDEN CAM recommended.) in the BRACE.
- Página 14 Step 9 Turn eight CAM SCREWS (7) into the DRAWER å FRONTS (E and F). Insert four SMALL WOOD DOWELS (9) into the edges å of the LARGE DRAWER SIDE (G and H) and LARGE DRAWER BACK (J). Push eight HIDDEN CAMS (8) into the DRAWER å...
- Página 15 Step 10 BLACK 1-3/16" FLAT HEAD SCREW (4 used in this step) i s h fi n r f a Groove Slide a DRAWER BOTTOM (N) into the grooves in the Fasten the SMALL DRAWER SIDES (K and L) to the å...
- Página 16 Step 11 Fasten a PULL (14) to the SMALL DRAWER FRONT (E). Use å two BLACK 7/8" MACHINE SCREWS (18). Flip the SMALL DRAWER over. Fasten the DRAWER RIGHT (3) to å the SMALL RIGHT DRAWER SIDE (L) and the DRAWER LEFT (4) to the SMALL LEFT DRAWER SIDE (K).
- Página 17 Step 12 BLACK 1-3/16" FLAT HEAD SCREW (4 used in this step) i s h fi n r f a Groove Fasten the LARGE DRAWER SIDES (G and H) to the Slide a DRAWER BOTTOM (N) into the grooves in å...
- Página 18 Step 13 Fasten a PULL (14) to the LARGE DRAWER FRONT (F). å Use two BLACK 7/8" MACHINE SCREWS (18). Fasten the EXTENSION SLIDES (2) to the LARGE å DRAWER SIDES (G and H). Use six BLACK 1/2" FLAT HEAD SCREWS (19). BLACK 1/2"...
- Página 19 Step 14 Push two FILE GLIDES (13) onto the top edges of the å LARGE DRAWER SIDES (G and H). Almost time to NOTE: This drawer is designed to hold letter size hangers. å celebrate! With a nap. t e r L e t Page 19...
- Página 20 NOTE: Please read the back pages of the instruction booklet for important safety information. å This completes assembly. Clean with a damp cloth. Wipe dry. å And to celebrate, why not share your success story at sauder.com or Place the roller on the SLIDE behind the roller on the RAIL. Page 20...
-
Página 21: Liste De Pièces
DESCRIPTION QUANTITÉ REFERENCE DESCRIPTION QUANTITÉ conserver le livret pour future référence. Pour contacter Sauder en PIED D’EXTRÉMITÉ GAUCHE ......1 (ENSEMBLE DE GLISSIÈRE ILLUSTRÉ À PART) ce qui concerne cet PIED DE MONTANT GAUCHE ......1 GLISSIÈRE D'EXTENSION ........2 élément, faire référence ARRIÈRE ................1... - Página 22 Guide d'utilisation de la visserie ÉTAPE 4 UTILISATION DE LA EXCENTRIQUE ESCAMOTABLE ET DE LA Fixer les TABLETTE/DESSOUS (D) et l'ARRIÈRE (C) au PIED VIS D'EXCENTRIQUE OU DE LA CHEVILLE D’EXCENTRIQUE DE MONTANT GAUCHE (B). Serrer quatre EXCENTRIQUES 1. REMARQUE : Plusieurs VIS D'EXCENTRIQUE ou une CHEVILLE ESCAMOTABLES.
- Página 23 ÉTAPE 9 ÉTAPE 11 Faire tourner huit VIS D'EXCENTRIQUE (7) dans les DEVANTS DE Fixer une POIGNÉE (14) sur le DEVANT DE PETIT TIROIR (E). TIROIR (E et F). Utiliser deux VIS À MÉTAUX 22 mm NOIRES (18). Insérer quatre PETITES CHEVILLES EN BOIS (9) dans les bords Retourner le PETIT TIROIR.
- Página 24 ÉTAPE 13 ÉTAPE 15 Fixer une POIGNÉE (14) au DEVANT DE GRAND TIROIR (F). Pour insérer le petit tiroir dans l'élément, abaisser le devant du Utiliser deux VIS À MÉTAUX 22 mm NOIRES (18). tiroir et faire passer les roulettes situées sur le tiroir derrière les roulettes situées sur l'élément.
-
Página 25: Lista De Partes
PATA DE EXTREMO IZQUIERDO .....1 (JUEGO DE EXTENSIÓN SE MUESTRA POR su referencia futura. Si SEPARADO) necesita ponerse en PATA DE PARAL IZQUIERDO ......1 contacto con Sauder en RIEL DE EXTENSIÓN ..........2 DORSO .................1 cuanto a esta unidad, CORREDERA DE EXTENSIÓN ......2 ESTANTE/FONDO............2 refi... - Página 26 Guía de uso de herrajes PASO 3 CÓMO UTILIZAR EL EXCÉNTRICO ESCONDIDO Y LA BIELA DE Inserte ocho PASADORES DE MADERA GRANDES (10) en los EXCÉNTRICO O PASADOR DE EXCÉNTRICO bordes del DORSO (C) y de los ESTANTE/FONDOS (D). 1. NOTA: Varias BIELAS DE EXCÉNTRICO o un PASADOR DE EXCÉNTRICO pueden ser utilizados.
- Página 27 PASO 7 PASO 10 Fije el PANEL SUPERIOR GRANDE (V) a las RIOSTRAS 1. Fije los LADOS DE CAJÓN PEQUEÑO (K y L) al DORSO DE LARGAS (R y S) y a las PATAS (T y U). Apriete los ocho CAJÓN PEQUEÑO (M).
- Página 28 PASO 12 PASO 14 1. Fije los LADOS DE CAJÓN GRANDE (G y H) al DORSO DE Fije dos CORRIMIENTOS DE ARCHIVERO (13) sobre los bordes CAJÓN GRANDE (J). Use cuatro TORNILLOS NEGROS DE superiores de los LADOS DE CAJÓN GRANDE (G y H). CABEZA PERDIDA de 30 mm (17).
- Página 29 WARNING Please use your furniture correctly and safely. Improper use can cause safety hazards, or damage to your furniture or household items. Carefully read the following chart. Look out for: What can happen: How to avoid the problem: • Overloaded shelves or drawers. •...
- Página 30 ADVERTENCIA Por favor use el mobiliario correcta y seguramente. El mal uso puede causar riesgos de seguridad o daño a las unidades o artículos domésticos. Cuidadosamente lea la tabla a continuación. Esté alerto de: Puede ocurrir: Evitar el problema: • Estantes o cajones sobrecargados. •...
-
Página 31: Garantie Limitée De 5 Ans
à compter de la date d'achat la première fois et qui sont signalés à Sauder dans les limites de couverture de la contre tout défaut de matériaux ou de fabrication des composantes de mobilier garantie. - Página 32 CONTACT US FIRST BEFORE MAKING ANY RETURNS TO THE RETAILER. Dear Valued Customer: So, how did it go? Thanks so much I hope the Set a world record for speed? purchase and assembly process was a positive experience Feeling good about yourself? and you feel good about the furniture you just built.