Publicidad
Idiomas disponibles
Idiomas disponibles
Enlaces rápidos
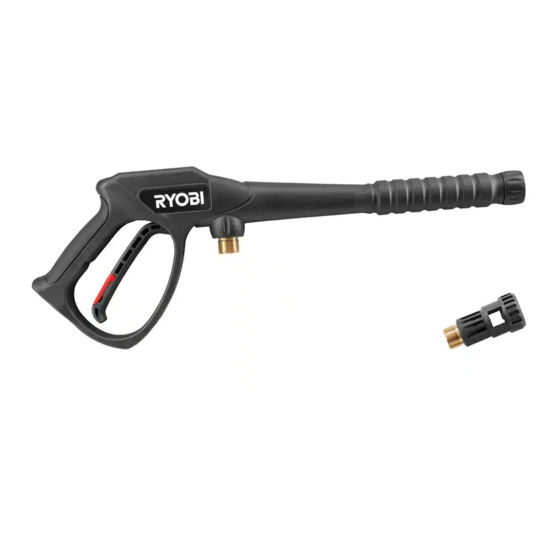
TRIGGER HANDLE AND ADAPTOR
WARNING:
To reduce the risk of injury, user must read and understand the
operator's manual for their pressure washer before using this ac-
cessory. Always wear eye protection. Risk of fluid injections; do not
point at people, pets, electrical devices, or the unit itself. Turn off the
pressure washer and make sure the trigger lock out on the trigger
handle is engaged before changing or adjusting accessories. For
cold water use only. For outdoor use only – store indoors.
INSTALLING THE TRIGGER HANDLE
See Figure 1.
n Screw the collar of the high pressure hose onto the trigger handle's
inlet coupler by turning the hose collar clockwise.
n Pull on the hose to be certain it is properly secured.
ASSEMBLING THE SPRAY WAND
See Figure 2.
WARNING:
Do not use the adaptor or a spray wand meant for electric pressure
washers when using a gas pressure washer. Doing so could result
in a hazardous condition leading to possible serious personal injury.
n If using a gas pressure washer:
• Place the threaded end of the spray wand in the connector on
the end of the trigger handle.
• Turn the connector clockwise until it stops. This secures the
spray wand in place.
n If using an electric pressure washer:
• Place the threaded end of the spray wand adaptor in the con-
nector on the end of the trigger handle.
• Push the end of the spray wand fully into the adaptor and rotate
clockwise to secure.
NOTE: Be careful to avoid cross-threading, which can cause the trigger
handle to leak during use.
NOTE: If the trigger handle begins to leak over time and you have veri-
fied that cross-threading is not the issue, the o-rings may need to be
replaced. Call customer service at 1-800-860-4050 to order replace-
ment o-rings (ID 10 mm x 2 mm, part no. 570742139).
USING THE TRIGGER HANDLE
See Figure 3.
For greater control and safety, keep both hands on the trigger handle
at all times.
n Pull back and hold the trigger to operate the pressure washer.
n Release the trigger to stop the flow of water through the nozzle.
To engage the lock out:
n Push up on the lock out until it clicks into the slot.
To disengage the lock out:
n Push the lock out down and into its original position.
Start with the nozzle 1-2 ft. away from the cleaning surface and care-
fully approach the surface just until the desired level of cleaning is
achieved. If the spray is too close it can damage the cleaning surface.
WARNING:
To reduce the risk of injury from kickback, hold the trigger handle
securely with both hands when the machine is on.
RY31001
SPECIFICATIONS
Maximum Pressure — Gas
Maximum Pressure — Electric (with Adaptor)
Maximum Gallons Per Minute Flow
Maximum Inlet Water Temperature
COLLAR
TRIGGER
HANDLE
CONNECTOR
ADAPTOR
ELECTRIC PRESSURE
WASHER SPRAY WAND
3,300 PSI
2,000 PSI
INLET
COUPLER
HIGH
PRESSURE HOSE
GAS PRESSURE
WASHER SPRAY
WAND
LOCK OUT
TRIGGER
7 gpm
140°F
Fig. 1
O-RINGS
Fig. 2
SLOT
Fig. 3
Publicidad

Resumen de contenidos para Ryobi RY31001
- Página 1 SPECIFICATIONS RY31001 Maximum Pressure — Gas 3,300 PSI Maximum Pressure — Electric (with Adaptor) 2,000 PSI Maximum Gallons Per Minute Flow 7 gpm TRIGGER HANDLE AND ADAPTOR Maximum Inlet Water Temperature 140°F WARNING: To reduce the risk of injury, user must read and understand the operator’s manual for their pressure washer before using this ac-...
- Página 2 POIGNÉE DE GÂCHETTE ET ADAPTATEUR FICHE TECHNIQUE — Gaz Pression maximum 3 300 psi AVERTISSEMENT : — Électrique Pression maximum Pour réduire les risques de blessures, l’utilisateur doit lire et veiller à bien 2 000 psi (avec adaptateur) comprendre le manuel d’utilisation pour leur nettoyeur haute pression avant d’utiliser ce accessoire.
- Página 3 MANGO DEL GATILLO Y ADAPTADOR ESPECIFICACIONES Presión máxima — Gasolina 3 300 psi ADVERTENCIA: Presión máxima — Eléctrico Para reducir el riesgo de lesiones, el usuario debe leer y comprender 2 000 psi el manual del operador para su lavadaora a presión antes de usar (con adaptador) este accesorio.
- Página 4 SERVICE Servicing requires extreme care and knowledge and should be performed only by a qualified service technician. For service we suggest you return the product to the nearest AUTHORIZED SERVICE CENTER for repair. When servicing, use only identical replacement parts. * Model/item number on product may have additional letters at the end.


