Publicidad
ITM. / ART. 1356692
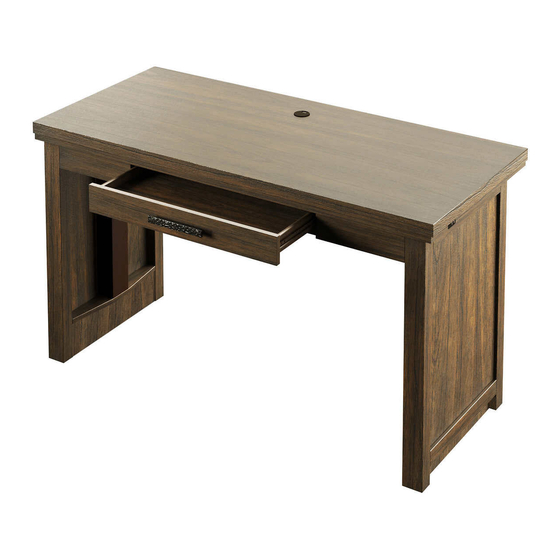
ADJUSTABLE HEIGHT DESK
BUREAU À HAUTEUR RÉGLABLE
ESCRITORIO DE ALTURA AJUSTABLE
ODP34128
tsicustomerservice.com
1-866-661-1218
Countries serviced: USA, Canada, Mexico, UK
(English, French, Spanish) 8:30 AM – 5:30 PM EST Monday – Friday
Les pays desservis : États-Unis, Canada, Mexique, Royaume-Uni
(Anglais, Français, Espagnol) De 8 h 30 à 17 h 30 HE, du lundi au vendredi
Países de servicio: E.U.A., Canadá, México, y el Reino Unido
(Inglés, Francés, Español) 8:30 AM – 5:30 PM EST Lunes – Viernes
(Teléfono no válido en México, por favor visite tsicustomerservice.com)
Publicidad
Tabla de contenido

Manuales relacionados para Tresanti ODP34128


Resumen de contenidos para Tresanti ODP34128
- Página 1 ITM. / ART. 1356692 ADJUSTABLE HEIGHT DESK BUREAU À HAUTEUR RÉGLABLE ESCRITORIO DE ALTURA AJUSTABLE ODP34128 tsicustomerservice.com 1-866-661-1218 Countries serviced: USA, Canada, Mexico, UK (English, French, Spanish) 8:30 AM – 5:30 PM EST Monday – Friday Les pays desservis : États-Unis, Canada, Mexique, Royaume-Uni (Anglais, Français, Espagnol) De 8 h 30 à...
- Página 2 REGISTER YOUR NEW PURCHASE online! INSCRIRE VOTRE NOUVEL ACHAT en ligne! REGISTRE SU NUEVA COMPRA en línea! Thank you for purchasing our product. Please take a moment to visit tsicustomerservice.com to register your new purchase: Merci d’avoir acheté ce produit. Veuillez prendre un court instant pour vous rendre sur tsicustomerservice.com et enregistrer votre nouvel achat : Gracias por comprar nuestro producto.
- Página 3 PRODUCT DETAILS AND NOTES DÉTAILS ET NOTES DU PRODUIT/DETALLES DEL PRODUCTO Y NOTAS Place of purchase/Lieu de l’achat/Lugar de compra: Date of purchase/Date de l’achat/Fecha de compra: Model #/No de modèle/Número de modelo: Notes/Remarque/Notas: IMPORTANT: Retain this manual for future reference. Read Carefully.
- Página 4 IMPORTANT INSTRUCTIONS INSTRUCCIONES INSTRUCTIONS IMPORTANTES IMPORTANTES When using electrical appliances, Al utilizar los aparatos eléctricos, debe Lors de l’utilisation des appareils basic precautions including the tomar en cuenta las precauciones électriques, les précautions following should always be taken to básicas que incluyen las siguientes élémentaires, notamment celles reduce the risk of fire, electrical shock, para reducir el riesgo de incendio,...
-
Página 5: Safety Information
SAFETY INFORMATION INFORMACIÓN DE INFORMATION DE SÉCURITÉ SEGURIDAD Please read and understand this Assurez-vous de lire et de comprendre Lea y comprenda completamente entire manual before attempting l’intégralité du présent manuel avant este manual antes de intentar to assemble, operate or install the de tenter d’assembler, d’utiliser ou ensamblar, usar o instalar el product. - Página 6 IMPORTANT NOTE: Please do not place anything on this surface as it could interfere with the operation of your desk. MAXIMUM LOAD REMARQUE IMPORTANTE: Veuillez ne rien déposer sur cette surface, car cela 45.4 kg / 100 lb pourrait nuire au bon fonctionnement de votre bureau. CHARGE MAXIMALE 45,4 kg / 100 lb INDICACIÓN IMPORTANTE: No coloque nada sobre esta superficie, pues...
- Página 7 ODP34128 ODP34128REV.1...
- Página 8 HARDWARE / QUINCAILLERIE / HERRAJE [x16] [x1] [x6] [x6] Ø6.3x12mm Ø6.3x32mm Ø16mm PODP34128-AA PH-BLTZNC001 PODP34128-CC PH-WSRZNC002 [x4] [x4] [x12] [x7] Ø8x10mm Ø3.5x12mm PODP34128-HH PH-SCRBLK013 PH-WMCBLK003 PODP34128-GG [x3] [x1] PODP34128-JJ PODP34128-II ODP34128REV.1...
- Página 9 Step 1 / Étape 1 / Paso 1 To reduce the risk of damage to your furniture, please lay down a blanket, cloth, or ATTENTION: cardboard on the floor prior to assembly. Pour réduire le risque d’endommager vos fournitures, veuillez les poser sur un tapis, un ATTENTION: tissu ou un carton sur le sol avant l’assemblage Para reducir el riesgo de daño a sus muebles, por favor coloque una manta, tela o...
- Página 10 Step 2 / Étape 2 / Paso 2 To prevent stress and/or damage to the connection pins, ensure all cords are plugged in straight and not at an angle. Pour éviter les contraintes et / ou d’endommager les broches de connexion, s’assurer de brancher dans l’axe et de ne pas former d’angle.
- Página 11 Step 3 / Étape 3 / Paso 3 [x4] [x4] ODP34128REV.1...
- Página 12 Step 4 / Étape 4 / Paso 4 [x4] ODP34128REV.1...
- Página 13 Step 5 / Étape 5 / Paso 5 ODP34128REV.1...
- Página 14 Step 6 / Étape 6 / Paso 6 [x12] [x1] ODP34128REV.1...
- Página 15 Step 7 / Étape 7 / Paso 7 Note: With the assistance of another person, carefully turn the desk upright. Plug in the power cord. Press and hold the button to raise the desk to the highest setting until “top” is displayed. Remove and discard pads (part GG) Note: Avec l’aide d’une autre personne, tournez soigneusement le bureau à...
- Página 16 Step 8 / Étape 8 / Paso 8 [x6] [x6] ODP34128REV.1...
- Página 17 Step 9 / Étape 9 / Paso 9 [x1] [x4] ODP34128REV.1...
- Página 18 Step 10 / Étape 10 / Paso 10 [x3] [x3] ODP34128REV.1...
- Página 19 Step 11 / Étape 11 / Paso 11 ODP34128REV.1...
- Página 20 Step 12 / Étape 12 / Paso 12 Note: It is very important that your unit is level in order for your desk to function properly. After moving your unit to its final location you may need to adjust the floor levelers. Remarque: Pour que votre bureau fonctionne correctement, il est très important qu’il soit de niveau.
- Página 21 Step 13 / Étape 13 / Paso 13 Reset/Initial Calibration: After desk is assembled and in final location, you will need to sync all the parts before use. Be sure to clear the desk of all items to avoid obstruction during the reset. Hold the “▼”...
- Página 22 OPERATION 2 USB Ports (5V/2.4 A, for each port) Control Panel - Lock Button: 1. Press this button for 3 seconds to lock the touch controls. This will prevent accidentally engaging the controls after the desired height has been set. Press the button for 3 seconds again to unlock. Converting Units: 1.
-
Página 23: Panneau De Commande
OPÉRATION Deux ports USB (5V/2.4A, chaque port) Panneau de commande - Bouton de verrouillage 1. Appuyez sur ce bouton pendant trois secondes pour verrouiller les commandes tactiles. Vous éviterez ainsi de les enclencher accidentellement après avoir réglé le bureau à la hauteur souhaitée. Appuyez de nouveau sur le bouton pendant trois secondes pour les déverrouiller. -
Página 24: Operación
OPERACIÓN 2 puertos USB (5v/2.4 A, para cada puerto) Panel de control - Botón de bloqueo 1. Presione este botón durante 3 segundos para bloquear los controles táctiles. Esto impedirá que se activen los controles por accidente luego de que se haya establecido la altura deseada. Vuelva a presionar el botón durante 3 segundos para desbloquearlos. - Página 25 FCC/IC Warning: Changes or modifications Avertissement : Des changements Advertencia: Los cambios o to this unit not expressly approved ou modifications effectués sur cet modificaciones en esta unidad, que no by the party responsible for appareil, non expressément approuvés sean aprobados directamente por la compliance could void user’s par la partie responsable de la parte responsable del cumplimiento,...
-
Página 26: Troubleshooting Dépannage / Solución De Problemas
TROUBLESHOOTING DÉPANNAGE / SOLUCIÓN DE PROBLEMAS PROBLEM ROOT CAUSE / CORRECTIVE ACTION / SOLUTION PROBLÈME / PROBLEMA CAUSE / CAUSA RAÍZ / ACCIÓN CORRECTIVA Motor temperature is too high or Display indicates HOT Rest system for 18 minutes before continuously operating for more than continuing to operate. - Página 27 Reset (initialize )the system. Motor is stalled. Display indicates E2 CAUSE / CAUSA RAÍZ Affichage signale E2 Le moteur a calé. Réinitialisez (initialisez) le système. Reinicie (inicialice) el sistema. La pantalla indica E2 El motor se detuvo. Check the motor wire whether is well Motor without electricity.
- Página 28 Display indicates E11 Contact customer service. Controller is out of electricity or the signal is wrong. Communiquez avec le service à la Le panneau de commandes n’est pas Affichage signale E11 CAUSE / CAUSA RAÍZ clientèle. alimenté ou émet un signal erroné. El controlador ya no tiene electricidad Comuníquese con el servicio al cliente.
-
Página 29: Care & Maintenance
CARE / SOIN / CUIDADO / MAINTENANCE ENTRETIEN MANTENIMIENTO • Use a soft, clean cloth that will not • Lors de l’époussetage, utilisez • Use un paño suave y limpio que no scratch the surface when dusting. un chiffon doux et propre qui raye la superficie cuando elimine el n’égratigne pas la surface. - Página 30 REPLACEMENT PARTS ODP34128 PIÈCES DE REMPLACEMENT ODP34128 PARTES DE REPUESTO ODP34128 [x4] [x16] [x1] PH-THRZNC001 PODP34128-KK PH-LVRBLK001 [x1] [x1] [x1] PODP34128-PC PODP34128-CP PODP34128-PS [x1] [x2] [x1] K6458 PH-DSLPCDS3510 PODP34128-TSF [x1] [x4] [x1] PODP34128-DW PODP34128-UU PH-BKTBLK009 ODP34128REV.1...
- Página 31 NOTES REMARQUES NOTAS ODP34128REV.1...
- Página 32 Costco Wholesale Canada Ltd.* Importado por: Distributed by: 415 W. Hunt Club Road Importadora Primex S.A. de C.V. Costco Wholesale Corporation Ottawa, Ontario Blvd. Magnocentro No. 4 P .O. Box 34535 K2E 1C5, Canada San Fernando La Herradura Seattle, WA 98124-1535 1-800-463-3783 Huixquilucan, Estado de México www.costco.ca...