Publicidad
Enlaces rápidos
Publicidad

Resumen de contenidos para Honeywell 8690i
- Página 1 8690i Mini Wearable Mobile Computer Quick Start Guide 8690i-EN-QS Rev (a) 10/20...
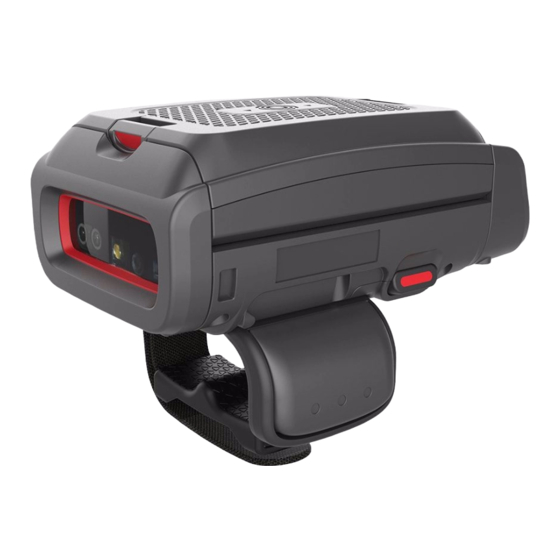
- Página 2 Overview Battery latch Battery Right Left button button User window Scanner Note: The battery must be fully charged before the first use. An MB4-BAT-SCN07 or an MB4-SCN07 Charging Station must be purchased separately.
- Página 3 Attach the Scanner to Your Hand...
- Página 4 Pull the finger strap to secure it and tuck the excess strap length into the finger guide channel.
- Página 5 Right or Left Handed Operation To release the finger trigger, turn over the scanner. Slide the latch toward the user window to release the finger trigger. Turn the finger strap around and snap it into place to change the operation to the correct hand.
- Página 6 Power Up the Scanner Press the trigger to power up the scanner. The battery, WiFi, and Bluetooth status appear in the window. User Window The user window displays prompts for using the scanner in your environment. The buttons to the left and right of the window are used to scroll through the windows or to enter responses to screen prompts.
- Página 7 Warning: Do not stare directly into the laser beam. How to Scan a Bar Code The 8690i scanner has a view finder that projects a bright aim- ing pattern. This aiming pattern should be centered over the bar code, but it can be positioned in any direction for a good read.
- Página 8 Once your host device has located the scanner, select the 8690i scanner name from the list displayed. Note: Refer to the 8690i User’s Guide if your host device displays a PIN. The Bluetooth symbol appears in the scanner window when the scanner pairs with a host.
- Página 9 Once your host device has located the scanner, select the 8690i scanner name from the list displayed. Note: Refer to the 8690i User’s Guide if your host device displays a PIN. The Bluetooth symbol appears in the scanner window when the scanner pairs with a host.
- Página 10 Once your host device has located the scanner, select the 8690i scanner name from the list displayed. Note: Refer to the 8690i User’s Guide if your host device displays a PIN. The Bluetooth symbol appears in the scanner window when the scanner pairs with a host.
- Página 11 Pair with an Android™ Mobile Device Tap and Pair You can pair your Android™ phone with the 8690i by touching the devices together. Make sure the NFC setting is On in your phone. Touch the Android phone to the scanner.
- Página 12 Scan the Bluetooth HID Keyboard Disconnect bar code below. Bluetooth HID Keyboard Disconnect Use the 8690i to scan the EZPairing bar code that is either supplied with the device, attached to the device, or displayed on the screen. The EZPairing bar code begins with {FNC3}LnkB, followed by 10 digits, like the sample below.
-
Página 13: Replace The Battery
Reset Custom Defaults If you want the custom default settings restored to your 8690i, scan the Activate Custom Defaults bar code below. This is the recommended default bar code for most users. It resets the 8690i to the custom default settings. If there are no custom defaults, it resets the 8690i to the factory default settings (Blue- tooth HID Keyboard Emulation). - Página 14 When the battery is low, the 8690i beeps and vibrates and the window shows a Battery Low warning. You can also press both the right and left buttons at any time to view the battery’s charge status. To replace the battery, squeeze the battery latch and lift up on the battery.
- Página 15 Patents For patent information, see www.hsmpats.com. Disclaimer Honeywell International Inc. (“HII”) reserves the right to make changes in specifications and other information contained in this document without prior notice, and the reader should in all cases consult HII to determine whether any such changes have been made.
- Página 16 All rights are reserved. No part of this docu- ment may be photocopied, reproduced, or translated into another language without the prior written consent of HII. Copyright2020 Honeywell International Inc. All rights reserved. Microsoft® Windows®, Windows NT®, Windows 2000, Windows ME, Windows XP, and the Windows logo are trademarks or regis- tered trademarks of Microsoft Corporation.
- Página 17 If necessary, the user should consult the dealer or an experienced radio/television technician for additional suggestions.
- Página 18 Product Warranty < Resources על výrobku). Resources > Product Warranty (Pobierz zasoby > .(מוצר Gwarancja produktu). Honeywell International Inc. 8690i-ML-RS-01 Rev (a) 9680 Old Bailes Road 10/20 Fort Mill, SC 29707 USA © 2020 Honeywell International Inc. All rights reserved.


