
Manuales relacionados para Kapro Prolaser Plus 870


Resumen de contenidos para Kapro Prolaser Plus 870
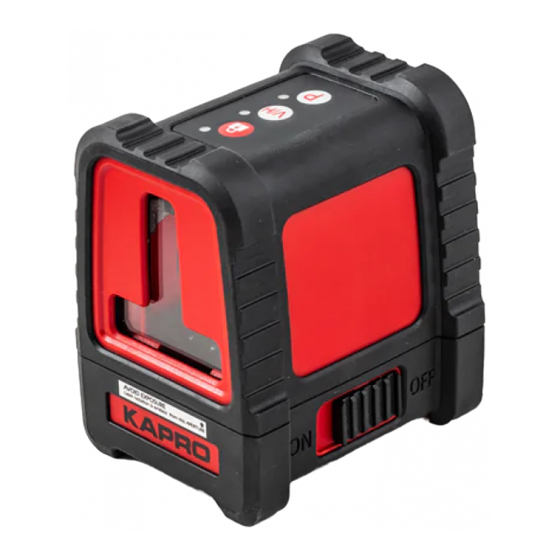
- Página 1 Prolaser Plus ® Model No. 870 User Manual Manual del usuario Manuel d'utilisation Up to 50m/165' 165'/50m INCLUDED...
- Página 2 Thank you for purchasing Kapro’s 870 Prolaser Plus. You ® now own one of the most advanced laser tools available. This manual will show you how to get the most out of your laser tool. APPLICATIONS The 870 Prolaser Plus is innovatively designed for a very broad ®...
-
Página 3: Tabla De Contenido
CONTENTS • Features • Safety instructions • Battery installation & Safety • Overview • Operating instructions 10-12 • Maintenance • Field calibration test 14-19 • Specifications • Warranty... -
Página 4: Features
FEATURES • This laser tool is automatically determines the horizontal and the vertical plans • The laser projects intersecting horizontal and vertical lines • Self-level in automatic mode when the laser is positioned within its self-leveling range. • Visual and audible “out of leveling range” warning •... -
Página 5: Safety Instructions
SAFETY INSTRUCTIONS WARNING This product is emitting radiation that is classified As class II according to EN 60825 -1 The laser radiation can cause serious eye injury • Do not stare into the laser beam • Do not position the laser beam so that it unintentionally blinds you or others. - Página 6 • Do not remove or deface warning labels on the laser level. • Do not disassemble the laser level, laser radiation can cause serious eye injury. • Do not drop the laser. • Do not use solvents to clean the laser. •...
-
Página 7: Battery Installation & Safety
BATTERY INSTALLATION & SAFETY 1. Press on the latch and open the battery cover. 2. Insert 3 new AA batteries of the same brand, according to the polarity diagram on the inside of the lid of the battery compartment. 3. Reclose the battery cover. NOTE If the laser level will not be used for a long period, remove the batteries from the battery... - Página 8 WARNING: Batteries can deteriorate, leak or explode, and 1. Do not shorten the battery terminals. 2. Do not charge Alkaline batteries. 3. Do not mix old and new batteries. 4. Do not dispose of batteries into household waste. 6. Defective or dead batteries must be disposed according to local Regulations.
-
Página 9: Overview
OVERVIEW 1. On/Off Locking Switch 2. Laser output window 3. Keypad a. Manual Mode button d. Manual Mode LED b. Beam Selector button e. Laser beam LED c. Pulse Mode button f. Pulse mode LED 4. Battery cover 5. ¼” tripod mount... -
Página 10: Operating Instructions
OPERATING INSTRUCTIONS Working in Automatic mode (self-leveling): In automatic mode the laser level will level itself at a ± 3° range and will project horizontal or vertical beams or both beams simultaneously. vibration free surface or on a tripod. 2.Slide the locking switch #1 to the ON position - the laser level will generate the crossed horizontal and vertical beams and the green LED near the V/H button will light up. - Página 11 Working in Manual mode: In Manual mode the 870’s self-leveling mechanism is disabled and 1.Press the Manual mode button . The laser will project the cross lines and the red LED near the button will light up. The green LED of the laser beams near V/H button will light up as well. 2.Choose the beams that you want to work with by pushing the Beam Selector button V/H 3.To mark a slope, tilt the laser to adjust the right angle and the...
- Página 12 Working in Pulse mode with a detector: For outdoor work under direct sunlight, or bright conditions and for extended indoor ranges up to 50 meters, use the pulse mode with a Detector. allow the detector to detect the laser lines. 1.
-
Página 13: Maintenance
MAINTENANCE To maintain the accuracy of your project, check the accuracy procedures. • Change the batteries when the laser beams begin to dim. • Wipe the aperture lens and the body of the laser level with a clean soft cloth. Do not use solvents. •... -
Página 14: Field Calibration Test
FIELD CALIBRATION TEST This laser level left the factory fully calibrated. Kapro recommend that the user will check the accuracy of the laser periodically, or if the unit falls or is mishandled. then check the levelling accuracy of the horizontal line, and Checking the Height Accuracy of the Horizontal Line. - Página 15 5) Turn the laser 180° towards wall B, and mark on the wall the center of the cross lines as b1 180° Figure # 2 6) Move the laser level towards wall B and position it approximately 0.5 meter from wall B. 7) Mark on wall B the center of the cross lines as b2 Figure # 3 0.5m...
- Página 16 8) Turn the laser 180° towards wall A, and mark on the wall the center of the cross lines as a2 180° Figure # 4 9) Measure the distances: |a2-a1| b1-b2| for repairs. Checking the Level Accuracy of Horizontal Line. (Side to side inclination) 1) Set up the laser on a tripod or on a solid surface at a distance of approximately 1.5 meters from a wall 5 meter long.
- Página 17 3) Mark point a1 on the wall, in the middle of the horizontal line 1.5m Figure # 5 4) Turn the laser level counterclockwise until the right edge of the horizontal line reach’s near a1, mark a point a2 on the wall x a1 x a2 Figure # 6...
- Página 18 5) The distance between a1 and a2, should not be more than technician for repairs. Checking the Accuracy of the Vertical line. 1) Hang approximately 4 meter plumb line on a wall. 2) After the plumb line has settled, Mark point a1 on the wall Figure # 7 3) Set up the laser on a tripod or on a solid surface in front of the wall at a distance of approximately 2 meters.
- Página 19 6) Mark point a2 on the wall, in the middle of the vertical line at the same height of a1 Figure # 8 7) The distance between a1 and a2, should not be more than for repairs.
-
Página 20: Specifications
SPECIFICATIONS Laser beams Vertical and horizontal cross lines output pattern Horizontal line Vertical line Laser range • Indoor - 30m (100ft) • Outdoor with detector 50m (165ft) Accuracy ±0.2mm/m (±0.0002in/in) Fan angle 120° ±5° Self-leveling range ±3° Laser line width 2 mm±0.5mm/5m (0.10”... -
Página 21: Warranty
It does no cover products that are used improperly, altered or repaired without Kapro approval. In the event of a problem with the laser level you have purchased, please return the product to the place of purchase with the proof of purchase. - Página 22 Gracias por su compra del Kapro 870 Prolaser Plus. Usted ® posee ahora una de las herramientas láser más avanzadas disponibles. Este manual le mostrará cómo sacar el máximo provecho de su herramienta láser. APLICACIONES El 870 Prolaser Plus está diseñado de manera innovadora ®...
- Página 23 CONTENIDO • Características • Instrucciones de seguridad 25-26 • Instalación de baterías y Seguridad 27-28 • Descripción general • Instrucciones de operación 30-32 • Mantenimiento • Prueba de calibración de campo 34-39 • Especificaciones • Garantía...
-
Página 24: Características
CARACTERÍSTICAS • Esta herramienta láser determina automáticamente los planos horizontal y vertical • El láser proyecta la intersección de líneas horizontales y verticales • Auto-nivel en el modo automático cuando el láser se coloca dentro de su rango de autonivelación. •... -
Página 25: Instrucciones De Seguridad
INSTRUCCIONES DE SEGURIDAD ADVERTENCIA Este producto emite radiación clasificada como de Clase II según la norma EN 60825 -1 La radiación láser puede causar lesiones oculares graves • No mire directamente al rayo láser • No opere el nivel láser cerca de niños, ni permita a los niños utilizar el nivel láser. -
Página 26: Instalación De Bat
INSTALACIÓN DE BAT láser. • No desarme el nivel láser, la radiación láser puede causar lesiones oculares graves. • No deje caer el láser. • No utilice disolventes para limpiar la unidad láser. • No debe usarse en temperaturas inferiores a -10°C o supe riores a 45°C (14°F / 113°F) •... -
Página 27: Instalación De Baterías Y Seguridad
INSTALACIÓN DE BATERÍAS Y SEGURIDAD 1. Presione el pestillo y abra la tapa de las baterías. 2. Inserte 3 pilas AA nuevas de misma marca, de acuerdo con tapa del compartimiento de las baterías. 3. Vuelva a colocar la tapa de las baterías. NOTA Si el nivel láser no se utiliza durante un largo periodo, retire las baterías del compartimiento... - Página 28 ADVERTENCIA: Las baterías pueden deteriorarse, producir fugas o explosiones, y pueden causar lesiones o incendios. 1. No acorte los terminales de las baterías. 2. No recargue las baterías alcalinas. 3. No mezcle baterías viejas y nuevas. 4. No deseche las baterías en la basura hogareña. 5.
-
Página 29: Descripción General
DESCRIPCIÓN GENERAL 1. Interruptor de bloqueo de encendido/apagado (On/Off) 2. Ventana de salida del láser 3. Teclado a. Botón de modo manual d. LED de modo manual b. Botón selector de haz e.LED de haz láser c. Botón de modo pulso f. -
Página 30: Instrucciones De Operación
INSTRUCCIONES DE OPERACIÓN Trabajo en modo Automático (auto-nivelación): En modo automático, el nivel láser se auto-nivelará en un rango de ± 3° y proyectará rayo horizontal, vertical o ambos rayos simultáneamente. plana, sólida y sin vibraciones, o sobre un trípode. (encendido);... - Página 31 ONES DE OPERACIÓN Trabajo en modo Manual: En modo Manual, el mecanismo de auto-nivelación del 870 está 1. Pulse el botón del modo Manual. El láser proyectará las líneas cruzadas y se iluminará el LED rojo cerca del botón El LED verde de los rayos láser cerca del botón V/H se iluminará de selección de rayos V/H 3.
- Página 32 Trabajo en modo de Pulsos con un detector: Para trabajar al aire libre bajo la luz solar directa o bajo condiciones de mucho brillo, y para los rangos de interior extendidos hasta 50 metros, utilice el modo de pulsos con un detector. Cuando se activa el modo de pulsos, las líneas de láser parpadearán a muy alta frecuencia (invisible para el ojo humano), 1.
-
Página 33: Mantenimiento
MANTENIMIENTO precisión de su nivel láser de acuerdo con los procedimientos de pruebas de calibración de campo. • Cambie las baterías cuando los rayos láser comiencen a atenuarse. • Limpie el lente de apertura y el cuerpo del nivel láser utilizando un paño suave y limpio. -
Página 34: Prueba De Calibración De Campo
PRUEBA DE CALIBRACIÓN DE CAMPO Este nivel láser sale de fábrica totalmente calibrado. láser periódicamente, o cuando la unidad se cae, o cuando se manipula en forma indebida. Para ello, compruebe en primer lugar la precisión de la altura de la línea horizontal, a continuación compruebe la exactitud de nivelación de la línea de la línea vertical. - Página 35 DE CALIBRACIÓN 5) Gire el láser 180° hacia la pared B el centro de las líneas cruzadas como b1 180° Figura # 2 Figure # 2 6) Mueva el nivel láser hacia la pared B y posiciónelo aproximadamente a 0.5 metros de la pared B. B el centro de las líneas cruzadas como b2 Figura # 3...
- Página 36 8) Gire el láser 180° hacia la pared A centro de las líneas cruzadas como a2 180° Figura # 4 Figure # 4 9) Mida las distancias: su reparación. Comprobación de la precisión de nivelado de la línea horizontal. (Inclinación de lado a lado) a una distancia de aproximadamente 1.5 metros de una pared de 5 metros de largo.
- Página 37 a1 en la pared, en el medio de la línea 1.5m Figura # 5 Figure # 5 4) Gire el nivel láser en sentido contrario de las manecillas del cerca de a1 a2 en la pared en medio de la x a1 x a2 Figura # 6...
- Página 38 10) La distancia entre a1 y a2 no debe ser de más de 1 mm., su reparación. Verificar la exactitud de la línea vertical. 1) Cuelgue una plomada de aproximadamente 4 metros en una pared. a1 en la pared detrás de la línea de plomada cerca del cono de la Figura # 7 Figure # 7 frente a la pared, a una distancia de aproximadamente 2 metros.
- Página 39 a2 en la pared, en el medio de la línea vertical a la misma altura de a1 Figura # 8 Figure # 8 7) La distancia entre a1 y a2 no debe ser de más de 1 mm., reparación.
-
Página 40: Especificaciones
ESPECIFICACIONES Patrón de salida de rayos Líneas cruzadas verticales y láser horizontales Linea horizontal; Linea vertical Rango del láser • En interiores - 30m (100 pies) • En exteriores con detector 50m (165 pies) Precisión ±0.2mm/m (±0.0002in/in) Ángulo de barrido de 120°... -
Página 41: Garantía
GARANTÍA s cruzadas verticales y ontales Este producto está cubierto por una garantía limitada de dos horizontal; Linea vertical años contra defectos de materiales y mano de obra. nteriores - 30m (100 pies) exteriores con detector 50m 5 pies) mm/m (±0.0002in/in) favor devuelva el producto al lugar de compra presentando el ±5°... - Página 42 Plus 870 ® Kapro. Vous êtes en possession de l'un des outils laser les plus parti de votre outil laser. APPLICATIONS De conception innovante, le 870 Prolaser® Vector se destine à de très nombreuses tâches professionnelles ou de bricolage, notamment: •...
- Página 43 SOMMAIRE • Fonctions • Consignes de sécurité 45-46 • Installation des piles et sécurité 47-48 • Vue d'ensemble • Utilisation 50-52 • Entretien • Test d'étalonnage sur site 54-59 • Caractéristiques • Garantie...
-
Página 44: Fonctions
CARACTÉRISTIQUES et vertical de 50 mètres (165’). • Norme IP 65 de protection contre l'eau et la poussière • Système de verrouillage de protection du balancier durant le transport transportation. • Boîtier antichoc en caoutchouc • Taille compacte - tient dans la caisse à outils REMARQUE Cet appareil contient des pièces de précision sensibles aux chocs externes, aux impacts... -
Página 45: Consignes De Sécurité
CONSIGNES DE SÉCURITÉ ATTENTION Ce produit émet un rayonnement de classe 2 selon la norme EN 60825 -1 • Ne pas regarder dans le faisceau laser direction de vos yeux ou des yeux d'autrui ou laisser des enfants utiliser le niveau laser ATTENTION: Ce produit contient des soudures au plomb reproduction (section 25249.6, proposition 65 du Code de REMARQUE... - Página 46 pou vant gravement endommager l'œil. • Ne pas faire chuter l'appareil • Ne pas employer de solvant pour nettoyer l'appareil piles, verrouiller le balancier et placer le laser dans sa sacoche de transport. REMARQUE Le non verrouillage du balancier avant le transport est susceptible d'endommager le mécanisme interne.
-
Página 47: Installation Des Piles Et Sécurité
INSTALLATION DES PILES ET SÉCURITÉ 1. Appuyez sur l'ergot et ôtez le couvercle du compartiment à piles. 3. Fermez le couvercle de piles. REMARQUE En cas de non utilisation prolongée du niveau laser, retirez les piles du compartiment afin d'éviter toute fuite ou corrosion. - Página 48 ATTENTION: exploser, et causer des blessures ou un incendie. 1. Ne pas raccourcir les bornes des piles. 2. Ne pas recharger des piles alcalines. 5. Ne pas jeter les piles au feu.
-
Página 49: Vue D'ensemble
VUE D'ENSEMBLE 1. Interrupteur On/Off 2. Fenêtre de projection laser 3. Bloc de touches faisceau impulsion 4. Couvercle de piles 5. Adaptateur trépied ¼”... -
Página 50: Utilisation
UTILISATION Fonctionnement en mode automatique (auto- nivellement) : le faisceau horizontal, le faisceau vertical, ou les deux faisceaux. 1. Retirez le laser du boîtier et placez-le sur une surface 2. Poussez le bouton de verrouillage n°1 en position ON. V/H s'illumine. appuyant sur le bouton de faisceau V/H. - Página 51 Utilisation en mode manuel : 1. Appuyez sur le bouton de mode manuel . Le laser projette V/H s'illumine. sur le bouton de faisceau V/H. bouton Mode manuel. 5. En mode manuel, tournez le bouton de verrouillage du balancier (1) de OFF à ON...
- Página 52 Utilisation en mode impulsion avec un détecteur 2. Pour passer en mode impulsion, appuyez sur le bouton P s'illumine. bouton P...
-
Página 53: Entretien
ENTRETIEN sur le terrain. • Nettoyez la fenêtre de projection et le boîtier du niveau laser à l'aide d'un chiffon propre et doux. N'utilisez pas de solvants. internes. corrosion. -
Página 54: Test D'étalonnage Sur Site
TEST D'ÉTALONNAGE SUR SITE Vérification de la précision de hauteur de la ligne horizontale (écart haut/bas) deux murs A et B distants d'environ 5 mètres. 2) Placez le niveau laser à environ 50 cm du mur A. comme point a1 (voir illustration 1) 5 mètres environ illustration 1... - Página 55 ALONNAGE SUR SITE 5) Tournez le laser de 180° vers le mur B (voir illustration 2). 180° illustration 2 Figure # 2 B, à environ 50 cm du mur. B le croisement des lignes comme point b2.(voir illustration 3) illustration 3 Figure # 3 0.5m...
- Página 56 8) Tournez le laser de 180° en direction du mur A sur le mur le croisement des lignes comme point a2 (voir illustration 4). 180° illustration 4 Figure # 4 9) Mesurez les distances : a2-a1| b1-b2| Vérification de la précision de nivellement de la ligne horizontale (inclinaison latérale) distance d'environ 1,5 m d'un mur de 5 m de long.
- Página 57 ligne horizontale (voir illustration 5). 1.5m illustration 5 Figure # 5 a2 sur le mur, sur la ligne horizontale (voir illustration 6). x a1 x a2 illustration 6 Figure # 6...
- Página 58 5) La distance entre a1 et a2 Vérification de la précision de la ligne verticale a1 sur le illustration 7 Figure # 7 mur, à une distance d'environ 2 mètres.
- Página 59 a2 au milieu de la ligne verticale et a1 (voir illustration 8). illustration 8 Figure # 8 7) La distance entre a1 et a2...
-
Página 60: Caractéristiques
CARACTÉRISTIQUES Sorties faisceaux laser Ligne horizontale Ligne verticale ±0.2mm/m (±0.0002in/in) Angle ventilateur 120° ±5° Plage d'auto-nivellement ±3° Largeur de ligne laser 2 mm (± 0,5mm) à 5 mètres Longueur d'onde 635 ±5nm - Laser de classe 2 Alimentation 3 piles AA (fournies) Autonomie 20 heures de fonctionnement continu -10°... -
Página 61: Garantie
GARANTIE Kapro. En cas de problème avec votre niveau laser, veuillez ramener le produit au lieu d'achat avec la preuve d'achat. Modèle n° 870 du compartiment à piles. - Página 62 ®...
- Página 63 • • • • • • • • •...
- Página 74 Figure #...
- Página 75 180° Figure # 2 Figure # 3 0.5m...
- Página 76 180° Figure # 4...
- Página 77 1.5m Figure # 5 x a1 x a2 Figure # 6...
- Página 78 Figure # 7...
- Página 79 Figure # 8...
- Página 84 © 2018 Kapro Industries Ltd.