Tabla de contenido
Publicidad
Enlaces rápidos
MANUAL
IMPORTANT SAFETY
INSTRUCTIONS
CALIFORNIA PROPOSITION 65
WARNING: This product contains chemical known to the state of California to
cause cancer or reproductive toxicity.
SAVE THESE INSTRUCTIONS
1.
– This manual contains important safety and operating
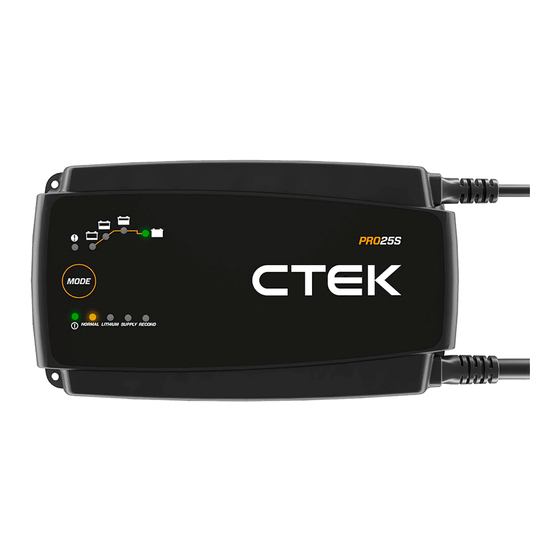
instructions for battery charger model PRO25S/PRO25SE
(1094).
2. Do not expose charger to rain or snow.
3. Use of an attachment not recommended or sold by CTEK
may result in a risk of fire, electric shock or injury to
persons.
4. To reduce risk of damage to electric plug and cord, pull
by the plug rather than cord when disconnecting charger.
5. An extension cord should not be used unless absolutely
necessary. Use of improper extension cord could result
in a risk of fire and electric shock. If an extension cord
must be used, make sure that: a) Pins on plug of extension
cord are the same number, size and shape as those of
plug on charger; b) Extension cord is properly wired and
in good electrical condition; and c) Wire size is large
enough for AC ampere rating of charger as specified
in "RECOMMENDED MINIMUM AWG SIZE FOR AC
EXTENSION CORDS".
6. Do not operate charger with damaged cord or plug –
return the charger to the retailer.
7.
Do not operate charger if it has received a sharp blow,
been dropped or otherwise damaged in any way; take it
to the retailer.
8. Do not disassemble charger; take it to the retailer when
service or repair is required. Incorrect reassembly may
result in a risk of electrical shock or fire.
9.
To reduce risk of electric shock, unplug charger from AC
outlet before attempting any maintenance or cleaning.
WARNING - RISK OF
10.
EXPLOSIVE GASES
WORKING IN VICINITY OF
a)
A LEAD-ACID BATTERY IS
DANGEROUS. BATTERIES
GENERATE EXPLOSIVE GASES
DURING NORMAL BATTERY
EN • 1
Publicidad
Tabla de contenido

Manuales relacionados para CTEK PRO25S


Resumen de contenidos para CTEK PRO25S
- Página 1 2. Do not expose charger to rain or snow. outlet before attempting any maintenance or cleaning. 3. Use of an attachment not recommended or sold by CTEK WARNING - RISK OF may result in a risk of fire, electric shock or injury to persons.
-
Página 2: Personal Precautions
OPERATION. FOR THIS e) NEVER smoke or allow a spark or flame in vicinity of battery or engine. REASON, IT IS OF OUTMOST f) Be extra cautious to reduce risk of dropping a metal tool onto battery. It might spark or short-circuit battery or IMPORTANCE THAT YOU other electrical part that may cause explosion. -
Página 3: Charger Location
DC CONNECTION d) Add distilled water in each cell until battery acid reaches level specified by battery manufacturer. Do not overfill. PRECAUTIONS For a battery without removable cell caps, such as valve regulated lead acid batteries, carefully follow manufac- a) Connect and disconnect dc output clips only after setting turer’s recharging instruction. -
Página 4: Important Safety Information
CAUSE BATTERY EXPLOSION. d) Determine which post of battery is grounded (connected) to the chassis. If negative post is grounded to the chassis TO REDUCE RISK OF (as in most vehicles) see (e). If positive post is grounded to the chassis, see (f). A SPARK NEAR BATTERY: e) For Negative-grounded vehicle, connect POSITIVE (RED) clip from battery charger to POSITIVE... - Página 5 tion. A charger with damaged cables must be returned to ensure that they can use the battery charger safely. Store the retailer. and use the battery charger out of the reach of children, • Ensure that the cabling does not jam or comes into contact and ensure that children cannot play with the charger.
- Página 6 RECOMMENDED CONNECT AND MINIMUM AWG DISCONNECT SIZEFOR AC EXTENSION THE CHARGER TO A CORDS BATTERY LENGTH OF CORD AWG SIZE OF CORD FEET (M) 25 (7.6) 50 (15.2) 100 (30.5) 150 (45.6) Comfort Connect 6 • EN Comfort Connect...
- Página 7 OPERATING Temperature sensor INSTRUCTIONS The temperature sensor works automatically and will adjust the voltage to the ambient temperature. Place the temperature sensor in the positive clamp 1. Connect the charger to the battery. or as the close to the battery as possible. –...
-
Página 8: Charging Programs
LEAD-ACID CHARGING PROGRAMS Settings are made by pressing the MODE-button. After about two seconds the charger activates the selected program. The selected program will be restarted next time the charger is connected. The table explains the different Charging Programs: Program Explanation Normal battery program 14.4V/25A. - Página 9 Connect the charger according to the vehicles manual. 40Ah 1.5h 2. Is the charger connected to a 12V 100Ah PRO25S battery? 200Ah 3. Are the clamps short circuited? 300Ah 4. Has charging been interrupted in MODE...
- Página 10 LEAD-ACID Max 25A until 12.6V Increasing voltage to Declining current Checks if voltage 13.0V*, 13.6V 12.9V–14.4V NORMAL 15.8V 14.4V, max 25A 14.4V drops to 12V max 25A 20–1.2A Max 25A until 12.6V Increasing voltage to Declining current Checks if voltage Max 15.8V 13.0V*, 13.6V 12.9V–14.4V...
- Página 11 LITHIUM* CHARGING PROGRAMS Settings are made by pressing the MODE-button. After about two seconds the charger activates the selected program. The selected program will be restarted next time the charger is connected. The table explains the different Charging Programs: Program Explanation Lithium* program 13.8V/25A LITHIUM...
- Página 12 LITHIUM* BATTERIES WITH "UNDER POWER LAMP MODE VOLTAGE PROTECTION" If the power lamp is lit with a: 1. STEADY LIGHT Some Lithium* batteries have an on-board UVP (under voltage The mains cable is connected to the wall socket. protection) that disconnects the battery to avoid it becoming 2.
- Página 13 80% 1. Is the chargers red clamp connected to the battery's positive pole? Connect BATTERY SIZE (Ah) TIME TO 80% CHARGED the charger according to the PRO25S vehicles manual. 40Ah 1.5h 2. Is the charger connected to a 12V 100Ah...
- Página 14 LITHIUM* Wake up Max 25A Declining current Checks if voltage 13.3V 13.0V–13.8V LITHIUM 13.0V Max 25A 14.4V until 13.8V 13.8V drops to 12.0V Max 25A 25A–3.0A 10 days If start charge Max 1h pulse Charge cycle Time limit: Max 10 minutes Max 30h Max 4h 3 minutes...
-
Página 15: Technical Specifications
Warranty 2 years *) Back current drain is the current that drains the battery if the charger is not connected to the mains. CTEK chargers have a very low back current. **) The quality of the charging voltage and charging current is very important. A high current ripple heats up the battery which has an aging effect on the positive electrode. -
Página 16: Maintenance Instructions
The customer must return the product for inspection warranty. If the power cable is damaged the charger must be together with the receipt of purchase to the retailer. CTEK Power returned to the retailer. The charger casing can be cleaned Inc. -
Página 17: Consignes De Sécurité Importantes
8. Ne pas démonter le chargeur; le retourner au vendeur importantes pour le chargeur de batteries PRO25S/ si un entretien ou une réparation sont nécessaires. Le PRO25SE (1094). - Página 18 LE TRAVAIL À PROXIMITÉ b) Veiller à ce que de l’eau et du savon soient disponibles en quantité suffisante en cas de contact de l’acide avec la D’UNE BATTERIE AU PLOMB peau, les vêtements ou les yeux. c) Toujours porter des vêtements de protection et des EST DANGEREUX.
-
Página 19: Avant De Charger Une Batterie
utilisées dans les appareils ménagers. Ce type de f) Déterminer la tension de la batterie en consultant le guide batteries est susceptible d’exploser et de provoquer des du propriétaire du véhicule et s’assurer que la tension de dégâts matériels et des blessures. sortie du chargeur est correctement sélectionnée. - Página 20 b) Attacher les pinces à la batterie et au châssis – se d) Déterminer quelle borne est mise à la masse (connectée au châssis). Si c’est la borne négative (comme dans reporter à 15(e), 15(f) et 16(b) à 16(d). la plupart des véhicules), aller à (e). Si c’est la borne SUIVRE CES ÉTAPES POUR positive, aller à...
- Página 21 SUIVRE CES ÉTAPES POUR e) Pour déconnecter le chargeur, procéder dans l’ordre inverse du branchement et couper la première connexion LA CHARGE D’UNE BATTERIE en se tenant aussi loin que possible de la batterie. f) Une batterie marine (sur un bateau) doit être déposée INSTALLÉE HORS D’UN et chargée à...
- Página 22 fréquentes persistent toujours. Ne pas laisser une batterie • Pour une utilisation en toute sécurité, placez le chargeur le en cours de charge sans surveillance pendant une période fond au-dessous lors de l’installation et du chargement. de temps prolongée. • Si des appareils qui consomment de l’énergie sont connectés à...
- Página 23 CALIBRE MINIMUM BRANCHEMENT ET RECOMMANDÉ POUR LES DÉBRANCHEMENT DU CORDONS DE RALLONGE CHARGEUR ET DE LA BATTERIE LONGUEUR DU CORDON CALIBRE MINIMUM PIEDS (M) (AWG) 25 (7,6) 50 (15,2) 100 (30,5) 150 (45,6) Comfort Connect FR • 23 Comfort Connect...
-
Página 24: Directives D'utilisation
DIRECTIVES D’UTILISATION Capteur de température Le capteur de température ajustera 1. Branchez le chargeur sur la batterie. automatiquement la tension en fonction de la température ambiante. Placez le capteur de température dans la pince positive ou aussi près de Pour les batteries montées la batterie que possible. -
Página 25: Programmes De Charge
BATTERIES D’ACCUMULATEURS AU PLOMB PROGRAMMES DE CHARGE Les réglages se font en appuyant sur le bouton MODE. Le chargeur active le programme choisi après environ deux secondes. Le programme choisi sera redémarré lors de la prochaine connexion du chargeur. Le tableau explique les différents Programmes de charge : Programme Explication Programme batterie normale 14,4V/25A. - Página 26 DE CHARGE batterie? Branchez le chargeur conformément au manuel du 40Ah 1,5h véhicule. 100Ah PRO25S 2. Le chargeur est branché sur une 200Ah batterie 12V ? 300Ah 3. Les pinces sont-elles en court-circuité? MODE 4. La charge a été interrompue TÉMOIN D’ALIMENTATION...
- Página 27 BATTERIES D’ACCUMULATEURS AU PLOMB Tension croissante Max 25A jusqu’à Réduction d’intensité Vérifiez si la tension 12.9V–14.4V 13.0V*, 13.6V NORMAL 15.8V jusqu’à 14,4V , max 12.6V 14.4V chute à 12 V max 25A 20–1.2A Tension croissante Max 25A jusqu’à Réduction d’intensité Vérifiez si la tension Max 15.8V 13.0V*, 13.6V...
- Página 28 LITHIUM* PROGRAMMES DE CHARGE Les réglages se font en appuyant sur le bouton MODE. Le chargeur active le programme choisi après environ deux secondes. Le programme choisi sera redémarré lors de la prochaine connexion du chargeur. Le tableau explique les différents Programmes de charge : Programme Explication Programme lithium* 13.8V/25A...
- Página 29 LITHIUM* BATTERIES AVEC voyant d’alimentation commence à clignote après au moins 10 minutes. À ce moment, débranchez les charges en parallèle « PROTECTION CONTRE sur la batterie, puis réessayez. Si la recharge ne démarre toujours pas, il faudra peut-être remplacer la batterie. LES SOUS-TENSIONS »...
- Página 30 1. La pince rouge du chargeur est-elle connectée au pôle positif de la TAILLE DE BATTERIE TEMPS POUR 80% batterie? Branchez le chargeur (Ah) DE CHARGE conformément au manuel du PRO25S 40Ah 1,5h véhicule. 100Ah 2. Le chargeur est branché sur une 200Ah batterie 12V ? 300Ah 3.
- Página 31 LITHIUM* Réveil Max 25A Réduction d’intensité Vérifiez si la tension 13.3V 13.0V–13.8V LITHIUM 13.0V Max 25A 14.4V jusqu’à 13.8V 13.8V chute à 12.0V Max 25A 25A–3.0A Si la charge de 10 jours Impulsion Max démarrage est Le cycle de charge pendant 1h.
-
Página 32: Caractéristiques Techniques
Garantie 2 ans *) L’intensité de fuite est le courant qui vide la batterie si le chargeur n’est pas branché au secteur. Les chargeurs CTEK ont une intensité de fuite très faible. **) La qualité de la tension et de l’intensité de charge est très importante. Une ondulation à forte intensité échauffe la batterie, ce qui a un effet de vieillissement sur l’électrode positive. -
Página 33: Garantie Limitée
été ouvert, manipulé avec négligence Pour l’assistance, les FAQ, les dernières versions des manuels et ou réparé par un intervenant autre que CTEK Power Inc. ou ses d’autres informations sur les produits de CTEK : www.ctek.com représentants agréés. LA GARANTIE QUI PRÉCÈDE, LES DROITS... - Página 34 34 • FR...
-
Página 35: Instrucciones Sobre Seguridad
Si está dañado de algún modo; llévelo a su importantes instrucciones sobre la seguridad y el funcio- distribuidor. namiento del cargador de baterías modelo PRO25S/ 8. No desmonte el cargador; cuando requiera manteni- PRO25SE (1094). miento o reparación, llévelo a su distribuidor. Un reen- 2. -
Página 36: Precauciones Personales
TRABAJAR CERCA DE a) Cuando trabaje junto a una batería de plomo, conviene tener cerca a alguna persona que pueda ayudarle si lo BATERÍAS DE PLOMO ES necesita. b) Tenga cerca abundante agua corriente y jabón para PELIGROSO. LAS BATERÍAS usarlos en caso de que el ácido de la batería entre en contacto con la piel, los ojos o la ropa. -
Página 37: Preparación De La Carga
h) Utilice este cargador para cargar únicamente baterías de f) Para determinar el voltaje de la batería, consulte el PLOMO. No está diseñado como fuente de alimentación manual del usuario del vehículo y asegúrese de que para sistemas eléctricos de bajo voltaje que no sean el selector de voltaje de salida esté... -
Página 38: Para Reducir El Riesgo De Chispas Cerca De La Batería
SI LA BATERÍA ESTÁ e) Para vehículos con el borne negativo conectado a tierra, conecte la pinza POSITIVA (ROJA) del cargador de INSTALADA EN UN VEHÍCULO, baterías al borne POSITIVO (POS, P, +) que no va a tierra. Conecte la pinza NEGATIVA (NEGRA) al chasis SIGA ESTOS PASOS. -
Página 39: Información Sobre Seguridad
SIGA ESTOS PASOS CUANDO e) Cuando desconecte el cargador, hágalo siempre en la secuencia inversa al procedimiento de conexión e LA BATERÍA ESTÉ INSTALADA interrumpa la primera conexión mientras se encuentra tan alejado de la batería como sea posible. FUERA DE UN VEHÍCULO. f) Las baterías de barco (marinas) se deben retirar para después cargarlas en tierra. - Página 40 algunos otros fallos poco corrientes. Durante la carga, no • Para un uso seguro, colocar el cargador con la parte infe- deje la batería desatendida durante periodos de tiempo rior abajo al instalar y cargar. prolongados. • Si tiene conectadas a la batería cargas consumidoras de energía, como alarmas y ordenadores de navegación, el proceso de carga requerirá...
- Página 41 CALIBRE AWG MÍNIMO CONEXIÓN Y RECOMENDADO DESCONEXIÓN DEL PARA CABLES CARGADOR A UNA PROLONGADORES DE CA BATERÍA LONGITUD DEL CABLE CALIBRE AWG DEL CABLE (PIES) M 25 (7,6) 50 (15,2) 100 (30,5) 150 (45,6) Comfort Connect ES • 41 Comfort Connect...
- Página 42 INSTRUCCIONES DE Sensor de temperatura FUNCIONAMIENTO El sensor de temperatura es automático y ajustará la tensión a la temperatura ambiente. Colocar el sensor de temperatura en la pinza positiva o lo más 1. Conecte el cargador a la batería cerca posible de la batería. –...
-
Página 43: Programas Y Opciones De Carga
ÁCIDO DE PLOMO PROGRAMAS Y OPCIONES DE CARGA Pulse el botón MODE para seleccionar entre los distintos programas de carga y opciones de carga. Los LED indicarán qué programas y opciones están seleccionadas. El programa seleccionado se memorizará y se volverá a iniciar la próxima vez que se conecte el cargador. -
Página 44: Lista Para Usar
40 Ah 1,5 h 2. ¿Está conectado el cargador a una 100 Ah batería de 12V? PRO25S 200 Ah 3. ¿Están las pinzas cortocircuitadas? 300 Ah 16 h 4. ¿Se ha interrumpido la carga en la... - Página 45 ÁCIDO DE PLOMO Tensión creciente Máx 25A hasta Corriente decreciente Comprueba si la 12.9V–14.4V 13.0V*, 13.6V NORMAL 15.8V hasta 14,4V , máx 12.6V 14.4V tensión cae a 12 V máx 25A 20–1.2A Tensión creciente Máx 25A hasta Corriente decreciente Comprueba si la Máx 15.8V 13.0V*, 13.6V 12.9V–14.4V...
- Página 46 LITIO* PROGRAMAS Y OPCIONES DE CARGA Pulse el botón MODE para seleccionar entre los distintos programas de carga y opciones de carga. Los LED indicarán qué programas y opciones están seleccionadas. El programa seleccionado se memorizará y se volverá a iniciar la próxima vez que se conecte el cargador.
-
Página 47: Luz Permanente
LITIO* BATERÍAS CON “PROTEC- máximo de 10 minutos. Desconecte todas las cargas paralelas de la batería e inténtelo de nuevo. Si aun así la carga no se CIÓN DE BAJA TENSIÓN” inicia, es posible que deba sustituir la batería. Algunas baterías de litio* tienen una protección de baja tensión PILOTO DE ENCENDIDO (UVP, por sus siglas en inglés) integrada que desconecta la MODE... - Página 48 CAPACIDAD DE LA TIEMPO HASTA EL la batería? Conecte el cargador de BATERÍA (Ah) 80% DE CARGA PRO25S acuerdo con el manual del vehículo. 40 Ah 1,5 h 2. ¿Está conectado el cargador a una 100 Ah batería de 12V?
-
Página 49: Etapa 4 Absorption (Absorción)
LITIO* Reactivación Máx 25A Corriente decreciente Comprueba si la 13.3V 13.0V–13.8V LITHIUM 13.0V Máx 25A 14.4V hasta 13,8V 13.8V tensión cae a 12.0V Máx 25A 25A–3.0A Si la tensión de 10 días Máximo 1h de carga de inicio es Se reinicia el ciclo Límite: Máx 10 minutos Máx 30 h... -
Página 50: Especificaciones Técnicas
**) La calidad de la tensión de carga y de la corriente de carga es muy importante. Una ondulación de corriente alta calienta la batería, lo cual acelera el envejecimiento del electrodo positivo. Una ondulación de tensión alta puede dañar otros equipos conectados a la batería. Los cargadores de baterías CTEK producen tensión y corriente muy limpia, con baja ondulación. 50 • ES... -
Página 51: Garantía Limitada
Para asistencia, preguntas frecuentes, último manual revisado y no perteneciente a CTEK Power Inc. o a sus representantes más información sobre productos CTEK, visitar: www.ctek.com autorizados. LA GARANTÍA, DERECHOS Y REMEDIOS ANTERIORES SON EXCLUSIVOS Y SE DAN EN LUGAR DE TODAS LAS DEMÁS GARANTÍAS, DERECHOS O... - Página 52 52 • ES...
- Página 53 取扱説明書 安全のための注意事項 • ケーブルが損傷した充電器は使用しないで ください。 • 本チャージャーはテクニカルデータに基づ 脱着式のコードなら、 ユーザー自らCTEK提 き、 バッテリー充電用として製造されていま 供の純正品を交換できます。 す。 他の目的に本品を使用しないでくださ • 充電コードを5m以上の長さにしないでくだ い。 さい。 CTEK提供の純正品のみを使用してく • 必ずバッテリーメーカーの使用および安全 ださい。 事項に従ってください。 • 出力ケーブルの延長で電磁障害を引き起こ • 充電のできないバッテリーは、 絶対に充電 すおそれがあります。 しないでください。 • 主電源に接続する際は、 お住まいの国で定 • 充電を行う際、 本品は高温になる場合があ められている電気設備の規制を順守してご ります。 本品をバッテリーの上に置いたり、 使用ください。...
- Página 54 • チャージャーは最初にバッテリーの+端子 ば、 子どもの場合は年齢が8歳以上、 さら に身体、 感覚、 知力などが十分でないユ に接続し、 次に-端子に接続します。 車載バ ッテリーの場合、 燃料管から離れた車両シ ーザー、 経験や知識が不足しているユー ャーシのアースに接続します。 その後、 チャ ザーでも使用できます。 子どもが製品で ージャーを電源に接続します。 遊ばせないようにしてください。 監督下 • チャージャーを電源から外します。 次に (車 にない限り、 子どもにクリーニングやメ 両シャーシの) -端子を外し、 それから+端 ンテナンスをさせないでください。 子を外します。 • 万一の事故防止のため、 充電中は、 チャー ジャーおよびバッテリーの状態を定期的に 確認してください。 エラーが発生した場合、 チャージャーを外してください。...
- Página 55 取扱説明書 温度センサ 充電器をバッテリーーにつなぎます。 温度センサが自動的に作動し、 電圧を周囲温度に調整します。 温 度センサを + のクランプに設置するか、 できる限りバッテリーの 近くに設置します。 車載バッテリーの場合 – 1. 車 両のマニュアルに沿って充電器を接続し てください。 2. 充 電器を壁のコンセントに接続します。 3. 充電器を壁のコンセントから抜いてから、 使用可能 バッテリーの接続を外します。 充電中 4. 黒 クランプを外してから、 赤クランプを外 します。 空 満充電状態 充 電器を壁のコンセントに接続します。 [POWER] ランプが点灯した場合、 主電源 ERROR ケーブルは壁のコンセントに接続されています。 [ERROR] ランプが点灯した場合、 ランプ バッテリーー クランプが正しく接続されていません。...
- Página 56 鉛蓄バッテリー MODE 充電プログラム POWER (電源) ランプ [MODE] ボタンを押して設定を行います。 約 2 秒後に、 充電器が選択済みプログラムを [POWER] ランプの状態は以下のとおりです。 起動します。 次回充電器を接続した際にも、 選択済みプログラムが起動します。 1. 点 灯している場合 下表では、 充電プログラムの種類を説明します。 主電源ケーブルは壁のコンセントに接続されています。 2. 点滅している場合 プログラム 説明 充電器が省電力モードになっています。 2 分以内に充電器をバッテリ NORMAL LITHIUM SUPPLY RECOND 通常のバッテリーー プログラム 14.4 V/25 A ーにつながない、 またはバッテリー電圧が 2 V未満の場合に省電力モ NORMAL 鉛蓄バッテリーのみ ードに切り替わります。...
- Página 57 鉛蓄バッテリー 最大 25 A / 12.6 V 上昇電圧 14.4 V以 低減電流 電圧が 12 V に降下 13.0 V*、 13.6 V 12.9 V ~ 14.4 V NORMAL 15.8 V 以下 下、 最大 25 A したら確認する 最大 25 A 14.4 V 20 ~ 1.2 A 最大 25 A / 12.6 V 上昇電圧 14.4 V以 低減電流 電圧が 12 V に降下 最大 15.8 V 13.0 V*、...
- Página 58 MODE LITHIUM* 充電プログラム POWER (電源) ランプ [MODE] ボタンを押して設定を行います。 約 2 秒後に、 充電器が選択済みプログラムを [POWER] ランプの状態は以下のとおりです。 起動します。 次回充電器を接続した際にも、 選択済みプログラムが起動します。 1. 点 灯している場合 下表では、 充電プログラムの種類を説明します。 主電源ケーブルは壁のコンセントに接続されています。 2. 点 滅している場合 プログラム 説明 NORMAL LITHIUM SUPPLY RECOND 充電器が省電力モードになっています。 2 分以内に充電器をバッテリ リチウム* プログラム 13.8 V/25 A ーにつながないと、 省電力モードに切り替わります。 LITHIUM リチウム* バッテリーに使用します。 ERROR (エラー) ランプ [ERROR] ランプが点灯している場合、 以下の項目を確認してください。 サプライ プログラム 13.6 V/25 A 12 V 電源として使用するか、...
- Página 59 LITHIUM* ウェーク アップ充電 最大 25 A 低減電流 電圧が 12.0 V に降 13.3 V 13.0 V ~ 13.8 V 最大 25 A LITHIUM 13.0 V 14.4 V 下したら確認する 最大 25 A 13.8 V 以下 13.8 V 25 A ~ 3.0 A 最大 1 時間パ 10 日間 充電開始電圧が 電圧が降下した場 ルス 時間制限: 最大 10 分間 最大 30 時間 最大 4 時間 3 分間 13.9 V 未満の場合 合は充電サイクル...
- Página 60 100 ~ 120 VAC、 50 ~ 60 Hz、 6.0 A 改造や修理をCTEKまたはCTEKが認めるサービスマン以外によって、 不注意に製品を 出力 25 A、 12 V 開けたり取り扱ったりした場合は、 本保証は適用されません。 製品底部にあるねじ穴 の1つは、 シールでふさがれる場合があります。 シールを剥がしたり、 剥がれたりする 2.0 V 鉛蓄バッテリー 起動電圧 と、 保証は無効となります。 CTEKでは本保証以外の保証はいたしません。 また、 前述以 8.0 V リチウム バッテリー 逆電流ドレイン* 外に生じる間接的損害などの費用は一切の責任を負いかねます。 CTEKでは、 本製品の < 2.3 Ah/月 交換以上の保証は行いません。 リップル** < 4% お問い合わせ...