Tabla de contenido
Publicidad
Idiomas disponibles
Idiomas disponibles
Enlaces rápidos
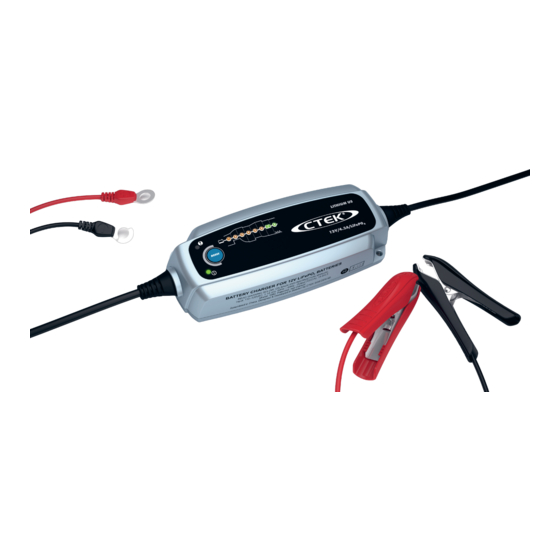
USER MANUAL / MODE D'EMPLOI / MANUAL DEL USUARIO
CTEK BATTERY CHARGER LITHIUM US / CHARGEUR DE BATTERIE CTEK LITHIUM US / CARGADOR DE BATERÍAS CTEK LITHIUM US
5 YEAR WARRANTY / GARANTIE DE 5 ANS / GARANTÍA DE 5 AÑOS
FOR ALL 12V TYPES OF LiFePO
4
POUR TOUTES LES BATTERIES AU LiFePO
PARA TODO TIPO DE BATERÍAS DE LiFePO
12V
4.3A
20018059A LITHIUM US, Manual Cover, Print file_001.indd 1
BATTERIES FULLY AUTOMATIC
12V ENTIÈREMENT AUTOMATIQUES
4
DE 12V TOTALMENTE AUTOMÁTICO
4
2013-01-17 14:00:56
Publicidad
Tabla de contenido

Manuales relacionados para CTEK LITHIUM US


Resumen de contenidos para CTEK LITHIUM US
- Página 1 USER MANUAL / MODE D'EMPLOI / MANUAL DEL USUARIO CTEK BATTERY CHARGER LITHIUM US / CHARGEUR DE BATTERIE CTEK LITHIUM US / CARGADOR DE BATERÍAS CTEK LITHIUM US 5 YEAR WARRANTY / GARANTIE DE 5 ANS / GARANTÍA DE 5 AÑOS...
- Página 2 à la cargador en el the battery! la batterie! a la batería! wall socket! prise murale! tomacorriente de pared! CTEK POWER INC 2374 Edison Blvd. TwinsBurg, oH 44087-2376 us 20018059A LITHIUM US, Manual Cover, Print file_001.indd 2 2013-01-17 14:00:57...
-
Página 3: Important Safety Instructions
California to cause cancer or reproductive toxicity. technology only. Please check with the battery manufacturer SAVE THESE INSTRUCTIONS for details. Do not use the LITHIUM US charger for any other battery technology. – This manual contains important safety and operating MAINS CABLE instructions for battery charger model LITHIUM US. -
Página 4: Personal Precautions
enough for AC ampere rating of charger as specified d) Remove personal metal items such as rings, bracelets, in “RECOMMENDED MINIMUM AWG SIZE FOR AC necklaces, and watches when working with Lithium-Ion EXTENSION CORDS”. battery. A Lithium-Ion battery can produce a short-circuit 6. -
Página 5: Charger Location
CHARGER LOCATION c) Check polarity of battery posts. POSITIVE (POS, P, +) battery post usually has larger diameter than NEGATIVE a) Locate charger as far away from battery as DC cables (NEG, N, -) post. permit. d) Determine which post of battery is grounded (connected) b) Never place charger directly above battery being to the chassis. -
Página 6: Important Safety Information
FOLLOW THESE STEPS IMPORTANT SAFETY WHEN BATTERY IS OUTSIDE INFORMATION! VEHICLE. TO REDUCE RISK OF • Charge no other batteries than specified in TECHNICAL INFORMATION. A SPARK NEAR BATTERY: • Check the charger cables prior to use. Ensure that no cracks have occurred in the cables or in the bend protec- a) Check polarity of battery terminals. - Página 7 CONNECT ANd • Always check that the charger has switched to STEP 7 before leaving the charger unattended and connected for dISCONNECT THE long periods. If the charger has not switched to STEP 7 within 24 hours, this is an indication of an error. Disconnect CHARGER TO A BATTERY the charger.
- Página 8 ERROR LAMP POWER LAMP If the error lamp is lit, check the following: If the power lamp is lit with a: 1. STEAdY LIGHT 1. Is the chargers positive lead connected The mains cable is connected to the wall to the battery’s positive pole? socket.
- Página 9 UVP. During this process, the charging STEP 7 is ing too deeply discharged. This prohibits the CTEK charger lit. Once the UVP has been opened and the battery is ready from detecting that there’s a battery connected.
- Página 10 CHARGING PROGRAM ACCEPT BULK ABSORPTION ANALYSE COMPLETION MAxIMIzATION FLOAT PULSE 4.3A until 11.0V Increasing voltage to Declining current Checks if voltage 13.6V 13.4V–13.8V 13.8V 13.8V drops to 12V 1.5A 14.4V 4.3A 4.3–1.0A 4.3A 10 days Charge cycle restarts Limit: Max 30s Max 10h Max 30h 3minutes...
- Página 11 STEP 1 ACCEPT Tests if the battery can accept charge. This step prevents that charging proceeds with a defect battery. STEP 2 BULK Charging with maximum current until approximately 90% battery capacity. STEP 3 ABSORPTION Charging with declining current to maximize up to 95% battery capacity. STEP 4 ANALYSE Tests if the battery can hold charge.
-
Página 12: Technical Specifications
Weight 1.4 Ibs *) Back current drain is the current that drains the battery if the charger is not connected to the mains. CTEK chargers have a very low back current. **) The quality of the charging voltage and charging current is very important. A high current ripple heats up the battery which has an aging effect on the positive electrode. -
Página 13: Maintenance Instructions
CTEK offers a professional customer support: www.ctek.com. For latest user manual see www.ctek.com. The LITHIUM US is maintenance-free. The charger must not By e-mail: info@ctek.se, by telephone: (330) 963-0981, be opened; doing so will invalidate the warranty. If the power by fax (330) 963-0982. - Página 14 CTEK PROdUCTS ARE PROTECTEd BY 2012–05–30 PATENTS dESIGNS TRAdE MARKS EP10156636.2 pending RCD 509617 TMA 669987 US12/780968 pending US D575225 CTM 844303 EP1618643 US D580853 CTM 372715 US7541778 US D581356 CTM 3151800 EP1744432 US D571179 TMA 823341 EP1483817 pending RCD 321216...
-
Página 15: Consignes De Sécurité Importantes
AVERTISSEMENT : Ce produit contient des produits chimiques teries. Le modèle de chargeur LITHIUM US est conçu unique- connus dans l'état de Californie comme étant cancérigènes ou ment pour la technologie des batteries Lithium-ion LiFePO toxiques pour la reproduction. -
Página 16: Précautions Personnelles
de la fiche du chargeur ;b) La rallonge est correctement a) Veillez à ce qu'une personne soit assez proche pour venir câblée et en bon état électrique ; et c) Le calibre des fils à votre aide lorsque vous travaillez près d'une batterie est assez grand pour l'intensité... -
Página 17: Préparation De La Charge
PRÉPARATION DE LA CHARGE b) Fixez les pinces à la batterie et au châssis comme indiqué dans 15 (e), 15 (f), 16 (b) à 16 (d). a) Le cas échéant, déposer la batterie du véhicule à charger, SUIVEZ CES ÉTAPES QUAND démontez toujours la borne négative de la batterie en premier. - Página 18 SUIVEZ CES ÉTAPES e) Pour un véhicule à masse négative, branchez la pince POSITIVE (ROUGE) du chargeur de batterie à la borne QUAND LA BATTERIE POSITIVE (POS, P, +) non à la masse de la batterie. Branchez la pince NÉGATIVE (NOIRE) au châssis du EST HORS DU VÉHICULE.
-
Página 19: Informations De Sécurité Importantes
f) Une batterie marine (de bateau) doit être déposée et • Si des consommateurs tels que les alarmes embarquées et chargée à terre. La charge à bord requiert un équipement les ordinateurs de navigation sont branchés sur la batterie, spécifiquement conçu pour l'utilisation marine. le processus de charge prend plus longtemps et la batterie peut être vidée. - Página 20 CALIBRE AWG MINIMUM CONNExION ET RECOMMANdÉ POUR LES dÉCONNExION dU RALLONGES CA CHARGEUR À UNE BATTERIE... LONGUEUR dU CALIBRE AWG dU CORdON CORdON PIEd (M) 25 (7.6) 50 (15.2) 100 (30.5) Comfort 150 (45.6) Connect – – Comfort Connect 20 • FR Comfort Connect 20018058A LITHIUM XS, US, Manual, Print file 005.indd 20...
-
Página 21: Témoin De Défaut
TÉMOIN dE dÉFAUT TÉMOIN d'ALIMENTATION Si le témoin d'erreur s'allume, contrôlez les points suivants : Si le témoin d'alimentation s'allume comme suit : 1. FIxE 1. Le fil positif du chargeur est branché Le câble secteur est branché dans la prise sur la borne positive de la batterie ? murale. - Página 22 Pendant ce processus, l'ÉTAPE 7 décharge trop profonde. Ceci empêche le chargeur CTEK de de la charge est allumée. Une fois l'UVP ouverte et la batterie détecter la batterie branchée.
-
Página 23: Caractéristiques Techniques
Poids 1,4 Ibs. *) L’intensité de fuite est le courant qui vide la batterie si le chargeur n’est pas branché au secteur. Les chargeurs CTEK ont une intensité de fuite très faible. **) La qualité de la tension et de l’intensité de charge est très importante. Une ondulation à forte intensité échauffe la batterie, ce qui a un effet de vieillissement sur l’électrode positive. -
Página 24: Programme De Charge
PROGRAMME dE CHARGE ACCEPT MAxIMIzATION BULK (PRINCIPALE) ABSORPTION ANALYSE COMPLETION (FIN) FLOAT (FLOTTANTE) PULSE (IMPULSIONS) (CONSERVATION) (MAxIMISATION) 4,3 A jusqu’à 11,0 V Augmentation de la Intensité décroissante Contrôle de la chute de 13,6 V 13,4 V – 13,8 V tension à sous 13,8V tension à 12V 1,5 A 14,4 V 4,3 A... - Página 25 ÉTAPE 1 CONSERVATION Teste si la batterie peut accepter la charge. Cette étape évite la poursuite de la charge avec une batte- rie défectueuse. ÉTAPE 2 PRINCIPALE Charge avec l’intensité maximum jusqu’à environ 90% de la capacité de la batterie. ÉTAPE 3 ABSORPTION Charge avec réduction de l'intensité...
-
Página 26: Instructions D'entretien
CTEK offre un support clientèle professionnel : www.ctek.com Visitez www.ctek.com pour obtenir le tout dernier mode Le LITHIUM US est sans entretien. Le chargeur ne doit pas être d'emploi. ouvert, ceci annulerait la garantie. Si le cable d'alimentation Par courriel : info@ctek.se, par téléphone : (330) 963-0981, est endommagé, le chargeur doit être rapporté... - Página 27 LES PROdUITS CTEK SONT PROTÉGÉS PAR 2012–05–30 dES MOdÈLES dES MARQUES dES BREVETS COMMERCIALES EP10156636.2 pending RCD 509617 TMA 669987 US12/780968 pending US D575225 CTM 844303 EP1618643 US D580853 CTM 372715 US7541778 US D581356 CTM 3151800 EP1744432 US D571179 TMA 823341...
- Página 28 20018058A LITHIUM XS, US, Manual, Print file 005.indd 28 2013-01-09 10:53:04...
-
Página 29: Instrucciones Sobre Seguridad
LiFePO . Consulte más detalles al fabricante de la batería. No GUARDE ESTAS lo utilice el cargador LITHIUM US para cargar baterías de ninguna otra tecnología. INSTRUCCIONES ENCHUFE dE CABLE dE ALIMENTACIÓN –... - Página 30 del cargador; b) El cable alargador está correctamente a) Cuando trabaje junto a una batería de iones de litio, con- conectado y en buenas condiciones eléctricas; y c) El viene tener cerca a alguna persona que pueda ayudarle calibre de los cables es suficientemente grueso para la si lo necesita.
-
Página 31: Preparación Para Cargar
PREPARACIÓN PARA CARGAR b) Conecte las pinzas a la batería y al chasis como se indica en 15(e), 15(f), 16(b) a 16(d). a) Si fuera necesario retirar la batería de un vehículo para SI LA BATERÍA ESTÁ cargarla, siempre quite primero el terminal de tierra de la batería. -
Página 32: Para Reducir El Riesgo De Chispas Cerca De La Batería
SIGA ESTOS PASOS CUANDO e) Para vehículos con el borne negativo conectado a tierra, conecte la pinza POSITIVA (ROJA) del cargador de bat- LA BATERÍA ESTÉ INSTALADA erías al borne POSITIVO (POS, P, +) que no va a tierra. Conecte la pinza NEGATIVA (NEGRA) al chasis del vehí- FUERA DE UN VEHÍCULO. -
Página 33: Información Sobre Seguridad
f) Las baterías de barco (marinas) se deben retirar para • Si tiene conectados a la batería cargas consumidoras de después cargarlas en tierra. Si requiere cargarlas a energía como alarmas y ordenadores de navegación, el bordo, es preciso utilizar equipos especialmente diseña- proceso de carga requerirá... -
Página 34: Longitud Del Cable
CALIBRE AWG MíNIMO CONExIÓN Y RECOMENdAdO dESCONExIÓN dEL PARA CABLES CARGAdOR A UNA PROLONGAdORES dE CA BATERíA LONGITUd dEL CABLE CALIBRE AWG dEL CABLE M (PIES) 25 (7.6) 50 (15.2) Comfort Connect 100 (30.5) 150 (45.6) – – Comfort Connect Comfort 34 • ES Connect... -
Página 35: Piloto De Error
PILOTO dE ERROR PILOTO dE FUNCIONAMIENTO Si se enciende el piloto de error, compruebe lo siguiente: Si el piloto de funcionamiento se enciende con: 1. ¿Está conectado al polo positivo de la batería el cable positivo del cargador? 1. LUz PERMANENTE El cable de alimentación está... -
Página 36: Funcionamiento
UVP que desconecta la batería para evitar una omite la protección UVP. Durante este proceso, la ETAPA descarga excesiva. Esto impide que el cargador CTEK detecte de carga 7 permanece iluminada. Una vez que se omite la que hay una batería conectada. Para eludir este problema, el UVP y la batería está... -
Página 37: Especificaciones Técnicas
**) La calidad de la tensión de carga y de la corriente de carga es muy importante. Una corriente de ondulación (rizado) alta calienta la batería, lo cual acelera el envejecimiento del electrodo positivo. Una tensión de ondulación alta puede dañar otros equipos conectados a la batería. Los cargadores de baterías CTEK producen tensión y corriente muy limpia, con baja ondulación. -
Página 38: Programas De Carga
PROGRAMAS dE CARGA CARGA dE VOLU- AdMISIÓN ABSORCIÓN ANÁLISIS FINALIzACIÓN MAxIMIzACIÓN FLOTANTE PULSOS 4,3A hasta 11,0V Tensión creciente hasta Corriente decreciente Comprueba si el Máx. Máx. 13,6V 13,4V–13,8V 13,8V 13,8V voltaje 1,5A 14,4V 4,3A 4,3–1,0A 4,3A cae hasta 12 V 10 días Si cae la tensión, se Si cae la tensión, se Límite:... -
Página 39: Etapa 3 Absorption (Absorción)
ETAPA 1 AdMISIÓN Comprueba si la batería puede aceptar la carga. Esta etapa impide que continúe el proceso de carga si la batería está defectuosa. ETAPA 2 BULK (CARGA dE VOLUMEN) Carga con corriente máxima hasta aproximadamente el 90 % de la capacidad de la batería. ETAPA 3 ABSORPTION (ABSORCIÓN) Carga con corriente decreciente para maximizar hasta el 95% la capacidad de la batería. -
Página 40: Instrucciones De Mantenimiento
MANTENIMIENTO CTEK ofrece asesoramiento profesional a los clientes: www.ctek.com. Para consultar la revisión más reciente del El LITHIUM US no necesita mantenimiento. Nunca abra el manual del usuario, vea www.ctek.com. cargador, pues anularía la garantía. Si se daña el cable Por correo electrónico: info@ctek.se. - Página 41 LOS PROdUCTOS dE CTEK ESTÁN PROTEGIdOS POR: 2012–05–30 MARCAS PATENTES dISEñOS REGISTRAdAS EP10156636.2 pending RCD 509617 TMA 669987 US12/780968 pending US D575225 CTM 844303 EP1618643 US D580853 CTM 372715 US7541778 US D581356 CTM 3151800 EP1744432 US D571179 TMA 823341 EP1483817 pending...
- Página 42 20018058A LITHIUM XS, US, Manual, Print file 005.indd 42 2013-01-09 10:53:06...