Tabla de contenido
Publicidad
Idiomas disponibles
Idiomas disponibles
Enlaces rápidos
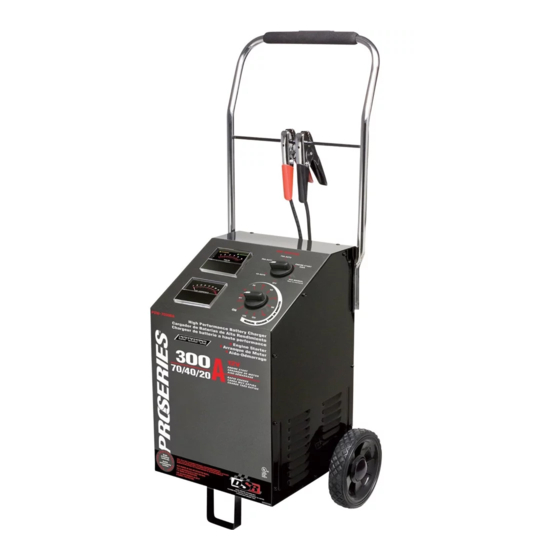
Model / Modelo / Modèle:
PSW-70300A
Automatic Battery Charger
Cargador de batería automático
Chargeur de batterie automatique
Voltage / Tensión / Tension: 12
Amperage / Amperaje / Ampérage:
4, 20, 40, 70
DO NOT RETURN THIS PRODUCT TO THE STORE!
Call Customer Service for assistance: 800-621-5485
¡NO LO DEVUELVA ESTE PRODUCTO A LA TIENDA!
Llame a Servicios al Cliente para asistencia: 800-621-5485
NE PAS RETOURNER LE PRODUIT AU MAGASIN !
Appeler le service clientèle pour l'assistance : 800-621-5485
READ THE ENTIRE MANUAL BEFORE USING THIS PRODUCT. FAILURE
TO DO SO COULD RESULT IN SERIOUS INJURY OR DEATH.
LEA EL MANUAL COMPLETO ANTES DE UTILIZAR ESTE PRODUCTO.
CUALQUIER FALLA PODRÍA RESULTAR EN SERIAS LESIONES O PODRÍA
SER MORTAL.
LIRE ENTIÈREMENT LE GUIDE AVANT D'UTILISER CE PRODUIT. L'ÉCHEC
DE FAIRE AINSI PEUT S'ENSUIVRE DANS LA BLESSURE SÉRIEUSE OU
LA MORT.
All manuals and user guides at all-guides.com
OWNER'S MANUAL
MANUAL DEL USUARIO
GUIDE D'UTILISATION
0099001272-00
Publicidad
Tabla de contenido
Solución de problemas

Manuales relacionados para Schumacher Electric PRO PSW-70300A


Resumen de contenidos para Schumacher Electric PRO PSW-70300A
- Página 1 All manuals and user guides at all-guides.com Model / Modelo / Modèle: OWNER’S MANUAL PSW-70300A MANUAL DEL USUARIO GUIDE D’UTILISATION Automatic Battery Charger Cargador de batería automático Chargeur de batterie automatique Voltage / Tensión / Tension: 12 Amperage / Amperaje / Ampérage: 4, 20, 40, 70 DO NOT RETURN THIS PRODUCT TO THE STORE! Call Customer Service for assistance: 800-621-5485...
- Página 2 All manuals and user guides at all-guides.com IMPORTANT: READ AND SAVE THIS SAFETY AND INSTRUCTION MANUAL. SAVE THESE INSTRUCTIONS – This manual will show you how to use your charger safely and effectively. Please read, understand and follow these instructions and precautions carefully, as this manual contains important safety and operating instructions.
-
Página 3: Personal Precautions
All manuals and user guides at all-guides.com 1.11 To reduce the risk of a battery explosion, follow these instructions and those published by the battery manufacturer and the manufacturer of any equipment you intend to use in the vicinity of the battery. Review the cautionary markings on these products and on the engine. -
Página 4: Charger Location
All manuals and user guides at all-guides.com CHARGER LOCATION RISK OF EXPLOSION AND CONTACT WITH BATTERY ACID. Locate the charger as far away from the battery as the DC cables permit. Never place the charger directly above the battery being charged; gases from the battery will corrode and damage the charger. Do not set the battery on top of the charger. -
Página 5: Grounding And Ac Power Cord Connections
All manuals and user guides at all-guides.com Position yourself and the free end of the cable you previously attached to the NEGATIVE (NEG, N, -) battery post as far away from the battery as possible – then connect the NEGATIVE (BLACK) charger clip to the free end of the cable. Do not face the battery when making the final connection. -
Página 6: Tools Needed
All manuals and user guides at all-guides.com Item PARTS TOOLS NEEDED (2) axle brackets 3/8" wrench (for mounting foot) (1) axle with pin holes 5/16" wrench (for mounting wheels) (2) wheels 1/4" wrench (for mounting handle) (2) 10-32, thread cutting screws hammer (2) ¼-20, thread cutting screws screwdriver (flat blade) -
Página 7: Control Panel
All manuals and user guides at all-guides.com CONTROL PANEL Timer • Timer Setting: The timer allows you to set a specified time for charging. After the timer expires, the charger stops charging your battery. The main function of the timer is to prevent over charging while allowing a battery time to obtain a satisfactory charge. - Página 8 All manuals and user guides at all-guides.com Connect the battery following the precautions listed in Sections 6 and 7. Connect the AC power following the precautions listed in Section 8. Select the desired charge rate. NOTE: The 40 amp Manual rate is a manual mode and will overcharge a battery if permitted to operate for extended periods of time.
- Página 9 All manuals and user guides at all-guides.com Set the charge rate switch and the timer to the OFF position. With the charger unplugged from the AC outlet, connect the charger to the battery following the instructions given in Section 6 (FOLLOW THESE STEPS WHEN THE BATTERY IS INSTALLED IN A VEHICLE).
-
Página 10: Calculating Charge Time
All manuals and user guides at all-guides.com General Charging Notes Fan: The charger is designed to control its cooling fan for efficient operation. Consequentially, it is normal for the fan to start and stop when maintaining a fully charged battery. Keep the area near the charger clear of obstructions to allow the fan to operate efficiently. -
Página 11: Maintenance Instructions
All manuals and user guides at all-guides.com The Chart Method Use the following table to more accurately determine the time it will take to bring a battery to full charge. First, identify where your battery fits into the chart. NR means that the charger setting is NOT RECOMMENDED. Find your battery’s rating on the chart below, and note the charge time given for each charger setting. -
Página 12: Troubleshooting
All manuals and user guides at all-guides.com TROUBLESHOOTING PROBLEM POSSIBLE CAUSE REASON/SOLUTION No reading on the Charger is not plugged in. Plug the charger into an AC outlet. ammeter. No power at the receptacle. Check for open fuse or circuit breaker supplying AC outlet. -
Página 13: Before Returning For Repairs
All manuals and user guides at all-guides.com PROBLEM POSSIBLE CAUSE REASON/SOLUTION Charger makes a loud buzz Transformer laminations vibrate No problem; this is a normal or hum. (buzz). condition. Shorted Diode Assembly or Have charger checked by a Output Rectifier Assembly (hum). qualified technician. - Página 14 Manufacturer does not provide any warranty for any accessories used with this product that are not manufactured by Schumacher Electric Corporation and approved for use with this product. This Limited Warranty is void if the product is misused, subjected to careless handling, repaired, or modified by anyone other than Manufacturer or if this unit is resold through an unauthorized retailer.
- Página 15 ORIGINAL receipt because it will be required for any warranty claims. This warranty is not transferable. Send warranty card only. Do not send unit to this address for repair. Mail this card to: Schumacher Electric Corporation 801 Business Center Drive Mount Prospect, IL 60056-2179 Name_______________________________________________________________...
- Página 16 Cette garantie n’est pas transférable. Envoyer la carte de garantie seulement. Ne pas envoyer l’unité à cette adresse pour réparation. Envoyer cette carte à : Schumacher Electric Corporation 801 Business Center Drive Mount Prospect, IL 60056-2179 ( É.-U. )
-
Página 17: El Riesgo De Descarga Eléctrica O Incendio
All manuals and user guides at all-guides.com IMPORTANTE: LEA Y GUARDE ESTE MANUAL DE INSTRUCCIONES Y SEGURIDAD. GUARDE ESTAS INSTRUCCIONES – Este manual le mostrará cómo utilizar su cargador en forma segura y efectiva. Por favor, lea, comprenda y siga estas instrucciones y precauciones cuidadosamente, ya que este manual contiene instrucciones operativas y de seguridad de importancia. -
Página 18: Precauciones Personales
All manuals and user guides at all-guides.com RIESGO DE GASES EXPLOSIVOS. 1.10 RESULTA PELIGROSO TRABAJAR EN FORMA CERCANA A UNA BATERÍA DE PLOMO. LAS BATERÍAS GENERAN GASES EXPLOSIVOS DURANTE SU NORMAL FUNCIONAMIENTO. POR ESTE MOTIVO, RESULTA DE SUMA IMPORTANCIA QUE SIGA LAS INSTRUCCIONES CADA VEZ QUE UTILIZA EL CARGADOR. -
Página 19: Ubicación Del Cargador
All manuals and user guides at all-guides.com Limpie los terminales de la batería antes de cargar la batería. Durante la limpieza, evite que la corrosión producida por aire tenga contacto con sus ojos, nariz y boca. Utilice bicarbonato de sodio y agua para neutralizar el ácido de la batería y ayudar a eliminar la corrosión producida por aire. - Página 20 All manuals and user guides at all-guides.com En un vehículo con descarga a tierra por borne negativo, conecte el gancho POSITIVO (ROJO) del cargador de batería al borne POSITIVO (POS, P, +) sin descarga a tierra de la batería. Conecte el gancho NEGATIVO (NEGRO) al chasis del vehículo o al bloque motor alejado de la batería.
-
Página 21: Tamaño Awg Mínimo Recomendado Para Alargadore
All manuals and user guides at all-guides.com Nunca altere el cable o enchufe de C.A. suministrado, si no se ajusta al tomacorriente, haga instalar un tomacorriente adecuado con descarga a tierra por medio de un electricista capacitado. Una conexión inadecuada puede provocar un riesgo de descarga eléctrica o electrocución. -
Página 22: Panel De Control
All manuals and user guides at all-guides.com Primero, cuidadosamente apoye el cargador en su parte frontal para prepararlo para el ensamblaje. Ensamble el pedestal (Artículo 6) usando dos tornillos¼-20 (Artículo 5) y apriete firmemente. Una los dos soportes de eje (Artículo 1) usando un tornillo 10-32 (Artículo 4) en cada uno. - Página 23 All manuals and user guides at all-guides.com • Hold (Suspensión): esta posición anula la función del temporizador, permitiendo un funcionamiento continuo. • Modos automáticos: Coloque el reloj automático en la posición HOLD cuando use el cargador de baterías en uno de los Modos Automáticos (4, 20 o 70A), de otra forma el reloj automático dejará...
- Página 24 All manuals and user guides at all-guides.com Conecte la energía eléctrica de CA teniendo en cuenta las precauciones que figuran en la Sección 8. Seleccione la proporción de carga deseada. NOTA: El tipo de carga manual a 40 Amperios, es un modo manual y tiende a sobrecargar la batería si se opera en tiempo excesivo.
- Página 25 All manuals and user guides at all-guides.com Utilizar la función de encendido de motor El cargador de batería se puede utilizar para impulsar el auto si la batería está baja. Siga estas instrucciones de cómo utilizar la función ENGINE START (encendido de motor). Siga todas las instrucciones y precauciones de seguridad para cargar la batería.
-
Página 26: Cálculo De Tiempo De Carga
All manuals and user guides at all-guides.com Utilización de un probador de rendimiento del alternador Visión general Este cargador de batería tiene un probador de alternador incorporado que muestra un cálculo de la salida relativa del alternador comparado con alternadores normales. Los valores de porcentaje del alternador que se muestran deberían tenerse en cuenta como referencia general, no como un diagnóstico preciso. -
Página 27: Tamaño/Índice De La Batería
All manuals and user guides at all-guides.com Ejemplo: Índice de amperio por hora x % de la carga necesaria x 1,25 = horas de carga Configuraciones del cargador 100 (índice AH) x 0,50 (carga necesaria) x 1,25 = 3,125 horas 20 (Configuraciones del cargador) 100 x 0,50 x 1,25 = 3,125 Necesitará... -
Página 28: Localización Y Solución De Problemas
All manuals and user guides at all-guides.com 15.3 Almacene los clips en la barra de la abrazadera de fibra de vidrio. No los almacene en la manija, uno con el otro, en, o alrededor del metal, o enganchados a los cables. 15.4 Si el cargador se mueve alrededor del taller o se transporta a otra localidad, trate de evitar/prevenir daño a los cables,pinzas y al cargador. - Página 29 All manuals and user guides at all-guides.com PROBLEMA POSIBLE CAUSA SOLUCIÓN Se escucha un sonido seco El disyuntor se resetea. Las configuraciones podrían en el cargador (“clic”). ser erróneas. Verifique las configuraciones del cargador. Batería defectuosa. Haga revisar la batería. Cables o ganchos de la batería El disyuntor se resetea cuando en cortocircuito.
-
Página 30: Antes De Devolver A Reparaciones
All manuals and user guides at all-guides.com PROBLEMA POSIBLE CAUSA SOLUCIÓN Ciclo reducido o sin inicio El cargador podría encontrarse El protector térmico podría al arrancar el motor. en estado de recalentamiento. encontrarse desconectado y (continuado) necesitar un mayor tiempo de descanso. -
Página 31: Garantía Limitada
El Fabricante no presta garantía por lo accesorios utilizados con este producto que no sean los fabricados por Schumacher Electric Corporation y que no estén aprobados para su uso con este producto. La presente Garantía Limitada será nula si el producto se utiliza en forma errónea, se trata de manera inadecuada, es reparado o modificado... - Página 32 All manuals and user guides at all-guides.com IMPORTANT : LIRE ET CONSERVER CE GUIDE DE CONSIGNES DE SÉCURITÉ ET D’UTILISATION. CONSERVER CES CONSIGNES – Ce guide vous montrera comment utiliser votre chargeur efficacement et en toute sécurité. Veuillez lire, comprendre et suivre ces instructions et précautions attentivement sachant que ce guide contient d’importantes consignes d’utilisation et de sécurité.
-
Página 33: Précautions Personnelles
All manuals and user guides at all-guides.com RISQUE DE GAZ EXPLOSIFS. 1.10 TRAVAILLER AU VOISINAGE D’ACCUMULATEUR AU PLOMB EST DANGEREUX. LES BATTERIES PRODUISENT DES GAZ EXPLOSIFS EN MARCHE NORMALE. POUR CETTE RAISON, IL EST DE LA PLUS HAUTE IMPORTANCE QUE VOUS SUIVIEZ LES DIRECTIVES à CHAQUE FOIS QUE VOUS UTILISEZ LE CHARGEUR. -
Página 34: Emplacement Du Chargeur
All manuals and user guides at all-guides.com Nettoyer les bornes de la batterie avant de la charger. Lors du nettoyage, ne laissez pas les particules de corrosion entrer en contact avec vos yeux, votre nez et votre bouche. Utilisez du bicarbonate de sodium et de l’eau pour neutraliser l’électrolyte de batterie et aider à... -
Página 35: Mise À La Terre Et Cordon D'énergie Ca
All manuals and user guides at all-guides.com à la masse. Connectez la pince NÉGATIVE ( NOIRE ) au chassis du véhicule ou au bloc moteur à l’écart de la batterie. Ne pas connecter la pince au carburateur, à la canalisation d’essence ou à des pièces de carrosserie en tôle. Connectez à une grosse pièce de métal de la carrosserie ou du bloc moteur. -
Página 36: Directives De Montage
All manuals and user guides at all-guides.com Tailles minimum AWG recommandées pour le rallonge : • 100 pieds ( 30,5 mètres ) de long ou moins – utilisent une 10 corde d’extension de calibre (5,26 mm • Plus de 100 pieds ( 30,5 mètres ) de long – utilisent une 8 corde d’extension de calibre ( 8,36 mm CARACTÉRISTIQUES Ampèremètre... - Página 37 All manuals and user guides at all-guides.com Premièrement, poser soigneusement le chargeur sur le sa face du devant pour préparer le montage. Monter le pied ( article 6 ) à l’aide de deux vis de ¼-20 ( article 5 ) et resserrer solidement.
-
Página 38: Panneau De Contrôle
All manuals and user guides at all-guides.com PANNEAU DE CONTRÔLE Minuterie • Réglage de la minuterie : La minuterie vous permet de choisir une heure spécifique de chargement. Quand la minuterie stoppe, le chargeur s’arrête de charger votre batterie. La fonction majeure de la minuterie est d’empêcher une surcharge tout en permettant un temps de chargement satisfaisant. -
Página 39: Consignes D'utilisation
All manuals and user guides at all-guides.com CONSIGNES D’UTILISATION Compensation Automatique de Température Le chargeur adapte le voltage de charge maximum et le maximum voltage pour maintien basé sur la température aérienne ambiante. Cela permet le fait de charger optimal et la sécurité. Fugueur Thermal Le chargeur réduit automatiquement le courant s’il découvre la batterie peut devenir trop chaud. - Página 40 All manuals and user guides at all-guides.com Mode Entretien ( Contrôlant le Mode de monitor ) Quand le voyant DEL ( vert ) CHARGÉE est allumé, le chargeur a commencé le mode Entretien. Dans ce mode, le chargeur garde la batterie complètement chargée en fournissant un faible courant selon les besoins.
- Página 41 All manuals and user guides at all-guides.com plus exacte, la charge de surface devrait être retirée en créant temporairement une charge sur la batterie, comme en allumant les lumières ou autres accessoires pendant quelques minutes avant de lire l’affichage. Lisez-le quelques minutes après avoir éteint les phares.
-
Página 42: Calcul Du Temps De Chargement
All manuals and user guides at all-guides.com CALCUL DU TEMPS DE CHARGEMENT Le densimètre ou la méthode électronique Pour trouver le temps de recharger entièrement votre batterie, déterminez le niveau de charge de la batterie avec un densimètre ou testeur électronique en pourcentage de chargement. -
Página 43: Consignes D'entretien
All manuals and user guides at all-guides.com TAUX DE CHARGE / TAILLE DE LA BATTERIE / TEMPS DE CHARGEMENT CARACTÉRISTIQUES 4 AMP 20 AMP 40 AMP 70 Amp 1 - 2 6 - 12 AH Motocyclette, heures PETITES tondeuse BATTERIES 2 - 5 à... - Página 44 All manuals and user guides at all-guides.com TABLEAU DE DÉPANNAGE PROBLÈME CAUSE POSSIBLE RAISON/SOLUTION Aucune lecture sur Le chargeur n’est pas branché. Branchez le chargeur à une prise l’ampèremètre. de courant CA. Pas de courant à la prise. Vérifiez si un fusible est coupé ou le disjoncteur pour cette prise de courant.
- Página 45 All manuals and user guides at all-guides.com PROBLÈME CAUSE POSSIBLE RAISON/SOLUTION On entend le chargeur faire Le coupe-circuit est en fonction Les paramètres peuvent être un cliquètement. mauvais. Vérifiez les paramètres du chargeur. La batterie est défectueuse. Faire vérifier la batterie. Court-circuit des câbles ou des Le coupe-circuit se met en pinces de la batterie.
-
Página 46: Avant De L'envoyer Pour Réparation
All manuals and user guides at all-guides.com PROBLÈME CAUSE POSSIBLE RAISON/SOLUTION Le chargeur ne s’allume La prise de courant CA est morte. Vérifiez si un fusible est coupé ou pas quand il est le disjoncteur pour cette prise de correctement branché. courant. -
Página 47: Garantie Limitée
L’ACHETEUR D’ORIGINE DU PRODUIT. CETTE GARANTIE LIMITÉE N’EST NI TRANSFÉRABLE NI CESSIBLE. Schumacher Electric Corporation ( le « Fabricant » ) garantit ce chargeur de batterie pour 3 ans, à partir de la date d’achat, contre les défauts de matériaux ou de fabrication qui peuvent survenir dans des conditions normales d’utilisation et d’entretien.