Tabla de contenido
Publicidad
Idiomas disponibles
Idiomas disponibles
Enlaces rápidos
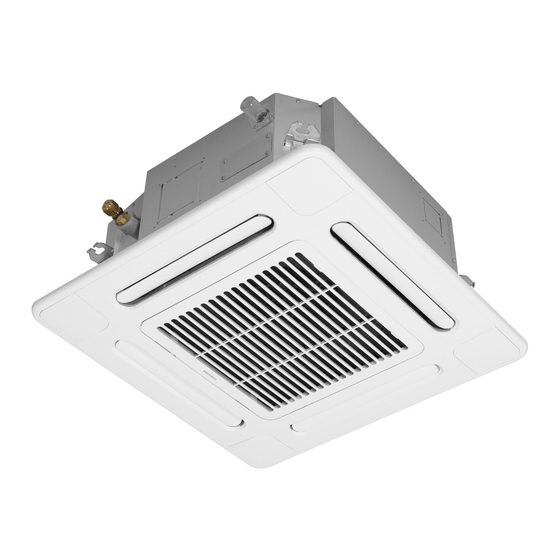
Heronhill - for all your Toshiba requirements
Remote Controller Wireless Kit
Kit de télécommande sans fil
Set der drahtlosen Fernbedienung
Kit per telecomando via radio
Juego de Controlador Remoto Inalámbrico
Kit do controlador remoto sem fios
Draadloze afstandsbedieningsset
Áóýñìáôï Êéô ÓõóêåõÞò Ôçëå÷åéñéóìïý
Model/Modèle/Geräte/Modello/Modelo/Modelo/Model/ÌïíôÝëï/
TCB-AX21E
Tel: 01823 665660 www.heronhill.co.uk Fax: 01823 665807
All manuals and user guides at all-guides.com
MANUALE DI INSTALLAZIONE
INSTALLATION MANUAL
MANUEL D’INSTALLATION
INSTALLATIONS-HANDBUCH
MANUAL DE INSTALACIÓN
MANUAL DE INSTALAÇÃO
INSTALLATIEHANDLEIDING
ÅÃ×ÅÉÑÉÄÉÏ ÅÃÊÁÔÁÓÔÁÓÇÓ
Publicidad
Tabla de contenido

Manuales relacionados para Toshiba TCB-AX21E


Resumen de contenidos para Toshiba TCB-AX21E
- Página 1 Heronhill - for all your Toshiba requirements All manuals and user guides at all-guides.com INSTALLATION MANUAL MANUEL D’INSTALLATION INSTALLATIONS-HANDBUCH MANUALE DI INSTALLAZIONE MANUAL DE INSTALACIÓN MANUAL DE INSTALAÇÃO INSTALLATIEHANDLEIDING ÅÃ×ÅÉÑÉÄÉÏ ÅÃÊÁÔÁÓÔÁÓÇÓ Remote Controller Wireless Kit Kit de télécommande sans fil...
- Página 2 Spiegare chiaramente il contenuto del Manuale del proprietario e consegnarne una copia all'utente. Muchas gracias por haber adquirido el control remoto TOSHIBA para su aparato de aire acondicionado. Lea atentamente este manual del propietario antes de utilizar el control remoto para el aparato de aire acondicionado.
-
Página 3: Tabla De Contenido
Heronhill - for all your Toshiba requirements All manuals and user guides at all-guides.com CONTENTS Accessory parts ................1 Slide switch ..................9 Switch location of receiver unit ............2 Self-diagnosis table and measures ..........9 Installation location of receiver unit ...........2 Cautions for installation of the remote controller ...... -
Página 4: Accessory Parts
Heronhill - for all your Toshiba requirements All manuals and user guides at all-guides.com CONTENTS Accessory parts Parts Quantity Separate receiver unit (provided 200mm power cable) Plate mounting Screws M4 x 25 Screws M4 x 40 Wood screws Spacer Wire joints... -
Página 5: Switch Location Of Receiver Unit
Heronhill - for all your Toshiba requirements All manuals and user guides at all-guides.com Switch location of receiver unit Address selector switch This switch is used to address one of a maximum of six air con- ditioners that can be controlled by the remote controller. -
Página 6: How To Install The Receiver Unit
Heronhill - for all your Toshiba requirements All manuals and user guides at all-guides.com How to install the receiver unit NOTES : • To avoid malfunction of the remote controller, do not assemble or run remote control wiring together with the power cables, and do not enclose them in the same metal conduit. - Página 7 Heronhill - for all your Toshiba requirements All manuals and user guides at all-guides.com When using exposed mounting for the receiver unit, install onto a wall where the receiver unit can be attached. 1. Insert a flathead screwdriver or similar tool...
- Página 8 Heronhill - for all your Toshiba requirements All manuals and user guides at all-guides.com If the separate receiver unit is installed on the ceiling, use the provided ceiling mounting bracket for installation. 1. Insert a screwdriver or similar tool into the notch at the bottom to remove the receiver nameplate.
-
Página 9: How To Perform Cabling Of Sensor Units
Heronhill - for all your Toshiba requirements All manuals and user guides at all-guides.com How to perform cabling of sensor units Flush Mounting Indoor unit remote Separate receiver controller terminal • Connection diagram unit board Wire of Power wire from... -
Página 10: Requirement
Heronhill - for all your Toshiba requirements All manuals and user guides at all-guides.com Requirement The control by two remote controllers is enabled by installing the wireless remote controller with the wired remote controller for an indoor unit. (Max. 2 remote controllers of wireless or wired are insatiable.) “2-remote controllers”... -
Página 11: How To Set The Room Temperature Sensor
Heronhill - for all your Toshiba requirements All manuals and user guides at all-guides.com How to set the room temperature sensor • The room temperature sensors are equipped in the indoor unit and the wireless remote controller. One of two sensors works. -
Página 12: Slide Switch
Heronhill - for all your Toshiba requirements All manuals and user guides at all-guides.com Slide switch • Check the slide switch in the battery box of the remote controller is set to [S] / [A] at shipment from the factory. -
Página 13: Cautions For Installation Of The Remote Controller
Heronhill - for all your Toshiba requirements All manuals and user guides at all-guides.com Cautions for installation of the remote controller • To operate the remote controller by fixing it to the wall, etc. with a remote controller holder, turn on the fluorescent lamp, operate the remote controller at the position to be fixed, check the air conditioner normally operates, and then mount it. -
Página 14: Test Run
Heronhill - for all your Toshiba requirements All manuals and user guides at all-guides.com Test run Before test run • Before turning on the power supply, carry out the following procedure. 1) Using 500V-megger, check 1MΩ or more exists between the terminal block 1 to 3 and the earth. If 1MΩ... -
Página 15: Pièces Accessoires
Heronhill - for all your Toshiba requirements All manuals and user guides at all-guides.com SOMMAIRE Pièces accessoires Pièce Quantité Unité réceptrice séparée (câble d’alimentation de 200 mm fourni) Monture de plaque Vis M4 x 25 Vis M4 x 40 Vis à bois Entretoise Raccords de câble... -
Página 16: Emplacement Des Commutateurs De L'unité Réceptrice
Heronhill - for all your Toshiba requirements All manuals and user guides at all-guides.com Emplacement des commutateurs de l’unité réceptrice Commutateur d’adresse Ce commutateur est utilisé pour définir l’adresse d’un de six climatiseurs maximum qui peuvent être commandés par la télécommande. -
Página 17: Installation De L'unité Réceptrice
Heronhill - for all your Toshiba requirements All manuals and user guides at all-guides.com Installation de l’unité réceptrice REMARQUES : • Afin d’éviter un dysfonctionnement de la télécommande, ne montez ni n’acheminez le câblage de télécommande avec les câbles d’alimentation, et ne les placez pas dans le même tube métallique. - Página 18 Heronhill - for all your Toshiba requirements All manuals and user guides at all-guides.com Pour un montage en surface de l’unité réceptrice, installez-la sur un mur où elle peut être fixée. 1. Insérez un tournevis plat ou outil similaire Plaque frontale dans la rainure sur le fond de l’unité...
- Página 19 Heronhill - for all your Toshiba requirements All manuals and user guides at all-guides.com Si l’unité réceptrice séparée est installée au plafond, utilisez le support de montage au plafond fourni pour l’installation. 1. Insérez un tournevis ou outil similaire dans l’encoche en bas pour retirer la plaque du...
-
Página 20: Mode De Raccordement Des Détecteurs
Heronhill - for all your Toshiba requirements All manuals and user guides at all-guides.com Mode de raccordement des détecteurs Montage encastré Plaque à bornes Unité réceptrice de télécommande • Schéma de séparée d’unité intérieure raccordement Fil d’unité Fil d’alimentation de réceptrice... -
Página 21: Conditions Requises
Heronhill - for all your Toshiba requirements All manuals and user guides at all-guides.com Conditions requises La commande par deux télécommandes est possible en installant la télécommande sans fil avec la télécommande avec fil d’une unité intérieure. (2 télécommandes avec ou sans fil au plus peuvent être installées.) Commande par “2 télécommandes”... -
Página 22: Mode De Réglage Du Détecteur De Température Ambiante
Heronhill - for all your Toshiba requirements All manuals and user guides at all-guides.com Mode de réglage du détecteur de température ambiante • L’unité intérieure et la télécommande sans fil sont équipées de détecteurs de température ambiante. Un détecteur sur deux fonctionne. -
Página 23: Curseur
Heronhill - for all your Toshiba requirements All manuals and user guides at all-guides.com Curseur • Vérifiez si le curseur situé dans le compartiment des piles de la télécommande est réglé sur [S] / [A] au départ de l’usine. Sélectionnez le mode de fonctionnement d’après le tableau ci-dessous. -
Página 24: Précautions Concernant L'installation De La Télécommande
Heronhill - for all your Toshiba requirements All manuals and user guides at all-guides.com Précautions concernant l’installation de la télécommande • Pour utiliser la télécommande en la fixant au mur, etc. avec un support de télécommande, allumez la lampe fluorescente, utilisez la télécommande dans sa position de fixation, vérifiez si le climatiseur fonctionne normalement, puis montez-la. -
Página 25: Essai De Fonctionnement
Heronhill - for all your Toshiba requirements All manuals and user guides at all-guides.com Essai de fonctionnement Opérations préliminaires • Avant de mettre le système sous tension, suivez la procédure ci-après. 1) A l’aide d’un mégohmmètre de 500 V, vérifiez s’il y a 1 MΩ ou plus entre le bornier 1 à 3 et la terre. -
Página 26: Zubehörteile
Heronhill - for all your Toshiba requirements All manuals and user guides at all-guides.com INHALT Zubehörteile Teile Menge Separate Empfängereinheit (mitgeliefertes 200-mm-Netzkabel) Montageplatte Schrauben M4 x 25 Schrauben M4 x 40 Holzschrauben Abstandsstücke Drahtverbindungen Klemme Schablone 95 x 51 Tel: 01823 665660 www.heronhill.co.uk Fax: 01823 665807... -
Página 27: Anordnung Der Schalter An Der Empfängereinheit
Heronhill - for all your Toshiba requirements All manuals and user guides at all-guides.com Anordnung der Schalter an der Empfängereinheit Adressenwahlschalter Mit diesem Schalter wird ausgewählt, welche der maximal sechs Klimaanlagen von der Fernbedienung gesteuert wird. Wahlschalter “Alle /NORMAL” Stellen Sie diesen Schalter auf die Position “NORMAL”, um die Klimaanlage im normalen Betrieb laufen zu lassen. -
Página 28: Installieren Der Empfängereinheit
Heronhill - for all your Toshiba requirements All manuals and user guides at all-guides.com Installieren der Empfängereinheit HINWEISE: • Um Fehlfunktionen der Fernbedienung zu verhindern, verlegen Sie die Verdrahtung der Fernbedienung nicht zusammen mit den stromführenden Kabeln, und umschließen Sie deren Drähte nicht mit derselben Metallrohrleitung. - Página 29 Heronhill - for all your Toshiba requirements All manuals and user guides at all-guides.com Wenn die Empfängereinheit über Putz installiert werden soll, bringen Sie sie an einer Wand an, an der sie sich montieren lässt. 1. Führen Sie einen Frontplatte Flachschlitzschraubendreher oder ein ähnliches Werkzeug in die Nut an der...
- Página 30 Heronhill - for all your Toshiba requirements All manuals and user guides at all-guides.com Wenn die separate Empfängereinheit an der Decke installiert wird, benutzen Sie zur Montage die im Lieferumfang enthaltenen Befestigungsbügel zur Deckenmontage. 1. Führen Sie einen Schraubendreher oder ein ähnliches Werkzeug in die Kerbe an der...
-
Página 31: Verkabelung Des Sensors
Heronhill - for all your Toshiba requirements All manuals and user guides at all-guides.com Verkabelung des Sensors Unterputzinstallation Anschlussplatte Separate für die • Verdrahtungsplan Empfängereinheit Fernbedienung der Inneneinheit Leiter der Stromleiter aus der Empfängerei Empfängereinheit nheit (Feldeinspei Anschlussstück sung) • Mitgelieferte Drahtverbindung (WHT 2) 1. -
Página 32: Voraussetzungen
Heronhill - for all your Toshiba requirements All manuals and user guides at all-guides.com Voraussetzungen Die Steuerung über zwei Fernbedienungen wird aktiviert, indem eine drahtlose Fernbedienung zusammen mit einer verdrahteten Fernbedienung einer Raumeinheit installiert wird. (Es können maximal 2 Fernbedienungen - verdrahtet oder drahtlos - installiert werden.) “2 Fernbedienungen”... -
Página 33: Auswahl Des Raumtemperaturfühlers
Heronhill - for all your Toshiba requirements All manuals and user guides at all-guides.com Auswahl des Raumtemperaturfühlers • Die Raumeinheit und die Fernbedienung sind jeweils mit einem Temperaturfühler ausgestattet. Einer dieser Fühler ist der aktive Temperaturfühler. • Als Werkseinstellung ist der Temperaturfühler der Raumeinheit aktiviert. -
Página 34: Schiebeschalter
Heronhill - for all your Toshiba requirements All manuals and user guides at all-guides.com Schiebeschalter • Prüfen Sie, ob der Schiebeschalter im Batteriefach der Fernbedienung werkseitig auf [S] oder [A] steht. Wählen Sie entsprechend der folgenden Tabelle einen Betriebsmodus. S K N... -
Página 35: Vorsichtsmaßnahmen Bei Der Installation Der Fernbedienung
Heronhill - for all your Toshiba requirements All manuals and user guides at all-guides.com Vorsichtsmaßnahmen bei der Installation der Fernbedienung • Ehe Sie die Fernbedienung an der Wand montieren, schalten Sie die Raumbeleuchtung ein, halten die Fernbedienung in die gewünschte Montageposition, betätigen sie und prüfen, ob das Klimagerät normal arbeitet. -
Página 36: Testlauf
Heronhill - for all your Toshiba requirements All manuals and user guides at all-guides.com Testlauf Vorbereitung • Ehe Sie die Stromversorgung einschalten, prüfen Sie folgendes: 1) Prüfen Sie mit einem 500V Multimeter ob zwischen den Anschlüssen 1 bis 3 und der Erde 1MΩ... -
Página 37: Accessori
Heronhill - for all your Toshiba requirements All manuals and user guides at all-guides.com INDICE Accessori Componenti Quantità Unità ricevente separata (cavo di alimentazione da 200 mm in dotazione) Supporto Viti M4 x 25 Viti M4 x 40 Viti per il legno... -
Página 38: Ubicazione Dell'interruttore Dell'unità Ricevente
Heronhill - for all your Toshiba requirements All manuals and user guides at all-guides.com Ubicazione dell’interruttore dell’unità ricevente Interruttore di selezione dell’indirizzo Questo interruttore va utilizzato per assegnare un indirizzo a uno dei 6 condizionatori (al massimo) che possono essere controllati dal telecomando. -
Página 39: Come Installare L'unità Ricevente
Heronhill - for all your Toshiba requirements All manuals and user guides at all-guides.com Come installare l’unità ricevente NOTE: • Per evitare il malfunzionamento del telecomando, non montare o far passare il cablaggio del telecomando insieme ai cavi di alimentazione elettrica, e non racchiuderli nello stesso condotto di metallo. - Página 40 Heronhill - for all your Toshiba requirements All manuals and user guides at all-guides.com Quando si utilizza il montaggio esterno per l’unità ricevente, effettuare l’installazione su una parete su cui sia possibile fissare l’unità ricevente. 1. Inserire un cacciavite a punta piatta o uno...
- Página 41 Heronhill - for all your Toshiba requirements All manuals and user guides at all-guides.com Se l’unità ricevente separata è installata sul soffitto, utilizzare la staffa di montaggio per soffitto in dotazione per l’installazione. 1. Inserire un cacciavite o uno strumento analogo nella scanalatura nella parte inferiore per rimuovere il pannello anteriore del ricevitore.
-
Página 42: Come Eseguire Il Cablaggio Delle Unità Sensore
Heronhill - for all your Toshiba requirements All manuals and user guides at all-guides.com Come eseguire il cablaggio delle unità sensore Montaggio a incasso Morsettiera del Unità ricevente dell’unità interra • Schema dei separata telecomando collegamenti Cavo di Cavo dell’unità... -
Página 43: Requisiti
Heronhill - for all your Toshiba requirements All manuals and user guides at all-guides.com Requisiti Il controllo da parte di due telecomandi viene abilitato installando il telecomando via radio insieme al telecomando via cavo per l’unità interna. (Si possono installare al massimo due telecomandi via radio o via cavo.) Controllo con “2 telecomandi”... -
Página 44: Come Impostare Il Sensore Della Temperatura Del Locale
Heronhill - for all your Toshiba requirements All manuals and user guides at all-guides.com Come impostare il sensore della temperatura del locale • I sensori della temperatura del locale sono montati nell’unità interna e nel telecomando via cavo. Funziona solo uno dei due sensori alla volta. -
Página 45: Interruttore A Scorrimento
Heronhill - for all your Toshiba requirements All manuals and user guides at all-guides.com Interruttore a scorrimento • Controllare che l’interruttore a scorrimento situato nel vano batterie del telecomando sia impostato su [S] / [A], come viene impostato nel momento della spedizione dalla fabbrica. -
Página 46: Precauzioni Per L'installazione Del Telecomando
Heronhill - for all your Toshiba requirements All manuals and user guides at all-guides.com Precauzioni per l’installazione del telecomando • Per azionare il telecomando fissandolo al muro, ecc. con un supporto per telecomando, accendere la lampada fluorescente, azionare il telecomando nella posizione di fissaggio, controllare che il condizionatore d’aria funzioni normalmente e poi montare il telecomando. -
Página 47: Funzionamento Di Prova
Heronhill - for all your Toshiba requirements All manuals and user guides at all-guides.com Funzionamento di prova Prima del funzionamento di prova • Prima di accendere l’alimentazione elettrica, eseguire la procedura seguente. 1) Usando un megger da 500 V, controllare che ci sia 1 MΩ o più tra i terminali da 1 a 3 della morsettiera e la messa a terra. -
Página 48: Partes Accesorias
Heronhill - for all your Toshiba requirements All manuals and user guides at all-guides.com CONTENIDO Partes accesorias N.° Partes Cantidad Unidad receptora separada (provistos 200 mm de cable de alimentación) Placa de montaje Tornillos M4 x 25 Tornillos M4 x 40... -
Página 49: Ubicación Del Interruptor De La Unidad Receptora
Heronhill - for all your Toshiba requirements All manuals and user guides at all-guides.com Ubicación del interruptor de la unidad receptora Interruptor selector de dirección Este interruptor se utiliza para designar uno de un máximo de seis acondicionadores de aire que pueden ser controlados con el mando a distancia. -
Página 50: Cómo Instalar La Unidad Receptora
Heronhill - for all your Toshiba requirements All manuals and user guides at all-guides.com Cómo instalar la unidad receptora NOTAS: • Para evitar un mal funcionamiento del mando a distancia, no ensamble ni tienda los cables del mando a distancia junto con los cables de alimentación, y no los meta en el mismo conducto metálico. - Página 51 Heronhill - for all your Toshiba requirements All manuals and user guides at all-guides.com Cuando quiera utilizar montaje expuesto para la unidad receptora, instálela en una pared en la que pueda ser fijada. 1. Inserte un destornillador de cabeza plana o...
- Página 52 Heronhill - for all your Toshiba requirements All manuals and user guides at all-guides.com Si quiere instalar la unidad receptora separada en el techo, utilice el soporte de montaje en techo suministrado para la instalación. 1. Quite la placa de fabricante insertando un destornillador o herramienta similar en la muesca de la parte inferior.
-
Página 53: Cómo Preparar El Cableado De Las Unidades Sensoras
Heronhill - for all your Toshiba requirements All manuals and user guides at all-guides.com Cómo preparar el cableado de las unidades sensoras Montaje empotrado Tarjeta terminal Unidad receptora del mando a • Diagrama de conexión separada distancia de la unidad interior Cable de la Cable de alimentación... -
Página 54: Requisitos
Heronhill - for all your Toshiba requirements All manuals and user guides at all-guides.com Requisitos El control con dos controles remotos se activa instalando el control remoto inalámbrico junto con el control remoto con cables para una unidad interior. (Se puede instalar un máximo de 2 controles remotos, ya sean con o sin cables.) El control con “2 controles remotos”... -
Página 55: Cómo Configurar El Sensor De Temperatura Ambiente
Heronhill - for all your Toshiba requirements All manuals and user guides at all-guides.com Cómo configurar el sensor de temperatura ambiente • Los sensores de temperatura ambiente se encuentran en la unidad interior y en el control remoto inalámbrico. Sólo uno de los dos sensores está activado. -
Página 56: Conmutador Deslizante
Heronhill - for all your Toshiba requirements All manuals and user guides at all-guides.com Conmutador deslizante • Asegúrese de que el conmutador deslizante del compartimiento para las pilas del control remoto esté configurado originalmente de fábrica en [S] / [A]. -
Página 57: Precauciones Para La Instalación Del Control Remoto
Heronhill - for all your Toshiba requirements All manuals and user guides at all-guides.com Precauciones para la instalación del control remoto • Para utilizar el control remoto fijado en la pared, etc. con un dispositivo de sujeción, encienda la luz fluorescente, utilice el control remoto en la posición en la que desea fijarlo, asegúrese de que el... -
Página 58: Prueba De Funcionamiento
Heronhill - for all your Toshiba requirements All manuals and user guides at all-guides.com Prueba de funcionamiento Antes de la prueba de funcionamiento • Antes de encender la fuente de alimentación, siga los pasos siguientes: 1) Utilizando un megóhmetro de 500V, compruebe si hay 1 MΩ o más entre el bloque de terminales (de 1 a 3) y el suelo. -
Página 59: Acessórios
Heronhill - for all your Toshiba requirements All manuals and user guides at all-guides.com INDICE Acessórios N.º Peças Quantidade Unidade de recepção individual (cabo de alimentação de 200 mm fornecido) Chapa de montagem Parafusos M4 x 25 Parafusos M4 x 40 Parafusos para madeira Espaçador... -
Página 60: Localização Do Interruptor Da Unidade De Recepção
Heronhill - for all your Toshiba requirements All manuals and user guides at all-guides.com Localização do interruptor da unidade de recepção Interruptor de endereço Este interruptor é utilizado para endereçar um dos seis aparelhos de ar condicionado que podem ser controlados pelo controlador remoto. -
Página 61: Como Instalar A Unidade De Recepção
Heronhill - for all your Toshiba requirements All manuals and user guides at all-guides.com Como instalar a unidade de recepção NOTAS: • Para evitar que o controlador remoto fique avariado, não monte nem ligue os fios do controlador remoto juntamente com os cabos de alimentação nem os feche na mesma calha metálica. - Página 62 Heronhill - for all your Toshiba requirements All manuals and user guides at all-guides.com Se optar por uma montagem não embutida para a unidade de recepção, instale-a numa parede que permita a fixação. 1. Insira uma chave para parafusos de cabeça...
- Página 63 Heronhill - for all your Toshiba requirements All manuals and user guides at all-guides.com Se a unidade de recepção individual for instalada no tecto, utilize o suporte de montagem de tecto fornecido durante a instalação. 1. Insira uma chave para parafusos ou uma...
-
Página 64: Como Instalar Os Cabos Das Unidades Sensoras
Heronhill - for all your Toshiba requirements All manuals and user guides at all-guides.com Como instalar os cabos das unidades sensoras Montagem embutida Placa de terminais Unidade de do controlador • Diagrama de ligação recepção remoto da unidade individual interior Fio da unidade Fio de alimentação... -
Página 65: Requisito
Heronhill - for all your Toshiba requirements All manuals and user guides at all-guides.com Requisito O controlo por via de dois controladores remotos é possível através da instalação do controlador remoto sem fios com o controlador remoto com fios destinado a uma unidade interior. -
Página 66: Como Configurar O Sensor De Temperatura Do Compartimento
Heronhill - for all your Toshiba requirements All manuals and user guides at all-guides.com Como configurar o sensor de temperatura do compartimento • Os sensores de temperatura do compartimento estão equipados na unidade interior e controlador remoto sem fios. Um dos dois sensores funciona. -
Página 67: Interruptor De Correr
Heronhill - for all your Toshiba requirements All manuals and user guides at all-guides.com Interruptor de correr • Verifique se o interruptor de correr na caixa das pilhas do controlador remoto foi configurado para [S] / [A] na fábrica. A selecção do modo de funcionamento é efectuada de acordo com a tabela abaixo. -
Página 68: Cuidados A Ter Na Instalação Do Controlador Remoto
Heronhill - for all your Toshiba requirements All manuals and user guides at all-guides.com Cuidados a ter na instalação do controlador remoto • Para utilizar o controlador remoto instalando-o na parede, etc., com um suporte, ligue a lâmpada fluorescente, utilize o controlador remoto na posição onde o pretende instalar e verifique se o ar condicionado funciona normalmente;... -
Página 69: Ensaio De Funcionamento
Heronhill - for all your Toshiba requirements All manuals and user guides at all-guides.com Ensaio de funcionamento Antes do ensaio de funcionamento • Antes de ligar a energia eléctrica, proceda do seguinte modo: 1) Utilizando um megger de 500 V, verifique a existência de 1 MΩ ou mais entre os blocos de terminais 1 a 3 e a terra. -
Página 70: Toebehoren
Heronhill - for all your Toshiba requirements All manuals and user guides at all-guides.com INHOUD Toebehoren Onderdelen Aantal Afzonderlijk ontvangtoestel (200 mm stroomkabel meegeleverd) Plaatbevestiging Schroeven M4 x 25 Schroeven M4 x 40 Houtschroeven Vulblokje Kabelschoenen Klem Sjabloon 95 x 51... -
Página 71: Schakelaars Op Het Ontvangtoestel
Heronhill - for all your Toshiba requirements All manuals and user guides at all-guides.com Schakelaars op het ontvangtoestel Adreskeuzeschakelaar Gebruik deze schakelaar om toegang te krijgen tot een van de maximaal zes airconditioners die u met de afstandsbediening kunt bedienen. -
Página 72: Installeren Van Het Ontvangtoestel
Heronhill - for all your Toshiba requirements All manuals and user guides at all-guides.com Installeren van het ontvangtoestel OPMERKINGEN: • Om foutieve werking van de afstandsbediening te voorkomen, mag u de bedrading van de afstandsbediening niet samen met de stroomkabels monteren of leiden, en mag u beide niet samen in hetzelfde metalen kabelkanaal monteren. - Página 73 Heronhill - for all your Toshiba requirements All manuals and user guides at all-guides.com Als u het ontvangtoestel bloot wilt monteren, gebruik dan een muur waaraan het toestel kan worden bevestigd. 1. Steek een platkopschroevendraaier of een Voorplaat gelijksoortig gereedschap in de groef aan de onderzijde van het ontvangtoestel.
- Página 74 Heronhill - for all your Toshiba requirements All manuals and user guides at all-guides.com Als u het ontvangtoestel in het plafond wilt monteren, gebruik dan de meegeleverde plafondmontagesteun. 1. Steek een schroevendraaier of een gelijksoortig gereedschap in de inkeping aan de onderzijde om de naamplaat van het ontvangtoestel te verwijderen.
-
Página 75: Zo Sluit U De Bekabeling Van De Sensorunits Aan
Heronhill - for all your Toshiba requirements All manuals and user guides at all-guides.com Zo sluit u de bekabeling van de sensorunits aan Vlak monteren Klemmenbord Afzonderlijk voor • Aansluitschema ontvangtoestel afstandsbediening van binnenunit Bedrading van Stroomkabel van ontvangtoestel ontvangtoestel... -
Página 76: Voorwaarde
Heronhill - for all your Toshiba requirements All manuals and user guides at all-guides.com Voorwaarde Bediening met twee afstandsbedieningen is mogelijk door een draadloze afstandsbediening te combineren met een bekabelde afstandsbediening voor een binnenunit. (Er kunnen maximaal 2 afstandsbedieningen (draadloos of bekabeld) worden gecombineerd.) Met “2 afstandsbedieningen”... -
Página 77: Zo Stelt U De Ruimtetemperatuursensor In
Heronhill - for all your Toshiba requirements All manuals and user guides at all-guides.com Zo stelt u de ruimtetemperatuursensor in • In zowel de binnenunit als de draadloze afstandsbediening zijn ruimtetemperatuursensoren gemonteerd. Een van twee sensoren werkt. • In de fabriek is de ruimtetemperatuursensor van de binnenunit ingesteld als de actieve sensor. -
Página 78: Verschuif De Schakelaar
Heronhill - for all your Toshiba requirements All manuals and user guides at all-guides.com Verschuif de schakelaar • Controleer of de schuifschakelaar in het batterijcompartiment van de afstandsbediening ingesteld is op [S] / [A]. Kies de bedieningsfunctie volgens de onderstaande tabel. -
Página 79: Let Op De Volgende Punten Bij De Installatie Van De Afstandsbediening
Heronhill - for all your Toshiba requirements All manuals and user guides at all-guides.com Let op de volgende punten bij de installatie van de afstandsbediening • Schakel, wanneer de afstandsbediening op de wand wordt gemonteerd in een houder voor de... -
Página 80: Werkingstest
Heronhill - for all your Toshiba requirements All manuals and user guides at all-guides.com Werkingstest Voor het uitvoeren van de werkingstest • Voer, voordat u de voeding inschakelt, eerst de volgende procedure uit. 1) Controleer met een multimeter of de weerstand tussen de aansluitingen 1 tot en met 3 en massa meer dan 1 MΩ... -
Página 81: Περιεχομενα
Heronhill - for all your Toshiba requirements All manuals and user guides at all-guides.com ΠΕΡΙΕΧΟΜΕΝΑ Παρελκόµενα ανταλλακτικά Αρ. Παρελκόµενο Ποσότητα Ξεχωριστή µονάδα λήψης (παρέχεται ηλεκτρικό καλώδιο 200mm) Στήριγµα πλάκας Βίδες M4 x 25 Βίδες M4 x 40 Βίδες για ξύλο... -
Página 82: Θέση Διακ Πτη Της Μονάδας Λήψης
Heronhill - for all your Toshiba requirements All manuals and user guides at all-guides.com Θέση διακόπτη της µονάδας λήψης ∆ιακόπτης επιλογής διεύθυνσης Ο διακόπτης αυτός χρησιµοποιείται για να διευθύνει ένα από τα έξι κλιµατιστικά, τα οποία υπάρχουν το µέγιστο και... -
Página 83: Πώς Να Εγκαταστήσετε Τη Ονάδα Λήψης
Heronhill - for all your Toshiba requirements All manuals and user guides at all-guides.com Πώς να εγκαταστήσετε τη µονάδα λήψης ΣΗΜΕΙΩΣΕΙΣ: • Για να αποφύγετε τη δυσλειτουργία της συσκευής τηλεχειρισµού, µη συναρµολογείτε ή θέτετε σε λειτουργία τις καλωδιώσεις της ασύρµατης συσκευής τηλεχειρισµού µαζί µε τα ηλεκτρικά καλώδια... - Página 84 Heronhill - for all your Toshiba requirements All manuals and user guides at all-guides.com Όταν χρησιµοποιείτε εκτεθειµένη στήριξη για τη µονάδα λήψης, τοποθετήστε σε τοίχο όπου µπορεί να στηριχτεί η µονάδα λήψης. 1. Τοποθετήστε ένα κατσαβίδι πεπλατυσµένης Πρόσοψη κεφαλής ή παρόµοιο εργαλείο στην εγκοπή...
- Página 85 Heronhill - for all your Toshiba requirements All manuals and user guides at all-guides.com Αν η ξεχωριστή µονάδα λήψης είναι εγκατεστηµένη στην οροφή, για την εγκατάσταση, χρησιµοποιήστε το στήριγµα για την οροφή που παρέχεται. 1. Τοποθετήστε ένα κατσαβίδι ή παρόµοιο εργαλείο...
-
Página 86: Πώς Να Πραγµατοποιήσετε Την Καλωδίωση Των Μονάδων Αισθητήρα
Heronhill - for all your Toshiba requirements All manuals and user guides at all-guides.com Πώς να πραγµατοποιήσετε την καλωδίωση των µονάδων αισθητήρα Ισόπεδη τοποθέτηση Πλάκα Ξεχωριστή µονάδα ακροδεκτών της • ∆ιάγραµµα συνδέσεων λήψης συσκευής τηλεχειρισµού στην εσωτερική Καλώδιο της Ηλεκτρικό καλώδιο... -
Página 87: Προϋπ Θεση
Heronhill - for all your Toshiba requirements All manuals and user guides at all-guides.com Προϋπόθεση Ο έλεγχος µε δύο συσκευές τηλεχειρισµού ενεργοποιείται κατόπιν εγκατάστασης της ασύρµατης συσκευής τηλεχειρισµού µε την ενσύρµατη συσκευή τηλεχειρισµού για εσωτερική µονάδα. (Ο µέγιστος δυνατός αριθµός ασύρµατων ή ενσύρµατων συσκευών τηλεχειρισµού που µπορούν να... -
Página 88: Πώς Να Ρυθµίσετε Τον Διακ Πτη Διευθύνσεων
Heronhill - for all your Toshiba requirements All manuals and user guides at all-guides.com Πώς να ρυθµίσετε τον αισθητήρα της θερµοκρασίας δωµατίου • Οι αισθητήρες θερµοκρασίας δωµατίου έχουν προσαρµοστεί στην εσωτερική µονάδα και την ασύρµατη συσκευή τηλεχειρισµού. Ο ένας από τους δύο αισθητήρες λειτουργεί. -
Página 89: Συρ Μενος Διακ Πτης
Heronhill - for all your Toshiba requirements All manuals and user guides at all-guides.com Συρόµενος διακόπτης • Ελέγξτε ότι ο συρόµενος διακόπτης στο κυτίο µπαταριών της συσκευής τηλεχειρισµού έχει ρυθµιστεί σε [S] / [A] κατά τη µεταφορά από το εργοστάσιο. -
Página 90: Προφυλάξεις Για Την Εγκατάσταση Της Συσκευής Τηλεχειρισµού
Heronhill - for all your Toshiba requirements All manuals and user guides at all-guides.com Προφυλάξεις για την εγκατάσταση της συσκευής τηλεχειρισµού • Για να θέσετε σε λειτουργία τη συσκευή τηλεχειρισµού µε επιτοίχια στερέωση, κλπ. από βάση συσκευής τηλεχειρισµού, ανοίξτε τον λαµπτήρα φθορισµού, θέστε σε λειτουργία τη συσκευή... -
Página 91: Οκιµή Λειτουργίας
Heronhill - for all your Toshiba requirements All manuals and user guides at all-guides.com ∆οκιµή Λειτουργίας Πριν από τη δοκιµή λειτουργίας • Προτού ενεργοποιήσετε την παροχή ισχύος, ακολουθήστε την εξής διαδικασία. 1) Χρησιµοποιώντας µετρητή εντάσεως 500V, ελέγξτε αν υπάρχει 1MΩ η περισσότερο ανάµεσα στην... - Página 92 Heronhill - for all your Toshiba requirements All manuals and user guides at all-guides.com 目录 附件 号码 零件 数量 分体接收装置 (所提供的 200 毫米电缆) 板固定 螺钉 M4 x 25 螺钉 M4 x 40 木螺钉 间隔块 电线接头 卡钉 样板 95 x 51...
-
Página 93: 接收装置的开关位置
Heronhill - for all your Toshiba requirements All manuals and user guides at all-guides.com 接收装置的开关位置 地址选择开关 此开关用于遥控器所控制的最多 6 台空调机之一的寻址。 /NORMAL 选择开关 空调机正常运行时,将此开关设定在 “NORMAL (正常) ”位置。 当此开关设定在 “ALL (所有) ” 时,空调机的室内机关闭。 RCU:SUB/RCU:MAIN 选择开关 正常运行时,将此开关设定在 “RCU:MAIN”位置。 关于 “RCU:SUB”位置的设定,参见第 95 页。 PCB CHK 开关... -
Página 94: 如何安装接收装置
Heronhill - for all your Toshiba requirements All manuals and user guides at all-guides.com 如何安装接收装置 注: • 为了避免遥控器发生故障,请不要将遥控线路与动力电缆装配或敷设在一起,不要将两者穿在同一根 金属导管中。 • 当动力装置可能产生电噪声时,建议安装噪声滤波器或类似的装置。 当需要平装在墙壁中时,应当事先将一个金属开关盒 (现场提供)放在墙壁的凹陷处,然后将分体接 收装置安装在金属开关盒中。 1. 将平头螺丝刀或类似的工具插到凹口处,然后 接收装置 除去面板。 间隔块 间隔块 2. 用所提供的两个 M4 螺钉将接收装置固定。 不 M4 x 25 (2) 要过度拧紧。应当使用所提供的间隔块。 如果... - Página 95 Heronhill - for all your Toshiba requirements All manuals and user guides at all-guides.com 当接收装置采用明装方式时,将它安装到可以固定的墙壁上即可。 1. 将平头螺丝刀或类似工具插入到接收装置底部 面板 的槽中。 用螺丝刀撬开,然后拆除下部箱体。 (图 A) 图 A 2. 为了随后将接收装置的电线从上部箱体穿过 (顶部中心处较薄的部分) ,应当采用镊子或 卡钉 类似的工具割一个槽口,其尺寸与遥控器线 2 - 3 毫米 在遥控器线穿过上部箱体处割 (选配件)相同。 (图 B) 一个槽口。 接头...
- Página 96 Heronhill - for all your Toshiba requirements All manuals and user guides at all-guides.com 如果分体接收装置安装在天花板上,则采用所提供的顶棚固定支架进行安装。 1. 将螺丝刀或类似的工具插入到底部的槽口中,以 拆除接收装置的铭牌。 2. 沿着所提供的纸型 (95 x 51 毫米)在天花板上割 下一部分。 3. 将线穿过所提供的固定支架,将支架插入到安装 孔中。 (图 D) 图 D 4. 使用支架零件 (A)和 (B)牢固地抓紧天花板材 零件 (A) 料。 (图 E)...
-
Página 97: 附怎样进行传感器装置的布线件
Heronhill - for all your Toshiba requirements All manuals and user guides at all-guides.com 附怎样进行传感器装置的布线件 平装 室内机遥控器端子板 分体接收装置 • 连接图 接收装置的电线 来自接收装置的动力线 (现场提供) 接头 • 所提供的线接头 (WHT 2) 1. 将需要连接的电线头上的绝缘皮剥下约 14 毫 接收装置的电线 米。 (现场提供) 2. 将 2 根线拧在一起,在线接头上形成一个压接 连接。... - Página 98 Heronhill - for all your Toshiba requirements All manuals and user guides at all-guides.com 要求 安装无线遥控器,有线的遥控器供室内机使用就能通过两个遥控器进行控制。 (最多只能安装两个无线或有线的遥控器。 ) “两个遥控器”的控制表示可通过复数的遥控器来操作一个或复数的装置。 注: 1. 确认室内机的终端数时,连接遥控器电缆不可有布线错误。 (使用 AC 220-240V 会损毁装置。 ) 2. 复数的无线遥控器工具不能同时用于一个室内机。 3. 安装无线遥控器时如同时安装有线遥控器,要把其中一具设置为辅遥控器。 • 把有线遥控器设置为辅遥控器时,要把有线遥控器印刷电路板后面的地址连接器从主改为辅。 • 当设定无线遥控器为 “副”时,将无线遥控器接收装置的开关从 RCU: MAIN 旋至 RCU: SUB。...
-
Página 99: 怎样设置地址开关
Heronhill - for all your Toshiba requirements All manuals and user guides at all-guides.com 怎样设置室温传感器 • 室温传感器内藏在室内机和无线遥控器内。两个传感器中,有一个动作。 • 出厂时,室温传感器设置在室内机侧。 选择遥控器中的传感器时,按下遥控器盖内的 SENSOR (传感器)按钮 (右图) ,检查 “Main 揗 sensor (主传感器) ”是否从 LCD 中消失。 注: 来自遥控器室温数据如果有 10 分钟以上不传送到空调,这时即使 选择的是遥控器侧的传感器,室内机侧的传感器也会被自动选择。 遥控器要尽量固定对着空调。 SENSOR (传感器) 按钮... -
Página 100: 滑动开关
Heronhill - for all your Toshiba requirements All manuals and user guides at all-guides.com 滑动开关 • 检查遥控器电池箱内的滑动开关在出厂时是否设置在 《S》 / 《A》 。 运行模式的选择,按照下表进行。 S K N A H C 数字反向变流器 超级多模 超级多模 (RAV) (热泵型) (单冷型) 滑动开关 位置 A H C A H C A H C 运转模式的设置选择... -
Página 101: 安装遥控器时的注意
Heronhill - for all your Toshiba requirements All manuals and user guides at all-guides.com 安装遥控器时的注意 • 想操作固定在墙上、并安放在遥控器夹持器内的遥控器时,点亮日光灯,在要固定的位置上操作遥控 器,检查空调是否能正常地运转,然后把它安装。 • 遥控器能探测室温时,这样就能装上遥控器。这时要注意下述各项。 • 要设置在不会被冷风或热风直接吹到的地方。 • 要设置在不会被阳光直接照射的地方。 • 要设置在遥控器不会受到影响的地方。 对用户的说明 • 安装工程结束后,要把 “用户手册”和 “安装手册”递交给用户。 • 根据 “用户手册” ,说明遥控器的用法和维修方法。 怎样使用遥控器 使用的遥控器安装在墙上时。 在要固定的位置上按下 按钮检查是否能正确 的收到信号。... -
Página 102: 试运转
Heronhill - for all your Toshiba requirements All manuals and user guides at all-guides.com 试运转 试运转前 • 在接通电源前,请进行下述程序。 1) 使用 500V 的兆欧表,检查接线盒 1 到 3 和地线之间是否有 1MΩ 以上。 如果测量到 1MΩ 以下, 不可运转装置。 对遥控器电路不可通电。 2) 2)检查室内机阀是否全部打开。 • 为了在启动时间保护压缩机,在运转前要接通电源 12 小时以上。 如何进行试运行... - Página 103 Heronhill - for all your Toshiba requirements All manuals and user guides at all-guides.com Tel: 01823 665660 www.heronhill.co.uk Fax: 01823 665807...
- Página 104 Heronhill - for all your Toshiba requirements All manuals and user guides at all-guides.com 85464359606000 Tel: 01823 665660 www.heronhill.co.uk Fax: 01823 665807...