Tabla de contenido
Publicidad
Idiomas disponibles
Idiomas disponibles
Enlaces rápidos
www.costway.com
USER'S MANUAL
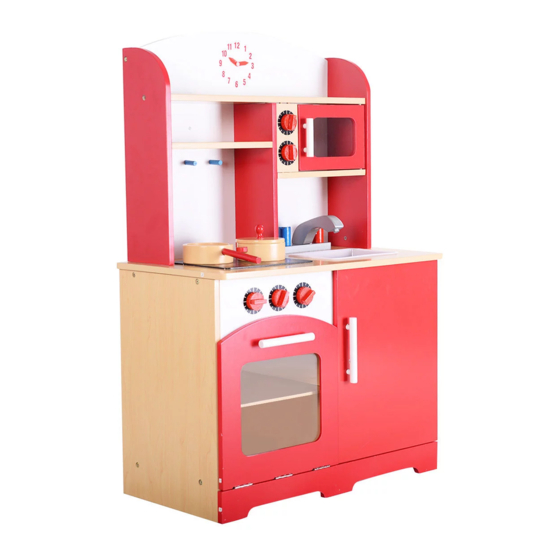
Children's Kitchen
TY322392
THIS INSTRUCTION BOOKLET CONTAINS IMPORTANT SAFETY INFORMATION. PLEASE READ AND KEEP FOR FUTURE REFERENCE.
Follow Costway
Please give us a chance to make it right and do better!
Visit us: www.costway.com
Contact our friendly customer service department for help first.
Replacements for missing or damaged parts will be shipped ASAP!
EN
DE
FR
ES
IT
Publicidad
Tabla de contenido

Manuales relacionados para Costway TY322392


Resumen de contenidos para Costway TY322392
- Página 1 THIS INSTRUCTION BOOKLET CONTAINS IMPORTANT SAFETY INFORMATION. PLEASE READ AND KEEP FOR FUTURE REFERENCE. Follow Costway Please give us a chance to make it right and do better! Visit us: www.costway.com Contact our friendly customer service department for help first. Replacements for missing or damaged parts will be shipped ASAP!
-
Página 2: Before You Start
Contact Us! Do NOT return this item. Contact our friendly customer service department for help first. E-mail US: cs.us@costway.com UK: cs.uk@costway.com Before You Start Before You Start Please read all instructions carefully. Retain instructions for future reference. Seperate and count all parts and hardware. - Página 3 Step 1 Step 2 Use the screws(A2) to fasten the handle(B1) on the board(L). Lock the board(V) and the board(Y2) with two screws(A3). Step 8 Step 9 Step 10 Then use 3 hinges to fix the bottom(S) and the door panel(A1) with B4 screws.
- Página 4 February 24, 2019 Great products so far. Fast delivery, easy setup, and working without any issues. With your inspiring rating, COSTWAY will be more consistent to offer you EASY SHOPPING EXPERIENCE, GOOD PRODUCTS and EFFICIENT SERVICE! US office: Fontana, California...
- Página 5 Stellen Sie den Artikel immer auf eine glatte, flache und stabile Oberfläche. Halten Sie alle kleinen Teile und Verpackungsmaterialien dieses Artikels TY322392 von Babys und Kindern fern, da sie zur ernsthaften Erstickungsgefahr DAS HANDBUCH ENTHÄLT WICHTIGE SICHERHEITSHINWEISE. BITTE LESEN UND BEWAHREN SIE FÜR DIE ZUKÜNFTIGE VERWENDUNG AUF.
- Página 6 Schritt 1 Schritt 2 Befestigen Sie den Griff b1 mit der Schraube A2 an der Platte L, und dann Befestigen Sie die Platte V ,Y2 mit zwei Schrauben A3. befestigen Sie die Unterseite des S und der A1 Türverkleidung mit 3 Scharnieren mit Schrauben B4.
- Página 7 Schritt 8 Schritt 9 Befestigen Sie den Knopf C1, C2, M mit der Schraube A2 in Schritt 10 Setzen Sie den Zapfen A4 in die Unterseite der linken Seite Streifen H, dann befestigen Sie den Wasserhahn mit der Setzen Sie vier Zapfen in die Platte X ein und befestigen Sie des k1 ein und sichern Sie es mit der A3-Schraube.
- Página 8 Ihre Vorschläge und Kommentare für COSTWAY sind wirklich wichtig für uns! Wir bitten Sie aufrichtig, in unseren Shop zurückzukehren und durch nur einen Klick eine gute Bewertung zu hinterlassen. Es wäre sehr ermutigend, wenn Sie das so tun könnten:...
-
Página 9: Contactez-Nous
Contactez-nous ! Ne retournez pas cet article. Contactez d’abord notre service à la clientèle amical pour l’aide. E-mail FR : cs.fr@costway.com Avant de Commencer Veuillez lire attentivement toutes les instructions. Conservez les instructions pour la référence future. Séparez et comptez toutes les pièces et les outils de matériel. - Página 10 Étape 1 : Étape 8 Étape 2 : Fixez la poignée B1 sur la plaque L à l’aide des vis A2. Étape 9 Fixez les boutons C1, C2 et M sur la bande H à l’aide des Fixez les plaques V et Y2 à l’aide de deux vis A3.
-
Página 11: Evaluation De Cinq-Étoiles
24 février 2019 Excellents produits jusqu’à présent. Livraison rapide et l’installation facile. Et le fonctionnnement sans problème. Avec votre évaluation inspirante, COSTWAY sera plus professionnel pour vous offrir une BONNE EXPERIENCE D’ACHATS, de BONS PRODUITS et un SERCIVE EFFICACE ! FR office : FDS France, 26 RUE DU VERTUQUET, 59960 Neuville-en-Ferrain Points de Récompense... -
Página 12: Antes De Empezar
Primero póngase en contacto con nuestro amable departamento de servicio al cliente para obtener ayuda. Dirección de Correo Electrónico EE.UU.:cs.us@costway.com Reino Unido: cs.uk@costway.com España: cs.es@costway.com Antes de Empezar Por favor lea todas instrucciones con mucha atención. Retenga instrucciones para referencias futuras. - Página 13 PASO 1 PASO 2 Utilice el tornillo A2 para fijar el tirador b1 en el tablero L. Bloquee los tableros V y Y2 con 2 tornillos A3 Luego use 3 bisagras con tornillo B4 para fijar la parte inferior S y la puerta A1.
- Página 14 PASO 8 PASO 9 Fije los botones C1, C2, y M respectativamente con los PASO 10 Inserte la madera A4 en la parte inferior del tablero izquierdo k1 tornillos A2 en la tira H. Inserte 4 maderas en el tablero X y luego fíjelas en el tablero K1...
- Página 15 ¡Bienvenido a visitar nuestro sitio web y comprar nuestros productos de alta calidad! ¡Sus sugerencias y comentarios para COSTWAY son muy importantes para nosotros! Le solicitamos sinceramente que vuelva a nuestra tienda y deje una buena calificación con solo un clic.
-
Página 16: Prima Di Iniziare
Contattaci! NON restituire questo articolo. Per prima cosa contatta il nostro servizio di assistenza clienti. E-mail US: cs.us@costway.com UK: cs.uk@costway.com IT: cs.it@costway.com Prima di iniziare Si prega di leggere attentamente tutte le istruzioni. Conservare le istruzioni per riferimento futuro. - Página 17 Passo 8 Passo 1 Passo 2 Passo 9 Fissare i pulsanti C1, C2, M con le viti A2 sulla striscia H, Utilizzare la vite A2 per fissare la maniglia B1 sulla piastra L, quindi utilizzare le Passo 10 Bloccare le schede V e Y2 con 2 viti A3.
- Página 18 Ottimi prodotti finora 24 febbraio 2019 Grandi prodotti finora. Consegna veloce, facile configurazione e funzionamento senza problemi. Con il tuo commento stimolante, COSTWAY continuerà a offrirti FACILITÀ DI ACQUISTO FACILE, PRODOTTI BUONI e SERVIZIO EFFICIENTE! US ufficio: Fontana, California UK ufficio: Ipswich...
- Página 19 Warnung / Warning/Avertissement/Advertencia/Avvertimento Entfernen Sie alle Verpackungen bevor Sie Ihr Kind mit dem Produkt spielen lassen. Remove all packaging before you let your child play with the product Retirez tous les emballages avant de laisser votre enfant jouer avec le produit. Remueva todos los embalajes antes de que les deja a sus niños jugándolo.