Publicidad
Publicidad
Tabla de contenido

Manuales relacionados para Hansgrohe Clubmaster Pressure Balance Tub/Shower Set With Rough 04906 0 Serie


Resumen de contenidos para Hansgrohe Clubmaster Pressure Balance Tub/Shower Set With Rough 04906 0 Serie
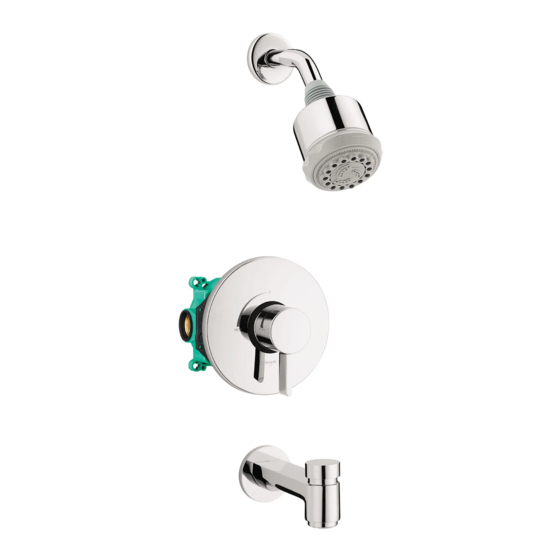
- Página 1 EN Installation / User Instructions / Warranty FR Instructions de montage / Mode d'emploi / Garantie ES Instrucciones de montaje / Manejo / Garantía Clubmaster Pressure Balance Tub/Shower Set With Rough 04906xx0 Croma Select E Pressure Balance Tub/Shower Set With Rough 04910xx0...
-
Página 2: Technical Information
* Please know and follow all applicable local plumbing codes when setting the temperature on the water heater. Installation Considerations • For best results, Hansgrohe recommends that • Keep this booklet and the receipt (or other proof this unit be installed by a licensed, professional of date and place of purchase) for this product in plumber. -
Página 3: Données Techniques
À prendre en considération pour l’installation • Pour meilleurs résultats, Hansgrohe • Conservez ce livret et le reçu (ou une autre recommande que ce produit soit installé par un preuve sur laquelle figurent la date et l’endroit plombier professionnel licencié. -
Página 4: Datos Tecnicos
Español Datos tecnicos Presión en servicio recomendada 15 - 75 PSI (0.1-0.5 MPa) máximo 145 PSI (1 MPa) Temperatura del agua caliente recomendada 120°-140° F (49°- 60°C)* máximo 158°F (70° C)* Caudal máximo @ 44 PSI (0.3 Mpa) válvula 5.5 GPM (20.8 L/min) 26528xx1 2.0 GPM (7.6 L/min) 28496xx1... - Página 5 Clubmaster Pressure Balance Tub/ Shower Set with Rough 04906xx0 iBox Universal Plus Ecostat Pressure Balance Trim S 01850181 04233xx0 ⅝" (15 mm) 3⅛" (80 mm) 5⅞" (149 mm) 2⅜" (60 mm) 5⅜" (137 mm) 1⅛" (28 mm) ¾ NPT 2⅜"-4¼" ⅞"...
- Página 6 Croma Select E Pressure Balance Tub/ Shower Set 04910xx0 iBox Universal Plus Ecostat Pressure Balance Trim E 01850181 15718xx1 ⅝" (15 mm) 3⅛" (80 mm) 5⅞" (149 mm) 2⅜" (60 mm) 5⅜" (137 mm) 1⅛" (28 mm) ¾ NPT 2⅜"-3½" (61-89 mm) ⅞"...
-
Página 7: Instalación
Installation Suggestion / Suggestion d'installation / Sugerencia para la instalación ½ NPT drop-ear ell The showerhead height shown here is a suggestion and may be altered to suit the needs and preferences of the homeowner. See page 8 regarding ½" the requirements for the tub spout drop. - Página 8 Tub spout requirements / Exigences pour le bec de baignoire / Requisitos para el caño de la bañera • The tub spout drop can be • La section de tuyau du bec • El caño de bajada del surtidor either ½" or ¾" pipe. de la baignoire peut être de bañera puede ser un caño constituée d’un tuyau de ½...
- Página 9 Service Stops / Butées d’arrêt d’isolation / Cierres de servicio closed ferme cerrado open ouvert 4 mm abierto 4 mm...
- Página 10 Installation Suggestions / Suggestions d'installation / Sugerencias para la instalación English Français Español When intalling the supply Pour monter les différents rac- Para enroscar los codos de elbows, hold the iBox steady cors, on peut fixer l'iBox grâce à conexión, fijar el iBox universal using a pipe and a vise.
- Página 11 Español English Français It is possible to support the iBox C’est possible de soutenir le Es posible apoyar la válvula que Plus Universal using a stringer robinet utilisant un plaque ar- utiliza una placa trasera y tornil- and screws (not included). rière et vis (pas inclus).
- Página 12 Adjust the fixing ring / Ajuster l'anneau de fixation / Ajuste el anillo de fijación press English Français Español The fixing ring may be reposi- L’anneau réparant pourrait être El anillo que fija puede ser reco- tioned to accommodate different repositionné...
- Página 13 Installation / Installation / Instalación see page 8 for tub spout piping requirements Voir page 8 pour les exigences relatives à la section de tuyau du bec de la baignoire. Consulte la página 8 para conocer los requisitos para el caño de bajada del surtidor de bañera.
- Página 14 ½" NPT English Français Español Make sure that the valve is level. Assurez-vous que le robinet est Asegúrese de que la válvula de niveau. quede nivelada. Install the valve so that the outside surface of the finished Installez le robinet de façon à Instale la válvula de modo que wall falls between the "min"...
- Página 15 ½" NPT ⅜" (10 mm) ¾" NPT ⅜" (10 mm) Español English Français The tub spout requires either a Le bec de la baignoire requiert El surtidor de ducha requiere ¾" NPT female fitting or a ½" un raccord femelle NPT de una conexión hembra NPT de NPT male nipple recessed ⅜"...
- Página 16 Flush the hot and cold supplies / Rincez les conduites d’alimentation de l’eau chaude et de l’eau froide / Lave los suministros frío y caliente 90° > 5 min 90° 90° 4 mm 90° English Français Español Remove the dust cover. Retirez l’étiquette.
- Página 17 Installation / Installation / Instalación ¹ ⁄ ₁ ₆ " - ⅛ " 1 - 2 5 mm Español English Français Make sure that the Fermez l’eau à les bu- Cierre el paso del agua stops are closed. tées d'arrêt d'isolation. en la entrada del sumi- nistro o los cierres de Cut the plaster shield so that...
- Página 18 4 mm English Français Español Install the function block. Insérez le bloc de fonction. Inserte el bloque de función. Tighten the screws. Installez les vis du bloc de Instale los tornillos del bloque fonction. de función. Measure the distance from the Mesurez la distance entre la Mida la distancia entre la front of the plaster shield to one...
- Página 19 90° 4 mm 90° Español English Français Add ½" to this measurement. Ajoutez ½ po à cette longueur Agregue ½" a X. Anote esta « X ». Notez cette longueur. medida. Cut each screw so that it is X + ½"...
- Página 20 English Français Español Install the carrier plate. Installez la plaque-support. Instale la placa del portador. Test the valve: Testez le robinet: Pruebe la válvula: Place the adapter and the Placez ensuite l'adapteur et la Coloque el adaptador y la handle on the stem. poignée sur la tige.
- Página 21 Español English Français Measure the temperature of the Mettez le temperature de l'eau. Mida la temperatura del agua. output water. Assurez-vous que l'eau froide Asegúrese que el agua fría fluya Make sure that cold water flows s'écoule de le robinet en de la válvula primero.
- Página 22 2.5 mm English Français Español Lubricate the cartridge o-ring Lubrifiez la joint torique sur Lubrique la junta del cartucho using a small amount of white la cartouche avec une petite con una pequeña cantidad de plumber's grease. quantité de graisse de plombe- grasa blanca para plomería.
- Página 23 Español English Français Place a dab of waterproof seal- Appliquer une petite quantité de Coloque un poco de sellador a ant at the grout joints. l’agent d’étanchéité aux joints prueba de agua en las uniones de coulis. de la lechada de cemento. Do not caulk around N’appliquez pas de No coloque masilla...
- Página 24 Reverse the cartridge / Inversez la cartouche / Invierta el cartucho 90° 4 mm 90° + ¼ turn English Français Español If the valve opens through Si le robinet s’ouvre en Si la válvula abre en caliente, hot, reverse the cartridge. faisant couler l’eau chaude, invierta el cartucho.
- Página 25 90° 4 mm 90° English Français Español Lift the cartridge out. Retirez la cartouche. Levante el cartucho. Turn the cartridge 180°, so that Tournez la cartouche de 180°, Gire el cartucho 180°, de the "hot side" marking is on the de façon à...
- Página 26 Adjust the Rotational Limit Stop / Réglez la butée de limite de rotation / Ajuste el tope límite rotacional hotter cooler plus chaude plus froid más caliente más frío English Français Español Pull the white rotational limit Tirez vers extérieur l’arrêt de Tire la parada de límite ro- stop outward.
- Página 27 Installation / Installation / Instalación NPT ½ 28496xx1 26528xx1 17 mm 7.4 ft-lb / 10 Nm 19 mm...
- Página 28 Installation / Installation / Instalación 14414xx1, 71412xx1 ½" NPT ¾" NPT 11 mm (⁷⁄₁₆") 11 mm (⁷⁄₁₆") English Français Español ½" NPT Installation: Wrap Enveloppez les filets sur le rac- Envuelva las roscas del niple the threads on the nipple with cord fileté...
- Página 29 3 mm 1.48 ft-lb / 2 Nm English Français Español Install the spout. Installez le bec. Instale el surtidor. Tighten the screw. Serrez la vis. Apriete el tornillo.
- Página 30 Replacement Parts / Pièces détachées / Repuestos iBox Universal Plus 01850181 97739000 13595000 not included non compris no incluido 98560000 5x1.5 98797000 Ecostat Pressure Balance Trim E 15718xx1 98133000 16x2 96525000 98793000 15597xx0 (⅞"/22 mm) 88727000 92756000 96454000 88765xx0 88763xx0 xx = Colors / Couleurs / Acabados 00 = Chrome 82 = Brushed Nickel...
- Página 31 Ecostat Pressure Balance Trim S 04233xx0 98133000 16x2 96525000 96647000 88727000 88765xx0 92756000 96454000 13596xx0 ⅞"/22 mm 88760xx0 88763xx0 Logis Tub Spout with Diverter Metris S Tub Spout with Diverter 71412xx1 14414xx1 96472001 96472001 92758000 98134000 (16x2.5) 98134000 (16x2.5) 98180000 97810000 (60x3) 98051000 97810000...
- Página 32 Clubmaster Showerhead 3-Jet Croma Select E Showerhead 180 2-Jet 28496xx1 26528xx1 98058000 96425000 88649000 97735000 98343001 Showerarm Standard 6" 27411xx3 Showerarm Standard 9" 04186xx3 06920xx0...
- Página 33 User Instructions / Instructions de service / Manejo warmer ouvert plus chaud abierto más caliente cooler plus froid fermé más frío cerrado It is normal for the showerhead Il est normal que la pomme de Es normal que el cabezal de du- to drip for several minutes after douche dégoutte pendant plus- cha gotee durante varios minutos...
- Página 35 User Instructions / Instructions de service / Manejo 26528xx1 IntenseRain Rain User Instructions / Instructions de service / Manejo 28496xx1...
- Página 36 Cleaning / Nettoyage / Limpieza 26528xx1 QUICK Just clean: simply rub over the spray nozzles to CLEAN remove lime scale. La propreté en toute simplicité: les dépôts formés sur les buses élastiques en silicone s’éliminent par un simple passage de la main. Fácil aseo: La cal se puede retirar sencillamente frotando con los dedos de las toberas elásticas de silicona.
- Página 37 3 mm (1.5 ft-lb /2 Nm) > 1 min 17 mm 7.4 ft-lb / 10 Nm...
- Página 38 Residue from basin/tub/tile cleaner can cause damage to faucets and fittings. Immediately rinse any overspray from the Hansgrohe product. • Do not store any cleaning agents under your Hansgrohe product, such as in a vanity unit, as the fumes may damage the product. •...
-
Página 39: Recomendación De Limpieza Para Los Productos De Hansgrohe
Cuando use limpiadores en spray, rocíe el limpiador sobre un paño suave o esponja. • Siempre enjuague su producto Hansgrohe con agua limpia y séquelo y lústrelo con un paño suave después de la limpieza. Importante •... - Página 40 Toll Free 1 (800) 334-0455 was originally installed. For commercial purchasers, the warranty period is (a) one (1) year for hansgrohe products and (b) five (5) In requesting warranty service, you will need to provide: years for AXOR products, in each case from the date of purchase.
- Página 41 Pour les acheteurs commerciaux, la période de garantie est de et produits raccordés ou les produits connexes non fabriqués par (a) un (1) an pour les produits et finitions hansgrohe et (b) cinq Hansgrohe, Inc. ou (ii) tout produit hansgrohe ou AXOR vendu à...
- Página 42 OU LA DURÉE DE CETTE GARANTIE, SELON LA PÉRIODE LA PLUS COURTE. Au moment de l’achat, ou avant l’installation, veuillez procéder à un examen minutieux de votre produit Hansgrohe afin de Limitation des dommages spéciaux, fortuits ou vérifier visuellement qu’il est exempt de dommages ou de consécutifs...
- Página 44 Hansgrohe, Inc. 1490 Bluegrass Lakes Parkway Alpharetta, GA 30004 Tel. 800-334-0455 Fax 770-889-1783 www.hansgrohe-usa.com...