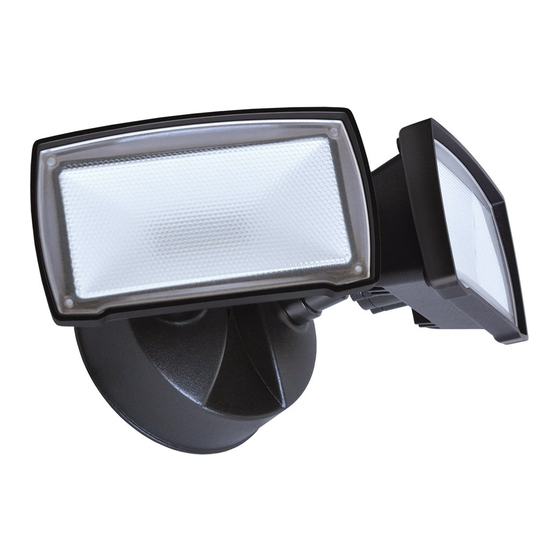
Publicidad
Enlaces rápidos
1. Shut off power at the circuit breaker or fuse panel before removing the old fixture or installing the new one.
2. DO NOT USE THIS FIXTURE IN A CIRCUIT HAVING A DIMMER CONTROL IN THE CIRCUIT.
3. This fixture can only be installed over a recessed electrical box, OR a UL Listed surface mount electrical box rated for wet locations. Recessed electrical box
installations REQUIRE the outer edge of the wall canopy to be completely sealed with silicone RTV glue, and surface mount electrical boxes require
the use of the foam gasket (included), to prevent water seepage into the wall canopy. Without sealing the canopy enclosure, water seepage can short out
the driver, and cause product failure, and/or other safety issues.
4. NOT FOR EAVE MOUNTING ONTO PERFORATED EAVE MATERIAL with a recessed junction box. Doing so can allow water to seep into the fixture canopy and result
in a hazardous situation and/or fixture failure.
5. LEDs can be damaged by electrostatic discharge shock. Before installation, discharge yourself by touching a grounded bare metal surface to remove this
hazard. For electrical requirements, see fixture.
6. Minimum 90°C supply conductors. For fixture electrical ratings, see fixture label.
7. If unsure if the electrical box is properly grounded, or the box is plastic and has no ground wire, or are unfamiliar with the methods of properly grounding
fixture, consult a qualified electrician.
TURN POWER OFF AT BREAKER BOX/FUSE BOX. TURN WALL SWITCH TO JUNCTION BOX OFF.
INSTALLATION FOR ROUND SURFACE
1S SURFACE
MOUNT ELECTRICAL BOXES
AA/BB
x2
FF x1
GG x1
Pull supply wires out of the junction box (j-box). With the side marked "FRONT" facing out,
1S
attach the mounting strap (FF) to the j-box with machine screws (AA or BB). Remove the
protective liner from adhesive side of the gasket (GG). Guide the j-box wires through the
gasket opening. Align the center holes of the gasket and mounting strap and apply the gasket
to the outer edge of round j-box.
DD x1
ATTACH TO JUNCTION BOX
CC x1
Luminaire à éclairage de sécurité commandé par un interrupteur
Light head
Tête d'éclairage
Foco de la
lámpara
Diffuser
Diffuseur
Difusor
Wall plate
Plaque murale
Placa para pared
WARNINGS AND CAUTIONS
Fixture must be properly grounded. Connect fixture
ground wire to ground wire in j-box using wire nut
(DD). These wires can either be green or bare
copper. Insert black supply lead into connector on
black fixture wires and white supply lead into
connector on white fixture wires. Push excess wire
and wire connections back into j-box. Orient light
heads properly to prevent water from damaging the
fixture.
Silicone
EE x1
Switch Controlled Security Light
Luz de seguridad para anochecer-amanecer
Model / Model / Modelo #: SE1092-BP2-00LF0-G, SE1092-WH3-00LF0-G
Hardware kit* / Trousse de quincaillerie*
/ Kit de aditamentos*
AA
BB
CC
x2
x2
x1
FF
EE
GND
x1
x1
FRONT
*Actual hardware may differ from illustration
* La quincaillerie incluse peut être différente de l'illustration.
*Los aditamentos reales pueden diferir de los que se muestran en la ilustración.
AA/BB
x2
FF x1
Pull supply wires out of the junction box (j-box). With the side
1R
marked "FRONT" facing out, attach the mounting strap (FF) to the
j-box with machine screws (AA or BB).
Align the center holes of the fixture and mounting strap (attached to the
J-box). Insert the long machine screw (CC) through the fixture's center
hole and drive into the strap. Restore power to the electrical box and
verify the light functions properly.
For round surface mount junction boxes, make sure the gasket (GG) properly seals the gap
between the wall plate and electrical box to prevent water from seeping into the j-box.
For recessed mount junction boxes, use silicone adhesive caulking (not included) to seal the
gap between the wall plate and the mounting surface to prevent water seepage into the j-box.
If the light is functioning properly, install the silicone cap (EE) into the
center hole on the fixture base to prevent water from entering the housing.
Required
Nécessaire
Obligatorio
DD
x1
GG
x1
INSTALLATION FOR RECESSED
ELECTRICAL BOXES
LIGHT ORIENTATION
LIGHT HEAD ORIENTATION
Light heads must be oriented with"THIS
SIDE UP" pointing upward.
Make sure each light head has this marking
pointing upward at all times to prevent water
from entering and damaging the unit.
(Page 1)
(Page 2)
(Página 4)
Silicone
Silicone
Silicona
Publicidad

Resumen de contenidos para Good Earth Lighting SE1092-BP2-00LF0-G
- Página 1 (Page 1) Luminaire à éclairage de sécurité commandé par un interrupteur (Page 2) Luz de seguridad para anochecer-amanecer (Página 4) Model / Model / Modelo #: SE1092-BP2-00LF0-G, SE1092-WH3-00LF0-G Hardware kit* / Trousse de quincaillerie* Required Light head / Kit de aditamentos* Nécessaire...
- Página 2 REPLACEMENT PARTS LIST Good Earth Lighting® - 6 YEAR LIMITED WARRANTY: The manufacturer warrants this lighting fixture to be free from defects in materials and workmanship for a period of (6) years from the date of original purchase by the consumer. The fixture is not warrantied for use in a commercial or retail application. The warranty is limited to use in a residential environment.
- Página 3 Kit de petit matériel de fixation : LISTE DES PIÈCES DE RECHANGE GARANTIE LIMITÉE DE 6 ANS de Good Earth Lighting : Le fabricant garantit que ce luminaire ne comporte pas de défaut de matériau ou de vice de fabrication ®...
- Página 4 Sírvase visitar nuestro sitio web en: www.goodearthlighting.com/support o llame al Centro de Asistencia ¿Necesita ayuda? al Cliente al 1-800-291-8838, 8:30 a.m.-5 p.m., Hora Central Estándar (CST), de lunes a viernes 1848INSE1092R1 Good Earth Lighting® 1400 East Business Center Drive, Ste. 108 Mount Prospect, IL 60056 Impreso en China...


