Tabla de contenido
Publicidad
Enlaces rápidos
Read all instructions BEFORE
assembly and USE of product.
KEEP INSTRUCTIONS FOR
FUTURE USE.
Lea todas las instrucciones ANTES
de armar y USAR este producto.
CONSERVE LAS INSTRUCCIONES
PARA USO FUTURO.
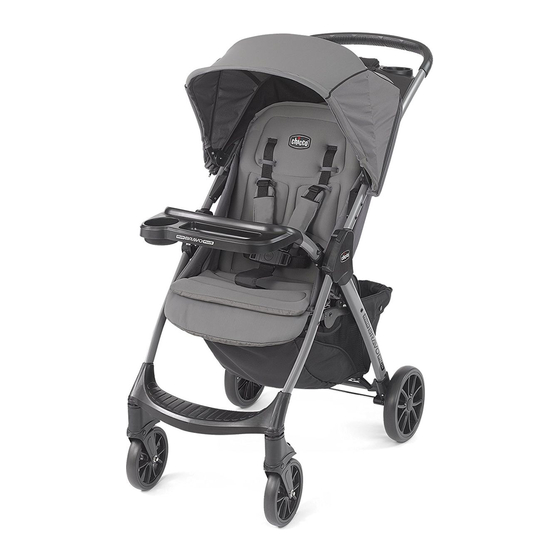
Mini Bravo Plus
Stroller
Owner's Manual
Manual del propietario
©2017 Artsana USA, INC. 09/17
IS0157ES_02
www.chiccousa.com
Publicidad
Tabla de contenido

Manuales relacionados para Chicco Mini Bravo Plus


Resumen de contenidos para Chicco Mini Bravo Plus
- Página 1 USE of product. KEEP INSTRUCTIONS FOR FUTURE USE. Lea todas las instrucciones ANTES de armar y USAR este producto. CONSERVE LAS INSTRUCCIONES PARA USO FUTURO. Mini Bravo Plus Stroller Owner's Manual Manual del propietario ©2017 Artsana USA, INC. 09/17 IS0157ES_02 www.chiccousa.com...
-
Página 2: Fall Hazard
• NEVER USE STROLLER ON STAIRS • ONLY USE the Chicco infant car • USE OF THE STROLLER with a or escalators. You may suddenly seat with this stroller. child weighing more than 50 lbs lose control of the product and •... -
Página 3: Nunca Utilice El Cochecito
Usar el asiento de seguridad PROPIETARIO PARA USO FUTURO. PELIGROSA, nunca coloque asiento de seguridad infantil al infantil de Chicco con el cochecito: • REQUIERE QUE LO ARME UN carteras, bolsas de compras, cochecito que no sea el asiento • La bandeja para el niño se debe ADULTO. -
Página 4: Stroller Frame
Components Components Componentes Componentes A. - Stroller Frame E. - Washers A. - Estructura del cochecito E. - Arandelas F. - Pins F. - Clavijas B. - Front Wheels B. - Ruedas delanteras G. - Hubcaps G. - Tapacubos C. - Rear Wheels C. - Página 5 Components How to Assemble Stroller Componentes Cómo armar el cochecito H. Canopy WARNING ADVERTENCIA H. Capota When opening the Stroller, ensure Al abrir el cochecito, asegúrese that your child, or other children, de que su hijo, u otros niños, se are at a safe distance.
- Página 6 How to Assemble Stroller How to Assemble Stroller Cómo armar el cochecito Cómo armar el cochecito 1B. Press down on the seat to 2. Remove and discard red plastic make sure that the frame is end caps on the Rear Axle (D). locked.
- Página 7 How to Assemble Stroller How to Assemble Stroller Cómo armar el cochecito Cómo armar el cochecito 3. Locate the rear basket straps 4A. On one side of the Rear Axle, above the Rear Axle. Thread a slide a Rear Wheel (C), and turn rear basket strap over and down the Wheel until the brake tab fits through the slot on the rear axle...
- Página 8 How to Assemble Stroller How to Assemble Stroller Cómo armar el cochecito Cómo armar el cochecito ADVERTENCIA 4C. Secure the Wheel to the Rear WARNING Axle using the Pin (F). Push the Asegúrese de que las ruedas estén Check that the wheels are fitted straight side of the Pin through the colocadas correctamente.
- Página 9 How to Assemble Stroller How to Remove Wheels Cómo armar el cochecito Cómo retire las ruedas 5. Attach the Front Wheel (B) to 6. Remove the Front Wheels by the Stroller Frame by lining up and pulling out the Release Lever, just inserting the Front Wheel Post above the wheel (as shown).
- Página 10 How to Recline the Seat How to Attach Accessory Pocket Cómo utilizar el asiento Cómo sujetar el bolsillo para accesorios 7. To Recline the Backrest, squeeze WARNING ADVERTENCIA together both levers and pull Accessory pocket MUST be El bolsillo para accesorios DEBE ser down on the Backrest.
-
Página 11: Remache De La Estructura
How to Use the Canopy How to Use the Canopy Cómo utilizar la capota Cómo utilizar la capota 9. To attach Canopy (H), fasten 10A. Thread canopy strap through BOTH Canopy Clips to the Stroller the gap below the Parent Tray Frame, making sure the RIVET ON and above the Seat Fabric Bow. - Página 12 How to Use the Canopy How to Use the Brakes Cómo utilizar la capota Cómo utilizar los frenos WARNING ADVERTENCIA 11. To use the Canopy mesh panel, unzip the zipper and pull forward Always apply both brakes whenever Cada vez que el cochecito esté on the front Canopy edge.
- Página 13 How to Use Safety Harness How to Use Safety Harness Cómo utilizar el arnés de seguridad Cómo utilizar el arnés de seguridad WARNING ADVERTENCIA 14. This stroller has a 5-point safety harness. This stroller features three harness Este cochecito tiene tres posiciones positions.
- Página 14 How to Use Safety Harness How to Use Safety Harness Cómo utilizar el arnés de seguridad Cómo utilizar el arnés de seguridad 16. The length of the Shoulder WARNING ADVERTENCIA Straps can be adjusted by Never leave child unattended. Avoid Nunca deje al niño desatendido.
- Página 15 How to Use the Child's Tray Using the Chicco Infant Car Seat Cómo utilizar la bandeja para el niño Utilizar el asiento de seguridad infantil de Chicco 17A. Insert the Child's Tray (H) WARNING ADVERTENCIA Tongues into the corresponding ONLY USE a Chicco infant car seat UTILICE ÚNICAMENTE un asiento...
- Página 16 Using the Chicco Infant Car Seat Using the Chicco Infant Car Seat Utilizar el asiento de seguridad infantil de Chicco Utilizar el asiento de seguridad infantil de Chicco 18A. With the Child's Tray attached 19. Squeeze the Release Handle and the Stroller Backrest FULLY...
- Página 17 How to Close the Stroller How to Close the Stroller Cómo cerrar el cochecito Cómo cerrar el cochecito 21. When closing the Stroller, the WARNING ADVERTENCIA Stroller Legs and Push Handle will When folding the Stroller, make sure Al plegar el cochecito, asegúrese fold down to make the Stroller that your child and other children de que su hijo y otros niños se...
- Página 18 How to Remove the Seat How to Remove the Seat Cómo quitar el asiento Cómo quitar el asiento 22. Undo both Canopy snaps 23. On the back of the Stroller on both sides and pull out on Seat, release all three of the fabric the Canopy Clips to remove the tabs from the seat pan.
- Página 19 How to Remove the Seat How to Remove the Seat Cómo quitar el asiento Cómo quitar el asiento 24. On both side of the seat back, 25A. Lift up and remove the bow release the snaps on the Seat from both side openings on the Fabric (as shown).
- Página 20 How to Remove the Seat How to Remove the Canopy Fabric Cómo quitar el asiento Cómo retirar la tela de la capota 25B. Before cleaning, remove the bow from the Seat Fabric. To re-attach the seat repeat steps 22 thru 25 in REVERSE. 25B.
- Página 21 How to Remove the Canopy Fabric How to Re-attach the Canopy Fabric Cómo retirar la tela de la capota Cómo volver a sujetar la tela de la capota 27. Unscrew both screws on the 28A. To attach the Canopy fabric, Canopy Clip with a Phillips slide the bow through the front Screwdriver.
-
Página 22: Limpieza
Cleaning and Maintenance Limpieza y mantenimiento This product requires regular maintenance. The cleaning and maintenance of Este producto requiere mantenimiento periódicamente. Las operaciones the stroller must only be carried out by an adult. de limpieza y mantenimiento del cochecito deben ser efectuadas exclusivamente por un adulto. - Página 23 For More Information Más información If you have any questions or comments about this product, or are missing any of the parts, please contact us in one of the following ways: By phone (toll free): (877)-424-4226 By e-mail: info.usa@artsana.com By mail: 1826 William Penn Way Lancaster, PA 17601 Si tiene preguntas o comentarios sobre este producto o le falta alguna de las partes, comuníquese con nosotros por alguno de los siguientes...
- Página 24 www.chiccousa.com...