Uline H-1555-10 Manual Del Usuario
Ocultar thumbs
Ver también para H-1555-10:
- Manual de instrucciones (9 páginas) ,
- Manual del usuario (9 páginas)
Publicidad
Idiomas disponibles
Idiomas disponibles
Enlaces rápidos
H-1555-10, H-1556-10
π
H-1557-10, H-1558-10
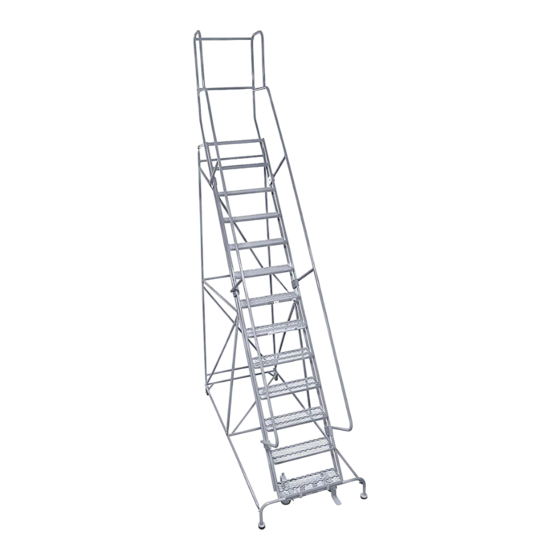
12-16 STEP ROLLING
SAFETY LADDERS
10" DEEP TOP STEP
TooLS nEEdEd
Step Ladder
Rubber Mallet
A. Side Handrail (1)
b. Side Handrail (1) Opposite
C. Rear Handrail bar (2)
(shipped under a step, attached with orange ties)
D. Stile (1)
E. base Panel (1)
WARnInG! Assembly of these types of ladders
can be inherently dangerous. Please take all
necessary precautions during the assembly
process. Always use a separate ladder to
finish assembly in high places. never climb a
ladder that is not completely assembled. do
not assemble or use a ladder with missing or
damaged parts. Use proper lifting mechanics
when assembling a ladder. Watch for overhead
electrical hazards and obstructions.
PAGE 1 OF 6
1-800-295-5510
uline.com
9/16" Wrench or Socket (2)
7/16" Wrench or Socket
Safety Glasses
PARTS
F. back Panel (1)
G. Horizontal brace (2)
ASSEMBLY
StEP 1: FRAME ASSEMbLy
1.
Place the ladder stile (D) on the floor. be sure to
assemble on a protective surface so the finish does
not get damaged. (See Figure 1)
Para Español, vea páginas 4-6.
H. Vertical brace (2)
I. Diagonal brace (2)
Hardware Kit (1)
(misc. hardware Included)
Handrail bracket (6)
(shipped attached to side of stile)
noTE: do noT tighten bolts until instructed to.
noTE: Back panel (F) has both round and
slotted holes. The round holes are at the bottom,
and the slotted holes are at the top (L1).
Notched
bushing (4)
0713 IH-1555-10
Publicidad

Manuales relacionados para Uline H-1555-10


Resumen de contenidos para Uline H-1555-10
- Página 1 Para Español, vea páginas 4-6. H-1555-10, H-1556-10 π 1-800-295-5510 H-1557-10, H-1558-10 uline.com 12-16 STEP ROLLING SAFETY LADDERS 10" DEEP TOP STEP TooLS nEEdEd 9/16" Wrench or Socket (2) Step Ladder 7/16" Wrench or Socket Rubber Mallet Safety Glasses PARTS H. Vertical brace (2) A.
- Página 2 ASSEMBLY ConTInUEd StEP 1: FRAME ASSEMbLy CONtINuED 2. using 3/8-16 x 1¼" hex head cap screws & SINGLE HOLE self-locking nuts, bolt the top (slotted hole) of MODEL back panel (F) to the insides of L1. (See Figure 1) SINGLE HOLE 3.
- Página 3 You may now tighten all handrail bolts. π CHICAGO • ATLANTA • DALLAS • LOS ANGELES • MINNEAPOLIS • NYC/PHILA • SEATTLE • MEXICO • CANADA 1-800-295-5510 uline.com PAGE 3 OF 6 0713 IH-1555-10...
-
Página 4: Escaleras De 12-16 Con Ruedas Y Escalón De Seguridad
H-1555-10, H-1556-10 π 01-800-295-5510 H-1557-10, H-1558-10 uline.mx ESCALERAS DE 12-16 CON RUEDAS Y ESCALÓN DE SEGURIDAD ESCALÓN SUPERIOR DE 10" DE PROFUNDIDAD REQUIERE HERRAMIEnTAS Llave o Dado 9/16" (2) Escalera Llave o Dado 7/16" Mazo de Hule Lentes de Seguridad PARTES H. -
Página 5: Continuación De Ensamble
ConTInUACIÓn dE EnSAMBLE PASO 1: CONtINuACIÓN DE ENSAMbLE EL MARCO 2. utilizando tornillos de cabeza hexagonal de MODELO DE 3/8-16 x 1⁄" y contratuercas, atornille la parte superior UN ORIFICIO (orificio ranurado) del panel trasero (F) en el interior de L1. (Vea Diagrama 1) MODELO DE UN ORIFICIO 3. - Página 6 1/4-20 x 2¾". (Vea Diagrama 2, Paso 3) noTA: Ahora ya puede apretar todos los pernos del pasamanos. π CHICAGO • ATLANTA • DALLAS • LOS ANGELES • MINNEAPOLIS • NYC/PHILA • SEATTLE • MEXICO • CANADA 01-800-295-5510 uline.mx PAGE 6 OF 6 0713 IH-1555-10...