Tabla de contenido
Publicidad
Idiomas disponibles
Idiomas disponibles
Enlaces rápidos
Publicidad
Tabla de contenido

Resumen de contenidos para IKOHS Chef BOT COMPACT
- Página 5 INDEX CHEFBOT COMPACT ENGLISH 6 -18 ESPAÑOL 19 - 31 32 - 44 PORTUGUÊS 45 - 57 FRANÇAIS 58 - 70 ITALIANO 71 - 83 DEUTSCH 84 - 96 NEDERLANDS 97 - 109 POLSKI...
-
Página 6: Safety Instructions
ENGLISH WELCOME Thank you for choosing our cooking robot. Before using the appliance, and to ensure the best use, carefully read these instructions. The safety precautions enclosed herein reduce the risk of death, injury and electrical shock when correctly adhered to. - Página 7 • Appliances can be used by persons with reduced physical, sensory or mental capabilities or lack of experience and knowledge if they have been given supervision or instruction concerning use of the appliance in a safe way and if they understand the hazards involved. •...
-
Página 8: Parts List
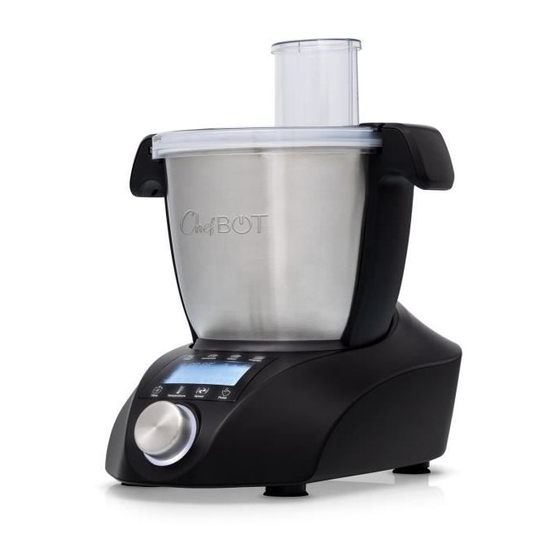
PARTS LIST 1. Steam outlet cap 2. Blender Lid 3. Blender lid seal 4. Whisk 5. Stir paddle 6. Blade 7. Steam basket 8. Blender jug 9. Base unit 10. Power Socket 11. Main switch 12. IMD Display screen 13. Knob 14. -
Página 9: Control Panel Overview
Touch Screen 1. Chop 2. Slow Cook 3. Steam 4. Program 5. Timer 6. Temperature 7. Speed 8. Pulse 9. Control panel Rotary knob 1. Can be used to setting temperature ,time, speed ;or select different Program. 2. Press the knob and the cooker will suspend when cooking .It will continue cooking if your press again. 3. - Página 10 ICON FUNCTION Time Button: Press and set time Time range: 0-90 minutes, The adjustment takes place via the following steps: Press one time to set Time seconds and press again to set minutes. Temperature Button: Press and set temp Temp range: 37º - 120ºC Temperature First step goes from 37º...
- Página 11 ASSEMBLING THE ROBOT 1. Place the drive shaft correctly locked into the jug. 2. Adjust and turn clockwise to fix it. 3. Insert the Jug into the Main Unit .Press down firmly to lock into place. • There is no need to place the drive shaft or any accessory if you just want to boil or heat food. Lid attachment 1.
-
Página 12: Accessories Overview
ACCESSORIES OVERVIEW KEY PART FUNCTION SPEED TIME TEMPERATURE ºC Whip Egg white 2-4 minutes Whip Cream 3-5 minutes Whisk Soup 1-90 minutes Other ingredients that need to heat As needed As needed Stirring paddle Meat Chopping 8-10 30-60s Ice Crush Sugar 8-10 10-20s Blender... - Página 13 Using the slicer disc 1. Attach the disc axis in the driving shaft. 2. Place the disc on the upper part of the axis. • The disc is reversible. One side is used for slicing and the other for grating. 3.
- Página 14 SETTING Setting the time 1. Time range: 0-90 2. Press button: Turn in clockwise to increase time and in anti-clockwise to reduce the time. The time is shown on display like below. Setting the temperature 1. Temperature range: 37-120ºC 2. Press button.
-
Página 15: Automatic Functions
STARTING, PAUSING AND STOPPING THE ROBOT 1. Once a program has been selected, press the control knob to start it. 2. You can pause the program during the cooking process by pressing the control knob and then resume the course of your recipe by pressing the same button a second time. -
Página 16: Automatic Programs
• To use the pre-recorded automatic programs, refer to the recipe book for 100% successful recipes. • Here you will find the list of automatic programs. Refer to the manual attached to learn how they work or go to www. ikohs.com to download it. Slice and grate Custard/flan Veluté... - Página 17 MOTOR RESTING TIME If the motor is overloaded, an error will occur to prevent overheating. The display will show E1. To avoid this, here are some indications of resting time to allow the motor to cool: • After using a dough program (23-27), leave the appliance to rest for at least for 15 to 20 minutes. These programs force the engine a lot, resting time is very important.
-
Página 18: Care And Cleaning
CARE AND CLEANING 1. Always switch off and unplug before cleaning. 2. Remove the lid and tool from the bowl before cleaning, 3. Power unit: Wipe with a damp cloth, then dry. Never use abrasives or immerse in water. 4. When there are burn marks on the bottom of the blender jug, you can put some citric acid or lemons in water, heat it for 5~7 minutes and use it to remove the burn marks with a cloth 5. -
Página 19: Bienvenido
ESPAÑOL BIENVENIDO Muchas gracias por elegir nuestro robot de cocina. Antes de utilizar el aparato, y para garantizar un uso correcto, lea atentamente estas instrucciones. Las precauciones de seguridad incluidas en el presente documento reducen el riesgo de sufrir una descarga eléctrica, lesiones e incluso la muerte cuando se respetan estrictamente. - Página 20 • Asegúrese siempre de que los alimentos estén bien cocinados antes de comérselos. • Los alimentos se deben consumir poco después de finalizar la cocción o dejar que se enfríen rápidamente y, a con- tinuación, refrigerarlos lo antes posible. • El mal uso de su aparato puede causar lesiones. •...
-
Página 21: Lista De Piezas
LISTA DE PIEZAS 1. Tapón de llenado 2. Tapa de la batidora 3. Junta de la tapa de la batidora 4. Batidor 5. Paleta removedora 6. Cuchilla 7. Cestillo de vapor 8. Jarra de la batidora 9. Base principal 10. Toma de corriente 11. -
Página 22: Descripción Del Panel De Control
Botón táctil 1. Picar 2. Cocinar a fuego lento 3. Vapor 4. Programación 5. Temporizador 6. Temperatura 7. Velocidad 8. Pulso 9. Panel de control Mando 1. Se puede utilizar para ajustar la temperatura, el tiempo, la velocidad o seleccionar un programa diferente. 2. -
Página 23: Descripción General Del Panel De Control
DESCRIPCIÓN GENERAL DEL PANEL DE CONTROL ICONO FUNCIÓN Botón de tiempo: Pulse y ajuste el tiempo Intervalo de tiempo: 0 a 90 minutos. El ajuste se realiza según los pasos siguientes: pulse una vez para Tiempo ajustar los segundos y vuelva a presionar para ajustar los minutos. Botón de temperatura: Pulse y ajuste la temperatura Intervalo de temperatura: 37 a 120 °C Temperatura... -
Página 24: Montaje Del Robot
MONTAJE DEL ROBOT 1. Coloque el eje de transmisión correctamente bloqueado en la jarra. 2. Ajuste y gire en el sentido de las agujas del reloj para arreglarlo. 3. Inserte la jarra en la unidad principal. Presione hacia abajo firmemente para bloquearla en su lugar. •... -
Página 25: Descripción General De Los Accesorios
DESCRIPCIÓN GENERAL DE LOS ACCESORIOS PIEZA FUNCIÓN VELOCI- TIEMPO TEMPERATURA (°C) Batir claras 2 a 4 minutos Batir nata 3 a 5 minutos Batidor Sopa 1 a 2 1 a 90 minutos Otros ingredientes que necesitan calor 1 a 2 Según nece- Según necesidad Paleta removedora... - Página 26 Uso del disco rallador 1. Fije el eje del disco en el eje motor. 2. Coloque el disco en la parte superior del eje. • El disco es reversible. Un lado se usa para rebanar y el otro para rallar. 3.
- Página 27 AJUSTE Ajuste del tiempo 1. Intervalo de tiempo: 0 a 90 2. Pulse el botón : gire en el sentido de las agujas del reloj para aumentar el tiempo y en sentido contrario para reducir el tiempo. El tiempo aparecerá en la pantalla, según se indica a continuación. Ajuste de la temperatura 1.
-
Página 28: Iniciar, Pausar Y Detener El Robot
INICIAR, PAUSAR Y DETENER EL ROBOT 1. Una vez que se ha seleccionado un programa, presione el mando de control para iniciarlo. 2. Puede pausar el programa durante el proceso de cocción presionando el mando de control y luego reanudar el curso de su receta presionando el mismo botón por segunda vez. -
Página 29: Programas Automáticos
• Para usar los programas automáticos pregrabados, consulte el libro de recetas para obtener recetas 100 % exitosas. • Aquí encontrará la lista de programas automáticos. Consulte el manual adjunto para saber cómo funcionan o visite www.ikohs.com para descargarlo. Rallar y cortar... -
Página 30: Tiempo De Descanso Del Motor
TIEMPO DE DESCANSO DEL MOTOR Si el motor está sobrecargado, se producirá un error para evitar el sobrecalentamiento. La pantalla mostrará E1. Para evitar esto, aquí hay algunas indicaciones de tiempo de descanso para permitir que el motor se enfríe. •... -
Página 31: Cuidado Y Limpieza
CUIDADO Y LIMPIEZA 1. Apague y desenchufe el aparato siempre antes de efectuar la limpieza. También, retire la tapa y los utensilios del recipiente. 2. Unidad eléctrica: Límpiela con un paño húmedo y séquela a continuación. Nunca utilice productos abrasivos ni sumerja la unidad en agua. -
Página 32: Instruções De Segurança
PORTUGUÊS BEM-VINDO Obrigado por escolher o nosso robô de cozinha. Antes de utilizar o dispositivo e para assegurar uma boa utilização do mesmo, leia cuidadosamente estas instruções. As precauções de segurança aqui indicadas reduzem o risco de morte, lesão ou choque elétrico quando corretamente cumpridas. - Página 33 • A comida deverá ser comida após ter sido cozinhada ou deverá deixar-se arrefecer rapidamente e depois colocada no frigorífico, assim que possível. • A má utilização do seu eletrodoméstico poderá resultar em lesão. • Os eletrodomésticos podem ser utilizados por pessoas com capacidades físicas, sensoriais ou mentais reduzidas ou com falta de experiência e conhecimentos se tiverem sido supervisionadas ou tiverem recebido instruções relati- vamente à...
-
Página 34: Lista De Partes
LISTA DE PARTES 1. Tampa do enchedor 2. Tampa do misturador 3. Vedante da tampa do misturador 4. Batedor 5. Pá de mistura 6. Lâmina 7. Cesto de vapor 8. Jarro do misturador 9. Unidade da base 10. Ficha elétrica 11. -
Página 35: Descrição Do Painel De Controle
Botão de toque 1. Picar 2. Cozinhar a fogo lento 3. Vapor 4. Programação 5. Cronômetro 6. Temperatura 7. Rapidez 8. Pulso 9. Painel de controle eu envio 1. Pode ser usado para ajustar temperatura, tempo, velocidade ou selecionar um programa diferente. 2. -
Página 36: Visão Geral Do Painel De Controle
VISÃO GERAL DO PAINEL DE CONTROLE ÍCONE FUNÇÃO Botão de tempo: Pressione e ajuste a hora Intervalo de tempo: 0 a 90 minutos. O ajuste é feito de acordo com as seguintes etapas: pressione uma Clima vez para ajustar os segundos e pressione novamente para ajustar os minutos. Botão de temperatura: Pressione e ajuste a temperatura Faixa de temperatura: 37 a 120 °... - Página 37 MONTAGEM DO ROBÔ 1. Coloque o eixo de acionamento devidamente travado no jarro. 2. Ajuste e gire no sentido horário para corrigi-lo. 3. Insira a jarra na unidade principal. Pressione firmemente para travá-lo no lugar. • Você não precisa instalar o eixo de acionamento ou qualquer acessório se quiser apenas ferver ou aquecer alimentos. Posicionamento do limite 1.
-
Página 38: Visão Geral Dos Acessórios
VISÃO GERAL DOS ACESSÓRIOS PEÇA FUNÇÃO RAPIDEZ CLIMA TEMPERATURA (° C) Bata as claras em neve 2 a 4 minutos Chantilly 3 a 5 minutos Whisk Sopa 1 a 2 1 a 90 minutos Outros ingredientes que precisam de 1 a 2 De acordo com De acordo com a Espátula removedor... - Página 39 Uso do disco de grade 1. Prenda o eixo do disco ao eixo de transmissão. 2. Coloque o disco em cima do eixo. • O disco é reversível. Um lado é usado para cortar e o outro para ralar. 3. Segure o disco pelos dois orifícios com o polegar e o indicador ou o dedo médio. Tenha cuidado porque as bordas são muito afiadas.
- Página 40 AJUSTAMENTO Definir hora 1. Intervalo de tempo: 0 a 90 2. Botão de apertar virar no sentido horário para aumentar o tempo e no sentido anti-horário para diminuir o tempo. A hora aparecerá na tela, conforme indicado abaixo. Ajuste de temperatura 1.
-
Página 41: Funções Automáticas
INICIAR, PAUSAR E PARAR O ROBÔ 1. Após a seleção de um programa, pressione o botão Controle para iniciá-lo. 2. Você pode pausar o programa durante o processo de cozimento pressionando o botão de controle e, em seguida, retomar o curso de sua receita pressionando o mesmo botão uma segunda vez. 3. -
Página 42: Como Redefinir O Protetor De Temperatura
• Para usar os programas automáticos pré-gravados, consulte o livro de receitas para obter 100% de receitas bem-sucedidas. • Aqui você encontrará a lista de programas automáticos. Consulte o manual em anexo para descobrir como eles funcionam ou visitam www.ikohs.com para fazer o download. Rale e corte Creme... -
Página 43: Tempo De Descanso Do Motor
TEMPO DE DESCANSO DO MOTOR Se o motor estiver sobrecarregado, ocorrerá um erro para evitar superaquecimento. O visor mostrará E1. Para evitar isso, aqui estão algumas indicações de tempo de descanso para permitir que o motor esfrie. • Após um programa de massa (23-27), deixe o aparelho descansar por 15 a 20 minutos. Esses programas forçam muito o motor, o tempo de descanso é... -
Página 44: Cuidados E Limpeza
CUIDADOS E LIMPEZA 1. Sempre desligue e desconecte o aparelho antes da limpeza. Retire também a tampa e os utensílios do recipiente. 2. Unidade elétrica: Limpe-o com um pano úmido e seque-o depois. Nunca use produtos abrasivos ou mergulhe a unidade em água. -
Página 45: Consignes De Securité
FRANÇAIS BIENVENUE Nous vous remercions d'avoir choisi notre robot de cuisine. Lisez attentivement ces instructions avant d'utiliser l'ap- pareil afin d'en optimiser l'usage. Les précautions de sécurité contenues dans le présent document réduisent le risque de mort, de blessure et d'électro- cution, lorsqu'elles sont observées correctement. - Página 46 doit pas être alimenté à travers un dispositif de commutation externe, tel qu'un temporisateur, ou relié à un circuit qui est régulièrement allumé et éteint par le fournisseur. • Assurez-vous toujours que la nourriture a été entièrement cuite avant de la manger. •...
-
Página 47: Liste Des Pièces
LISTE DES PIÈCES 1. Bouchon de remplissage 2. Couvercle du batteur 3. Joint du couvercle du batteur 4. Fouet 5. Pale de mélange 6. Lames 7. Panier vapeur 8. Bol mélangeur 9. Base 10. Prise d'alimentation 11. Interrupteur principal 12. Écran IMD 13. -
Página 48: Description Du Panneau De Commande
Touche tactile 1. Hacher 2. Mijoter 3. Vapeur 4. Programmation 5. Minuteur 6. Température 7. La vitesse 8. Impulsion 9. Panneau de commande Bouton rotatif 1. Il peut être utilisé pour régler la température, l'heure, la vitesse ou sélectionner un programme différent. 2. -
Página 49: Présentation Du Panneau De Commande
PRÉSENTATION DU PANNEAU DE COMMANDE ICÔNE FONCTION Bouton Heure: Appuyez et réglez l'heure Intervalle de temps: 0 à 90 minutes. Le réglage s'effectue selon les étapes suivantes: appuyez une fois Temps pour régler les secondes et appuyez à nouveau pour régler les minutes. Bouton de température: Appuyez et réglez la température Écart de température: 37 à... - Página 50 ASSEMBLAGE DU ROBOT 1. Placez l'arbre d'entraînement correctement verrouillé dans le bocal. 2. Ajustez et tournez dans le sens horaire pour le fixer. 3. Insérez la carafe dans l'unité principale. Appuyez fermement pour le verrouiller en place. • Vous n'avez pas besoin d'installer l'arbre d'entraînement ou tout autre accessoire si vous voulez simplement faire bouillir ou chauffer des aliments.
- Página 51 PRÉSENTATION DES ACCESSOIRES PIÈCE FONCTION MÉTÉO TEMPERATURE (° C) VITESSE Fouetter les blancs d'oeufs 2 à 4 minutes Crème fouettée 3-5 minutes Fouet Soupe 1 à 2 1 à 90 minutes Autres ingrédients qui ont besoin de 1 à 2 Selon besoin Selon besoin Truelle décapante...
- Página 52 Utilisation du disque à râper 1. Fixez l'arbre du disque à l'arbre d'entraînement. 2. Placez le disque sur le dessus de l'arbre. • Le disque est réversible. Un côté est utilisé pour trancher et l'autre pour râper. 3. Tenez le disque par les deux trous avec votre pouce et votre index ou votre ma- jeur.
- Página 53 AJUSTEMENT Temps de prise 1. Intervalle de temps: 0 à 90 2. Bouton poussoir tour dans le sens horaire pour augmenter le temps et dans le sens antihoraire pour le diminuer. L'heure apparaîtra à l'écran comme indiqué ci-dessous. Réglage de la température 1.
-
Página 54: Fonctions Automatiques
DÉMARRER, PAUSE ET ARRÊTER LE ROBOT 1. Une fois un programme sélectionné, appuyez sur la molette de commande pour le démarrer. 2. Vous pouvez interrompre le programme pendant la cuisson en appuyant sur le bouton de commande, puis reprendre le cours de votre recette en appuyant une deuxième fois sur le même bouton. 3. -
Página 55: Programmes Automatiques
• Pour utiliser les programmes automatiques préenregistrés, veuillez vous référer au livre de recettes pour des recettes 100% réussies. • Vous trouverez ici la liste des programmes automatiques. Consultez le manuel ci-joint pour savoir comment ils fonctionnent ou visitez www.ikohs.com Pour le télécharger. Râper et couper Crème Crème végétale... - Página 56 TEMPS DE REPOS MOTEUR Si le moteur est surchargé, une erreur se produira pour éviter une surchauffe. L'écran affichera E1. Pour éviter cela, voici quelques indications de temps de repos pour permettre au moteur de refroidir. • Après un programme de masse (23-27), laissez l'appareil reposer pendant 15 à 20 minutes. Ces programmes forcent beaucoup le moteur, le temps de repos est très important.
-
Página 57: Nettoyage Et Entretien
ENTRETIEN ET NETTOYAGE 1. Éteignez et débranchez toujours l'appareil avant de le nettoyer. Retirez également le couvercle et les ustensiles du récipient. 2. Unité électrique: Essuyez-le avec un chiffon humide et séchez-le ensuite. N'utilisez jamais de produits abrasifs et ne plongez pas l'appareil dans l'eau. 3. -
Página 58: Istruzioni Di Sicurezza
ITALIANO BENVENUTO Grazie per aver scelto il nostro robot da cucina. Per una migliore prestazione, leggere attentamente le presenti istru- zioni prima di usare l’apparecchio. Rispettando le misure di sicurezza qui riportate si riduce il rischio di morte, lesioni e scosse elettriche. Conservare il manuale in un posto sicuro per future consultazioni, insieme alla scheda di garanzia compilata, la prova di acquisto e l'imballaggio. - Página 59 • Un uso scorretto dell’apparecchio può arrecare lesioni. • L’apparecchio può essere usato da persone con ridotte capacità motorie, sensoriali o mentali o da persone senza esperienza o conoscenza sufficienti, sotto sorveglianza o se opportunamente istruite sull’uso sicuro dell’apparec- chio e se sono consapevoli dei rischi connessi. •...
-
Página 60: Elenco Dei Componenti
ELENCO DEI COMPONENTI 1. Tappo di riempimento. 2. Coperchio del mescolatore. 3. Guarnizione del coperchio del mescolatore. 4. Frusta. 5. Pala mescolatrice. 6. Lama. 7. Cestello vapore. 8. Recipiente del mescolatore. 9. Unità principale. 10. Entrata cavo di alimentazione. 11. Interruttore principale. 12. -
Página 61: Descrizione Del Pannello Di Controllo
Pulsante a sfioramento 1. Chop 2. cuocere a fuoco lento 3. Vapore 4. Programmazione 5. Timer 6. Temperatura 7. Velocità 8. impulso 9. Pannello di controllo Manopola 1. Può essere utilizzato per regolare temperatura, tempo, velocità o selezionare un altro programma. 2. - Página 62 PANORAMICA DEL PANNELLO DI CONTROLLO ICONA FUNZIONE Pulsante ora: Premere e regolare l'ora Tempo Intervallo di tempo: Da 0 a 90 minuti. La regolazione viene eseguita secondo i seguenti passaggi: premere una volta per regolare i secondi e premere nuovamente per regolare i minuti. metereologico Pulsante temperatura: Premere e regolare la temperatura Intervallo di temperatura: 37 a 120 °C...
-
Página 63: Assemblaggio Del Robot
ASSEMBLAGGIO DEL ROBOT 1. Posizionare l'albero di trasmissione correttamente bloccato nel vaso. 2. Regolare e ruotare in senso orario per risolverlo. 3. Inserire la caraffa nell'unità principale. Premere con decisione verso il basso per bloccarlo in posizione. • Non è necessario montare l'albero di trasmissione o alcun accessorio se si desidera semplicemente bollire o riscaldare il cibo. -
Página 64: Panoramica Degli Accessori
PANORAMICA DEGLI ACCESSORI PEZZO FUNZIONE VELOCITÀ TEMPO METE- TEMPERATURA (°C) REOLOGICO Sbatti gli albumi 2-4 minuti Panna montata 3-5 minuti Frusta La minestra 1 a 2 1 a 90 minuti Altri ingredienti che richiedono calore 1 a 2 Secondo Secondo necessità Cazzuola di rimozione necessità... - Página 65 Uso del disco grattugiato 1. Fissare l'albero del disco sull'albero motore. 2. Posizionare il disco sopra l'albero. • Il disco è reversibile. Un lato viene utilizzato per affettare e l'altro per grattugiare. 3. Tenere il disco dai due fori con il pollice e l'indice o il medio. Fai attenzione perché...
- Página 66 REGISTRAZIONE Tempo di impostazione 1. Intervallo di tempo: 0 a 90 2. Premi il bottone girare in senso orario per aumentare il tempo e in senso antiorario per ridurre il tempo. L'ora apparirà sullo schermo come indicato di seguito. Impostazione della temperatura 1.
-
Página 67: Funzioni Automatiche
INIZIA, PAUSA E FERMA IL ROBOT 1. Dopo aver selezionato un programma, premere la manopola di controllo per avviarlo. 2. È possibile mettere in pausa il programma durante il processo di cottura premendo la manopola di controllo e quindi riprendere il corso della ricetta premendo lo stesso pulsante una seconda volta. 3. -
Página 68: Programmi Automatici
• Per utilizzare i programmi automatici preregistrati, consultare il ricettario per ricette di successo al 100%. • Qui troverai l'elenco dei programmi automatici. Consultare il manuale allegato per scoprire come funzionano o visi- tano www.ikohs.com Per scaricarlo Grattugiare e tagliare... - Página 69 TEMPO DI RIPOSO DEL MOTORE Se il motore è sovraccarico, si verificherà un errore per evitare il surriscaldamento. Il display mostrerà E1. Per evitare ciò, ecco alcune indicazioni sul tempo di riposo per consentire al motore di raffreddarsi. • Dopo un programma di massa (23-27), lasciare riposare l'apparecchio per 15-20 minuti. Questi programmi costrin- gono molto il motore, il tempo di riposo è...
-
Página 70: Cura E Pulizia
CURA E PULIZIA 1. Spegnere e scollegare sempre l'apparecchio prima di pulirlo. Inoltre, rimuovere il coperchio e gli utensili dal contenitore. 2. Unità elettrica: Pulirlo con un panno umido e asciugarlo successivamente. Non utilizzare mai prodotti abrasivi o immergere l'unità in acqua. 3. - Página 71 DEUTSCH HERZLICH WILLKOMMEN Vielen Dank, dass Sie sich für unsere Küchenmaschine entschieden haben. Bevor Sie das Gerät benutzen, lesen Sie bitte diese Anleitung aufmerksam durch, um die optimale Nutzung zu gewährleisten. Die hierin enthaltenen Sicherheitsvorkehrungen verringern bei sachgemäßer Anwendung das Risiko von Tod, Verlet- zung und Stromschlag.
- Página 72 • Vergewissern Sie sich vor dem Essen stets, dass die Nahrungsmittel vollständig gekocht und siedend heiß sind. • Die Speisen sollten bald nach dem Garen verzehrt oder rasch abgekühlt und schnellstens gekühlt werden. • Die unsachgemäße Verwendung des Geräts kann zu Verletzungen führen. •...
- Página 73 TEILELISTE 1. Abdeckung des Einfüllstutzens 2. Mixerabdeckung 3. Mixerdeckeldichtung 4. Schneebesen 5. Rührhaken 6. Klinge 7. Dampfkorb 8. Mixbecher 9. Grundeinheit 10. Gerätesteckdose 11. Hauptschalter 12. IMD Displayanzeige 13. Knopf 14. Schieber 15. Abdeckung der Küchenmaschine 16. Deckeldichtung der Küchenmaschine 17.
-
Página 74: Beschreibung Des Bedienfeldes
Berühren Sie die Taste 1. Hacken 2. Kochen 3. Dampf 4. Programmierung 5. Timer 6. Temperatur 7. Geschwindigkeit 8. Impuls 9. Schalttafel Drehknopf 1. Es kann verwendet werden, um Temperatur, Zeit, Geschwindigkeit einzustellen oder ein anderes Programm auszuwählen. 2. Drücken Sie den Drehknopf und die Küchenmaschine hört auf zu kochen. Drücken Sie den Knopf erneut, um das Kochen fortzusetzen. - Página 75 BEDIENFELDÜBERSICHT SYMBOL FUNKTION Zeitschaltfläche: Drücken Sie und stellen Sie die Zeit ein Zeitintervall: 0 bis 90 Minuten. Die Einstellung erfolgt gemäß den folgenden Schritten: Drücken Sie Wetter einmal, um die Sekunden einzustellen, und erneut, um die Minuten einzustellen. Temperaturknopf: Drücken Sie und stellen Sie die Temperatur ein Temperaturbereich: 37 bis 120 °...
- Página 76 ZUSAMMENBAU DES ROBOTERS 1. Setzen Sie die ordnungsgemäß verriegelte Antriebswelle in das Gefäß ein. 2. Stellen Sie es ein und drehen Sie es im Uhrzeigersinn, um es zu reparieren. 3. Setzen Sie die Karaffe in das Hauptgerät ein. Drücken Sie fest nach unten, um es zu verriegeln. •...
- Página 77 ZUBEHÖRÜBERSICHT STÜCK FUNKTION WETTER TEMPERATUR (° C) SCHWIN- DIGKEIT Eiweiß verquirlen 2 bis 4 Minuten --- ---. Schlagsahne 3-5 Minuten --- ---. Schneebesen Suppe 1 bis 2 1 bis 90 Minuten Andere Zutaten, die Wärme benötigen 1 bis 2 Je nach Bedarf Je nach Bedarf Kelle entfernen Fleisch schneiden...
- Página 78 Verwendung der Gitterscheibe 1. Befestigen Sie die Scheibenwelle an der Antriebswelle. 2. Legen Sie die Scheibe auf die Welle. • Die Scheibe ist reversibel. Eine Seite dient zum Schneiden und die andere zum Reiben. 3. Halten Sie die Disc mit Daumen und Zeige- oder Mittelfinger an den beiden Löchern.
-
Página 79: Zeit Einstellen
EINSTELLUNG Zeit einstellen 1. Zeitintervall: 0 bis 90 2. Druckknopf Wende im Uhrzeigersinn, um die Zeit zu erhöhen, und gegen den Uhrzeigersinn, um die Zeit zu verkürzen. Die Uhrzeit wird wie unten angegeben auf dem Bildschirm angezeigt. Temperatureinstellung 1. Temperaturbereich: 37 bis 120 °C 2. -
Página 80: Automatische Funktionen
STARTEN, PAUSEEN UND STOPPEN SIE DEN ROBOTER 1. Sobald ein Programm ausgewählt wurde, drücken Sie den Steuerknopf, um es zu starten. 2. Sie können das Programm während des Garvorgangs anhalten, indem Sie den Steuerknopf drücken, und dann den Verlauf Ihres Rezepts fortsetzen, indem Sie dieselbe Taste ein zweites Mal drücken. 3. - Página 81 • Informationen zur Verwendung der automatisch aufgezeichneten Programme finden Sie im Rezeptbuch für 100% erfolgreiche Rezepte. • Hier finden Sie die Liste der automatischen Programme. Konsultieren Sie das beigefügte Handbuch, um herauszufin- den, wie sie funktionieren oder besuchen www.ikohs.com Um es herunterzuladen. Reiben und schneiden Pudding Gemüsecreme...
- Página 82 MOTORRUHEZEIT Wenn der Motor überlastet ist, tritt ein Fehler auf, um eine Überhitzung zu vermeiden. Das Display zeigt E1 an. Um dies zu vermeiden, finden Sie hier einige Angaben zur Ruhezeit, damit der Motor abkühlen kann. • Lassen Sie das Gerät nach einem Massenprogramm (23-27) 15 bis 20 Minuten ruhen. Diese Programme zwingen den Motor sehr, die Ruhezeit ist sehr wichtig.
-
Página 83: Pflege Und Reinigung
PFLEGE UND REINIGUNG 1. Schalten Sie das Gerät vor dem Reinigen immer aus und ziehen Sie den Netzstecker. Entfernen Sie auch den Deckel und die Utensilien vom Behälter. 2. Elektrische Einheit: Wischen Sie es mit einem feuchten Tuch ab und trocknen Sie es anschließend ab. Verwenden Sie niemals Schleifmittel und tauchen Sie das Gerät niemals in Wasser. -
Página 84: Veiligheidsinstructies
NEDERLANDS WELKOM Hartelijk dank voor het kiezen van onze keukenrobot. Lees deze instructies aandachtig door voordat u het apparaat in gebruik neemt. De veiligheidsmaatregelen in dit document verminderen het risico op elektrische schokken, letsel en zelfs de dood in- dien strikt gerespecteerd. Bewaar deze handleiding op een veilige plaats voor toekomstig gebruik, samen met de naar behoren ingevulde productgarantiekaart, de originele productverpakking en het aankoopbewijs. - Página 85 • Zorg er altijd voor dat voedsel goed gekookt is voordat je het eet. • Voedsel moet kort na het koken worden geconsumeerd of snel worden afgekoeld en vervolgens zo snel mogelijk worden gekoeld. • Misbruik van uw apparaat kan letsel veroorzaken. •...
-
Página 86: Onderdelenlijst
ONDERDELENLIJST 1. Tankdop 2. Blender deksel 3. Pakking blenderdeksel 4. vliegenmepper 5. Paddle remover 6. mes 7. Stoommandje 8. Blender werper 9. Hoofdbasis 10. Stopcontact 11. Hoofdschakelaar 12. IMD-scherm 13. commando 14. pusher 15. Deksel keukenmachine 16. Dekselafdichting keukenmachine 17. Rasp / snij schijf 18. - Página 87 Raak de knop aan 1. Karbonade 2. Sudderen 3. Stoom 4. Programmeren 5. Timer 6. Temperatuur 7. Snelheid 8. Pulse 9. Controlepaneel Draaiknop 1. Het kan worden gebruikt om temperatuur, tijd, snelheid aan te passen of een ander programma te selecteren. 2.
-
Página 88: Overzicht Bedieningspaneel
OVERZICHT BEDIENINGSPANEEL ICOON FUNCTIE Tijd-knop: Druk op en pas de tijd aan Tijdsinterval: 0 tot 90 minuten. De aanpassing gebeurt volgens de volgende stappen: druk eenmaal om de Weer seconden aan te passen en druk nogmaals om de minuten aan te passen. Temperatuurknop: Druk op en pas de temperatuur aan Temperatuurbereik: 37 tot 120 °C Temperatuur... - Página 89 MONTAGE VAN DE ROBOT 1. Plaats de goed vergrendelde aandrijfas in de pot. 2. Stel af en draai met de klok mee om het te repareren. 3. Plaats de karaf in de hoofdeenheid. Druk stevig naar beneden om het op zijn plaats te vergrendelen. •...
-
Página 90: Overzicht Accessoires
OVERZICHT ACCESSOIRES STUK FUNCTIE SNELHEID WEER TEMPERATUUR (°C) Klop eiwit op 2 tot 4 minuten Slagroom 3-5 minuten Klop Soep 1 op 2 1 tot 90 minuten Andere ingrediënten die warmte nodig 1 op 2 Naar behoefte Naar behoefte Troffel verwijderaar hebben Snijd vlees 8 tot 10... - Página 91 Gebruik van de raspschijf 1. Bevestig de schijfas aan de aandrijfas. 2. Plaats de schijf bovenop de as. • De schijf is omkeerbaar. De ene kant wordt gebruikt om te snijden en de andere om te raspen. 3. Houd de schijf bij de twee gaten vast met uw duim en wijs- of middelvinger. Wees voorzichtig, want de randen zijn erg scherp.
-
Página 92: Temperatuurinstelling
AANPASSING Tijd zetten 1. Tijdsinterval: 0 tot 90 2. Druk op de knop beurt rechtsom om de tijd te verlengen en linksom om de tijd te verkorten. De tijd verschijnt op het scherm zoals hieronder aangegeven. Temperatuurinstelling 1. Temperatuurbereik: 37 tot 120 °C 2. -
Página 93: Start, Pauze En Stop De Robot
START, PAUZE EN STOP DE ROBOT 1. Zodra een programma is geselecteerd, drukt u op de regelknop om het te starten. 2. U kunt het programma tijdens het kookproces pauzeren door op de bedieningsknop te drukken en vervolgens de loop van uw recept te hervatten door nogmaals op dezelfde knop te drukken. 3. -
Página 94: Automatische Programma's
• Raadpleeg het receptenboek voor 100% succesvolle recepten om de vooraf opgenomen automatische programma's te gebruiken. • Hier vindt u de lijst met automatische programma's. Raadpleeg de bijgevoegde handleiding om erachter te komen hoe ze werken of bezoeken www.ikohs.com Om het te downloaden. Rasp en snijd Plantaardige room... -
Página 95: Geef Foutmeldingen En Oplossingen Weer
RUSTTIJD VAN DE MOTOR Als de motor overbelast is, treedt er een fout op om oververhitting te voorkomen. Op het display verschijnt E1. Om dit te voorkomen, volgen hier enkele indicaties voor de rusttijd om de motor te laten afkoelen. •... -
Página 96: Verzorging En Reiniging
VERZORGING EN REINIGING 1. Schakel het apparaat altijd uit en haal de stekker uit het stopcontact voordat u het schoonmaakt. Verwijder ook het deksel en het keukengerei uit de container. 2. Elektrische eenheid: Veeg het af met een vochtige doek en droog het daarna af. Gebruik nooit schurende producten en dompel het apparaat nooit onder in water. -
Página 97: Instrukcje Bezpieczeństwa
POLSKI WITAMY Dziękujemy bardzo za wybór naszego robota kuchennego. Przed użyciem urządzenia i w celu zapewnienia prawidłowe- go użytkowania przeczytaj uważnie niniejszą instrukcję. Środki ostrożności zawarte w tym dokumencie zmniejszają ryzyko porażenia prądem, obrażeń, a nawet śmierci, jeśli są ściśle przestrzegane. Przechowuj tę instrukcję w bezpiecznym miejscu do wykorzystania w przyszłości, wraz z należycie wypełnioną... - Página 98 • Żywność należy spożyć krótko po zakończeniu gotowania lub pozostawić do szybkiego ostygnięcia, a następnie schłodzić jak najszybciej. • Niewłaściwe użytkowanie urządzenia może spowodować obrażenia. • To urządzenie może być używane przez osoby niepełnosprawne fizycznie, sensorycznie lub umysłowo, a także przez osoby bez doświadczenia i wiedzy, pod warunkiem, że są...
-
Página 99: Lista Części
LISTA CZĘŚCI 1. Korek wlewu 2. Pokrywa miksera 3. Uszczelka pokrywy blendera 4. Trzepaczka 5. Zmywacz łopatek 6. Ostrze 7. Kosz parowy 8. Dzban miksera 9. Główna baza 10. Gniazdko elektryczne 11. Wyłącznik główny 12. Ekran IMD 13. Pokrętło 14. Popychacz 15. - Página 100 Przycisk dotykowy 1. Posiekać 2. Dusić 3. Parowy 4. Programowanie 5. Regulator czasowy 6. Temperatura 7. Prędkość 8. Puls 9. Panel sterowania wysyłam 1. Można go użyć do regulacji temperatury, czasu, prędkości lub wyboru innego programu. 2. Naciśnij pokrętło, a robot kuchenny przestanie gotować. Aby wznowić gotowanie, naciśnij ponownie pokrętło.
- Página 101 PRZEGLĄD PANELU STEROWANIA IKONA FUNKCJONOWAĆ Przycisk czasu: Naciśnij i dostosuj czas Przedział czasowy: 0 do 90 minut. Regulacji dokonuje się zgodnie z następującymi krokami: naciśnij raz, Pogoda aby ustawić sekundy, i naciśnij ponownie, aby ustawić minuty. Przycisk temperatury: Naciśnij i dostosuj temperaturę Zakres temperatury: 37 do 120 °C Temperatura Pierwszy przedział...
- Página 102 MONTAŻ ROBOTA 1. Umieść prawidłowo zablokowany wał napędowy w słoiku. 2. Dostosuj i obróć zgodnie z ruchem wskazówek zegara, aby to naprawić. 3. Włóż dzbanek do jednostki głównej. Naciśnij mocno, aby zablokować na miejscu. • Nie musisz montować wału napędowego ani żadnych akcesoriów, jeśli chcesz tylko zagotować lub podgrzać jedzenie.
- Página 103 PRZEGLĄD AKCESORIÓW KAWAŁEK FUNKCJONOWAĆ PRĘDKOŚĆ POGODA TEMPERATURA (°C) Ubij białka jajek 2 do 4 minut Bita śmietana 3-5 minut Śmigać zupa 1 do 2 1 do 90 minut Inne składniki wymagające ciepła 1 do 2 W zależności od W zależności od Paca do usuwania potrzeby potrzeby...
- Página 104 Korzystanie z tarczy rusztowej 1. Przymocuj wałek tarczy do wału napędowego. 2. Umieść dysk na wale. • Dysk jest odwracalny. Jedna strona służy do krojenia, a druga do tarcia. 3. Trzymaj dysk za dwa otwory kciukiem i palcem wskazującym lub środkowym. Uważaj, ponieważ...
- Página 105 DOSTOSOWANIE Czas wiązania 1. Przedział czasowy: Od 0 do 90 2. Naciśnij przycisk skręcać zgodnie z ruchem wskazówek zegara, aby zwiększyć czas i przeciwnie do ruchu wskazówek zegara, aby skrócić czas. Czas pojawi się na ekranie, jak wskazano poniżej. Ustawienie temperatury 1.
-
Página 106: Funkcje Automatyczne
START, PAUZA I STOP ROBOTA 1. Po wybraniu programu naciśnij pokrętło kontroli, aby go uruchomić. 2. Możesz zatrzymać program podczas gotowania, naciskając pokrętło sterowania, a następnie wznowić przebieg przepisu, naciskając ten sam przycisk po raz drugi. 3. Aby całkowicie zatrzymać uruchomiony program, naciśnij i przytrzymaj pokrętło kontroli przez kilka sekund. 4. -
Página 107: Programy Automatyczne
• Aby skorzystać z wcześniej nagranych programów automatycznych, zapoznaj się z książką kucharską zawierającą 100% udanych przepisów. • Tutaj znajdziesz listę programów automatycznych. Zapoznaj się z załączoną instrukcją, aby dowiedzieć się, jak działają lub odwiedzają www.ikohs.com Aby go pobrać. Zetrzeć i pokroić Krem... - Página 108 CZAS ODPOCZYNKU SILNIKA Jeśli silnik jest przeciążony, wystąpi błąd, aby zapobiec przegrzaniu. Na wyświetlaczu pojawi się E1. Aby tego uniknąć, oto kilka wskazówek dotyczących czasu odpoczynku, aby silnik mógł ostygnąć. • Po programie masowym (23–27) pozostaw urządzenie na 15–20 minut. Programy te bardzo zmuszają silnik, czas odpoczynku jest bardzo ważny.
-
Página 109: Pielęgnacja I Czyszczenie
PIELĘGNACJA I CZYSZCZENIE 1. Zawsze wyłączaj i odłączaj urządzenie od zasilania przed czyszczeniem. Zdejmij również pokrywkę i przybory ku- chenne z pojemnika. 2. Jednostka elektryczna: Wytrzyj wilgotną ściereczką, a następnie wysusz. Nigdy nie używaj produktów ściernych ani nie zanurzaj urządzenia w wodzie. 3. - Página 112 Made in P.R.C.