Tabla de contenido
Publicidad
Idiomas disponibles
Idiomas disponibles
Publicidad
Tabla de contenido

Manuales relacionados para Oster GCSTBS4901L


Resumen de contenidos para Oster GCSTBS4901L
- Página 1 MODELOS - MODELS GCSTBS4901L - GCSTBS4901P - GCSTBS4901R GCSTBS4901S - GCSTBS4901W Manual de Instrucciones PLANCHA DE VAPOR LEA TODAS LAS INSTRUCCIONES ANTES DE USAR ESTE APARATO Instruction Manual STEAM IRON READ ALL INSTRUCTIONS BEFORE USING THIS APPLIANCE...
-
Página 2: Precauciones Importantes
12. No opere la plancha si el cordón está dañado, si la plancha se ha caído, está dañada, si tiene daños visibles o gotea. Para evitar el riesgo de una descarga eléctrica, no desarme la plancha. Llévelo al Centro de Servicio Autorizado Oster® mas cercano para su inspección o reparación. Si la plancha es ensamblada incorrectamente puede causar el riesgo de descarga eléctrica al usarla. - Página 3 18. Solo personal calificado puede reparar la unidad. Las reparaciones incorrectas pueden ser peligrosas para el usuario. Comuníquese con un Centro de Servicio Oster® Autorizado si necesita realizar reparaciones. 19. Siempre desconecte la plancha del tomacorriente cuando se llene o se bote el agua. 20. Evite sobrellenar el tanque de agua. Nunca llene más arriba del nivel máximo de agua.
-
Página 4: Descripción Del Artefacto
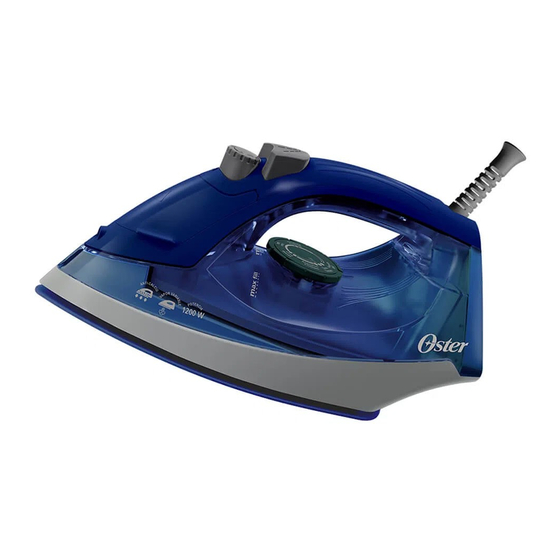
DESCRIPCIÓN DEL ARTEFACTO GCSTBS4901 1. Boquilla de Rocío Fino 6. Luz Indicadora 2. Tapa del Tanque de Agua 7. Disco Selector de Temperatura 3. Selector de Vapor 8. Ventana Visora del Tanque de Agua 4. Boton de Rocío Fino 9. Suela Antiadherente en Color 5. -
Página 5: Instrucciones Para Uso
ANTES DE UTILIZAR POR PRIMERA VEZ • Cuando use la plancha de vapor por primera vez, pruébela con un pedazo de tela servible para controlar que la base y el tanque de agua estén bien limpios. • Posiblemente observe un poco de humo o perciba un olor leve proveniente de la plancha al usarla por primera vez. - Página 6 PLANCHADO EN SECO 1. Enchufe la plancha en el tomacorriente. 2. Asegúrese de que el selector de vapor se encuentre en la posición de cerrado. 3. Seleccione la graduación de temperatura deseada en la rueda de control de la temperatura. 4.
-
Página 7: Planchando Con Vapor
PLANCHANDO CON VAPOR Solo se puede planchar al vapor a temperaturas altas (“ ”, “ ”), según lo indica la rueda de control de la temperatura. Asegúrese de que hay suficiente agua en el tanque. Siga las instrucciones de la sección “Usando la plancha a vapor” correspondientes al modelo de su plancha. Gire el disco selector de temperatura a la posición deseada (figura 3). Ahora la plancha estará... -
Página 8: Seleccionando La Temperatura
ADVERTENCIA: El apagado automático es una función de seguridad y no se recomienda como forma de apagar la plancha. Consulte la sección “Guardando la plancha” para obtener información sobre cómo apagar y guardarla de modo seguro después de cada uso. ADVERTENCIA: Para prevenir el riesgo de quemaduras, mantenga las manos alejadas de la zona que está... -
Página 9: Tabla Guía De Temperaturas
TABLA GUÍA DE TEMPERATURAS Temperatura Tipo de Tejido Material de la Fibra sintético acrílico, modacril, polipropileno, poliuretano sintético acetato, triacetato, metalizado, sintético cupro,poliamide (nylon) seda seda lana lana algodón algodón lino lino en la etiqueta significa que esta prenda no puede plancharse (por ejemplo: clorofibra, elastodieno) SUELA CON ACABADO ANTIADHERENTE A COLOR. •... -
Página 10: Mantenimiento Y Limpieza
Si por cualquier razón su plancha de vapor requiere reparación, no intente repararla. Llévelo al Centro de Servicio Autorizado Oster® mas cercano para su inspección o reparación. Center. GUARDANDO LA PLANCHA 1. Apague la plancha de vapor y desenchufe del tomacorriente. -
Página 11: Important Safeguards
To avoid the risk of electric shock, do not disassemble the iron. Take it to the nearest Authorized Oster® Service Center for examination and repair. Incorrect reassembly can cause a risk of electric shock when the iron is used. - Página 12 19. Always disconnect the steam iron from the wall electrical outlet when filling it with water or emptying it out. 20. Avoid overfilling the reservoir. Never fill it above the maximum water level. The water reservoir should not be open during use. 21. In order to avoid overloading the circuits, never use another appliance with high wattage on the same circuit. 22. The manufacturer is not liable for any damages, which are caused by using the appliance incorrectly or for any other purpose than that intended.
-
Página 13: Description Of The Appliance
DESCRIPTION OF THE APPLIANCE GCSTBS4901 1. Spray Mist Nozzle 6. Indicator Light 2. Water Reservoir Lid 7. Temperature Control Dial 3. Steam Select Switch 8. See Through Water Window 4. Spray Mist Button 9. Non-Stick Colored Soleplate 5. Power Cord 180º English - 3... - Página 14 PREPARING FOR FIRST TIME USE • When using the iron for the first time, test it on a piece of old cloth to be sure that the soleplate and the water reservoir are clean. • It is possible that the iron will discharge some smoke or give off a slight odor during its first usage. This is due to the initial heating of the materials used. This is completely normal and will stop shortly afterwards. •...
- Página 15 DRY IRONING 1. Insert the plug in the electrical wall outlet. 2. Make sure the steam select switch is in the closed position. 3. Select the desired temperature on the temperature control dial 4. Follow instructions from section “Using Steam Your Iron” for your iron model. 5.
- Página 16 STEAM IRONING Steam ironing is only possible at high temperatures (“ ”, “ ”), as indicated on the temperature control dial. Be sure there is enough water in the reservoir. Follow the instructions from the section “Using Steam Your Iron” for your iron model. Set the steam select switch to the desired steam level position (figure 3). You are now ready to start steam ironing.
- Página 17 WARNING: The limited auto shut-off is a safety feature, not a recommended means for turning your iron off. See the “Storing the Iron” section for information on turning off your iron and storing it safely between uses. WARNING: To prevent risk of burns, keep your hand away from area being steamed. WARNING: DO NOT steam garments while wearing them;...
- Página 18 TEMPERATURE SETTINGS TABLE Temperature Control Dial Kind of Textile Fiber Material synthetic Acrylic, modacryl polypropylene, polyurethane acetate, triacetate synthetic metalized, cupro, synthetic polyamide (nylon), polyester silk silk wool wool cotton cotton linen linen on the label means: This article cannot be ironed (e.g. chlorofiber, elastodiene) NON-STICK COLORED SOLEPLATE • Residue on soleplate can be wiped off with a cloth soaked in a solution of equal parts water and vinegar.
-
Página 19: Care And Cleaning
CARE AND CLEANING Before cleaning the iron, always make sure that it is disconnected from electrical wall socket and is completely cool. SOLEPLATE • Residue on soleplate can be wiped off with a cloth soaked in a solution of water and vinegar. - Página 20 XXX where X is any number between 0 and 9 or any letter between A and Z. La siguiente información es para México solamente. The following information is intended for Mexico only. PLANCHA DE VAPOR OSTER ® MODELOS: GCSTBS4901L, GCSTBS4901P, GCSTBS4901R, GCSTBS4901S, GCSTBS4901W.