Publicidad
Idiomas disponibles
Idiomas disponibles
Enlaces rápidos
INTERFACE FEATURES
• Designed for GM Ethernet amplifiers
• Ethernet data interface w/AXDSP-X (digital signal processor) built-in
• Includes an amplifier bypass harness
• Retains factory chimes including parking sensor chimes
• Retains vehicle's voice prompts
• Chimes and voice prompts go through the aftermarket amplifier and/
or cluster
• Selectable 31 Band graphic EQ or 5 Band Parametric EQ
• 10 individually assignable outputs
For Dash Disassembly Instructions, refer
to metraonline.com.
AxxessInterfaces.com
GENERAL MOTORS 2019-UP
ETHERNET DSPX PACKAGE
Visit axxessinterfaces.com for current application list.
INTERFACE COMPONENTS
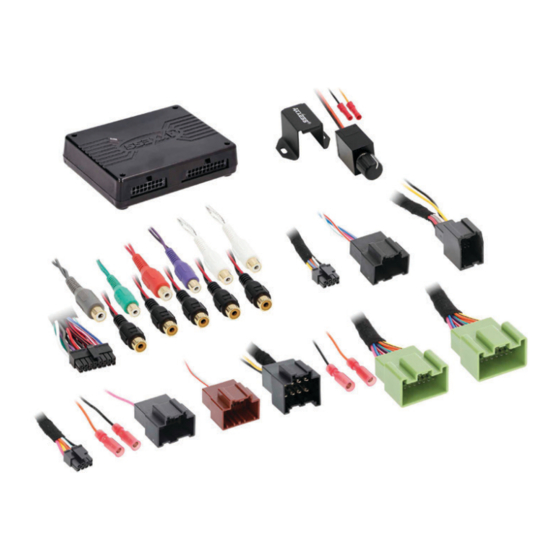
• AXDSPX-ETH1 interface
• AXDSPX-ETH1 harness
• LD-DSP-ETH1
• LD-DSP-ETH2
• AXBK-1
• Independent equalization on each of the 10 outputs
• Independent high pass, low pass, and bandpass filters
• Each channel can be delayed independently up to 10ms
• Clipping detection and limiting circuits
• Settings adjusted via Bluetooth® in a smart device application (tablet
or mobile phone), compatible with both Android and Apple devices
• Read, write, and store configurations for future recall
• Password protect feature available in the mobile app
• Micro-B USB updatable
Enter the year, make, and model of the vehicle in the Vehicle Fit Guide for Radio Install kits.
© COPYRIGHT 2023 METRA ELECTRONICS CORPORATION
• AXDSPX-ETH1 interface harness
(male connectors: 8-pin, 16-pin)
• Amplifier bypass harness
(female connectors: 8-pin black
and 20-pin green )
AXDSPX-ETH1
I N S TA L L AT I O N I N S T R U C T I O N S
TABLE OF CONTENTS
Connections ............................................................2
Installation .............................................................3
Troubleshooting .....................................................4
TOOLS REQUIRED
• Crimping tool and connectors, or solder gun,
solder, and heat shrink • Tape • Wire cutter
• Zip ties
Apple App Store
Google Play Store
iOS 12.1 or higher
ATTENTION:
With the key out of the
ignition, disconnect the negative battery
terminal before installing this product. Ensure
that all installation connections, especially the
air bag indicator lights, are plugged in before
reconnecting the battery or cycling the ignition
to test this product.
NOTE: Refer also to the instructions included
with the aftermarket radio.
REV. 2/8/23 INSTAXDSPX-ETH1
Publicidad

Resumen de contenidos para Axxess AXDSPX-ETH1
- Página 1 Troubleshooting .............4 TOOLS REQUIRED INTERFACE COMPONENTS • Crimping tool and connectors, or solder gun, • AXDSPX-ETH1 interface • AXDSPX-ETH1 interface harness solder, and heat shrink • Tape • Wire cutter • AXDSPX-ETH1 harness (male connectors: 8-pin, 16-pin) • Zip ties • LD-DSP-ETH1 •...
- Página 2 Assignable outputs labeled E-123, must be used if the amp turn-on CH 7-10 to be used current of all amps exceed 1-amp. for optional amps. AXDSPX-ETH1 Interface Brown/Yellow - Subwoofer Right + Brown/Blue - Subwoofer Right - Green/White - Subwoofer Left +...
- Página 3 7. Connect the amp turn-on wire from the AXDSPX-ETH1 harness. 8. Click the Identify button to confirm that the AXDSPX-ETH1 is connected properly. If so, a chime will be heard from the front left speaker or gauge cluster. Test all functions of the installation for proper operation.
- Página 4 Contact our Tech Support line at: 386-257-1187 • If the Red light in the AXDSPX-ETH1 interface is blinking, it is not communicating with the vehicle. Remove the key from the Or via email at: ignition, unplug the connectors from the interface, then inspect all connections made. If everything is proper, connect the techsupport@metra-autosound.com...
- Página 5 • Herramienta de prensado y conectores o pistola COMPONENTES DE LA INTERFAZ de soldadura hilo de soldadura y tubo termoretráctil • Interfaz AXDSPX-ETH1 • Arnés de interfaz AXDSPX-ETH1 • Cinta • Cortador de cables• Abrazaderas de plástico • Arnés AXDSPX-ETH1 (conectores macho: 8 pins, 16 pins) Apple App Store •...
- Página 6 CH 7 encendido del amplificador de todos a 10 deben usarse para los amplificadores es mayor a 1 ampere. amplificadores opcionales. AXDSPX-ETH1 Interfaz Café con amarillo: Subbafle derecho + Café con azul: Subbafle derecho - Verde con blanco: Subbafle izquierdo +...
- Página 7 2. Instale el arnés AXDSPX-ETH1 y realice todas las conexiones necesarias, pero deje sin conectar el cable de encendido del amplificador. 3. Conecte los conectores de 8 pins y 16 pins del arnés AXDSPX-ETH1 a la interfaz AXDSPX-ETH1. 4. Descargue la aplicación AXDSP-X de Google Play Store o Apple App Store e instálela.
- Página 8 Póngase en contacto con nuestra línea de soporte técnico en: • Si parpadea la luz Roja en la interfaz AXDSPX-ETH1, eso quiere decir que no se está comunicando con el vehículo. Quite la 386-257-1187 llave de la marcha, desconecte los conectores de la interfaz y proceda a revisar todas las conexiones que se realizaron. Si O por correo electrónico a:...


