Tabla de contenido
Publicidad
Enlaces rápidos
Publicidad
Tabla de contenido

Manuales relacionados para Faro Barcelona ventyly RIMO VT23006


Resumen de contenidos para Faro Barcelona ventyly RIMO VT23006
- Página 1 RIMO Assembly manual Instrucciones de montaje Manuel de montage...
- Página 2 EN. Congratulations on the purchase of your new ventyly fan that will pro- vide you with design, quality and com- fort for many years. We are proud of our work and appre- ciate the opportunity to provide one of the best ceiling fans available. It’s time to start enjoying your ventyly ceiling fan! The manuals contain the complete instruc-...
-
Página 3: Información
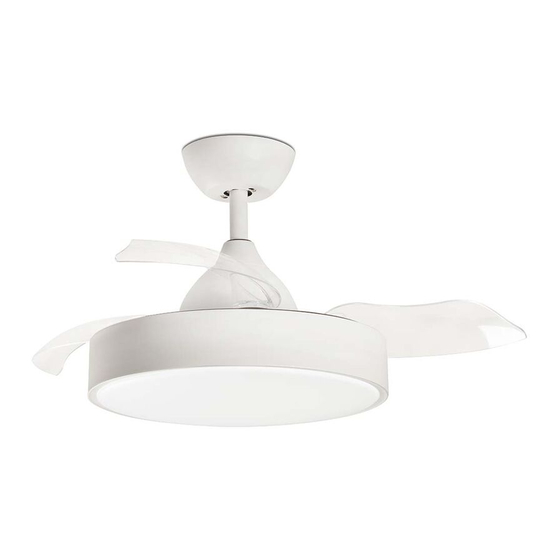
Information Información Information RIMO with body blades light kit VT23006 White Steel Transparent ABS Opal PMMA light kit specs LED 24W 3000K~6500K This product contains a light source of energy efficiency class Ø165mm 400mm 410mm Ø425mm Ø915mm 220-240 50/60 With Timer motor 1, 4, 8hr... -
Página 4: Checklist
Check list Lista de contenido Liste de contrôle Canopy Florón Couvercle Mounting Bracket Soporte Support de montage Tija Tige Yoke cover Florón Couvercle Housing and motor Carcasa y motor Boîtier et moteur Hardware bag Tornilleria LED Light kit Sachet de quicaillerie Kit de luz LED Kit d’éclairage LED Remote control kit... -
Página 5: Montaje
Assembly Montaje Montage Disassemble the parts. Thread the power leads from the fan through the down rod. Put the downrod to the motor and the conecting pin. Desmontar las piezas. Pase los cables por la tija. Ponga la tija y coloque el pasador. Démonter les pièces. - Página 6 Assembly Montaje Montage Raise and tighten and tighten canopy. Remove the screws. Install the light kit. Then tighten the screws. Eleve y apriete los tornillos del florón. Quite los tornillos. Instale el kit de luz y apriete los tornillos. Soulevez et serrez les vis de la rosette. Retirer les vis.
-
Página 7: Remote Control Mando A Distancia Télécomande
Remote control Mando a distancia Télécomande 1,5V AAA battery x 2 pcs (no incl) 1- “1 to 6”: Wind speed controller from slow to fast. 1- “1 to 6”: Velocidades del ventilador de la más lenta a la 1- “1 to 6” : vitesses du ventilateur de plafond: 1 (le plus bas) 2- “FAN OFF”: fan swich off. -
Página 8: Troubleshooting Guide
Warning Atención Attention As experts in ventilation, we recommend that you install your fan at Read the manual carefully before starting the installation Lea todo este manual antes de empezar la instalación y and save it for future reference. Contact our techical service 2.30 meters high. -
Página 9: Guide De Dépannage
Warning Atención Attention CONSEJOS DE INSTALACIÓN la pièce dans laquelle vous allez l’installer, respectez la distance de Lisez tout ce manuel soigneusement avant de commencer l’in- Para sacar el máximo partido y garantizar la durabilidad de su ven- sécurité (2.3mètres-90,50 pouces) entre le ventilateur et les surfa-ces, stallation et gardez ces instructions. -
Página 10: Configuration Configuración Configuration
Configuration Configuración Configuration App Installation Click “... ” Click “Download” Click “Open in Browser” Download Tuya App. Descarque Tuya. Téléchargez l’application Tuya. - Register an account & Log In You are a new user Click “Register” You have an account Click “Install”... - Página 11 Configuration Configuración Configuration TUYA App pairing 1- Turn on the wall switch and the light will be 1-Enciende la alimentación general y la luz se 1- Allumez l’interrupteur mural et la lumière encenderá. s’allumera. 2- At the same time long-press the key of “ “...
-
Página 12: Garantia
Guarantee Garantia Garantie Cumpliendo con el Real Decreto-ley 7/2021, de 27 de abril. In Compliance with the directive (EU) 2019/1, of 11th Decem- Conformément à la directive (UE) 2019/1 du 11 décembre 2018 ber 2018 CONDICIONES CONDITIONS Si alguna pieza de su ventilador de techo que no sea del motor Si une pièce de votre ventilateur de plafond, qui ne fait pas CONDITIONS fallara en cualquier momento dentro del período de 3 años desde la...