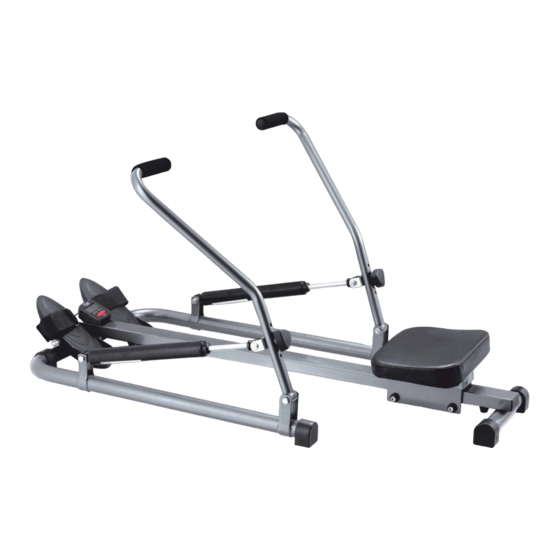
Resumen de contenidos para HOMCOM A90-276
- Página 1 INapa013_ES_EN A90-276 IMPORTANT, RETAIN FOR FUTURE REFERENCE: READ CAREFULLY ASSEMBLY & INSTRUCTION MANUAL...
-
Página 2: Dibujo De Ensamblaje Y Despiece
DIBUJO DE ENSAMBLAJE Y DESPIECE... -
Página 3: Lista De Piezas
LISTA DE PIEZAS NOMBRE CANTIDAD Marco principal Barra transversal trasera Pernos de fijación (M8 x 50 mm) Cubierta de goma para barra trasera Tope final Disco Asiento Asiento Destornillador (1/4’’ x ½’’) Biela derecha Biela izquierda Pernos (M8 x 55 mm) Disco Tuercas de seguridad Tapa final... -
Página 4: Lista De Hardware Y Herramientas
LISTA DE HARDWARE Y HERRAMIENTAS Pernos Portadores Pernos (8x50mm) (M8x55mm) (M10x45mm) Pernos Tornillo Tornillo Tuercas de seguridad (10x55mm) (1/4’’x1/2’’) (M4x16mm) (M10mm) Tuerca Disco de placa Arandela de goma Plástico (1/2’’) -
Página 5: Ensamblaje
ENSAMBLAJE Paso 1: Fije el asiento mediante 4 tornillos (Pieza No. 9) al soporte del asiento como se muestra a continuación. El extremo más grueso del asiento debe apuntar hacia el extremo trasero de la máquina de remo. Paso 2: Fije la biela izquierda (10b) y la biela derecha (10a) al marco principal (Pieza No.1) y atornille estas bielas (Pieza No.10a y No.10b) por medio de dos tornillos hexagonales (Pieza No.11), cada uno con dos arandelas (Pieza No.12) y cada uno con dos tuercas de... - Página 6 Paso 3: Empuje la barra del pedal con el reposapiés adjunto a través de los orificios del marco principal. Luego empuje un plástico (Pieza No.15), el soporte (Pieza No.16) y una goma (Pieza No.17) en el eje y atorníllelo con la ayuda de la segunda tuerca grande (Pieza No.18).
- Página 7 Paso 5: Inserte el tornillo de fijación (pieza No.27) con la ayuda de la abrazadera en H (pieza No. 26) y un disco (pieza No.12) al timón derecho (19a) y apriete el tornillo. Repita este paso para el timón del otro lado (19b). Asegúrese de que las dos abrazaderas en H están en los brazos de remo a la misma altura.
-
Página 8: Computadora
COMPUTADORA Con la batería (2 batería AAA de 1,5 V) instalada, la pantalla se ilumina y examina todas las opciones de pantalla. Asegúrese de poner la batería con las polaridades correctas. Los cables de contacto deben tocar los polos para garantizar el suministro de energía. ADVERTENCIA: Si la pantalla no se ilumina después de insertar la batería de forma correcta, retire la batería y colóquela nuevamente después de un período de aproximada- mente 15 segundos de la misma forma como se describe arriba. - Página 9 Número total [T.CNT] El contador de número total integrado cuenta el número de entrenamientos de remo de 0 a 9,999 desde que se ha colocado la batería. Este contador sólo se puede restablecer a 0 por quitar la batería. Calorías [CAL] El contador de calorías integrado cuenta hasta 9,999 cal desde el inicio del entrenamien- Esta información es sólo como referencia y sirve para comparar el rendimiento alcanzado en varias unidades de entrenamiento.
- Página 10 EXPLODED-VIEW ASSEMBLY RAWING...
-
Página 11: Parts List
PARTS LIST NAME Core Rear cross bar Fixing bolts (M8 x 50 mm) Rubber cover for rear Endstops Disc Seat Seat Screwdriver (1/4’’ x ½’’) Frame tube right Frame tube left Bolts (M8 x 55 mm) Disc Safety Nut Endcap Plastic Pedal support Rubber... - Página 12 HARDWARE & TOOLS LIST Bolts Carriers Bolts (8x50mm) (M8x55mm) (M10x45mm) Bolts Screw Screw Safety Nut (10x55mm) (1/4’’x1/2’’) (M4x16mm) (M10mm) Plate disc Rubber washer Plastic (1/2’’)
- Página 13 ASSEMBLY Step 1: Attach the seat by means of 4-screw screws (Part 9) to the seat holder as shown below. The thicker end of the seat should point to the rear end of the rowing machine. Step 2: Attach the left (10b) and the right (10a) connecting rod to the main tube (Part 1) and screw these connecting rods (Part 10a&...
- Página 14 Step 3: Push the pedal rod with the attached foot support through the holes in the main frame. Then push a plastic bucket (Part 15), the second base (Part 16) and a rubber disc (Part 17) onto the spindle and screw it with the help of the second big nut (Part 18). Step 4: Connect the right rudder arm (part 19a) with the right side bracket (part 19a);...
- Página 15 Step 5: Attach the fixing screw (part 27) with the help of the H-clamp (part 26) and a disc (part 12) to the right rudder arm (19a) and tighten the screw. Repeat this working step for the rudder arm on the other side (19b). Imagine r that the two H-clamps are on the rowing arms at the same height.
- Página 16 COMPUTER After inserting the battery(2 chunk AAA 1,5V battery), the display lights up and briefly examines all display options. Make sure you insert the battery with the correct recorded polarity. The contact wires must touch the poles for an easy power supply. WARNING: If the display does not show after inserting the correct battery, remove the battery again and place after a waiting period of approximately 15 seconds as described above.
- Página 17 Total Number [T.CNT] The integrated total countes the number of rwoing trains from 0 to 9.999 since the last time the batteries were inserted from the begining of the training. This counter can only be reset to 0 by removing the batteries. Calories [CAL] The integrated calorie counter counts up to 9.999 cal from the start of the training.


