Publicidad
Idiomas disponibles
Idiomas disponibles
Enlaces rápidos
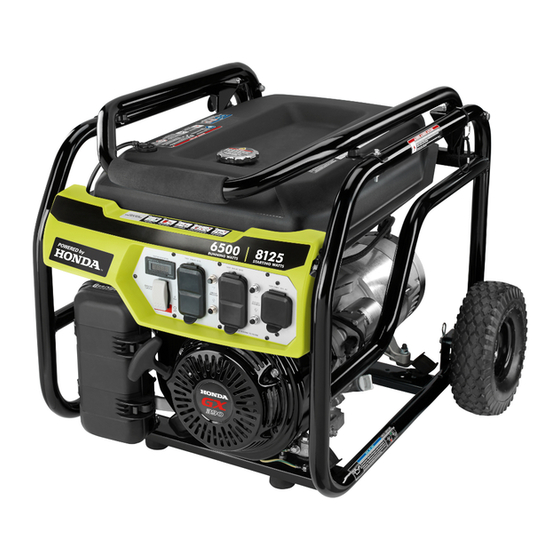
6,500 WATT GENERATOR
GÉNÉRATRICE DE 6 500 WATTS
GENERADOR 6 500 WATTS
RY906500
NOTICE
Do not use E15 or E85 fuel in this
product. It is a violation of federal law
and will damage the unit and void your
warranty. Only use unleaded gasoline
containing up to 10% ethanol.
Ne pas utiliser d'essence E15 ou E85 dans ce produit. Une
telle utilisation représente une violation de la loi fédérale
et endommagera l'appareil et annulera la garantie. Utiliser
seulement de l'essence sans plomb ne contenant pas plus
de 10 % d'éthanol.
No utilice combustibles E15 o E85 con este producto. Esto
constituye una violación a la ley federal, dañará la unidad y
anulará la garantía. Utilice únicamente gasolina sin plomo
que contiene hasta 10% de etanol.
TABLE OF CONTENTS
Important Safety Instructions ............3-4
Specific Safety Rules ........................... 4
Symbols ............................................5-7
Electrical ...........................................8-9
Features .............................................10
Assembly ......................................11-12
Operation ......................................12-14
Maintenance .................................15-17
Troubleshooting ................................. 18
Parts Ordering / Service ....... Back Page
WARNING:
To reduce the risk of
injury, the user must read and understand
the operator's manual before using this
product.
SAVE THIS MANUAL FOR
FUTURE REFERENCE
AVIS
AVISO
TABLE DES MATIÈRES
Instructions importantes
concernant la sécurité ......................3-4
Règles de sécurité particulières ........... 4
Symboles ..........................................5-7
Caractéristiques électriques .............8-9
Caractéristiques ................................. 10
Assemblage ..................................11-12
Utilisation ......................................12-15
Entretien ........................................15-18
Dépannage .........................................19
Commande de pièces /
réparation ............................Páge arrière
AVERTISSEMENT :
réduire les risques de blessures,
l'utilisateur doit lire et veiller à bien
comprendre le manuel d'utilisation avant
d'employer ce produit.
CONSERVER CE MANUEL
POUR FUTURE RÉFÉRENCE
OPERATOR'S MANUAL
MANUEL D'UTILISATION
MANUAL DEL OPERADOR
NEUTRAL BONDED TO FRAME
CONNECTEUR NEUTRE RELIÉ AU CADRE
PUNTO NEUTRO CONECTADO AL MARCO
Instrucciones de seguridad
Reglas de seguridad específicas ......... 4
Símbolos ...........................................5-7
Aspectos eléctricos ..........................8-9
Características ................................... 10
Armado .........................................11-12
Funcionamiento ............................12-15
Mantenimiento ..............................15-18
Corrección de problemas .................. 19
Pedidos de piezas/
Pour
riesgo de lesiones, el usuario debe leer
y comprender el manual del operador
antes de usar este producto.
PARA FUTURAS CONSULTAS
ÍNDICE DE CONTENIDO
importantes .......................................3-4
servicio ............................ Pág. posterior
ADVERTENCIA:
Para reducir el
GUARDE ESTE MANUAL
Publicidad

Manuales relacionados para Ryobi RY906500


Resumen de contenidos para Ryobi RY906500
- Página 1 OPERATOR’S MANUAL MANUEL D’UTILISATION MANUAL DEL OPERADOR 6,500 WATT GENERATOR GÉNÉRATRICE DE 6 500 WATTS GENERADOR 6 500 WATTS RY906500 NOTICE AVIS AVISO Do not use E15 or E85 fuel in this product. It is a violation of federal law and will damage the unit and void your warranty.
- Página 2 See this fold-out section for all of the figures referenced in the operator’s manual. Consulter l’encart à volets afin d’examiner toutes les figures mentionnées dans le manuel d’utilisation. Consulte esta sección desplegable para ver todas las figuras a las que se hace referencia en el manual del operador. Fig.
- Página 3 Fig. 3 Fig. 4 Fig. 8 Fig. 7 A - Socket wrench (clé à douille, llave de casquillo) B - Combination wrench (clé à molette, llave de combinación) Fig. 5 A - Bolt (boulon, perno) B - Cross brace (renfort transversal, través del travesaño) C - Rubber foot (pied en caoutchouc, pie de A - Handle (poignée, mango)
- Página 4 Fig. 12 Fig. 14 Fig. 9 A - Pull choke out to START position [tirer A - Oil cap/dipstick (bouchon/jauge d’huile, l’étrangleur vers position START tapa de relleno de aceite/varilla medidora (DÉMARRAGE), tire del anegador a la de aceite) posición START (ARRANQUE)] B - Oil fill hole (orifice de remplissage d’huile, B - Push choke in to RUN position [mettre agujero de llenado de aceite)
- Página 5 Fig. 19 Fig. 22 Fig. 17 Fig. 20 A - Oil drain plug (huiler le bouchon d’égout, tapón de drenaje del aceite) B - Oil cap/dipstick (bouchon / jauge d’huile, tapa de relleno de aceite/varilla medidora de aceite) Fig. 18 A - Carburetor drain screw (vis de vidange du carburateur, tornillo de drenaje del carburador)
- Página 6 To register your Ryobi product, please visit: www.ryobitools.com LOCATE GENERATOR AT LEAST 20 FT.* AWAY TO REDUCE THE RISK OF CARBON MONOXIDE GETTING INSIDE THE HOME * Minimum distance as recommended by U.S. Department of Health and Human Services Centers for Disease Control and Prevention (www.cdc.gov/co). Your specific home and/or wind conditions may require additional distance.
- Página 7 IMPORTANT SAFETY INSTRUCTIONS Do not start or operate the engine in a confined space, building, near open windows, or in other unventilated space DANGER: where dangerous carbon monoxide fumes can collect. Carbon Monoxide. Using a generator indoors CAN KILL Carbon monoxide, a colorless, odorless, and extremely YOU IN MINUTES.
- Página 8 IMPORTANT SAFETY INSTRUCTIONS Maintain the unit per maintenance instructions in this Use only recommended or equivalent replacement parts Operator’s Manual. and accessories and follow instructions in the Maintenance section of this manual. Use of any other parts or failure Inspect the unit before each use for loose fasteners, fuel to follow maintenance instructions may create a risk of leaks, etc.
- Página 9 SYMBOLS The following signal words and meanings are intended to explain the levels of risk associated with this product. SYMBOL SIGNAL MEANING Indicates a hazardous situation, which, if not avoided, will result in death or DANGER: serious injury. Indicates a hazardous situation, which, if not avoided, could result in death or WARNING: serious injury.
- Página 10 SYMBOLS Some of the following symbols may be used on this product. Please study them and learn their meaning. Proper interpretation of these symbols will allow you to operate the product better and safer. SYMBOL NAME DESIGNATION/EXPLANATION Volts Voltage Amperes Current Hertz Frequency (cycles per second)
- Página 11 SYMBOLS FUEL CAP WARNING Never remove fuel cap when unit is running. Shut off engine DANGER and allow the unit to cool at least five minutes. Remove cap RISK OF FIRE AND SERIOUS BURNS: Never remove fuel cap when unit is slowly to release any pressure built up in the fuel system running.
- Página 12 ELECTRICAL EXTENSION CORD CABLE SIZE Refer to the table below to ensure the cable size of the extension cords you use are capable of carrying the required load. Inadequate size cables can cause a voltage drop, which can burn out the appliance and overheat the cord. Load in Watts Maximum Allowable Cord Length Current in...
- Página 13 ELECTRICAL GENERATOR CAPACITY NOTICE: Make sure the generator can supply enough continuous (run- Do not overload the generator’s capacity. Exceeding the ning) and surge (starting) watts for the items you will power generator’s wattage/amperage capacity may damage at the same time. Follow these simple steps. the generator and/or electrical devices connected to it.
- Página 14 FEATURES PRODUCT SPECIFICATIONS GENERATOR ENGINE Rated Voltage .............120V/240V Engine Type .........GX390, 389cc, OHV Rated Amps ............. 54.1A/27.0A Fuel Volume ..............6 gal. Rated Output*............6500 W Starting Watts ............8125 W Rated Frequency ............60 Hz *Rated output determined by PGMA Standard G300 KNOW YOUR GENERATOR FUEL VALVE See Figure 2.
- Página 15 ASSEMBLY UNPACKING LOOSE PARTS LIST See Figure 3. This product requires assembly. The following items are included with the generator: Carefully cut the box down the sides then remove the machine and any accessories from the box. Make sure that all items listed in the loose parts list are included.
- Página 16 ASSEMBLY INSTALLING THE WHEELS Raise the end of the generator where the handle is located high enough to gain access to the frame bottom; securely See Figure 6. position props underneath to support. Wheels are provided to assist in moving the generator to Slide the axle through the spacer, then through the hole the desired location and should be installed on the same in the center of the wheel.
- Página 17 OPERATION BEFORE OPERATING THE UNIT Unscrew the oil cap/dipstick and remove. Wipe dipstick clean and re-seat in hole; do not re-thread. Only use OUTSIDE and at least 20 feet away from win- dows, doors, and vents as recommended by the U.S Remove dipstick again and check lubricant level.
- Página 18 OPERATION Turn the fuel valve to the OFF (O) position. STARTING THE ENGINE See Figures 12 - 15. Remove the fuel cap slowly. Fill the fuel tank to 1 in. below the top of the fuel neck. NOTICE: Replace and secure the fuel cap.
- Página 19 MAINTENANCE Normal maintenance, replacement or repair of emission con- If the filter element is dirty, clean with warm, soapy water. trol devices and systems may be performed by any qualified Rinse and let dry. repair establishment or individual with original or equivalent Apply a light coat of engine lubricant to the element, then parts.
- Página 20 MAINTENANCE Turn the fuel valve to the ON ( l ) position. Seat spark plug in position; thread in by hand to prevent cross-threading. When the fuel has drained from the tank, close the fuel Tighten with wrench to compress washer. If spark plug valve and reinstall fuel line securely on hose barb.
- Página 21 MAINTENANCE STORAGE When preparing the generator for storage, allow the unit to cool for 30 minutes then follow the guidelines below. STORAGE TIME PRIOR TO STORING Less than 2 months Drain gasoline from tank and dispose of in a suitable container according to state and local ordinances. 2 months to 1 year Drain fuel from carburetor.
- Página 22 TROUBLESHOOTING PROBLEM POSSIBLE CAUSE SOLUTION Engine will not start. No fuel. Fill fuel tank. Stale gasoline or water in gasoline. Drain entire system and refill with fresh fuel. Engine is equipped with Low Oil Shutoff. Lubricant level is low. If engine lubricant level is low, it must be filled before unit will start.
- Página 23 Pour enregistrer votre produit de Ryobi, s’il vous plaît la visite : www.ryobitools.com INSTALLER ET ÉLOIGNER LA GÉNÉRATRICE D’AU MOINS 6 M (20 PI)* AFIN DE RÉDUIRE LE RISQUE D’INFILTRATION DE MONOXYDE DE CARBONE À L’INTÉRIEUR DE LA MAISON Distance minimale recommandée par le Service de santé et les Centres pour le contrôle et la prévention des maladies américains (www.cdc.gov/co).
- Página 24 INSTRUCTIONS IMPORTANTES CONCERNANT LA SÉCURITÉ Ne pas laisser des enfants ou personnes n’ayant pas reçu une formation adéquate utiliser cette unité. DANGER : Ne pas démarrer ou faire tourner le moteur dans un espace Monoxyde de Carbone. Utiliser une génératrice à l’intérieur confine, de bâtiment, à...
- Página 25 INSTRUCTIONS IMPORTANTES CONCERNANT LA SÉCURITÉ ou une contrainte indue sur les composantes du génératrice, Entretenir le produit conformément aux instructions de ce ce qui peut provoquer une défaillance de la génératrice. manuel d’utilisation. Utiliser seulement les pièces et accessoires de rechange Inspecter le produit avant chaque utilisation pour s’assurer recommandées ou équivalentes et suivre les instructions du qu’il n’y a pas de pièces desserrées, de fuites de carburant,...
- Página 26 SYMBOLES Les termes de mise en garde suivants et leur signification ont pour but d’expliquer le degré de risques associé à l’utilisation de ce produit. SYMBOLE SIGNAL SIGNIFICATION Indique une situation dangereuse qui, si elle n’est pas évitée, aura pour con- DANGER : séquences des blessures graves, voire mortelles.
- Página 27 SYMBOLES Certains des symboles ci-dessous peuvent être utilisés sur le produit. Veiller à les étudier et à apprendre leur signification. Une interprétation correcte de ces symboles permettra d’utiliser le produit plus efficacement et de réduire les risques. SYMBOLE DÉSIGNATION / EXPLICATION Volts Tension Ampères...
- Página 28 SYMBOLES AVERTISSEMENT AU SUJET DU CAPUCHON DU RÉSERVOIR D’ESSENCE DANGER Ne jamais retirer le capuchon du réservoir d’essence pendant RISK OF FIRE AND SERIOUS BURNS: que l’appareil fonctionne. Éteindre le moteur et laisser refroidir Never remove fuel cap when unit is running.
- Página 29 CARACTÉRISTIQUES ÉLECTRIQUES TAILLE DU CÂBLE DU CORDON PROLONGATEUR Voir le tableau ci-dessous pour vérifier que la taille de câble des cordons prolongateurs utilisés est capable de porter la charge requise. Des tailles de câbles inadéquates peuvent causer une chute de tension qui peut griller l’appareil et surchauffer le cordon. Charge en watts Longueur de cordon permise maximum Courant en...
- Página 30 CARACTÉRISTIQUES ÉLECTRIQUES CAPACITÉ DU GÉNÉRATRICE Ne jamais ajouter de charges supérieures à la capacité du génératrice. Bien veiller à considérer les charges de surtension S’assurer que le génératrice peut fournir les watts continus comme décrit précédemment. (de fonctionnement) et de surtension (démarrage) suffisants pour tous les articles alimentés au même moment.
- Página 31 CARACTÉRISTIQUES FICHE TECHNIQUE MOTEUR GÉNÉRATRICE Tension nominale ..........120 V / 240 V Type de moteur........GX390, 389 cc, OHV Ampérage nominal ........54,1 A / 27,0 A Volume de carburant ........22,7 l (6 gal.) Sortie nominale* .............6 500 W Watts démarrage ............8 125 W Fréquence nominale ...........60 Hz *Sortie nominale déterminé...
- Página 32 ASSEMBLAGE DÉBALLAGE LISTE DES PIÈCES DÉTACHÉE Voir la figure 3. Ce produit doit être assemblé. Les articles suivants sont inclus avec le génératrice : Couper prudemment les côtés de la caisse puis sortir le No. de machine et les accessoires de la caisse. S’assurer que toutes les pièces figurant sur la liste de contrôle sont Pièce Description Qté.
- Página 33 ASSEMBLAGE INSTALLATION DES ROUES Relever l’extrémité du génératrice du côté du poignée à rappel suffisamment pour accéder au bas du cadre ; Voir la figure 6. placer des cales en dessous pour obtenir un bon support. Les roues sont fournies pour aider à déplacer le génératrice Glisser l’essieu à...
- Página 34 UTILISATION Relévement le poignée (pour déplacer génératrice) : tirer AVIS : sur le bouton de verrouillage de la poignée, relever la Ce produit est équipé d’un pare-étincelles qui a poignée, puis relâchez le bouton afin qu’il se mette en été...
- Página 35 UTILISATION NOTE : Pour maîtriser la quantité de stabilisateur de carburant à ajouter au moteur, toujours mélanger le AVERTISSEMENT : stabilisateur de carburant et le carburant avant de Toujours arrêter le moteur avant de faire le plein de remplir le réservoir plutôt qu’ajouter le stabilisateur de carburant.
- Página 36 UTILISATION Débrancher toutes les charges du génératrice. Mettre le robinet de carburant sur ARRÊT ( O ). Ouvrir le robinet de carburant sur ON ( I ) (MARCHE). Appuyer et maintenir l’interrupteur d’arrêt du moteur à la position « OFF » jusqu’à ce que le moteur cesse Tirez le l’étrangleur en position START (DÉMARRAGE).
- Página 37 ENTRETIEN INSPECTION/NETTOYAGE DU FILTRE À AIR ENTRETIEN DE LA BOUGIE Voir la figure 16. Voir la figure 18. Pour assurer un fonctionnement correct et une longue vie L’écartement de la bougie doit être vérifié et la bougie doit utile, garder les filtre à air propres. être exempte de dépôts pour que le moteur fonctionne correctement.
- Página 38 ENTRETIEN REMPLACEMENT DU FILTRE À ESSENCE Inspecter le pare-étincelles pour des fissures ou des trous. Nettoyer ou remplacer au besoin. Voir la figure 23. Au besoin, uiliser une brosse (non fourni) pour enlever les Parfois, le filtre à essence peut s’encrasser, et c’est pourquoi dépôts de calamine sur l’écran du pare-étincelles.
- Página 39 ENTRETIEN REMISAGE Lors de la préparation du génératrice pour le remisage, laisser l’appareil refroidir pendant 30 minutes puis suivre les instructions ci-dessous. DURÉE DU REMISAGE AVANT LE REMISAGE Moins d’2 mois Vidanger l’essence du réservoir et la disposer dans un récipient adapté selon les règlements nationaux et locaux en vigueur.
- Página 40 DÉPANNAGE PROBLÈME CAUSE POSSIBLE SOLUTION Le moteur ne démarre pas. Pas de carburant. Remplir le réservoir de carburant. Stale gasoline or water in gasoline. Drain entire system and refill with fresh fuel. Niveau de lubrifiant bas. Le moteur est équipé d’un arrêt en cas de bas niveau d’lubrifiant .
- Página 41 Para registrar su producto de Ryobi, por favor visita: www.ryobitools.com UBIQUE EL GENERADOR A UNA DISTANCIA DE POR LO MENOS 6 M (20 PIES)* PARA REDUCIR EL RIESGO DE QUE EL MONÓXIDO DE CARBONO INGRESE EN LA CASA Distancia mínima recomendada por el Departamento de Salud y Servicios Humanos y por los Centros para el Control y la Prevención de Enfermedades de los Estados Unidos (www.cdc.gov/co).
- Página 42 INSTRUCCIONES DE SEGURIDAD IMPORTANTES No haga arrancar o funcionar el motor en un espacio confinado, de edificio, cerca de ventana abiertas, o en PELIGRO: otro área sin ventilación donde se puedan recolectar las Monóxido de carbono. Usar un generador en el interior LO emanaciones de monóxido de carbono.
- Página 43 INSTRUCCIONES DE SEGURIDAD IMPORTANTES Los generadores fijos instalados de manera permanente sección de Mantenimiento de este manual. El empleo de son la mejor alternativa para abastecer de electricidad al piezas diferentes o el incumplimiento de las instrucciones hogar durante los cortes de energía. Incluso los generadores de mantenimiento puede significar un riesgo de descarga portátiles que están conectados correctamente pueden eléctrica o de lesiones.
- Página 44 SÍMBOLOS Las siguientes palabras de señalización y sus significados tienen el objeto de explicar los niveles de riesgo relacionados con este producto. SÍMBOLO SEÑAL SIGNIFICADO Indica una situación peligrosa, la cual, si no se evita, causará lesiones graves PELIGRO: o mortales. Indica una situación peligrosa, la cual, si no se evita, podría causar lesiones ADVERTENCIA: graves o mortales.
- Página 45 SÍMBOLOS Es posible que se empleen en este producto algunos de los siguientes símbolos. Le suplicamos estudiarlos y aprender su significado. Una correcta interpretación de estos símbolos le permitirá utilizar mejor y de manera más segura el producto. SÍMBOLO NOMBRE DENOMINACIÓN / EXPLICACIÓN Voltios Voltaje...
- Página 46 SÍMBOLOS ADVERTENCIA PARA LA TAPA DEL TANQUE DE COMBUSTIBLE DANGER Nunca retire la tapa de combustible mientras esté encendida RISK OF FIRE AND SERIOUS BURNS: la unidad. Apague el motor y deje enfriar la unidad durante al Never remove fuel cap when unit is running.
- Página 47 ASPECTOS ELÉCTRICOS CALIBRE DEL CORDÓN DE EXTENSIÓN Consulte el cuadro mostrado abajo para asegurarse de que el calibre de los cordones de extensión que utilice puedan con la carga eléctrica requerida. Los cordones de calibre insuficiente pueden causar una caída de voltaje, lo cual puede quemar el dispositivo y recalentar el cordón mismo.
- Página 48 ASPECTOS ELÉCTRICOS Realice mensualmente esta prueba para asegurarse del buen 3. Deje que se estabilice la salida del generador (el motor funcionamiento del GFCI. Si se guarda a la intemperie el marcha uniformemente y el dispositivo acoplado funciona generador, sin protección de los elementos, pruebe el GFCI del correctamente).
- Página 49 CARACTERÍSTICAS ESPECIFICACIONES DEL PRODUCTO MOTOR GENERADOR Voltaje nominal ..........120 V/240 V Tipo de motor ........GX390, 389 cc, OHV Amperaje nominal.......... 54,1 A/27,0 A Fuel Volume .............22,7 l (6 gal.) Salida nominal* ............6 500 W Salida máxima ............8 125 W Frecuencia nominal ............60 Hz *Salida nominal definida según el estándar G300 de PGMA FAMILIARÍCESE CON EL GENERADOR TERMINAL DE CONEXIÓN A TIERRA...
- Página 50 ARMADO DESEMPAQUETADO LISTA DE PIEZAS SUELTAS Vea la figura 3. Este producto requiere armarse. Los siguientes artículos incluidos con generador: Orte cuidadosamente los lados de la caja y después Núm. retire la herramienta y cualesquier accesorios de la caja. Asegúrese de que estén presentes todos los artículos ref.
- Página 51 ARMADO INSTALACIÓN DE LAS RUEDAS Eleve el extremo del generador donde está ubicado el mango hasta una altura suficiente que permita el acceso Vea la figura 6. a la parte inferior del bastidor; coloque firmemente cuñas Las ruedas se proporcionan para ayudar a trasladar el debajo para apoyarlo.
- Página 52 FUNCIONAMIENTO Nunca utilice el mango para levantar el generador. Solamente AVISO: se debe utilizar el mango para desplazar la unidad sobre Antes de cada uso, inspeccione todo el producto para las ruedas. detectar partes dañadas, faltantes o sueltas, como VERIFICACIÓN Y ABASTECIMIENTO DE tornillos, tuercas, pernos, tapas, etc.
- Página 53 FUNCIONAMIENTO la gasolina antes de llenar el tanque, en vez de agregarlo directamente al tanque de combustible del generador. ADVERTENCIA: Coloque de nuevo la tapa del tanque de combustible y Apague siempre el motor antes de reabastecer asegúrela. combustible. Nunca retire la tapa de combustible ni agregue combustible a una máquina mientras el motor Arranque el motor y déjelo funcionar por lo menos cinco esté...
- Página 54 FUNCIONAMIENTO Ponga la válvula de combustible en la posición OFF ( O ) NOTA: Si el generador no está en una superficie nivelada, (APAGADO). es posible que no arranque o se apague durante su funcionamiento. Presione y sostenga el en la posición OFF (apagado) hasta que el motor se haya detenido por completo.
- Página 55 MANTENIMIENTO MANTENIMIENTO DE LA BUJÍA REVISIÓN Y LIMPIEZA DEL FILTRO DE AIRE Vea la figura 18. Vea la figura 16. La bujía debe tener el debido espacio interelectródico y debe Para obtener un desempeño apropiado y una larga vida útil estar libre de depósitos para que el motor funcione de forma de la unidad, mantenga limpios los filtro de aire.
- Página 56 MANTENIMIENTO REEMPLAZO DEL FILTRO DE COMBUSTIBLE Revise si el parachispas tiene rasgaduras o agujeros. Limpie o reemplácelo si es necesario. Vea la figura 23. Utilice un cepillo (no incluido) para retirar los devpósitos En algunas ocasiones, el filtro de combustible puede de carbono de la rejilla del parachispas.
- Página 57 MANTENIMIENTO ALMACENAMIENTO Al preparar el generador para guardarlo, deje que la unidad se enfríe por durante 30 minutos y luego siga los lineamientos señalados abajo. TIEMPO DE ANTES DE GUARDARLO ALMACENAMIENTO Menos de dos meses Vacíe el tanque de combustible y colóquelo en un recipiente apropiado según lo establecido por las disposiciones estatales y locales.
- Página 58 CORRECCIÓN DE PROBLEMAS PROBLEMA CAUSA POSIBLE SOLUCIÓN El motor no arranca. No hay combustible. Llene el tanque de combustible. Gasolina pasada o agua pasada en la Drene todo el sistema y reabastézcalo con gasolina. combustible nuevo. Está bajo el nivel de lubricante. El motor posee un apagado por poco aceite.
- Página 59 NOTES / NOTAS...
- Página 60 1-800-860-4050. RYOBI is a trademark of Ryobi Limited and is used pursuant to a license granted by Ryobi Limited. • PIÈCES ET SERVICE : Avant de faire la demande de service ou l’achat de pièces de remplacement, veuillez obtenir le numéro d’article, le numéro de fabrication et le numéro de série à...